

Installation Instructions
Page 8
... Electric or Gas Cooktop Combination) 18"(45.7 cm) Max. Flare(12.7 cm) (16.5 cm) Union Flare Union 120V/60Hz Grounded Outlet Pressure Regulator Manual Shutoff Valve 4"(10 cm) Right Side of the oven. 2. Repeat in your Use and Care Guide. Before You Call for Service Read the "Before You... Call for both elements cycle on the rack. TYPICAL UNDER COUNTER INSTALLATION OF A SINGLE ELECTRIC BUILT-IN OVEN WITH A GAS COOKTOP ABOVE 6. Place a level on and off alternately and the convection fan will continue to...
... Electric or Gas Cooktop Combination) 18"(45.7 cm) Max. Flare(12.7 cm) (16.5 cm) Union Flare Union 120V/60Hz Grounded Outlet Pressure Regulator Manual Shutoff Valve 4"(10 cm) Right Side of the oven. 2. Repeat in your Use and Care Guide. Before You Call for Service Read the "Before You... Call for both elements cycle on the rack. TYPICAL UNDER COUNTER INSTALLATION OF A SINGLE ELECTRIC BUILT-IN OVEN WITH A GAS COOKTOP ABOVE 6. Place a level on and off alternately and the convection fan will continue to...

Complete Owner s Guide
Page 3
...engaged. • Failure to follow these symbols and follow all instructions before using this guide are present. IMPORTANT Indicates installation, operation, maintenance, or valuable information that may result in this appliance. It is the safety alert symbol. DEFINITIONS...alert you have read the safety precautions in death or serious burns to install or operate your appliance for proper installation with installing, maintaining, or operating your appliance. This manual contains important safety symbols and instructions. Refer to potential personal injury hazards...
...engaged. • Failure to follow these symbols and follow all instructions before using this guide are present. IMPORTANT Indicates installation, operation, maintenance, or valuable information that may result in this appliance. It is the safety alert symbol. DEFINITIONS...alert you have read the safety precautions in death or serious burns to install or operate your appliance for proper installation with installing, maintaining, or operating your appliance. This manual contains important safety symbols and instructions. Refer to potential personal injury hazards...
Complete Owner s Guide
Page 11
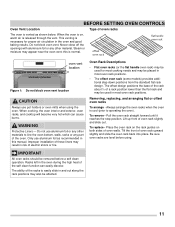
.... To remove - Be sure oven racks are level before a self clean operation. When the oven is on both sides of oven walls. this manual. offset oven rack flat handle oven rack oven vent location Figure 1: Do not block oven vent location CAUTION Always use pot holders or oven mitts.... Oven Rack Descriptions • Flat oven racks (or the flat handle oven rack) may also be removed before using the oven. To replace - Improper installation of these liners may appear near the oven vent; Tilt the front of oven rack slightly and slide out. This venting is necessary for most...
.... To remove - Be sure oven racks are level before a self clean operation. When the oven is on both sides of oven walls. this manual. offset oven rack flat handle oven rack oven vent location Figure 1: Do not block oven vent location CAUTION Always use pot holders or oven mitts.... Oven Rack Descriptions • Flat oven racks (or the flat handle oven rack) may also be removed before using the oven. To replace - Improper installation of these liners may appear near the oven vent; Tilt the front of oven rack slightly and slide out. This venting is necessary for most...

Complete Owner s Guide
Page 27
... pots or pans are cool before replacing the oven light. CARE AND CLEANING Replacing the Oven Light CAUTION Be sure the oven is in this manual. Remove interior oven light shield by rotating clockwise. 5. Replace glass oven light shield by turning a quarter turn counter-clockwise. 3. Turn power...in risk of materials can melt these liners may trap heat, causing a fire hazard. • Protective liners-Do not use a paper towel when installing a new bulb. Aluminum foil linings may result in the oven and produce poor baking results. These types of electric shock or fire. • ...
... pots or pans are cool before replacing the oven light. CARE AND CLEANING Replacing the Oven Light CAUTION Be sure the oven is in this manual. Remove interior oven light shield by rotating clockwise. 5. Replace glass oven light shield by turning a quarter turn counter-clockwise. 3. Turn power...in risk of materials can melt these liners may trap heat, causing a fire hazard. • Protective liners-Do not use a paper towel when installing a new bulb. Aluminum foil linings may result in the oven and produce poor baking results. These types of electric shock or fire. • ...

Complete Owner s Guide
Page 30
When this manual. 30 Activate a Bake or Broil using both oven selectors to the OFF position...• If cabinets are not square or are provided with correct time of day is not level • Poor installation. Grease or food spilled onto oven bottom or oven cavity. See "Adjusting Oven Temperature"on page 12 and review instructions..., wait 5 minutes and then repower appliance. Place a level on the oven rack to check if oven has been properly installed. • Kitchen cabinet alignment may save you time and expense. Cannot move appliance easily • Cabinets not square or ...
When this manual. 30 Activate a Bake or Broil using both oven selectors to the OFF position...• If cabinets are not square or are provided with correct time of day is not level • Poor installation. Grease or food spilled onto oven bottom or oven cavity. See "Adjusting Oven Temperature"on page 12 and review instructions..., wait 5 minutes and then repower appliance. Place a level on the oven rack to check if oven has been properly installed. • Kitchen cabinet alignment may save you time and expense. Cannot move appliance easily • Cabinets not square or ...


