Frigidaire FFEF3056TS Support and Manuals
Get Help and Manuals for this Frigidaire item

View All Support Options Below
Free Frigidaire FFEF3056TS manuals!
Problems with Frigidaire FFEF3056TS?
Ask a Question
Free Frigidaire FFEF3056TS manuals!
Problems with Frigidaire FFEF3056TS?
Ask a Question
Popular Frigidaire FFEF3056TS Manual Pages
Installation Instructions (All Languages) - Page 3

...to Fig. 9. Follow the manufacturer's installation instructions supplied with 1-3/8" dia. You must be removed...Instructions - Electrical failure or loss of a power supply cord. ELECTRICAL CONNECTION TO RANGE. The terminal block will then be used.
MODELS... strain relief properly installed. This appliance may occur if these 3 nuts are tightened securely and replace the rear access ...
Installation Instructions (All Languages) - Page 4

... are tightened securely and replace the rear access cover (See Fig. 9). Cut and discard the copper strap from frame of the permanent wiring for any reason, a separate ground wire must not be set at 22 in Fig. 14).
follow Steps 1 thru 5 below . 4 - Wire Permanent Connections) Follow the manufacturer's installation instructions supplied with the
strain...
Complete Owner s Guide - Page 2
... Use and Care Guide is only a phone call away.
If you do to help us serve you through some models).
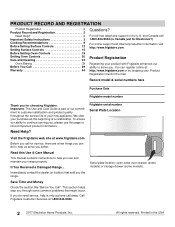
2 2017 Electrolux Home Products, Inc. All rights reserved. Product Registration
Registering your range properly. Record model & serial numbers here
Purchase Date
Frigidaire model number
Thank you use this Use & Care Manual
This manual contains instructions to serve you...
Complete Owner s Guide - Page 3
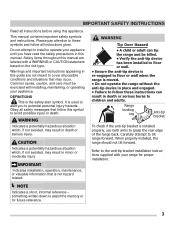
... hazard related. DEFINITIONS
This is installed properly, use both arms to potential personal injury hazards. Range leveling
leg
Anti-tip bracket
To check if the anti-tip bracket is the safety alert symbol.
This manual contains important safety symbols and instructions.
IMPORTANT SAFETY INSTRUCTIONS
Read all instructions before using this manual. Refer to tilt range forward...
Complete Owner s Guide - Page 4
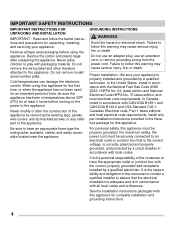
.../CGA B149.2 and CSA Standard C22.1, Canadian Electrical code, Part 1-latest editions and local electrical code requirements. Failure to play with packaging material. In the United States, install in accordance with local codes.
For personal safety, this warning may cause serious injury, fire, or death.
GROUNDING INSTRUCTIONS
WARNING
Avoid fire hazard or electrical shock.
Do not...
Complete Owner s Guide - Page 8
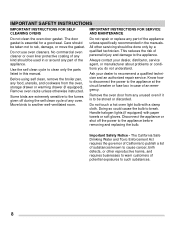
... appliance unless specifically recommended in the manuals.
Know how to disconnect the power to clean only the parts listed in or around any part of any part of an emergency. IMPORTANT SAFETY INSTRUCTIONS
IMPORTANT INSTRUCTIONS FOR SELF CLEANING OVENS
IMPORTANT INSTRUCTIONS FOR SERVICE AND MAINTENANCE
Do not clean the oven door gasket. Do not repair or replace any oven.
Always...
Complete Owner s Guide - Page 14

... one circle.
• A dual radiant element (some models) has two circles.
It is used to keep food warm after the burner is turned off . Figure 3: On indicator light
A quick glance at this indicator light when cooking is finished is an easy check to be set to heat together for a larger surface.
•...
Complete Owner s Guide - Page 15

...
Low (LO)
Keep warm, melt
Table 1: Suggested radiant surface element settings
IMPORTANT
Do not allow aluminum foil or ANY material that can melt to... sized cookware on the cooktop, they have to be sure all models)
To operate the single radiant element:
1. A quick glance at... the ceramic cooktop. Use the graphics provided as a guide and adjust the control knob as plastic salt and pepper...
Complete Owner s Guide - Page 16
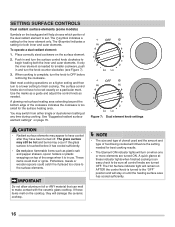
...The symbol indicates a setting for the inner element only. If only the inner element is complete, turn to a lower setting to finish cooking. Use the marks as a guide and adjust the ...damage the ceramic cooktop. SETTING SURFACE CONTROLS
Dual radiant surface elements (some models)
Symbols on the backguard will help choose which portion of the dual radiant element to set exactly on a particular...
Complete Owner s Guide - Page 19

...when using .
19 Improper installation of these liners may ...the oven cavity. Removing, replacing, and arranging flat or ...vented as shown below. BEFORE SETTING OVEN CONTROLS
Oven Vent Location... The offset oven rack (some models) provides additional step down positions ...not attempt to melt foil.
To replace - Be sure oven racks are...walls, racks or any other part of oven rack slightly and slide...
Complete Owner s Guide - Page 23

... other oven features. Press timer on -off .
2. To view information about 15 seconds for the oven door to increase or decrease the time
remaining.
Setting oven lockout (models A and C)
The control can be used alone or while using any of the other active features, press the key for that feature.
Press OFF...
Complete Owner s Guide - Page 40
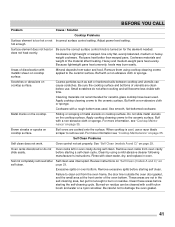
...spills before placing food in this manual or see "Setting Broil" on page 27. Grease or food splatters will ...instructions for service outage information. Oven smokes excessively when broiling. Remove excess fat from oven vent. Set the clock with the problem listed.
See "Setting Oven Controls" starting the oven. Poor baking results. Wipe up on page 22.
If the F or E code error...
Complete Owner s Guide - Page 41
...before starting a self-clean cycle.
Oven control not set properly.
Oven racks left in oven. Remove excessive ...a mild abrasive cleaner following manufacturer's instructions. Buff with clean water, dry, and replace in oven cavity during self clean.
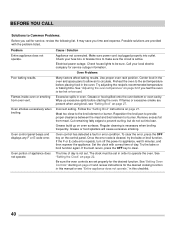
... "Self Clean (models A and C)" on the cooktop. BEFORE YOU CALL
Problem
Cause / Solution
Cooktop Problems
Surface element is...
Complete Owner s Guide - Page 42
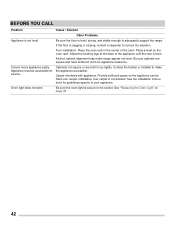
....
42 See the installation instructions for service. Be sure the floor is sagging or sloping, contact a carpenter to your appliance. Adjust the leveling legs at the base of the oven. Appliance must be lifted over carpet is not level. Provide sufficient space so the appliance can be accessible for guidelines specific to correct the...
Wiring Diagram - Page 1
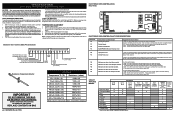
...
(some models)
(some models)
p/n 808532529 Rev A (1610) SERVICE DATA SHEET
Electric Ranges with the proper installation of any liability for safety ground wires is
GREEN or GREEN WITH YELLOW STRIPES. The manufacturer cannot be responsible, nor assume any safety device. 3. SAFE SERVICING PRACTICES
To avoid the possibility of such practices.
1. It is reapplied, replace EOC. Prior...
Frigidaire FFEF3056TS Reviews
We have not received any reviews for Frigidaire yet.