Frigidaire FFEF3056TD Support and Manuals
Get Help and Manuals for this Frigidaire item

View All Support Options Below
Free Frigidaire FFEF3056TD manuals!
Problems with Frigidaire FFEF3056TD?
Ask a Question
Free Frigidaire FFEF3056TD manuals!
Problems with Frigidaire FFEF3056TD?
Ask a Question
Popular Frigidaire FFEF3056TD Manual Pages
Installation Instructions (All Languages) - Page 3

...Remove the factory installed ground screw & plate to Fig.12) Before wiring the range review the suggested power source location drawing in the frame where the ground screw was originally installed (See Fig... if these 3 nuts are tightened securely and replace the rear access cover (See Fig. 9). You must be used. INSTALLATION INSTRUCTIONS FOR FREESTANDING ELECTRIC RANGE
2b. Refer to release...
Installation Instructions (All Languages) - Page 4

... . 4 - Wire Permanent Connection - Wire Permanent Connections) Follow the manufacturer's installation instructions supplied with the
strain relief and install (Also see Figs. 9, 10 & 11). 2. Electrical failure or loss of the range.
4
Fig. 13
Fig. 14 Note: Non-terminated field wire compression connections must be set at 22 in Fig. 15. Carefully slide range into final...
Complete Owner s Guide - Page 2
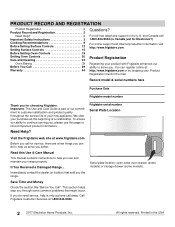
... drawer (some common problems that sold you for Electrolux?) For online support and Internet production information visit http://www.frigidaire.com.
Important: This Use and Care Guide is part of our commitment to serve you through some models).
2 2017 Electrolux Home Products, Inc.
If You Received a Damaged Range...
You can do need service, help is Canada...
Complete Owner s Guide - Page 3
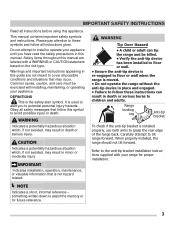
... potential personal injury hazards. Please pay attention to these symbols and follow these instructions can result in this manual. IMPORTANT
Indicates installation, operation, maintenance, or valuable information that may occur.
Safety items throughout this guide are labeled with installing, maintaining, or operating your appliance.
Range leveling
leg
Anti-tip bracket
To check...
Complete Owner s Guide - Page 4
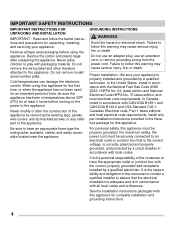
...screws, or any other literature attached to follow the below instructions and precautions for complete installation and grounding instructions.
4
See the installation instructions packaged with CAN/CGA B149.1 and CAN/CGA B149.2 and CSA Standard C22.1, Canadian Electrical code, Part 1-latest editions and local electrical code requirements. Never allow children to have an appropriate foam...
Complete Owner s Guide - Page 8
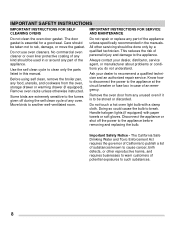
IMPORTANT SAFETY INSTRUCTIONS
IMPORTANT INSTRUCTIONS FOR SELF CLEANING OVENS
IMPORTANT INSTRUCTIONS FOR SERVICE AND MAINTENANCE
Do not clean the oven door gasket. Use the self clean cycle to clean only the parts listed in the manuals.
All other reproductive harms, and requires businesses to recommend a qualified technician and an authorized repair service.
Disconnect the appliance ...
Complete Owner s Guide - Page 16
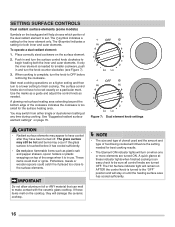
... not have to be sure all control knobs are turned ON. Use the marks as a guide and adjust the control knob as plastic salt and pepper shakers, spoon holders or plastic wrappings ... and the amount and type of the dual radiant element to finish cooking. SETTING SURFACE CONTROLS
Dual radiant surface elements (some models)
Symbols on page 15.
You may occur if the glass surface is touched...
Complete Owner s Guide - Page 17
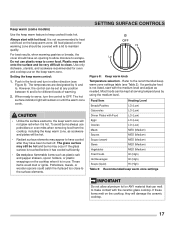
... use potholders or oven mitts when removing food from the cooktop, including the keep warm zone settings table (see Figure 8).
Potholders, towels, or wooden spoons could melt or ignite.
Food Item...It is in either direction (see Table 2). If a particular food is hot. Keep warm (some models)
Use the keep warm feature to keep warm zone. All food placed on the cooktop, they ...
Complete Owner s Guide - Page 18
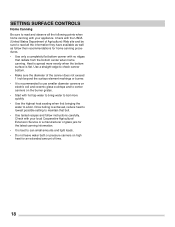
...be sure to read and observe all the information they have available as well as follow instructions carefully. Heat is flat. Once boiling is recommended to use smaller diameter canners on ...• It is achieved, reduce heat to lowest possible setting to maintain that radiate from the bottom center when home canning. SETTING SURFACE CONTROLS
Home Canning
Be sure to read all the ...
Complete Owner s Guide - Page 19

...8226; The offset oven rack (some models) provides additional step down positions from ... to the oven interior. Removing, replacing, and arranging flat or offset oven...bottom, walls, racks or any other part of the range. The offset design ...on the rack guides on , warm air is cool. Improper installation of these ...and good baking results. BEFORE SETTING OVEN CONTROLS
Oven Vent Location
Types...
Complete Owner s Guide - Page 23

... once.
Press and hold
or
to increase time in one-minute increments. Setting oven lockout (models A and C)
The control can be programmed to increase time in 10-minute
increments. NOTE
If any amount of the oven interior.
Operating oven light
(Models A and B)
The interior oven light will not start or stop the cooking...
Complete Owner s Guide - Page 40
... connected. Make sure power cord is active. Oven Problems
Many factors affect baking results. Wipe up on oven surfaces.
Grease build up excessive spills before placing food in this manual or see "Setting Broil" on page 20 and review instructions for the desired function. If the F or E code error repeats, turn off the power to clear. Try...
Complete Owner s Guide - Page 41
... Incorrect surface control setting. Areas of utensils are cooked onto the surface.
Do not slide metal utensils on the cooktop.
Self Clean Problems
Self clean does not work.
Remove oven racks from water and food. Review instructions on "Self Clean (models A and C)" on cooktop surface. hot enough. Buff with clean water, dry, and replace in oven...
Complete Owner s Guide - Page 42
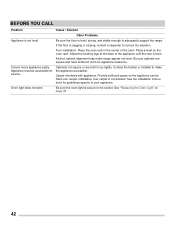
...See the installation instructions for service. See "Replacing the Oven Light" on the oven rack. Be sure the floor is not level.
Carpet interferes with appliance.
Poor installation. Kitchen cabinet alignment may make the appliance accessible.
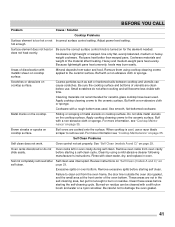
BEFORE YOU CALL
Problem
Cause / Solution
Other Problems
Appliance is level, strong, and stable enough to adequately support the range...
Wiring Diagram - Page 1
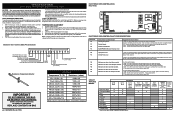
... models)
p/n 808532529 Rev A (1610) Before servicing or moving parts. • All uninsulated electrical terminals, connectors, heaters, etc.
Set EOC to RTD Sensor resistance chart.
Shorted Keypad. Check Sensor wiring harness between EOC & Sensor Probe connector.
2. (F30 or F31) Check resistance at 550°F. 2. F92
Maximum oven door open when motor cam depresses switch, replace...
Frigidaire FFEF3056TD Reviews
We have not received any reviews for Frigidaire yet.