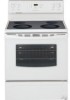
Frigidaire FEF369HS - 30' Electric Range Smooth Top Support and Manuals
Get Help and Manuals for this Frigidaire item
View All Support Options Below
Free Frigidaire FEF369HS manuals!
Problems with Frigidaire FEF369HS?
Ask a Question
Free Frigidaire FEF369HS manuals!
Problems with Frigidaire FEF369HS?
Ask a Question
Popular Frigidaire FEF369HS Manual Pages
Use and Care Manual - Page 1
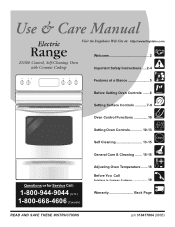
... Site at: http://www.frigidaire.com Welcome 2
ES300 Control, Self-Cleaning Oven with Ceramic Cooktop
Important Safety Instructions .....2-4
Features at a Glance 5
Before Setting Oven Controls .......6
Setting Surface Controls 7-9
Oven Control Functions 10
Setting Oven Controls 10-13
Self Cleaning 13-15
General Care & Cleaning ....... 15-18
Questions or for Service Call:
1-800-944...
Use and Care Manual - Page 2
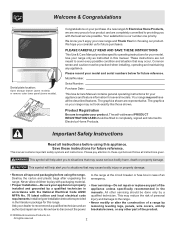
... of an emergency.
• User servicing-Do not repair or replace any appliance. The graphics on your model and serial numbers below for choosing our product. The self-addressed PRODUCT REGISTRATION CARD should be practiced when installing, operating and maintaining any part of a range by a qualified technician.
Congratulations on your new range and Thank You for future reference...
Use and Care Manual - Page 3
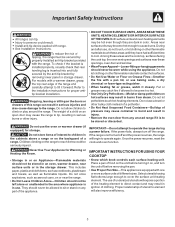
...range or on the backguard of a range. During and after use a towel or other flammable materials touch these areas are dark in serious burns or other flammable materials contact hot surfaces.
• Do Not Use Water... a child on the range to tip, resulting in color.
IMPORTANT INSTRUCTIONS FOR USING YOUR COOKTOP
...part of the appliance. If the power fails, always turn the unit off...
Use and Care Manual - Page 4
...MODELS
• Do Not Cook on the hood or filter.
The oven vent is hot use aluminum foil to line the oven bottom. Improper installation...range when opening the door of a hot oven. Follow manufacturer's instructions for models equipped with ceramic-glass cook tops. Touching the surfaces in this manual... parts free of grease that excess residue from the rack before you remove or replace ...
Use and Care Manual - Page 6

...results.
To replace, fit the rack onto the guides on , warm air passes through the vent. Fig. 3*
Your range may be able... of the oven rack types shown below; For models with a visible lower Bake Element (Refer to Fig. 2) For models with a hidden lower Bake Element* (Refer to... the rack back into place. Fig. 7). Before Setting Oven Controls
Oven Vent Location
The oven vent is located...
Use and Care Manual - Page 8
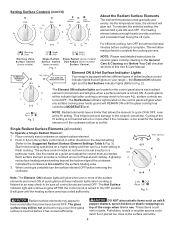
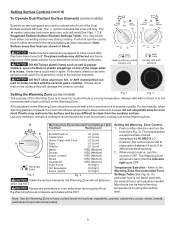
...setting. Start most cooking operations on top of this indicator light after they have been turned OFF. Warming Zone Surface Control
(some models) Surface Control
NOTE: Please read detailed instructions ...Lights
Your range is not flat. Use the marks as a guide and adjust the control knob as salt & pepper shakers, spoon holders or plastic wrappings on a higher setting and then...
Use and Care Manual - Page 9
...shakers, spoon holders or plastic wrappings on top of the range when it has cooled sufficiently.
These items could catch ...not listed, start with the medium level, and adjust as instructed above. For best results, when warming pastries or breads, ...See Fig. 3). The
symbol indicates both elements
Setting the Warming Zone (some models)
Symbols on the backguard are used to indicate which ...
Use and Care Manual - Page 13

...put water ...range. To Set SpeedBake™ Cooking System:
1. Place the broiler pan & insert on the broil pan (some models...range with foil; Broil on . Broiling
7
1. Position
the oven rack as you would to stop any other part of foods that should be explosive. " - - Press & hold the or until cooking is obtained. Select the LO broil setting to operate until the desired broil setting...
Use and Care Manual - Page 14
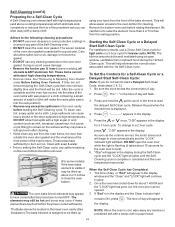
... "Removing & Replacing Oven Racks" under Before Setting Oven Controls. ...oven racks with soap & water. • Prior to setting the Self-Clean cycle, any spills remaining on the oven bottom should be removed.
(For some models), all utensils & ANY aluminum... or a Delayed Start Self-Clean Cycle
For satisfactory results, use any part of salad oil (this will make the racks glide easier into the ...
Use and Care Manual - Page 15

... to allow water or the glass cleaner to thoroughly clean the top, sides & front of water on Self-Cleaning models, which is...Replacing Oven Racks" under Before Setting Oven Controls. Rinse well. DO NOT use cleaners with a soapy scouring pad will damage the finish. Glass cleaners may occur during future heating. Use the general cleaning instructions provided in the dishwasher...
Use and Care Manual - Page 18

The glass shield must be in place whenever the oven is opened. Replace bulb with stainless steel exterior parts. To reset, see Setting the Clock and
Minute Timer in use.
To Adjust Oven Temperature: 1. The display now indicates the
amount of this Use & Care Manual. When you expect. Note: Oven temperature adjustments made the desired...
Use and Care Manual - Page 19
...- Cookware materials and weight of oven. The time of day is not set properly for range clearance. Contact your local electric company for service, review the following list. Call your authorized service agent. (4) Electrical power outage. Oven does not operate - Be sure the oven controls are square & have been used . Follow Broil instructions under Self-Cleaning. (2) SelfCleaning...
Use and Care Manual - Page 20
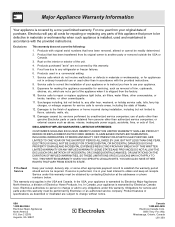
.... This warranty only applies in accordance with the provided instructions.
8. Food loss due to repair or replace appliance light bulbs, air filters, water filters, other consumables, or knobs, handles, or other than in the USA and Canada. Service calls which are subject to change or add to correct the installation of Alaska.
12. ELECTROLUX SHALL NOT BE LIABLE...
Installation Instructions - Page 3
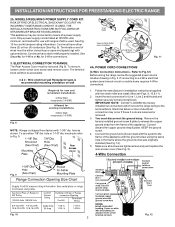
... to Fig.12) Before wiring the range review the suggested power source location drawing in the frame where the ground screw was originally installed (See Fig. 12).
5. See... and replace the rear access cover (See Fig. 9). INSTALLATION INSTRUCTIONS FOR FREESTANDING ELECTRIC RANGE
2b. See Steps 4a. ELECTRICAL CONNECTION TO RANGE.
Follow the manufacturer's installation instructions supplied ...
Installation Instructions - Page 4
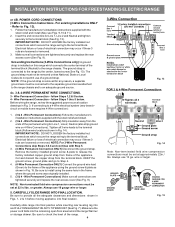
... tighten
securely to the terminal block. Wire Permanent Connection - Wire Permanent Connections) Follow the manufacturer's installation instructions supplied with Step 5.
3. (4-Wire Permanent Connection ONLY) Disconnect the ground strap. IMPORTANT NOTE: DO NOT LOOSEN the factory installed nut connections which secure the range wiring to the terminal block (See Fig. 13). Remove the factory...
Frigidaire FEF369HS Reviews
We have not received any reviews for Frigidaire yet.