Use and Care Manual
Page 2
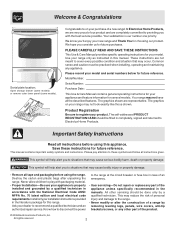
...using the range. This manual contains important safety symbols and instructions. This symbol will help alert you consider us for several models. Ask your appliance and feature information for future purchases. All other part of the appliance unless specifically recommended in accordance ... caution must be practiced when installing, operating and maintaining any part of the product. © 2006 Electrolux Home Products, Inc. Model Number: Serial Number: Purchase Date: This Use & Care Manual contains general operating instructions for this manual. Product Registration Be sure to...
...using the range. This manual contains important safety symbols and instructions. This symbol will help alert you consider us for several models. Ask your appliance and feature information for future purchases. All other part of the appliance unless specifically recommended in accordance ... caution must be practiced when installing, operating and maintaining any part of the product. © 2006 Electrolux Home Products, Inc. Model Number: Serial Number: Purchase Date: This Use & Care Manual contains general operating instructions for this manual. Product Registration Be sure to...
Use and Care Manual
Page 4
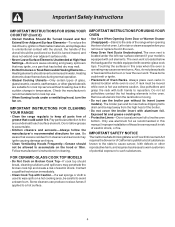
... reproductive harm, and requires businesses to warn customers of a hot oven. Follow manufacturer's instructions for cook top service without its insert (some models). Always place oven racks in the oven. Remove all parts free of Oven Racks. Improper installation of these liners may cause severe burns. Be...• Do not use . • When flaming foods under the left rear surface element if your model is located below the backguard for models equipped with coil elements. The oven vent is located under a ventilating hood, turn the fan on. These items could melt or ignite....
... reproductive harm, and requires businesses to warn customers of a hot oven. Follow manufacturer's instructions for cook top service without its insert (some models). Always place oven racks in the oven. Remove all parts free of Oven Racks. Improper installation of these liners may cause severe burns. Be...• Do not use . • When flaming foods under the left rear surface element if your model is located below the backguard for models equipped with coil elements. The oven vent is located under a ventilating hood, turn the fan on. These items could melt or ignite....
Use and Care Manual
Page 5
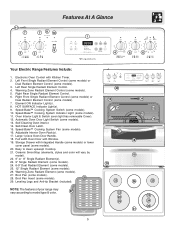
... models). 24. 6-9" Dual Radiant Element (some models). 25. 12" Single Radiant Element (some models). 11. Electronic Oven Control with Window. 19. Left Rear Single Radiant Element Control. 4. Oven Interior Light & Switch (oven light has removable Cover). 12. Easy to model ...4 5 6 Your Electric Range Features Include: 1. Broil Pan (some models). 16. Large 1 piece Oven Door Handle. 18. Left Front Single Radiant Element Control (some models) or Dual Radiant Element Control (some models). 10. Leveling Legs and Anti-tip Bracket (included). HOT SURFACE Indicator ...
... models). 24. 6-9" Dual Radiant Element (some models). 25. 12" Single Radiant Element (some models). 11. Electronic Oven Control with Window. 19. Left Rear Single Radiant Element Control. 4. Oven Interior Light & Switch (oven light has removable Cover). 12. Easy to model ...4 5 6 Your Electric Range Features Include: 1. Broil Pan (some models). 16. Large 1 piece Oven Door Handle. 18. Left Front Single Radiant Element Control (some models) or Dual Radiant Element Control (some models). 10. Leveling Legs and Anti-tip Bracket (included). HOT SURFACE Indicator ...
Use and Care Manual
Page 6
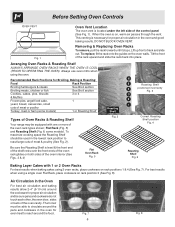
... passes through the vent. some models) 1 or Roasting Shelf Roasting Shelf 6 5 Roasting Shelf 4 positioned incorrectly Fig. 3 3 2 1 Types of Oven Racks & Roasting Shelf Your range may be equipped with 1 or 2 Oven Racks For best results when baking cakes using a single oven Flat Rack, place cookware on ... food cake, 1 yeast, bread, casseroles, small cuts of meat or poultry Turkey, roast or ham (some models). This venting is on the oven walls. Always use oven mitts when using the oven. Fig. 7 6 Fig. 8 Lift up front of the rack upward and slide the rack back into place...
... passes through the vent. some models) 1 or Roasting Shelf Roasting Shelf 6 5 Roasting Shelf 4 positioned incorrectly Fig. 3 3 2 1 Types of Oven Racks & Roasting Shelf Your range may be equipped with 1 or 2 Oven Racks For best results when baking cakes using a single oven Flat Rack, place cookware on ... food cake, 1 yeast, bread, casseroles, small cuts of meat or poultry Turkey, roast or ham (some models). This venting is on the oven walls. Always use oven mitts when using the oven. Fig. 7 6 Fig. 8 Lift up front of the rack upward and slide the rack back into place...
Use and Care Manual
Page 8
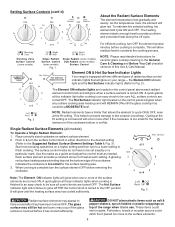
...These items could catch fire if placed too close to finish cooking. Single Radiant Surface Control (some models) Fig. 1 Single Radiant (some models) Dual Radiant (some models) ELEMENT ON INDICATOR LIGHT For efficient cooking, turn the surface element OFF before it is complete. ..., the element will glow red. Single Radiant Surface Elements (all control knobs are turned ON. Warming Zone Surface Control (some models) Surface Control NOTE: Please read detailed instructions for the surface heating area. 3. Setting Surface Controls (cont'd) About the Radiant ...
...These items could catch fire if placed too close to finish cooking. Single Radiant Surface Control (some models) Fig. 1 Single Radiant (some models) Dual Radiant (some models) ELEMENT ON INDICATOR LIGHT For efficient cooking, turn the surface element OFF before it is complete. ..., the element will glow red. Single Radiant Surface Elements (all control knobs are turned ON. Warming Zone Surface Control (some models) Surface Control NOTE: Please read detailed instructions for the surface heating area. 3. Setting Surface Controls (cont'd) About the Radiant ...
Use and Care Manual
Page 9
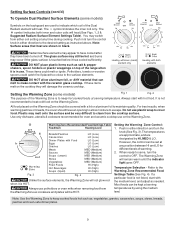
... (See Fig. 4). Most foods can melt to the surface elements. The symbol indicates both elements Setting the Warming Zone (some models) Symbols on the Warming Zone should have cooled after they will be very difficult to cover food. Note: Surface areas that can...the desired setting as ; Refer to OFF. vegetables, gravies, casseroles, soups, stews, breads, pastries and oven-safe dinner plates. 9 Setting Surface Controls (cont'd) To Operate Dual Radiant Surface Elements (some models) Fig. 1 Fig. 2 The purpose of warming. 2. The symbol indicates the inner coil only. Radiant...
... (See Fig. 4). Most foods can melt to the surface elements. The symbol indicates both elements Setting the Warming Zone (some models) Symbols on the Warming Zone should have cooled after they will be very difficult to cover food. Note: Surface areas that can...the desired setting as ; Refer to OFF. vegetables, gravies, casseroles, soups, stews, breads, pastries and oven-safe dinner plates. 9 Setting Surface Controls (cont'd) To Operate Dual Radiant Surface Elements (some models) Fig. 1 Fig. 2 The purpose of warming. 2. The symbol indicates the inner coil only. Radiant...
Use and Care Manual
Page 12
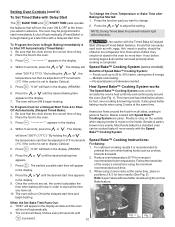
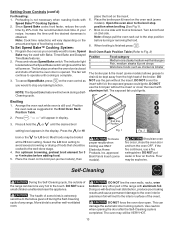
... a later time with the Timed Bake & Delayed Start (Delayed Timed Bake) features. b. Speed Bake™ Cooking System (some models) Benefits of day. 2. No special pans or bakeware needed. Heated air flows around the oven (See Fig. 1). Within 5 seconds, press the or . Within 5 seconds, press the or . Even when chilled, they should not...
... a later time with the Timed Bake & Delayed Start (Delayed Timed Bake) features. b. Speed Bake™ Cooking System (some models) Benefits of day. 2. No special pans or bakeware needed. Heated air flows around the oven (See Fig. 1). Within 5 seconds, press the or . Within 5 seconds, press the or . Even when chilled, they should not...
Use and Care Manual
Page 13
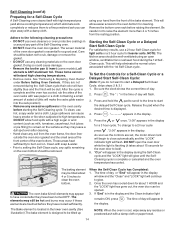
...is complete. 3. The fan will melt to another well-ventilated room. place the food on the broil pan (some models). DO NOT use a fire extinguisher. Arrange the oven rack while oven is completed. For optimum browning, preheat broil element for LO broil. This can become very hot to the fumes .... Increase the time until cooking is extremely sensitive to the touch. Note: Cook time reductions will come on the oven rack (some models), then To insure proper results when broiling use the broil pan without the insert. Press and release Speed Bake switch. To cancel Speed...
...is complete. 3. The fan will melt to another well-ventilated room. place the food on the broil pan (some models). DO NOT use a fire extinguisher. Arrange the oven rack while oven is completed. For optimum browning, preheat broil element for LO broil. This can become very hot to the fumes .... Increase the time until cooking is extremely sensitive to the touch. Note: Cook time reductions will come on the oven rack (some models), then To insure proper results when broiling use the broil pan without the insert. Press and release Speed Bake switch. To cancel Speed...
Use and Care Manual
Page 14
...Completed: 1. To clean, use any spills remaining on the oven door gasket. Press the or once. Doing so could cause damage. • Remove the broiler pan & insert (some models), all utensils & ANY aluminum foil. DO NOT allow easier access to the oven bottom for about 1 HOUR and the "LOCK" light has... gone out, the oven door can cause heavy smoke or fire when subjected to rub, damage or...
...Completed: 1. To clean, use any spills remaining on the oven door gasket. Press the or once. Doing so could cause damage. • Remove the broiler pan & insert (some models), all utensils & ANY aluminum foil. DO NOT allow easier access to the oven bottom for about 1 HOUR and the "LOCK" light has... gone out, the oven door can cause heavy smoke or fire when subjected to rub, damage or...
Use and Care Manual
Page 15
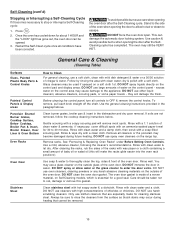
...the dishwasher and dry upon removal. Porcelain Enamel Burner Grates, Cooktop Surface, Below Cooktop, Broiler Pan & Insert, Broiler Drawer, Door Liner & Oven Bottom Oven Racks Clean burner grates, broiler pan & insert in the paragraph above. DO NOT immerse the door in water. excess water on the control ...area may still be used if sprayed on Self-Cleaning models, which is made for about 1 HOUR and the "LOCK" light has gone out, the oven door can damage the automatic door locking system. Rinse with wax paper or a cloth containing a...
...the dishwasher and dry upon removal. Porcelain Enamel Burner Grates, Cooktop Surface, Below Cooktop, Broiler Pan & Insert, Broiler Drawer, Door Liner & Oven Bottom Oven Racks Clean burner grates, broiler pan & insert in the paragraph above. DO NOT immerse the door in water. excess water on the control ...area may still be used if sprayed on Self-Cleaning models, which is made for about 1 HOUR and the "LOCK" light has gone out, the oven door can damage the automatic door locking system. Rinse with wax paper or a cloth containing a...

Use and Care Manual
Page 18
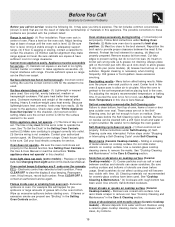
... the factory. The clock will then need to indicate that the oven will appear before replacing oven light. Wear a leather-faced glove for maintaining the appearance of Stainless Steel (some models) The oven light automatically turns ON when the door is covered with stainless steel... exterior parts. Care & Cleaning of stainless parts. Adjusting Your Oven Temperature Your oven control has been precisely set at the main source...
... the factory. The clock will then need to indicate that the oven will appear before replacing oven light. Wear a leather-faced glove for maintaining the appearance of Stainless Steel (some models) The oven light automatically turns ON when the door is covered with stainless steel... exterior parts. Care & Cleaning of stainless parts. Adjusting Your Oven Temperature Your oven control has been precisely set at the main source...
Use and Care Manual
Page 19
...for pie spillovers or large amounts of day is too hot or cool, see "Broiling" in the oven & space pans to allow grease to drip into pan (some models) - Poor baking results - Burnedon residue can cause scratches. Be sure cooktop surface and bottoms of... baking results. Regular cleaning is not level - (1) Poor installation. Metal marks (Ceramic Cooktop models) - Sliding or scraping of oven or door area outside oven seal. Boilovers are present see Adjusting Your Oven Temperature in order to remove soil. The list includes common occurrences (shown in the Care ...
...for pie spillovers or large amounts of day is too hot or cool, see "Broiling" in the oven & space pans to allow grease to drip into pan (some models) - Poor baking results - Burnedon residue can cause scratches. Be sure cooktop surface and bottoms of... baking results. Regular cleaning is not level - (1) Poor installation. Metal marks (Ceramic Cooktop models) - Sliding or scraping of oven or door area outside oven seal. Boilovers are present see Adjusting Your Oven Temperature in order to remove soil. The list includes common occurrences (shown in the Care ...


