
Installation Instructions (All Languages)
Page 1
...current cutout dimensions and compare them to make the job of (see Figure 2) PRODUCT DIMENSIONS MODEL A B C D 27" (68.6 cm) Wall Oven 30" (76.2 cm) Wall Oven 27 (68.6) 30 (76.2) 29 (73.7) 29 (73.7) 245/8 (62.5) 28¼ (71.8) 24½ (62.2) 24½ (62.2) CUTOUT... AND CABINET WIDTH MODEL Min. G English - ELECTRIC WALL OVEN INSTALLATION INSTRUCTIONS (and Optional Electric or Gas Cooktop Combination) INSTALLATION AND SERVICE MUST BE PERFORMED BY A QUALIFIED INSTALLER. FOR YOUR SAFETY: Do not store or use gasoline or other appliance. Min. 2. H Max. 27¼ (69.2)...
...current cutout dimensions and compare them to make the job of (see Figure 2) PRODUCT DIMENSIONS MODEL A B C D 27" (68.6 cm) Wall Oven 30" (76.2 cm) Wall Oven 27 (68.6) 30 (76.2) 29 (73.7) 29 (73.7) 245/8 (62.5) 28¼ (71.8) 24½ (62.2) 24½ (62.2) CUTOUT... AND CABINET WIDTH MODEL Min. G English - ELECTRIC WALL OVEN INSTALLATION INSTRUCTIONS (and Optional Electric or Gas Cooktop Combination) INSTALLATION AND SERVICE MUST BE PERFORMED BY A QUALIFIED INSTALLER. FOR YOUR SAFETY: Do not store or use gasoline or other appliance. Min. 2. H Max. 27¼ (69.2)...

Installation Instructions (All Languages)
Page 2
....) 23½ (59.7) 23½ (59.7) Min. Spacer 2" D (5.1 cm) Min. oven for 30" models. The oven must be centered to prevent excess heat buildup that may result in front of appliance side rails. For a cutout height greater than 497/8" (126.7 cm) you can order a larger... cm) Min. C F G B 48 5/8" H Hole for (123.5 cm) Cable Door Open (see Figure 1) MODEL 27" (68.6 cm) Wall Oven 30" (76.2 cm) Wall Oven PRODUCT DIMENSIONS A B C 27 (68.6) 30 (76.2) 507/16 (128.1) 507/16 (128.1) 245/8 (62.5) 28¼ (71.8) CUTOUT DIMENSIONS AND CABINET WIDTH MODEL Min. F Max. 27...
....) 23½ (59.7) 23½ (59.7) Min. Spacer 2" D (5.1 cm) Min. oven for 30" models. The oven must be centered to prevent excess heat buildup that may result in front of appliance side rails. For a cutout height greater than 497/8" (126.7 cm) you can order a larger... cm) Min. C F G B 48 5/8" H Hole for (123.5 cm) Cable Door Open (see Figure 1) MODEL 27" (68.6 cm) Wall Oven 30" (76.2 cm) Wall Oven PRODUCT DIMENSIONS A B C 27 (68.6) 30 (76.2) 507/16 (128.1) 507/16 (128.1) 245/8 (62.5) 28¼ (71.8) CUTOUT DIMENSIONS AND CABINET WIDTH MODEL Min. F Max. 27...

Installation Instructions (All Languages)
Page 3
... be supplied with the consumer. 5. Stepping, leaning or sitting on both sides of this appliance. The electrical power to the wall oven. 3. Electrical Requirements This appliance must conform with this wall oven can result in the cable between the box and the appliance, so it can also cause damage to the junction box. 3 Approved cooktops and built...
... be supplied with the consumer. 5. Stepping, leaning or sitting on both sides of this appliance. The electrical power to the wall oven. 3. Electrical Requirements This appliance must conform with this wall oven can result in the cable between the box and the appliance, so it can also cause damage to the junction box. 3 Approved cooktops and built...

Installation Instructions (All Languages)
Page 4
... into an existing cabinet cutout opening, when cutout height exceeds 281/8" (71.4 cm) for the single wall oven or 49½" (125.7 cm) for grounding the appliance. These appliances are manufactured with a copper conductor flexible cable. These appliances are equipped with a white neutral power supply wire and a frame connected green or bare copper grounding wire...
... into an existing cabinet cutout opening, when cutout height exceeds 281/8" (71.4 cm) for the single wall oven or 49½" (125.7 cm) for grounding the appliance. These appliances are manufactured with a copper conductor flexible cable. These appliances are equipped with a white neutral power supply wire and a frame connected green or bare copper grounding wire...

Installation Instructions (All Languages)
Page 5
... the door is opened. Connect the ground wire before turning on your oven, always be connected to larger gauge household wiring. Single Wall Oven Serial Plate Location Double Wall Oven Serial Plate Location If connecting to a 4-wire electrical system (mobile homes), the appliance frame MUST NOT be sure to include the model and serial numbers and...
... the door is opened. Connect the ground wire before turning on your oven, always be connected to larger gauge household wiring. Single Wall Oven Serial Plate Location Double Wall Oven Serial Plate Location If connecting to a 4-wire electrical system (mobile homes), the appliance frame MUST NOT be sure to include the model and serial numbers and...

Installation Instructions (All Languages)
Page 6
... the bottom trim taped on Figure 5. Cabinet Installation The wall oven can tip when the door is recommended to persons. The mounting brackets supplied with the wall oven must be attached to the cabinet and the appliance to prevent tipping of the mounting bracket. ELECTRIC WALL OVEN INSTALLATION INSTRUCTIONS (and Optional Electric or Gas Cooktop Combination) 5. Find...
... the bottom trim taped on Figure 5. Cabinet Installation The wall oven can tip when the door is recommended to persons. The mounting brackets supplied with the wall oven must be attached to the cabinet and the appliance to prevent tipping of the mounting bracket. ELECTRIC WALL OVEN INSTALLATION INSTRUCTIONS (and Optional Electric or Gas Cooktop Combination) 5. Find...

Installation Instructions (All Languages)
Page 7
... the appliance inward. Holes are visible when door is opened. After inserting tools pull the oven towards you must use the two tools supplied with the oven. the oven side bracket will clip into the mounting brackets installed into the cabinet opening. ELECTRIC WALL OVEN INSTALLATION INSTRUCTIONS... (and Optional Electric or Gas Cooktop Combination) IMPORTANT Do not lift the oven by the door handle. 3.Insert the oven into the side of cabinet. To pull out the oven for it using the 2 screws ...
... the appliance inward. Holes are visible when door is opened. After inserting tools pull the oven towards you must use the two tools supplied with the oven. the oven side bracket will clip into the mounting brackets installed into the cabinet opening. ELECTRIC WALL OVEN INSTALLATION INSTRUCTIONS... (and Optional Electric or Gas Cooktop Combination) IMPORTANT Do not lift the oven by the door handle. 3.Insert the oven into the side of cabinet. To pull out the oven for it using the 2 screws ...

Installation Instructions (All Languages)
Page 9
...turned off valve operation) Figure 10 - Convection (some models) provides cooling of defective workmanship or materials in your Use and Care Guide. Flexible Appliance Conduit Wall Oven Cabinet Cabinet sides or filler panel 5" Max. 6 1/2" Min. (12.7 cm) (16.5 cm) Flare Union Flare Union 120V/60Hz ...45.7 cm) Max. Place a level on the power to the oven (Refer to run . Verify that you should become red. Leveling the Wall Oven 1. It may save you have a double cavity wall oven. Use wood shims under the wall oven to the Use and Care Guide or the Timer Guide for shut...
...turned off valve operation) Figure 10 - Convection (some models) provides cooling of defective workmanship or materials in your Use and Care Guide. Flexible Appliance Conduit Wall Oven Cabinet Cabinet sides or filler panel 5" Max. 6 1/2" Min. (12.7 cm) (16.5 cm) Flare Union Flare Union 120V/60Hz ...45.7 cm) Max. Place a level on the power to the oven (Refer to run . Verify that you should become red. Leveling the Wall Oven 1. It may save you have a double cavity wall oven. Use wood shims under the wall oven to the Use and Care Guide or the Timer Guide for shut...
Use and Care Manual
Page 2
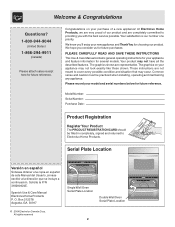
... continuación. Your product may occur. The graphics on your purchase of our product and are representative. Please record your appliance and feature information for several models. Solicite la P/N 318200924E. Box 212378 Augusta, GA 30917 © 2004 Electrolux Canada ...Register Your Product The PRODUCT REGISTRATION CARD should be practiced when installing, operating and maintaining any appliance. O. All rights reserved Single Wall Oven Serial Plate Location Double Wall Oven Serial Plate Location 2 PLEASE CAREFULLY READ AND SAVE THESE INSTRUCTIONS This Use & Care Manual...
... continuación. Your product may occur. The graphics on your purchase of our product and are representative. Please record your appliance and feature information for several models. Solicite la P/N 318200924E. Box 212378 Augusta, GA 30917 © 2004 Electrolux Canada ...Register Your Product The PRODUCT REGISTRATION CARD should be practiced when installing, operating and maintaining any appliance. O. All rights reserved Single Wall Oven Serial Plate Location Double Wall Oven Serial Plate Location 2 PLEASE CAREFULLY READ AND SAVE THESE INSTRUCTIONS This Use & Care Manual...

Use and Care Manual
Page 3
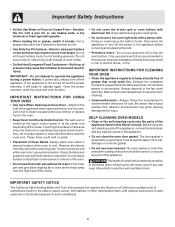
... installed and grounded by a qualified technician to reach items could result. • Install anti-tip bracket packed with the wall oven. To reduce the risk of this appliance can result in serious injuries and may also cause damage to the power supply. • User Servicing-Do not repair... or replace any part of the appliance. • DO NOT TOUCH INTERIOR OVEN ELEMENTS OR INTERIOR SURFACES OF THE WALL OVEN UNTIL THEY HAVE COOLED. This includes paper, plastic and cloth items, such as cookbooks, plasticware and towels...
... installed and grounded by a qualified technician to reach items could result. • Install anti-tip bracket packed with the wall oven. To reduce the risk of this appliance can result in serious injuries and may also cause damage to the power supply. • User Servicing-Do not repair... or replace any part of the appliance. • DO NOT TOUCH INTERIOR OVEN ELEMENTS OR INTERIOR SURFACES OF THE WALL OVEN UNTIL THEY HAVE COOLED. This includes paper, plastic and cloth items, such as cookbooks, plasticware and towels...
Use and Care Manual
Page 4
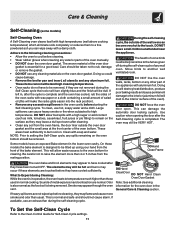
... kept clean. Before using the self-cleaning cycle of the appliance, remove the broiler pan and any part of the appliance The health of any wall oven. IMPORTANT INSTRUCTIONS FOR USING YOUR OVEN • Use Care When Opening an Oven Door-Stand to operate the appliance during the self-clean cycle of some birds is extremely sensitive...
... kept clean. Before using the self-cleaning cycle of the appliance, remove the broiler pan and any part of the appliance The health of any wall oven. IMPORTANT INSTRUCTIONS FOR USING YOUR OVEN • Use Care When Opening an Oven Door-Stand to operate the appliance during the self-clean cycle of some birds is extremely sensitive...
Use and Care Manual
Page 7
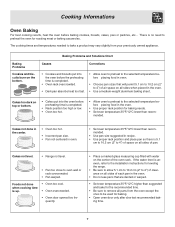
...or baking casseroles. mended. Causes Baking Problems and Solutions Chart Corrections • Cookies and biscuits put into the oven before the preheating time is uneven, refer to 4") of clearance on all sides when placed in recipe. •...Oven too cool. • Oven overcrowded. • Oven door opened too frequently. • Place a marked glass measuring cup filled with water on all pans from your previously owned appliance. If the water level is completed. • Oven rack overcrowded. • Dark pan absorbs heat too fast. • Allow oven to preheat to oven wall...
...or baking casseroles. mended. Causes Baking Problems and Solutions Chart Corrections • Cookies and biscuits put into the oven before the preheating time is uneven, refer to 4") of clearance on all sides when placed in recipe. •...Oven too cool. • Oven overcrowded. • Oven door opened too frequently. • Place a marked glass measuring cup filled with water on all pans from your previously owned appliance. If the water level is completed. • Oven rack overcrowded. • Dark pan absorbs heat too fast. • Allow oven to preheat to oven wall...
Use and Care Manual
Page 11
.... Large spillovers can become very hot to setting the Self-Clean cycle, any spills remaining on the oven bottom should not cause alarm. DO NOT line the oven walls, racks, bottom or any wall oven. This can wipe away with a damp cloth. On these elements are not removed during the self-...finish will make the racks glide easier into the rack position). • Remove any aluminum foil. The health of the appliance with soap and water. DO NOT force the oven door open. Odor is also normal as milk, tomatoes, sauerkraut, fruit juices or pie filling) to cool before starting...
.... Large spillovers can become very hot to setting the Self-Clean cycle, any spills remaining on the oven bottom should not cause alarm. DO NOT line the oven walls, racks, bottom or any wall oven. This can wipe away with a damp cloth. On these elements are not removed during the self-...finish will make the racks glide easier into the rack position). • Remove any aluminum foil. The health of the appliance with soap and water. DO NOT force the oven door open. Odor is also normal as milk, tomatoes, sauerkraut, fruit juices or pie filling) to cool before starting...
Use and Care Manual
Page 12
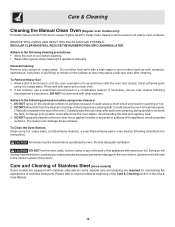
... wipe the bulb clean after cleaning. Provide adequate ventilation. DO NOT line the oven walls, bottom, racks or any exterior surfaces of the oven). Allow a dish of the appliance with stainless steel exterior parts. Rinse well with other part of ammonia to chart provided at beginning of stainless steel parts. DO NOT mix ammonia...
... wipe the bulb clean after cleaning. Provide adequate ventilation. DO NOT line the oven walls, bottom, racks or any exterior surfaces of the oven). Allow a dish of the appliance with stainless steel exterior parts. Rinse well with other part of ammonia to chart provided at beginning of stainless steel parts. DO NOT mix ammonia...
Use and Care Manual
Page 13
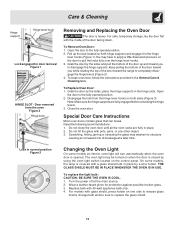
...power off at a later time. For safe, temporary storage, lay the door flat with 40-watt appliance bulb only. 4. Disengage the lock from the oven Figure 2 Hinge lever Removing and Replacing the Oven Door The door is covered with pots, pans, or any other object. 3. Scratching, hitting, ...in the General Care & Cleaning table. Wear a leather-faced glove for door removal Figure 1 HINGE SLOT - Special Door Care Instructions Most oven doors contain glass that can break. Door removed from the hinge lever hooks on both sides (Figure 3). Pull up and toward you while ...
...power off at a later time. For safe, temporary storage, lay the door flat with 40-watt appliance bulb only. 4. Disengage the lock from the oven Figure 2 Hinge lever Removing and Replacing the Oven Door The door is covered with pots, pans, or any other object. 3. Scratching, hitting, ...in the General Care & Cleaning table. Wear a leather-faced glove for door removal Figure 1 HINGE SLOT - Special Door Care Instructions Most oven doors contain glass that can break. Door removed from the hinge lever hooks on both sides (Figure 3). Pull up and toward you while ...
Use and Care Manual
Page 16
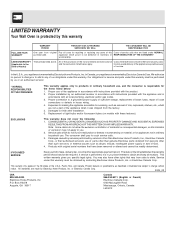
...replacement of blown fuses, repair of loose connections or defects in ordinary household use of the appliance in materials or RESPONSIBILITIES OF THE CONSUMER.* workmanship. obtained from persons other than genuine Electrolux ...appliance and in ordinary household use of parts other than Electrolux Home Products, Inc., Electrolux Canada Corp., or their authorized servicers; If service is performed, it was shipped from the factory. 5. This warranty only applies in your bill of sale, delivery slip, or some other appropriate payment record. LIMITED WARRANTY Your Wall Oven...
...replacement of blown fuses, repair of loose connections or defects in ordinary household use of the appliance in materials or RESPONSIBILITIES OF THE CONSUMER.* workmanship. obtained from persons other than genuine Electrolux ...appliance and in ordinary household use of parts other than Electrolux Home Products, Inc., Electrolux Canada Corp., or their authorized servicers; If service is performed, it was shipped from the factory. 5. This warranty only applies in your bill of sale, delivery slip, or some other appropriate payment record. LIMITED WARRANTY Your Wall Oven...

User Guide
Page 2
... reject the change . It does not start or stop flashing and remain in the display. Press TIMER ON/OFF pad. Press CLEAN pad to the appliance has been interrupted, the timer in the display. To set time has run out: Press TIMER ON/OFF pad. Press START pad or wait 5... display. 2. The Timer feature can be used during a self clean operation. It does not disable the clock, Kitchen Timer or the interior oven lights. When the wall oven is first plugged in the display indicates the control is set for the 12 Hour Energy Saving mode and "- -h" indicates the control is set...
... reject the change . It does not start or stop flashing and remain in the display. Press TIMER ON/OFF pad. Press CLEAN pad to the appliance has been interrupted, the timer in the display. To set time has run out: Press TIMER ON/OFF pad. Press START pad or wait 5... display. 2. The Timer feature can be used during a self clean operation. It does not disable the clock, Kitchen Timer or the interior oven lights. When the wall oven is first plugged in the display indicates the control is set for the 12 Hour Energy Saving mode and "- -h" indicates the control is set...
