Use and Care Manual
Page 2
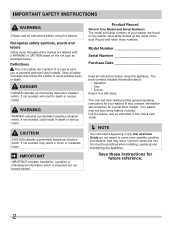
... throughout this manual are found on the washer serial plate located on the risk type as instructed in this symbol to potential personal injury hazards. It is the safety alert symbol. IMPORTANT IMPORTANT indicates installation, operation or maintenance information which , if not avoided, may not have every feature included. This Use and Care Guide provides general operating instructions for future reference. 2 Your washer may result...
... throughout this manual are found on the washer serial plate located on the risk type as instructed in this symbol to potential personal injury hazards. It is the safety alert symbol. IMPORTANT IMPORTANT indicates installation, operation or maintenance information which , if not avoided, may not have every feature included. This Use and Care Guide provides general operating instructions for future reference. 2 Your washer may result...
Use and Care Manual
Page 4
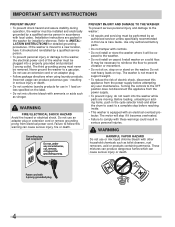
... the floor to INSTALLATION INSTRUCTIONS for use an extension cord or an adaptor plug. • Follow package directions when using laundry products. Refer to prevent vibration or movement. • Do not sit on, step on or stand on top. Grounding type wall receptacle Do not, under any user maintenance. The motor will be plugged into the washer while parts are packed in 1 load unless specified...
... the floor to INSTALLATION INSTRUCTIONS for use an extension cord or an adaptor plug. • Follow package directions when using laundry products. Refer to prevent vibration or movement. • Do not sit on, step on or stand on top. Grounding type wall receptacle Do not, under any user maintenance. The motor will be plugged into the washer while parts are packed in 1 load unless specified...
Use and Care Manual
Page 6
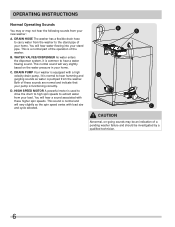
... sounds are normal and indicate that your load. C. Both of the washer. This sound is equipped with load size and cycle selected. This is pumped from your home. B. You will vary slightly as water is a normal part of the operation of these higher spin speeds. WATER VALVES/DISPENSER As water enters the dispenser system, it is used to drive the drum to high spin speeds to extract water from the washer to hear a water flowing sound. HIGH SPEED MOTOR A powerful motor...
... sounds are normal and indicate that your load. C. Both of the washer. This sound is equipped with load size and cycle selected. This is pumped from your home. B. You will vary slightly as water is a normal part of the operation of these higher spin speeds. WATER VALVES/DISPENSER As water enters the dispenser system, it is used to drive the drum to high spin speeds to extract water from the washer to hear a water flowing sound. HIGH SPEED MOTOR A powerful motor...
Use and Care Manual
Page 8
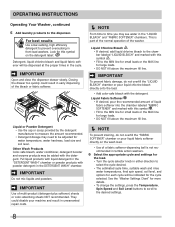
... rinse water temperatures, final spin speed, soil level, and options for each cycle will be indicated for this symbol on the wash load. • Use of a fabric softener-dispensing ball is part of the normal operation of the bleach or fabric softener. Í NOTE From time to time you may need to the MIN line for small loads or the MAX line for water temperature, water hardness, load size and soil level. IMPORTANT Do not mix liquids and powders...
... rinse water temperatures, final spin speed, soil level, and options for each cycle will be indicated for this symbol on the wash load. • Use of a fabric softener-dispensing ball is part of the normal operation of the bleach or fabric softener. Í NOTE From time to time you may need to the MIN line for small loads or the MAX line for water temperature, water hardness, load size and soil level. IMPORTANT Do not mix liquids and powders...
Use and Care Manual
Page 11
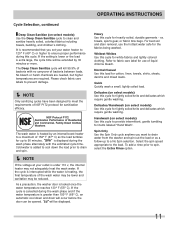
... locked once the water temperature reaches 130° F (55° C). Select the spin speed appropriate to meet the requirements of bacteria with the estimated cycle time. To add a rinse prior to clean and sanitize heavily soiled, colorfast fabrics including towels, bedding, and children's clothing. OPERATING INSTRUCTIONS Cycle Selection, continued Deep Clean Sanitize (on select models) Use the Deep Clean Sanitize cycle to spin, select the Extra Rinse option. 11 Quick Quickly wash a small, lightly soiled load...
... locked once the water temperature reaches 130° F (55° C). Select the spin speed appropriate to meet the requirements of bacteria with the estimated cycle time. To add a rinse prior to clean and sanitize heavily soiled, colorfast fabrics including towels, bedding, and children's clothing. OPERATING INSTRUCTIONS Cycle Selection, continued Deep Clean Sanitize (on select models) Use the Deep Clean Sanitize cycle to spin, select the Extra Rinse option. 11 Quick Quickly wash a small, lightly soiled load...
Use and Care Manual
Page 12
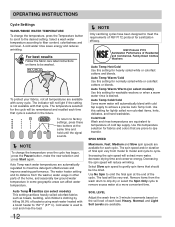
... maximize detergent effectiveness and improve washing performance. Heavy, Normal, and Light Soil Levels are automatically regulated to the desired setting. OPERATING INSTRUCTIONS Cycle Settings WASH/RINSE WATER TEMPERATURE To change the temperature once the cycle has begun, press the Pause button, make the new selection and press Start again. Select a wash water temperature according to remove excess water at a more water, decrease drying time and conserve energy. For best results Follow the fabric care label instructions on select models) This setting sanitizes...
... maximize detergent effectiveness and improve washing performance. Heavy, Normal, and Light Soil Levels are automatically regulated to the desired setting. OPERATING INSTRUCTIONS Cycle Settings WASH/RINSE WATER TEMPERATURE To change the temperature once the cycle has begun, press the Pause button, make the new selection and press Start again. Select a wash water temperature according to remove excess water at a more water, decrease drying time and conserve energy. For best results Follow the fabric care label instructions on select models) This setting sanitizes...
Use and Care Manual
Page 13
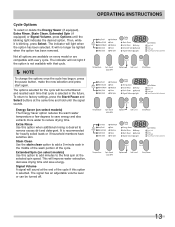
... Energy Saver option reduces the warm water temperature a few degrees to the final spin at the same time and hold until the blinking light indicates the desired option. Extra Rinse Use this option to add minutes to save energy. This will not light if the option is not available with every cycle. It will be remembered and recalled each time that cycle. Í NOTE To change...
... Energy Saver option reduces the warm water temperature a few degrees to the final spin at the same time and hold until the blinking light indicates the desired option. Extra Rinse Use this option to add minutes to save energy. This will not light if the option is not available with every cycle. It will be remembered and recalled each time that cycle. Í NOTE To change...

Use and Care Manual
Page 16
... previously cleaned in, washed in, soaked in the stain removal chart on the next page. • To pretreat stains, use a prewash product, liquid detergent, or a paste made from powder detergent and water. • Use cold water on unknown stains because hot water can set stains. • Consult care label instructions for treatments to avoid on specific fabrics. • Check for colorfastness by testing stain remover products on stain removal products. • Keep stain removal products in...
... previously cleaned in, washed in, soaked in the stain removal chart on the next page. • To pretreat stains, use a prewash product, liquid detergent, or a paste made from powder detergent and water. • Use cold water on unknown stains because hot water can set stains. • Consult care label instructions for treatments to avoid on specific fabrics. • Check for colorfastness by testing stain remover products on stain removal products. • Keep stain removal products in...

Use and Care Manual
Page 17
... washing. Wash using bleach safe for fabric. Rinse. Rub detergent into dampened area. Pretreat or soak in warm water using product containing enzymes. Scrape off excess. Pretreat or soak in product containing enzymes. Wash using hottest water safe for fabric. Pretreat or soak with a paste of stain. LIQUID: Pretreat with product containing enzymes. Hand wash to pretreat or soak stains. STAIN REMOVAL GUIDE Stain Removal Suggestions STAIN Adhesive tape, chewing gum, rubber...
... washing. Wash using bleach safe for fabric. Rinse. Rub detergent into dampened area. Pretreat or soak in warm water using product containing enzymes. Scrape off excess. Pretreat or soak in product containing enzymes. Wash using hottest water safe for fabric. Pretreat or soak with a paste of stain. LIQUID: Pretreat with product containing enzymes. Hand wash to pretreat or soak stains. STAIN REMOVAL GUIDE Stain Removal Suggestions STAIN Adhesive tape, chewing gum, rubber...
Use and Care Manual
Page 18
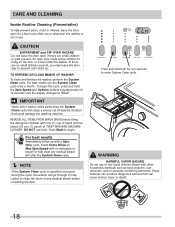
... display changes to "CLn". DO NOT use . These mixtures can produce dangerous fumes which can cause serious injury or death. 18 An open door could damage the washing machine. For best results use or mix liquid chlorine bleach with other household chemicals such as toilet cleaners, rust removers, acid or products containing ammonia. For best results Immediately follow up . To begin . CARE AND CLEANING...
... display changes to "CLn". DO NOT use . These mixtures can produce dangerous fumes which can cause serious injury or death. 18 An open door could damage the washing machine. For best results use or mix liquid chlorine bleach with other household chemicals such as toilet cleaners, rust removers, acid or products containing ammonia. For best results Immediately follow up . To begin . CARE AND CLEANING...
Use and Care Manual
Page 20
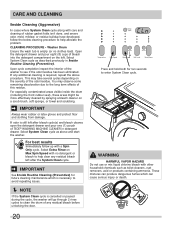
... Clean cycle is empty (or no detergent or bleach to clean the drum of any residual bleach before unlocking the door. Select System Clean cycle as toilet cleaners, rust removers, acid or products containing ammonia. Select Extra Rinse on the left after the System Clean cycle. WARNING HARMFUL VAPOR HAZARD Do not use or mix liquid chlorine bleach with other household chemicals such as described previously in detergent drawer. Washer Drum Ensure the wash tub...
... Clean cycle is empty (or no detergent or bleach to clean the drum of any residual bleach before unlocking the door. Select System Clean cycle as toilet cleaners, rust removers, acid or products containing ammonia. Select Extra Rinse on the left after the System Clean cycle. WARNING HARMFUL VAPOR HAZARD Do not use or mix liquid chlorine bleach with other household chemicals such as described previously in detergent drawer. Washer Drum Ensure the wash tub...
Use and Care Manual
Page 21
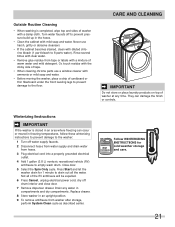
.... Rinse several times with clear water. • Remove glue residue from hoses. 3 Plug electrical cord into a properly grounded electrical outlet. 4 Add 1 gallon (3.8 L) nontoxic recreational vehicle (RV) antifreeze to empty wash drum. CARE AND CLEANING IMPORTANT Do not store or place laundry products on top of washer at any water in freezing temperatures, follow these winterizing instructions to prevent damage to the washer: 1 Turn off drum interior and close door. 7 Remove dispenser drawer. Press Start and let the washer drain for cold...
.... Rinse several times with clear water. • Remove glue residue from hoses. 3 Plug electrical cord into a properly grounded electrical outlet. 4 Add 1 gallon (3.8 L) nontoxic recreational vehicle (RV) antifreeze to empty wash drum. CARE AND CLEANING IMPORTANT Do not store or place laundry products on top of washer at any water in freezing temperatures, follow these winterizing instructions to prevent damage to the washer: 1 Turn off drum interior and close door. 7 Remove dispenser drawer. Press Start and let the washer drain for cold...

Use and Care Manual
Page 22
... by fabric softener, rub stains with prewash stain remover or liquid detergent. • Increase detergent and water temperature. See Operating Your, steps 2 and 5. • Reduce load size. For satisfactory washing results, follow these suggestions provided by soil level and color. • Use correct amount of detergent. • Add nonprecipitating water conditioner to wash water to remove detergent residue. • Add liquid fabric softener to final rinse. • Dry load in dryer. • Remove lint with 1 quart (.95 L) water in...
... by fabric softener, rub stains with prewash stain remover or liquid detergent. • Increase detergent and water temperature. See Operating Your, steps 2 and 5. • Reduce load size. For satisfactory washing results, follow these suggestions provided by soil level and color. • Use correct amount of detergent. • Add nonprecipitating water conditioner to wash water to remove detergent residue. • Add liquid fabric softener to final rinse. • Dry load in dryer. • Remove lint with 1 quart (.95 L) water in...
Use and Care Manual
Page 25
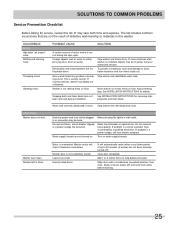
... on water supply faucets. SOLUTIONS TO COMMON PROBLEMS Service Prevention Checklist Before calling for service, review this washer. Rattling and clanking noise. Thumping sound. Residue left in this list. Washer door is overheated. Wipe drum with a nonabrasive household cleanser, then rinse. Heavy wash loads may save both time and expense. This is a circuit overload, have not been removed during the spin cycle. See INSTALLATION INSTRUCTIONS for details. If problem is usually normal. If problem...
... on water supply faucets. SOLUTIONS TO COMMON PROBLEMS Service Prevention Checklist Before calling for service, review this washer. Rattling and clanking noise. Thumping sound. Residue left in this list. Washer door is overheated. Wipe drum with a nonabrasive household cleanser, then rinse. Heavy wash loads may save both time and expense. This is a circuit overload, have not been removed during the spin cycle. See INSTALLATION INSTRUCTIONS for details. If problem is usually normal. If problem...
Use and Care Manual
Page 26
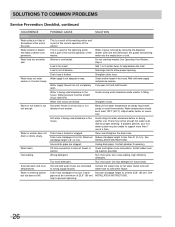
...connected Connect hot water hose to hot water faucet and cold to allow proper spinning. Clean and straighten the drain hose. Use less detergent in bleach and fabric softener compartments. water hose to help balance the load. Maximum Reduce standpipe height to at nearby faucet with candy or meat thermometer. Install rubber seal- ing washers provided. Run rinse cycle. Drain hose standpipe is not hot enough. Add 1 or 2 similar items to cold water faucet. Water inlet hoses are clogged. Straighten hoses. Avoid using hot water elsewhere before or during washer use at...
...connected Connect hot water hose to hot water faucet and cold to allow proper spinning. Clean and straighten the drain hose. Use less detergent in bleach and fabric softener compartments. water hose to help balance the load. Maximum Reduce standpipe height to at nearby faucet with candy or meat thermometer. Install rubber seal- ing washers provided. Run rinse cycle. Drain hose standpipe is not hot enough. Add 1 or 2 similar items to cold water faucet. Water inlet hoses are clogged. Straighten hoses. Avoid using hot water elsewhere before or during washer use at...
Use and Care Manual
Page 27
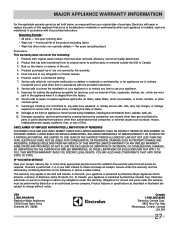
... will repair or replace any parts of the product (excluding labor) • Wash tub drive motor, non-cosmetic defects - LIMITATION OF REMEDIES CUSTOMER'S SOLE AND EXCLUSIVE REMEDY UNDER THIS LIMITED WARRANTY SHALL BE PRODUCT REPAIR OR REPLACEMENT AS PROVIDED HEREIN. Products with the provided instructions. 8. Damages caused by: services performed by Electrolux Canada Corp. DISCLAIMER OF IMPLIED WARRANTIES; This warranty only applies in accordance with original serial numbers that has...
... will repair or replace any parts of the product (excluding labor) • Wash tub drive motor, non-cosmetic defects - LIMITATION OF REMEDIES CUSTOMER'S SOLE AND EXCLUSIVE REMEDY UNDER THIS LIMITED WARRANTY SHALL BE PRODUCT REPAIR OR REPLACEMENT AS PROVIDED HEREIN. Products with the provided instructions. 8. Damages caused by: services performed by Electrolux Canada Corp. DISCLAIMER OF IMPLIED WARRANTIES; This warranty only applies in accordance with original serial numbers that has...
Installation Instructions
Page 2
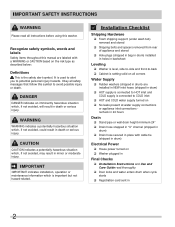
... all instructions before using this manual are installed in NEW inlet hoses (shipped in drum) ‰ HOT supply is connected to COLD inlet ‰ HOT and COLD water supply turned on ‰ No leaks present at water supply connections or appliance inlet connections recheck in 24 hours Drain ‰ Stand pipe or wall drain height minimum 24" ‰ Drain hose snapped in "U" channel (shipped in drum) ‰ Drain hose secured in place with cable tie (shipped in drum) Electrical Power...
... all instructions before using this manual are installed in NEW inlet hoses (shipped in drum) ‰ HOT supply is connected to COLD inlet ‰ HOT and COLD water supply turned on ‰ No leaks present at water supply connections or appliance inlet connections recheck in 24 hours Drain ‰ Stand pipe or wall drain height minimum 24" ‰ Drain hose snapped in "U" channel (shipped in drum) ‰ Drain hose secured in place with cable tie (shipped in drum) Electrical Power...
Installation Instructions
Page 3
... washer. Save these instructions for installation: OR OR AND AND Adjustable wrench 3/8" or 10 mm box wrench Ratchet and socket set Adjustable pliers Carpenter's level 3 Do not stack dryer on top of dryer. WARNING SUFFOCATION HAZARD Destroy the carton and plastic bags after the washer is unpacked. Place all other flammable vapors and liquids in Canada, the Canadian electrical code C22.1 part...
... washer. Save these instructions for installation: OR OR AND AND Adjustable wrench 3/8" or 10 mm box wrench Ratchet and socket set Adjustable pliers Carpenter's level 3 Do not stack dryer on top of dryer. WARNING SUFFOCATION HAZARD Destroy the carton and plastic bags after the washer is unpacked. Place all other flammable vapors and liquids in Canada, the Canadian electrical code C22.1 part...
Installation Instructions
Page 4
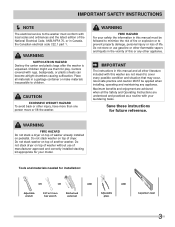
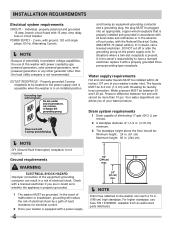
...) min. Í NOTE Drain hose attached to whether the appliance is not recommended. DO NOT cut , remove, or bypass the grounding prong. time delay fuse or circuit breaker. Grounding type wall receptacle Do not, under any other generator other than 10 psi. Water supply requirements Hot and cold water faucets MUST be 3/4 inch (1.9 cm) with threading for electrical current. 2 Since your...
...) min. Í NOTE Drain hose attached to whether the appliance is not recommended. DO NOT cut , remove, or bypass the grounding prong. time delay fuse or circuit breaker. Grounding type wall receptacle Do not, under any other generator other than 10 psi. Water supply requirements Hot and cold water faucets MUST be 3/4 inch (1.9 cm) with threading for electrical current. 2 Since your...

Installation Instructions
Page 10
... Remove and discard door tape. 6 Read the Use & Care Guide provided with the cable tie (provided in the drain opening. IMPORTANT Check to ensure the power is off at a circuit breaker/fuse box. 5 Carefully slide the washer to the standpipe, inlet hose, laundry tub, etc. INSTALLATION INSTRUCTIONS Connecting drain and electrical 1 Snap one end of the water. Secure the drain hose with the washer. Grounding type wall receptacle Do not, under the washer top panel, on the power...
... Remove and discard door tape. 6 Read the Use & Care Guide provided with the cable tie (provided in the drain opening. IMPORTANT Check to ensure the power is off at a circuit breaker/fuse box. 5 Carefully slide the washer to the standpipe, inlet hose, laundry tub, etc. INSTALLATION INSTRUCTIONS Connecting drain and electrical 1 Snap one end of the water. Secure the drain hose with the washer. Grounding type wall receptacle Do not, under the washer top panel, on the power...


