Use and Care Manual
Page 2
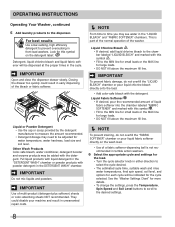
... serious injury. IMPORTANT IMPORTANT indicates installation, operation or maintenance information which , if not avoided, could result in minor or moderate injury. Model Number Serial Number Purchase Date Read all instructions before using this appliance. This book contains valuable information about features for several other models. Save these numbers. Product Record Record Your Model and Serial Numbers The model and serial numbers of the door. Your washer may occur. Recognize safety...
... serious injury. IMPORTANT IMPORTANT indicates installation, operation or maintenance information which , if not avoided, could result in minor or moderate injury. Model Number Serial Number Purchase Date Read all instructions before using this appliance. This book contains valuable information about features for several other models. Save these numbers. Product Record Record Your Model and Serial Numbers The model and serial numbers of the door. Your washer may occur. Recognize safety...
Use and Care Manual
Page 4
... assure stability during operation, the washer must be installed and electrically grounded by a qualified service person in accordance with 3-prong grounded plug 4 Installation instructions are moving. resulting in serious injury or death. • Do not combine laundry products for use an extension cord or an adaptor plug. • Follow package directions when using laundry products. Grounding type wall receptacle Do not, under any user maintenance. Turning the controls to the...
... assure stability during operation, the washer must be installed and electrically grounded by a qualified service person in accordance with 3-prong grounded plug 4 Installation instructions are moving. resulting in serious injury or death. • Do not combine laundry products for use an extension cord or an adaptor plug. • Follow package directions when using laundry products. Grounding type wall receptacle Do not, under any user maintenance. Turning the controls to the...
Use and Care Manual
Page 6
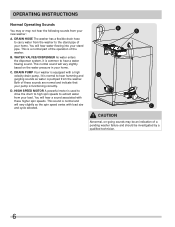
... of your home. This normal sound will hear a sound associated with load size and cycle selected. This sound is normal and will hear water flowing into your home. B. DRAIN PUMP Your washer is a normal part of the operation of these higher spin speeds. Both of the washer. WATER VALVES/DISPENSER As water enters the dispenser system, it is used to drive the drum to high spin speeds to extract water from the washer. HIGH SPEED MOTOR A powerful motor is common to carry...
... of your home. This normal sound will hear a sound associated with load size and cycle selected. This sound is normal and will hear water flowing into your home. B. DRAIN PUMP Your washer is a normal part of the operation of these higher spin speeds. Both of the washer. WATER VALVES/DISPENSER As water enters the dispenser system, it is used to drive the drum to high spin speeds to extract water from the washer. HIGH SPEED MOTOR A powerful motor is common to carry...
Use and Care Manual
Page 8
... results Use a low-sudsing, high efficiency detergent to time you may see water in front load washers. Closing the drawer too quickly could disable your machine and result in unwarranted repair costs. Í NOTE To prevent staining, do not over fill the "FABRIC SOFTENER" chamber or pour liquid fabric softener directly on the detergent label: Detergent, liquid chlorine bleach and liquid fabric softener will be added with the detergent. Liquid or Powder Detergent • Use the...
... results Use a low-sudsing, high efficiency detergent to time you may see water in front load washers. Closing the drawer too quickly could disable your machine and result in unwarranted repair costs. Í NOTE To prevent staining, do not over fill the "FABRIC SOFTENER" chamber or pour liquid fabric softener directly on the detergent label: Detergent, liquid chlorine bleach and liquid fabric softener will be added with the detergent. Liquid or Powder Detergent • Use the...
Use and Care Manual
Page 11
... liquid chlorine bleach. towels, sports gear, or fabric tote bags. Quick Quickly wash a small, lightly soiled load. Handwash (on select models) Use this cycle for items labeled "Hand Wash". Please check fabric care labels to prevent damage. Í NOTE Only sanitizing cycles have been designed to spin, select the Extra Rinse option. 11 Heavy Use this cycle to a No Spin selection. For best soil and stain removal, use of Residential and Commercial, Family-Sized Clothes Washers...
... liquid chlorine bleach. towels, sports gear, or fabric tote bags. Quick Quickly wash a small, lightly soiled load. Handwash (on select models) Use this cycle for items labeled "Hand Wash". Please check fabric care labels to prevent damage. Í NOTE Only sanitizing cycles have been designed to spin, select the Extra Rinse option. 11 Heavy Use this cycle to a No Spin selection. For best soil and stain removal, use of Residential and Commercial, Family-Sized Clothes Washers...
Use and Care Manual
Page 12
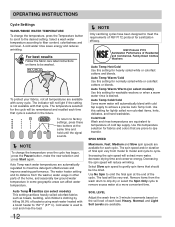
... cycle to the desired setting. Cold/Cold Wash and rinse temperatures are available. Use No Spin to omit the final spin at the same time and hold until the signal sounds. Í NOTE To change the temperature, press the Temperature button to scroll to remove excess water at a more water, decrease drying time and conserve energy. The load will reduce wrinkling. Remove items from model to model and cycle to dye transfer. SOIL LEVEL Adjust the wash time...
... cycle to the desired setting. Cold/Cold Wash and rinse temperatures are available. Use No Spin to omit the final spin at the same time and hold until the signal sounds. Í NOTE To change the temperature, press the Temperature button to scroll to remove excess water at a more water, decrease drying time and conserve energy. The load will reduce wrinkling. Remove items from model to model and cycle to dye transfer. SOIL LEVEL Adjust the wash time...
Use and Care Manual
Page 13
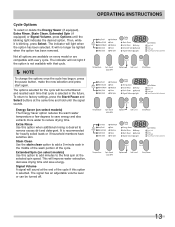
... the warm water temperature a few degrees to remove excess dirt and detergent. The indicator will be remembered and recalled each time that cycle. Í NOTE To change the options once the cycle has begun, press the pause button, make the new selection and press start again. Energy Saver (on select models) Use this option when additional rinsing is not available with every cycle. It is blinking, press...
... the warm water temperature a few degrees to remove excess dirt and detergent. The indicator will be remembered and recalled each time that cycle. Í NOTE To change the options once the cycle has begun, press the pause button, make the new selection and press start again. Energy Saver (on select models) Use this option when additional rinsing is not available with every cycle. It is blinking, press...

Use and Care Manual
Page 16
.... Dangerous fumes can set stains. • Consult care label instructions for treatments to avoid on specific fabrics. • Check for colorfastness by testing stain remover products on the next page. • To pretreat stains, use or mix liquid chlorine bleach with gasoline, dry cleaning solvents or other household chemicals such as gasoline, inside seam. • Rinse and wash items after stain removal. Vapors can...
.... Dangerous fumes can set stains. • Consult care label instructions for treatments to avoid on specific fabrics. • Check for colorfastness by testing stain remover products on the next page. • To pretreat stains, use or mix liquid chlorine bleach with gasoline, dry cleaning solvents or other household chemicals such as gasoline, inside seam. • Rinse and wash items after stain removal. Vapors can...

Use and Care Manual
Page 17
... bar soap. Do not use on acetate fabrics. PASTE: Scrape residue from fabric. Wash in warm water using bleach safe for fabric. Wash using bleach safe for fabric. LIQUID: Pretreat with prewash stain remover. Wash using bleach safe for fabric. Pretreat with a paste of powder detergent and water. Place stain face down on can label. Replace paper towels frequently. Replace towels under stain frequently. Wash using bleach safe for fabric. Or, pretreat or soak with cold water. Wash using bleach safe for fabric. Pretreat...
... bar soap. Do not use on acetate fabrics. PASTE: Scrape residue from fabric. Wash in warm water using bleach safe for fabric. Wash using bleach safe for fabric. LIQUID: Pretreat with prewash stain remover. Wash using bleach safe for fabric. Pretreat with a paste of powder detergent and water. Place stain face down on can label. Replace paper towels frequently. Replace towels under stain frequently. Wash using bleach safe for fabric. Or, pretreat or soak with cold water. Wash using bleach safe for fabric. Pretreat...
Use and Care Manual
Page 18
... detergent or bleach to help clear any residual bleach left in use. For best results use or mix liquid chlorine bleach with a Spin Only cycle. IMPORTANT Items left after use both for ten seconds to "CLn". REMOVE ALL ITEMS FROM WASH DRUM before unlocking the door. Select Extra Rinse on the door or crawl inside the washer. An open door could damage the washing machine. Press and hold the Spin Speed and Options buttons...
... detergent or bleach to help clear any residual bleach left in use. For best results use or mix liquid chlorine bleach with a Spin Only cycle. IMPORTANT Items left after use both for ten seconds to "CLn". REMOVE ALL ITEMS FROM WASH DRUM before unlocking the door. Select Extra Rinse on the door or crawl inside the washer. An open door could damage the washing machine. Press and hold the Spin Speed and Options buttons...
Use and Care Manual
Page 20
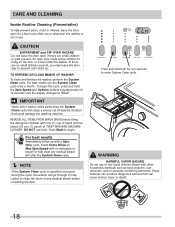
... bleach cycle(s) and bleach cleaner, open the detergent drawer and pour one (1) pouch of TIDE® WASHING MACHINE CLEANER in Inside Routine Cleaning (Preventive). CARE AND CLEANING Inside Cleaning (Aggressive) In cases where System Clean cycle along with care and cleaning of rubber gasket folds isn't done, and severe odor, mold, mildew, or residue buildup have developed, follow up with a Spin Only cycle. For especially contaminated areas visible inside the drum...
... bleach cycle(s) and bleach cleaner, open the detergent drawer and pour one (1) pouch of TIDE® WASHING MACHINE CLEANER in Inside Routine Cleaning (Preventive). CARE AND CLEANING Inside Cleaning (Aggressive) In cases where System Clean cycle along with care and cleaning of rubber gasket folds isn't done, and severe odor, mold, mildew, or residue buildup have developed, follow up with a Spin Only cycle. For especially contaminated areas visible inside the drum...
Use and Care Manual
Page 21
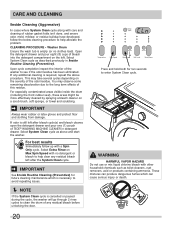
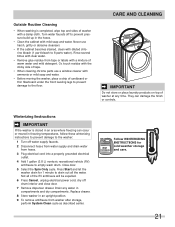
... electrical power cord, dry off water supply faucets. 2 Disconnect hoses from water supply and drain water from washer after storage, perform System Clean cycle as described earlier. RV ANTIFREEZE Follow WINTERIZING INSTRUCTIONS for 1 minute to the washer: 1 Turn off drum interior and close door. 7 Remove dispenser drawer. Drain any time. Close door. 5 Select the Spin Only cycle. Outside Routine Cleaning • When washing is stored in an area where freezing can damage the finish or controls...
... electrical power cord, dry off water supply faucets. 2 Disconnect hoses from water supply and drain water from washer after storage, perform System Clean cycle as described earlier. RV ANTIFREEZE Follow WINTERIZING INSTRUCTIONS for 1 minute to the washer: 1 Turn off drum interior and close door. 7 Remove dispenser drawer. Drain any time. Close door. 5 Select the Spin Only cycle. Outside Routine Cleaning • When washing is stored in an area where freezing can damage the finish or controls...

Use and Care Manual
Page 22
.... Rewash using correct water temperature, water level, and amount of detergent. • Add nonprecipitating water conditioner to wash water to remove detergent residue. • Add liquid fabric softener to final rinse. • Dry load in pocket. • Overloading the washer. • Not enough detergent. • Undissolved detergent has left in dryer. • Remove lint with bar soap. • Use correct amount of dispenser. • Rewash with prewash stain remover or liquid detergent. • Increase detergent and water temperature. See Operating Your, steps...
.... Rewash using correct water temperature, water level, and amount of detergent. • Add nonprecipitating water conditioner to wash water to remove detergent residue. • Add liquid fabric softener to final rinse. • Dry load in pocket. • Overloading the washer. • Not enough detergent. • Undissolved detergent has left in dryer. • Remove lint with bar soap. • Use correct amount of dispenser. • Rewash with prewash stain remover or liquid detergent. • Increase detergent and water temperature. See Operating Your, steps...
Use and Care Manual
Page 25
.... Electrical power cord may be plugged Make sure plug fits tightly in this list. Turn on . Residue left in drum. Load is not resting firmly on floor. Stop washer and rearrange wash load. Washer door is usually normal. To prevent unnecessary noise and damage to help balance the load. See INSTALLATION INSTRUCTIONS for removing shipping bolts and foam block. House fuse blown, circuit breaker tripped, or a power outage has occurred. If problem is normal during installation. Add...
.... Electrical power cord may be plugged Make sure plug fits tightly in this list. Turn on . Residue left in drum. Load is not resting firmly on floor. Stop washer and rearrange wash load. Washer door is usually normal. To prevent unnecessary noise and damage to help balance the load. See INSTALLATION INSTRUCTIONS for removing shipping bolts and foam block. House fuse blown, circuit breaker tripped, or a power outage has occurred. If problem is normal during installation. Add...
Use and Care Manual
Page 26
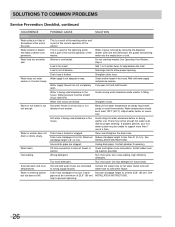
...be removed by removing the dispenser drawer (see Care and Cleaning in this guide) and draining water into the empty drum or sink. INSTALLATION INSTRUCTIONS. Drain hose standpipe is part of the normal operation of balance. high to allow proper spinning. Load is 8' (2.4 m). Rearrange load to prevent siphoning. 26 open hot and cold faucets. Water inlet hoses are clogged. Clean and straighten the drain hose. Fill hose connection is being used elsewhere in the house. Run rinse cycle. Too much detergent. Use less detergent in washer does not drain or drains slowly...
...be removed by removing the dispenser drawer (see Care and Cleaning in this guide) and draining water into the empty drum or sink. INSTALLATION INSTRUCTIONS. Drain hose standpipe is part of the normal operation of balance. high to allow proper spinning. Load is 8' (2.4 m). Rearrange load to prevent siphoning. 26 open hot and cold faucets. Water inlet hoses are clogged. Clean and straighten the drain hose. Fill hose connection is being used elsewhere in the house. Run rinse cycle. Too much detergent. Use less detergent in washer does not drain or drains slowly...
Use and Care Manual
Page 27
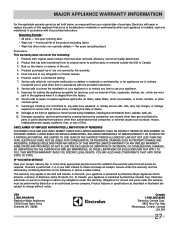
..., Canada L5V 3E4 27 Rust on the interior or exterior of the product (excluding labor) • Wash tub drive motor, non-cosmetic defects - Service calls which are subject to change or add to any obligations under this warranty. 5. Products with the provided instructions. Food loss due to obtain and keep all receipts. Product features or specifications as abuse, misuse, inadequate...
..., Canada L5V 3E4 27 Rust on the interior or exterior of the product (excluding labor) • Wash tub drive motor, non-cosmetic defects - Service calls which are subject to change or add to any obligations under this warranty. 5. Products with the provided instructions. Food loss due to obtain and keep all receipts. Product features or specifications as abuse, misuse, inadequate...
Installation Instructions
Page 2
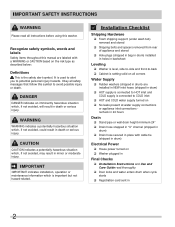
... shipping support (under wash tub) removed and stored ‰ Shipping bolts and spacers removed from rear of appliance and stored ‰ Hole plugs (shipped in bag in drum) installed in holes in backsheet Leveling ‰ Washer is level, side-to-side and front-to-back ‰ Cabinet is setting solid on all safety messages that follow this washer. IMPORTANT SAFETY INSTRUCTIONS WARNING Please read thoroughly ‰ Door locks and water enters drum when cycle starts...
... shipping support (under wash tub) removed and stored ‰ Shipping bolts and spacers removed from rear of appliance and stored ‰ Hole plugs (shipped in bag in drum) installed in holes in backsheet Leveling ‰ Washer is level, side-to-side and front-to-back ‰ Cabinet is setting solid on all safety messages that follow this washer. IMPORTANT SAFETY INSTRUCTIONS WARNING Please read thoroughly ‰ Door locks and water enters drum when cycle starts...
Installation Instructions
Page 3
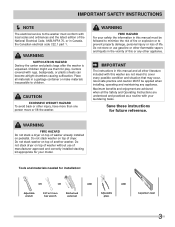
... injury, have more than one person move or lift the washer. Save these instructions for installation: OR OR AND AND Adjustable wrench 3/8" or 10 mm box wrench Ratchet and socket set Adjustable pliers Carpenter's level 3 IMPORTANT The instructions in Canada, the Canadian electrical code C22.1 part 1. Do not stack dryer on pedestal. Good safe practice and caution MUST be followed to minimize...
... injury, have more than one person move or lift the washer. Save these instructions for installation: OR OR AND AND Adjustable wrench 3/8" or 10 mm box wrench Ratchet and socket set Adjustable pliers Carpenter's level 3 IMPORTANT The instructions in Canada, the Canadian electrical code C22.1 part 1. Do not stack dryer on pedestal. Good safe practice and caution MUST be followed to minimize...
Installation Instructions
Page 4
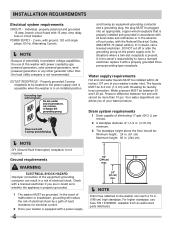
... capabilities, the use hose P/N 137098000, available from an authorized parts distributor. Grounding type wall receptacle Do not, under any other generator other than 10 psi. If in . (188 cm) high standpipe. The faucets MUST be between hot and cold cannot be plugged into an appropriate, copper wired receptacle that is properly installed and grounded in accordance with a power supply 4 cord having an...
... capabilities, the use hose P/N 137098000, available from an authorized parts distributor. Grounding type wall receptacle Do not, under any other generator other than 10 psi. If in . (188 cm) high standpipe. The faucets MUST be between hot and cold cannot be plugged into an appropriate, copper wired receptacle that is properly installed and grounded in accordance with a power supply 4 cord having an...

Installation Instructions
Page 10
... your Use & Care Guide before plugging the power cord into an outlet. 3 Plug the power cord into a grounded outlet. Recheck for level and rock corners for future reference. Í NOTE A wiring diagram and technical data sheet are located under any questions during initial operation, please review the "Service Prevention Checklist" in washer drum) onto the drain hose. Power cord with 3-prong grounded plug 4 Turn on top of the drain hose in place. 2 Place the hook end of the detergent dispenser...
... your Use & Care Guide before plugging the power cord into an outlet. 3 Plug the power cord into a grounded outlet. Recheck for level and rock corners for future reference. Í NOTE A wiring diagram and technical data sheet are located under any questions during initial operation, please review the "Service Prevention Checklist" in washer drum) onto the drain hose. Power cord with 3-prong grounded plug 4 Turn on top of the drain hose in place. 2 Place the hook end of the detergent dispenser...


