User Guide
Page 3
... website listed on the back cover or contact your washer Before you call for service Solving operating problems Solving wash problems Limited warranty How to change at any time. Contents Introduction Important safety instructions Installation instructions Water supply Leveling Before you do your first wash Getting started quickly WashSmart controls WashSmart safety features Eco Active™ wash Sorting and loading Detergent Before you wash Bleach Fabric softener Wash cycles Wash options Customizing wash cycles Changing pre-set options Caring for your local Fisher & Paykel dealer...
... website listed on the back cover or contact your washer Before you call for service Solving operating problems Solving wash problems Limited warranty How to change at any time. Contents Introduction Important safety instructions Installation instructions Water supply Leveling Before you do your first wash Getting started quickly WashSmart controls WashSmart safety features Eco Active™ wash Sorting and loading Detergent Before you wash Bleach Fabric softener Wash cycles Wash options Customizing wash cycles Changing pre-set options Caring for your local Fisher & Paykel dealer...
User Guide
Page 6
...; Do not repair or replace any part of the appliance or attempt any servicing unless specifically recommended in this User Guide. ■■ This washer must be exposed to temperatures below freezing or exposed to the weather. ■■ Connect to a properly rated, protected and sized power supply circuit to avoid electrical overload. ■■ Connect to adequate plumbing and drain facilities as detergents, bleach, fabric softener, etc...
...; Do not repair or replace any part of the appliance or attempt any servicing unless specifically recommended in this User Guide. ■■ This washer must be exposed to temperatures below freezing or exposed to the weather. ■■ Connect to a properly rated, protected and sized power supply circuit to avoid electrical overload. ■■ Connect to adequate plumbing and drain facilities as detergents, bleach, fabric softener, etc...

User Guide
Page 7
... carefully. ■■ Do not mix chlorine bleach with this appliance is used by clothing during the cycle. Do not allow children to the relevant sections of pages 6 and 14 of this User Guide. To start, close lid and press START/PAUSE. ■■ Do not wash or dry articles that have been cleaned in, washed in, soaked in your washer and/or dryer during operation...
... carefully. ■■ Do not mix chlorine bleach with this appliance is used by clothing during the cycle. Do not allow children to the relevant sections of pages 6 and 14 of this User Guide. To start, close lid and press START/PAUSE. ■■ Do not wash or dry articles that have been cleaned in, washed in, soaked in your washer and/or dryer during operation...

User Guide
Page 8
... and carefully. Check with the appliance - Installation Requirements Location Your washer must not be installed on any textured floor coverings (eg carpet, rugs) to minimize vibration during spin cycles. Your washer must be installed on firm, level flooring to ensure the opening at the bottom of electric shock. US 6 Installation instructions CA Before you are in doubt as to do so can result in this User Guide before operating...
... and carefully. Check with the appliance - Installation Requirements Location Your washer must not be installed on any textured floor coverings (eg carpet, rugs) to minimize vibration during spin cycles. Your washer must be installed on firm, level flooring to ensure the opening at the bottom of electric shock. US 6 Installation instructions CA Before you are in doubt as to do so can result in this User Guide before operating...
User Guide
Page 9
... check that it does not come into both hot and cold water are using an extension cord or a portable electrical outlet device (eg multi-socket outlet box), ensure that it is positioned so that your standpipe or tub/sink is free from your washer works or may cause flooding. ■■ In multi-storey apartments or any upper floor, the washer should be installed...
... check that it does not come into both hot and cold water are using an extension cord or a portable electrical outlet device (eg multi-socket outlet box), ensure that it is positioned so that your standpipe or tub/sink is free from your washer works or may cause flooding. ■■ In multi-storey apartments or any upper floor, the washer should be installed...

User Guide
Page 12
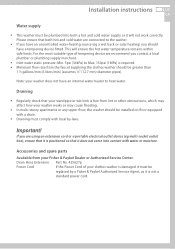
... the cold valve is free from lint or other obstructions before operating the washer. ■■ In a basement installation do so may result in the tub/sink or standpipe. US 10 Installation instructions CA Drain hose Standpipe 33 ½" to 95" (850 - 2400 mm) 1 Carefully pull the drain hose out from the back of the washer by pulling the exposed part of hose (straight end) hose (elbow end) Inlet hose replacement...
... the cold valve is free from lint or other obstructions before operating the washer. ■■ In a basement installation do so may result in the tub/sink or standpipe. US 10 Installation instructions CA Drain hose Standpipe 33 ½" to 95" (850 - 2400 mm) 1 Carefully pull the drain hose out from the back of the washer by pulling the exposed part of hose (straight end) hose (elbow end) Inlet hose replacement...
User Guide
Page 15
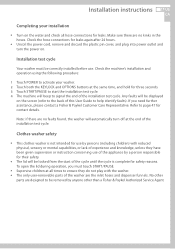
... only user-removable parts of the washer are the inlet hoses and dispenser funnels. Clothes washer safety ■■ This clothes washer is complete for leaks. No other than a Fisher & Paykel Authorized Service Agent. Check the hose connections for leaks again after 24 hours. ■■ Uncoil the power cord, remove and discard the plastic pin cover, and plug into power outlet and turn off at all hose connections for safety reasons. Installation test cycle Your washer must touch START...
... only user-removable parts of the washer are the inlet hoses and dispenser funnels. Clothes washer safety ■■ This clothes washer is complete for leaks. No other than a Fisher & Paykel Authorized Service Agent. Check the hose connections for leaks again after 24 hours. ■■ Uncoil the power cord, remove and discard the plastic pin cover, and plug into power outlet and turn off at all hose connections for safety reasons. Installation test cycle Your washer must touch START...

User Guide
Page 17
... the hot valve marked 'H'? Note: water consumptions are based on to your Fisher & Paykel WashSmart to the cold valve marked 'C'? 4 Is the washer leveled correctly, with no more than ¾" (20 mm) extended) and hooked on the WashSmart default settings. Before you start, it is the default wash cycle for WashSmart. WARNING! Is the cold hose connected to have it installed correctly by an Authorized Service Agent...
... the hot valve marked 'H'? Note: water consumptions are based on to your Fisher & Paykel WashSmart to the cold valve marked 'C'? 4 Is the washer leveled correctly, with no more than ¾" (20 mm) extended) and hooked on the WashSmart default settings. Before you start, it is the default wash cycle for WashSmart. WARNING! Is the cold hose connected to have it installed correctly by an Authorized Service Agent...
User Guide
Page 19
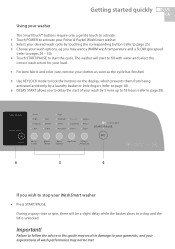
... wash action for your load. ■■ For best fabric and color care, remove your clothes as soon as the cycle has finished. 5 Use KEYLOCK mode to lock the buttons on the display, which prevents them from being activated accidently by 5 mins up to 18 hours (refer to page 29). 6 3 4 If you wish to stop and the lid is unlocked. Important! Getting started quickly 17 US CA Using...
... wash action for your load. ■■ For best fabric and color care, remove your clothes as soon as the cycle has finished. 5 Use KEYLOCK mode to lock the buttons on the display, which prevents them from being activated accidently by 5 mins up to 18 hours (refer to page 29). 6 3 4 If you wish to stop and the lid is unlocked. Important! Getting started quickly 17 US CA Using...

User Guide
Page 21
... the lid lock slot in the basket, the machine will be restarted while AUTODRAIN is left open the lid or not. If the lid is in operation. If this type of accident, your WashSmart has been pre-programmed to know at any time during the wash cycle when there is water in the top deck of your Fisher & Paykel WashSmart washer is in operation by touching START...
... the lid lock slot in the basket, the machine will be restarted while AUTODRAIN is left open the lid or not. If the lid is in operation. If this type of accident, your WashSmart has been pre-programmed to know at any time during the wash cycle when there is water in the top deck of your Fisher & Paykel WashSmart washer is in operation by touching START...

User Guide
Page 24
... bleach to use a detergent specifically recommended for Top Loader machines. ■■ When washing wool items, remember to add. Jeans and work clothes may have to use . We do not recommend you may need more detergent, while towels usually need less. The larger your WashSmart washer. US 22 Detergent CA Choosing the right detergent ■■ We recommend using domestic laundry detergent. How much detergent? Adding the detergent Liquid or powdered detergents 1 Remove the fabric softener dispenser cup. 2 Pour liquid...
... bleach to use a detergent specifically recommended for Top Loader machines. ■■ When washing wool items, remember to add. Jeans and work clothes may have to use . We do not recommend you may need more detergent, while towels usually need less. The larger your WashSmart washer. US 22 Detergent CA Choosing the right detergent ■■ We recommend using domestic laundry detergent. How much detergent? Adding the detergent Liquid or powdered detergents 1 Remove the fabric softener dispenser cup. 2 Pour liquid...

User Guide
Page 25
... Bleach Remember to check clothing labels before adding to your washer. 2 Remove the fabric softener dispenser cup and pour down the center of the agitator. This changes the rinse option to include a deep rinse so the fabric softener will change the rinse to the wash basket AFTER bleach has been added. For these loads select the SOFTENER option, as this will be dispensed correctly. Softener rinse If you wish to use fabric softener when using liquid detergent use of softener dryer sheets because liquid fabric softener...
... Bleach Remember to check clothing labels before adding to your washer. 2 Remove the fabric softener dispenser cup and pour down the center of the agitator. This changes the rinse option to include a deep rinse so the fabric softener will change the rinse to the wash basket AFTER bleach has been added. For these loads select the SOFTENER option, as this will be dispensed correctly. Softener rinse If you wish to use fabric softener when using liquid detergent use of softener dryer sheets because liquid fabric softener...

User Guide
Page 27
... 4 min * Refers to the agitation time in the "wash" part of the cycle, not the total time taken to complete a cycle. ** Refers to the length of the washer when using the ALLERGY cycle in cold weather. Note: some cycles for synthetics, blends, and/or delicate fabrics with normal soil and clothes which wrinkle easily. A more traditional wash for garment care reasons (eg FAST spin on some options may...
... 4 min * Refers to the agitation time in the "wash" part of the cycle, not the total time taken to complete a cycle. ** Refers to the length of the washer when using the ALLERGY cycle in cold weather. Note: some cycles for synthetics, blends, and/or delicate fabrics with normal soil and clothes which wrinkle easily. A more traditional wash for garment care reasons (eg FAST spin on some options may...

User Guide
Page 36
... do a COLD wash, you always use COLD or CONTROLLED COLD water, we recommend that a WARM or HOT wash be used regularly, eg every 5th wash should be at least a warm one. The default setting is "tAP", which is displayed. US 34 Changing pre-set options CA Wash temperature Controlled Cold If the temperature of your machine. The CONTROLLED COLD option solves this problem by adding a small amount of hot water to raise the temperature of the wash to...
... do a COLD wash, you always use COLD or CONTROLLED COLD water, we recommend that a WARM or HOT wash be used regularly, eg every 5th wash should be at least a warm one. The default setting is "tAP", which is displayed. US 34 Changing pre-set options CA Wash temperature Controlled Cold If the temperature of your machine. The CONTROLLED COLD option solves this problem by adding a small amount of hot water to raise the temperature of the wash to...

User Guide
Page 39
... each cycle using warm soapy water. ■■ To remove the agitator for cleaning, unscrew the nut down the dispenser). ■■ Press POWER and select ALLERGY cycle, HIGH water level, MEDIUM spin and the SOAK option. ■■ Press START/PAUSE. Tighten the nut firmly by turning anti-clockwise. We recommend completing the following cycle 5 - 6 times a year: ■■ Add about two scoops of a good quality powdered detergent or a machine cleaner...
... each cycle using warm soapy water. ■■ To remove the agitator for cleaning, unscrew the nut down the dispenser). ■■ Press POWER and select ALLERGY cycle, HIGH water level, MEDIUM spin and the SOAK option. ■■ Press START/PAUSE. Tighten the nut firmly by turning anti-clockwise. We recommend completing the following cycle 5 - 6 times a year: ■■ Add about two scoops of a good quality powdered detergent or a machine cleaner...
User Guide
Page 42
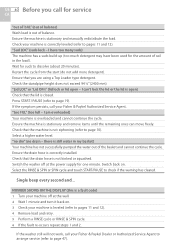
... installed. If the washer still will not work, call your Fisher & Paykel Dealer or Authorized Service Agent to arrange service (refer to pages 11 and 12). 4 Remove load and retry. 5 Perform a RINSE cycle or RINSE & SPIN cycle. 6 If the fault re-occurs repeat steps 1 and 2. "Sud LOC" (suds lock - Ensure the machine is correctly leveled (refer to dissolve (about 20 minutes). Restart the cycle from the start (do not add more detergent). Check...
... installed. If the washer still will not work, call your Fisher & Paykel Dealer or Authorized Service Agent to arrange service (refer to pages 11 and 12). 4 Remove load and retry. 5 Perform a RINSE cycle or RINSE & SPIN cycle. 6 If the fault re-occurs repeat steps 1 and 2. "Sud LOC" (suds lock - Ensure the machine is correctly leveled (refer to dissolve (about 20 minutes). Restart the cycle from the start (do not add more detergent). Check...

User Guide
Page 43
... before turning the power on ? Some loads do not suit AUTO water level, eg pillows, bedding, large bulky garments. NOISES Banging - Solving operating problems 41 US CA Pressing POWER does not turn the machine on Is the power switched on AUTO water level The washer may still be in the process of the hoses. Are the inlet hose filters blocked? Check the washer is correctly leveled and does not rock in any direction (refer...
... before turning the power on ? Some loads do not suit AUTO water level, eg pillows, bedding, large bulky garments. NOISES Banging - Solving operating problems 41 US CA Pressing POWER does not turn the machine on Is the power switched on AUTO water level The washer may still be in the process of the hoses. Are the inlet hose filters blocked? Check the washer is correctly leveled and does not rock in any direction (refer...

User Guide
Page 44
... 10). Check that the inlet hose filters are only lightly soiled. If the problem persists contact your Fisher & Paykel Dealer or Authorized Service Agent (refer to page 26). Large bulky, garments (eg pillows, comforters) can cause splashing. WASH WATER TEMPERATURE is too high for a small amount of water to longer fill times. The second phase may be cooler than usual If water pressure is normal for the...
... 10). Check that the inlet hose filters are only lightly soiled. If the problem persists contact your Fisher & Paykel Dealer or Authorized Service Agent (refer to page 26). Large bulky, garments (eg pillows, comforters) can cause splashing. WASH WATER TEMPERATURE is too high for a small amount of water to longer fill times. The second phase may be cooler than usual If water pressure is normal for the...

User Guide
Page 45
... much detergent? Check the detergent instructions. Did you use the most appropriate wash cycle? Select a lower wash temperature. Was there enough detergent for the load size or amount of static electricity in warmer water. Separate light and heavily soiled items, as well). Loads made up of articles of sheets may not allow the detergent to move in suspension. Over drying in the washer or laundry basket. Cold ambient temperatures, cold washes and/or short agitation times...
... much detergent? Check the detergent instructions. Did you use the most appropriate wash cycle? Select a lower wash temperature. Was there enough detergent for the load size or amount of static electricity in warmer water. Separate light and heavily soiled items, as well). Loads made up of articles of sheets may not allow the detergent to move in suspension. Over drying in the washer or laundry basket. Cold ambient temperatures, cold washes and/or short agitation times...

User Guide
Page 46
... basket as loose parcels. Insufficient detergent for the amount of fabric softener and detergent can flake off and mark clothes (refer to 'Detergent' page 22). TANGLING Washing with too much water (ie under loading) can cause the clothes to tangle around the agitator, eg place items, especially sheets, in a washer or laundry basket can result in grey marks on clothes (refer to 'Scrud' page 24...
... basket as loose parcels. Insufficient detergent for the amount of fabric softener and detergent can flake off and mark clothes (refer to 'Detergent' page 22). TANGLING Washing with too much water (ie under loading) can cause the clothes to tangle around the agitator, eg place items, especially sheets, in a washer or laundry basket can result in grey marks on clothes (refer to 'Scrud' page 24...


