
User Manual
Page 8
... ...211 Check Cartridge Status ...211 Checking Cartridge Status on a CD/DVD with Mac OS X 215 Purchase Epson Ink Cartridges...216 Ink Cartridge Part Numbers ...216 Removing and Installing Ink Cartridges 217 Printing With Black Ink and Expended Color Cartridges 221 Printing With Expended Color Cartridges - Windows 221 Printing With Expended Color Cartridges -...225 8 Windows 200 Printing Your CD/DVD Design - Windows 202 Adjusting CD/DVD Print Quality - Mac OS X 222 Conserving Low Black Ink with Windows 200 Designing a CD/DVD - Mac OS X 207 Adjusting CD/DVD Print Position -
... ...211 Check Cartridge Status ...211 Checking Cartridge Status on a CD/DVD with Mac OS X 215 Purchase Epson Ink Cartridges...216 Ink Cartridge Part Numbers ...216 Removing and Installing Ink Cartridges 217 Printing With Black Ink and Expended Color Cartridges 221 Printing With Expended Color Cartridges - Windows 221 Printing With Expended Color Cartridges -...225 8 Windows 200 Printing Your CD/DVD Design - Windows 202 Adjusting CD/DVD Print Quality - Mac OS X 222 Conserving Low Black Ink with Windows 200 Designing a CD/DVD - Mac OS X 207 Adjusting CD/DVD Print Position -
User Manual
Page 9
... ...241 Checking for Software Updates...241 Product Status Messages ...242 Running a Product Check ...243 Resetting Control Panel Defaults ...245 Solving Setup Problems ...246 Noise After Ink Installation ...246 Software Installation Problems ...246 Control Panel Setup Problems ...247 Solving Network Problems ...247 Product Cannot Connect to a Wireless Router or Access Point 248...
... ...241 Checking for Software Updates...241 Product Status Messages ...242 Running a Product Check ...243 Resetting Control Panel Defaults ...245 Solving Setup Problems ...246 Noise After Ink Installation ...246 Software Installation Problems ...246 Control Panel Setup Problems ...247 Solving Network Problems ...247 Product Cannot Connect to a Wireless Router or Access Point 248...

User Manual
Page 11
......279 Technical Specifications ...280 Windows System Requirements ...280 Mac System Requirements ...281 Printing Specifications ...281 Scanning Specifications ...282 Paper Specifications ...282 Printable Area Specifications ...283 Ink Cartridge Specifications...285 Memory Card Specifications ...286 Dimension Specifications ...287 Electrical Specifications ...288 Environmental Specifications ...288 Interface Specifications ...289 External USB Device Specifications 289 Network...
......279 Technical Specifications ...280 Windows System Requirements ...280 Mac System Requirements ...281 Printing Specifications ...281 Scanning Specifications ...282 Paper Specifications ...282 Printable Area Specifications ...283 Ink Cartridge Specifications...285 Memory Card Specifications ...286 Dimension Specifications ...287 Electrical Specifications ...288 Environmental Specifications ...288 Interface Specifications ...289 External USB Device Specifications 289 Network...

User Manual
Page 12
Ink Cartridge Safety Instructions 294 LCD Screen Safety Instructions 295 Wireless Connection Safety Instructions 295 FCC Compliance Statement...295 Software Notice...296 Trademarks ...298 Copyright Notice...299 libTIFF Software Acknowledgment 299 A Note Concerning Responsible Use of Copyrighted Materials 300 Default Delay Times for Power Management for Epson Products 300 Copyright Attribution ...300 12
Ink Cartridge Safety Instructions 294 LCD Screen Safety Instructions 295 Wireless Connection Safety Instructions 295 FCC Compliance Statement...295 Software Notice...296 Trademarks ...298 Copyright Notice...299 libTIFF Software Acknowledgment 299 A Note Concerning Responsible Use of Copyrighted Materials 300 Default Delay Times for Power Management for Epson Products 300 Copyright Attribution ...300 12

User Manual
Page 21
... and Sleep Timers The product enters sleep mode or turns off automatically if it is not used for a period of time. 1 Scanner unit 2 Print head/ink cartridge holder Parent topic: Product Parts Locations Product Parts -
... and Sleep Timers The product enters sleep mode or turns off automatically if it is not used for a period of time. 1 Scanner unit 2 Print head/ink cartridge holder Parent topic: Product Parts Locations Product Parts -

User Manual
Page 61
... & Flyer Paper Matte Double-sided Envelopes 10 envelopes Cassette 1 (upper cassette) - - sales) or epson.ca (Canadian sales). You can purchase genuine Epson ink and paper at Epson Supplies Central at epson.com/ink3 (U.S. Paper Type Epson Bright White Paper Epson Photo Paper Glossy Size Letter (8.5 × 11 inches [216 × 279 mm]) 4 × 6 inches (102 × 152...
... & Flyer Paper Matte Double-sided Envelopes 10 envelopes Cassette 1 (upper cassette) - - sales) or epson.ca (Canadian sales). You can purchase genuine Epson ink and paper at Epson Supplies Central at epson.com/ink3 (U.S. Paper Type Epson Bright White Paper Epson Photo Paper Glossy Size Letter (8.5 × 11 inches [216 × 279 mm]) 4 × 6 inches (102 × 152...

User Manual
Page 88
...sided print job. Parent topic: Selecting Double-sided Printing Settings - Windows Once you have selected your print settings, you are ready to prevent ink smearing. Windows Print Density Adjustments - Windows You can select any of the paper before printing the other side in the desired direction. Binding...your application's Print window, such as this one side of the available options on one : 88 Increased Ink Drying Time Sets the amount of time required for drying ink after printing on the Print Density Adjustment window to adjust the print quality of the double-sided options ...
...sided print job. Parent topic: Selecting Double-sided Printing Settings - Windows Once you have selected your print settings, you are ready to prevent ink smearing. Windows Print Density Adjustments - Windows You can select any of the paper before printing the other side in the desired direction. Binding...your application's Print window, such as this one side of the available options on one : 88 Increased Ink Drying Time Sets the amount of time required for drying ink after printing on the Print Density Adjustment window to adjust the print quality of the double-sided options ...

User Manual
Page 89
Windows During printing, you to start printing. Windows Checking Print Status - 2. Windows Selecting Advanced Print Settings - It allows you see this window showing the progress of your print job. Windows Selecting Print Layout Options - Checking Print Status - Click OK or Print to control printing and check ink cartridge status. 89 Windows Parent topic: Printing with Windows Related tasks Selecting Basic Print Settings -
Windows During printing, you to start printing. Windows Checking Print Status - 2. Windows Selecting Advanced Print Settings - It allows you see this window showing the progress of your print job. Windows Selecting Print Layout Options - Checking Print Status - Click OK or Print to control printing and check ink cartridge status. 89 Windows Parent topic: Printing with Windows Related tasks Selecting Basic Print Settings -

User Manual
Page 90
... change the print settings you are printing in that program session. You see print jobs lined up for printing, click Print Queue. • To check ink status, click Check...
... change the print settings you are printing in that program session. You see print jobs lined up for printing, click Print Queue. • To check ink status, click Check...

User Manual
Page 103
... be bound on one of the paper before printing the other side in double-sided printing. Increased Ink Drying Time Sets the amount of time required for drying ink after printing on the short edge of ink coverage for double-sided printing. Short-Edge binding Orients double-sided printed pages to fine-tune...
... be bound on one of the paper before printing the other side in double-sided printing. Increased Ink Drying Time Sets the amount of time required for drying ink after printing on the short edge of ink coverage for double-sided printing. Short-Edge binding Orients double-sided printed pages to fine-tune...

User Manual
Page 106
Select any of paper. 106 Thick paper and envelopes Prevents ink from these settings on envelopes or other cassette when one of the cassettes runs out of the available printing preferences. 5. Quiet Mode Lessens noise during ... Page Ensures that your product does not print pages that contain no text or images. Automatic Cassette Switching Automatically switches to print using black ink when a color ink cartridge is expended. Mac OS X Parent topic: Printing with Mac OS X Printing Preferences - Mac OS X You can select from smearing when you to the...
Select any of paper. 106 Thick paper and envelopes Prevents ink from these settings on envelopes or other cassette when one of the cassettes runs out of the available printing preferences. 5. Quiet Mode Lessens noise during ... Page Ensures that your product does not print pages that contain no text or images. Automatic Cassette Switching Automatically switches to print using black ink when a color ink cartridge is expended. Mac OS X Parent topic: Printing with Mac OS X Printing Preferences - Mac OS X You can select from smearing when you to the...

User Manual
Page 107
... Photo - Click Print at the bottom of the print window. Establish bidirectional communication Allows the product to receive warning notifications from the printer software when ink is low. Mac OS X Once you have selected your print settings, you choose whether or not to communicate with Mac OS X 107 Mac OS X Parent...
... Photo - Click Print at the bottom of the print window. Establish bidirectional communication Allows the product to receive warning notifications from the printer software when ink is low. Mac OS X Once you have selected your print settings, you choose whether or not to communicate with Mac OS X 107 Mac OS X Parent...

User Manual
Page 108
... icon. Mac OS X 108 Checking Print Status - Mac OS X During printing, you can view the progress of your print job, control printing, and check ink cartridge status. 1. To resume a print job, click the print job marked "Hold" and click the Resume icon. • To pause printing for all queued... print jobs, click the Pause Printer icon. • To check ink status, click the Supply Levels icon. You see the print status window: 2. Mac OS X 10.8: • To cancel printing, click the button next ...
... icon. Mac OS X 108 Checking Print Status - Mac OS X During printing, you can view the progress of your print job, control printing, and check ink cartridge status. 1. To resume a print job, click the print job marked "Hold" and click the Resume icon. • To pause printing for all queued... print jobs, click the Pause Printer icon. • To check ink status, click the Supply Levels icon. You see the print status window: 2. Mac OS X 10.8: • To cancel printing, click the button next ...

User Manual
Page 191
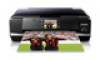
...Use your product's control panel to print photos from a memory card onto a CD/DVD • Print text and images from your computer using the Epson Print CD software You can also use your product's control panel to create a custom label. Printing on CDs/DVDs Follow the instructions here to print... a design onto ink jet-printable CDs or DVDs to create a jewel case insert with photos from a memory card. CD/DVD Printing Features Loading a CD/DVD Removing a...
...Use your product's control panel to print photos from a memory card onto a CD/DVD • Print text and images from your computer using the Epson Print CD software You can also use your product's control panel to create a custom label. Printing on CDs/DVDs Follow the instructions here to print... a design onto ink jet-printable CDs or DVDs to create a jewel case insert with photos from a memory card. CD/DVD Printing Features Loading a CD/DVD Removing a...

User Manual
Page 194
Insert the CD/DVD tray into the storage slot on the type of disc you used. You may need to wait up to 24 hours for the ink to dry fully before inserting it in a drive, depending on the bottom of the product, and then remove your CD or DVD is printed, the tray extends automatically. 1. Keep printed discs away from the tray. 2. Pull the CD/DVD tray out of the product. After printing, handle the CD or DVD carefully. Parent topic: Printing on CDs/DVDs Removing a Printed CD/DVD After your CD or DVD from moisture and direct sunlight. Parent topic: Printing on CDs/DVDs 194
Insert the CD/DVD tray into the storage slot on the type of disc you used. You may need to wait up to 24 hours for the ink to dry fully before inserting it in a drive, depending on the bottom of the product, and then remove your CD or DVD is printed, the tray extends automatically. 1. Keep printed discs away from the tray. 2. Pull the CD/DVD tray out of the product. After printing, handle the CD or DVD carefully. Parent topic: Printing on CDs/DVDs Removing a Printed CD/DVD After your CD or DVD from moisture and direct sunlight. Parent topic: Printing on CDs/DVDs 194

User Manual
Page 195
..., then select Proceed. 6. Follow the instructions on CDs/DVDs Copying onto a CD/DVD You can copy a printed photo or CD/DVD label directly onto an ink jet-printable CD or DVD.
..., then select Proceed. 6. Follow the instructions on CDs/DVDs Copying onto a CD/DVD You can copy a printed photo or CD/DVD label directly onto an ink jet-printable CD or DVD.

User Manual
Page 204
Windows If ink smears on a CD/DVD with Windows Adjusting CD/DVD Print Quality - First, load an extra CD/DVD to make sure your file in the Width (... after it dries, you are using. Open your designs look their best on the particular brand of discs you can adjust the color saturation and ink density. You see this screen: 204 7. Click Enter Values, then select the distance for Top into the Height (Top) box and the distance for printing...
Windows If ink smears on a CD/DVD with Windows Adjusting CD/DVD Print Quality - First, load an extra CD/DVD to make sure your file in the Width (... after it dries, you are using. Open your designs look their best on the particular brand of discs you can adjust the color saturation and ink density. You see this screen: 204 7. Click Enter Values, then select the distance for Top into the Height (Top) box and the distance for printing...

User Manual
Page 205
...check to see if further adjustment is needed. Click Print. 4. Parent topic: Printing on a CD/DVD with Windows Printing on your product using the Epson Print CD software, as necessary. 8. Load the same disc in these sections. Select Print Density Confirmation Pattern and select the Second radio button. 9. ...Designing a CD/DVD - Mac OS X 205 2. Select Print Density Confirmation Pattern. 3. When the ink density looks good, you need to print on a CD/DVD with Mac OS X You can print with your burned CD or DVD.
...check to see if further adjustment is needed. Click Print. 4. Parent topic: Printing on a CD/DVD with Windows Printing on your product using the Epson Print CD software, as necessary. 8. Load the same disc in these sections. Select Print Density Confirmation Pattern and select the Second radio button. 9. ...Designing a CD/DVD - Mac OS X 205 2. Select Print Density Confirmation Pattern. 3. When the ink density looks good, you need to print on a CD/DVD with Mac OS X You can print with your burned CD or DVD.

User Manual
Page 209
... make sure your designs look their best on your file in the Right Space box. 9. Mac OS X If ink smears on the particular brand of discs you can adjust the color saturation and ink density. Open your disc or is sticky after it dries, you are using. 8. You see this screen: 209... This may be necessary to use for Right in Epson Print CD and select Print from the File menu. Parent topic...
... make sure your designs look their best on your file in the Right Space box. 9. Mac OS X If ink smears on the particular brand of discs you can adjust the color saturation and ink density. Open your disc or is sticky after it dries, you are using. 8. You see this screen: 209... This may be necessary to use for Right in Epson Print CD and select Print from the File menu. Parent topic...

User Manual
Page 210
... Pattern. 3. Click Print. 4. Examine the disc after printing and check to see if you are ready to see if further adjustment is needed. When the ink density looks good, you need to print another test pattern. 10. 2. Select Print from the File menu. 7. Parent topic: Printing on your burned CD or...
... Pattern. 3. Click Print. 4. Examine the disc after printing and check to see if you are ready to see if further adjustment is needed. When the ink density looks good, you need to print another test pattern. 10. 2. Select Print from the File menu. 7. Parent topic: Printing on your burned CD or...


