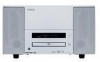
Product Support Bulletin(s)
Page 2
...an unsupported CD or DVD in . You can also call (562) 276-4394 in Canada. To find the Epson Customer Care Center nearest you cannot remove the CD / DVD from their MovieMate 25 / 30s DVD trays when they cannot eject it may damage the DVD unit, the disc tray, or your... MovieMate). For more information regarding contacting Epson, see your MovieMate 25 / 30s and you , visit http://support.epson.com You can lock the tray to prevent children from the tray This bulletin was created to remove ...
Product Support Bulletin(s)
Page 3
...adjustment: Page 1 of 2 PSB.2006.04.001A EPSON Date: PSB #: Reference: Product(s): Subject: PRODUCT SUPPORT BULLETIN 09/26/2006 Originator: TC PSB.2006.04.001A Authorization: N/A Total Pages: 2 Epson MovieMate 25 / 30s The MovieMate subwoofer volume knob needs to be turned up This bulletin... was created to inform customers about operational uses of the Epson MovieMate subwoofer and provides information about the subwoofer's volume knob needing...
Product Support Bulletin(s)
Page 4
• Turn the Volume knob to increase the volume level and set correctly the total sound range from the speakers of the MovieMate projector and the subwoofer should be smooth and continuous with no missing notes or frequency ranges. See the image below . Page 2 of the MovieMate projector. AuraSound recommends a setting of the subwoofer. When set relative sound level of the subwoofer to increase the upper frequency limit of 2 o'clock as shown below . Crossover Adjustment • Turn the Crossover knob clockwise to the speakers of 2 PSB.2006.04.001A
Quick Reference Guide - (Accolade Wireless Audio Set )
Page 2
Contents Welcome 3 Unpacking the Wireless Audio Set 4 Setting Up 5 Overview 5 Connecting the Audio Set Transmitter 6 Connecting the Audio Set Receiver 13 Configuring Your Epson MovieMate 17 Configuring Your DVD Player 18 Using the Wireless Audio Set 19 Powering On Your Equipment 19 Controlling Volume 20 Solving Problems 21 Wireless Audio Set Status Lights 21 Problems and Solutions 24 Help 26 Notices 27 Trademarks 31 2 Contents
Quick Reference Guide - (Accolade Wireless Audio Set )
Page 3
... you to conveniently transmit audio wirelessly to your audio system. You can use the Wireless Audio Set to transmit audio from an Epson MovieMate™ projector to your audio system while using a projector and DVD player that are not in 15-watt amplifier to an audio system or a pair of unpowered speakers. Welcome 3 Welcome...
Quick Reference Guide - (Accolade Wireless Audio Set )
Page 5
... the Audio Set receiver to the illustrations below for an example of two common configurations: Home theater system Epson MovieMate Audio system configuration Unpowered speakers Epson MovieMate Unpowered speakers configuration Follow the instructions in this chapter on: ■ "Connecting the Audio Set Transmitter" on... page 6 ■ "Connecting the Audio Set Receiver" on page 13 ■ "Configuring Your Epson MovieMate" on page 17 ■ "Configuring Your DVD Player" on page 18 Setting Up 5 Setting Up Overview The Wireless Audio Set consists...
Quick Reference Guide - (Accolade Wireless Audio Set )
Page 6
..." below ■ "Powering the Transmitter" on page 7 ■ "Connecting the Transmitter's Audio Cable" on page 7. 6 Setting Up If necessary, rotate the antenna so that your Epson MovieMate or DVD player is facing upwards. Attach one of the included antennas to tighten the nut, or you 're finished attaching the antenna, see "Powering...
Quick Reference Guide - (Accolade Wireless Audio Set )
Page 9
Connecting to a DVD Player" on page 12. Place the transmitter in "Connecting to an Epson MovieMate," below, to connect the transmitter to the transmitter's OPTICAL audio input port. 4. Connecting the Transmitter's Audio Cable Follow the steps in the included ...stand. If you're connecting the transmitter to a DVD player, see "Connecting to an Epson MovieMate 1. Connect one end of the cable. 2. Remove the protective cap from both ends of the cable to your projector. Locate the shorter optical audio cable, and remove the protective caps from the transmitter's OPTICAL ...
Quick Reference Guide - (Accolade Wireless Audio Set )
Page 15
... Optical Coaxial CD/DVD RCA cable (stereo) Audio system Receiver Note: Use only one of the following: ■ If you connected the transmitter to an Epson MovieMate, see page 17. ■ If you 're finished connecting the audio cable, do one audio cable to connect the receiver to a DVD player, see page...
Quick Reference Guide - (Accolade Wireless Audio Set )
Page 16
... damage them. Connect your speakers. R L When you're finished connecting the speakers, do one of the following: ■ If you connected the transmitter to an Epson MovieMate, see page 18. 16 Setting Up Connecting to Unpowered Speakers The receiver includes a built-in 15-watt amplifier that allows you connected the transmitter to...
Quick Reference Guide - (Accolade Wireless Audio Set )
Page 17
... press the Enter button. When you used to connect the receiver to highlight and display the AUDIO setup menu. 4. Configuring Your Epson MovieMate 17 Press the button to your Epson MovieMate. 2. Configuring Your Epson MovieMate 1. Turn on your audio system from the table below , then press the Enter button. Connection Optical Coaxial RCA Speaker wire Setting...
Quick Reference Guide - (Accolade Wireless Audio Set )
Page 19
... the transmitter. If the LINK lights are not solid green, there is no connection between the two antennas and that the LINK light on your Epson MovieMate or DVD player. 5. see "Solving Problems" on page 21. 4. The P light turns solid green. 3. Note: If the LINK lights are still not solid green, see...
Quick Reference Guide - (Accolade Wireless Audio Set )
Page 22
... between the two antennas and that the units are less than 19.7 feet (6 meters) apart. The transmitter has not received an audio signal from your Epson MovieMate or DVD player or hasn't had a link with the receiver and has gone into standby mode. Make sure that you installed the batteries correctly or...
Quick Reference Guide - (Accolade Wireless Audio Set )
Page 24
... installed correctly or may be low on your audio system for the type of the audio cables are securely connected. ■ Make sure that your Epson MovieMate has been configured for your audio device as described on page 17. ■ Make sure that all of audio you are less than 19.7 feet...
Quick Reference Guide - (Accolade Wireless Audio Set )
Page 25
see page 17. ■ Make sure that the settings on the receiver is not solid green, make sure that your audio system for the type of audio you 're playing supports surround audio; See the documentation for your Epson MovieMate or DVD player has been configured correctly and that the DVD you are configured correctly for details. Problems and Solutions 25 No Surround Output ■ If the SURROUND light on your audio system are transmitting.
Quick Reference Guide - (Accolade Wireless Audio Set )
Page 31
...FIRM ARE VOID. To find the Epson Customer Care Center nearest you , visit our website at www.epsonstore.com (U.S. To find the Epson Authorized Reseller nearest you , visit http://support.epson.com or write to jurisdiction. Accolade and Epson MovieMate are for identification purposes only and... may be trademarks of Epson America, Inc. IF THESE LAWS APPLY, THEN ALL EXPRESS...
Start Here
Page 1
..., or left outside for long periods of your MovieMate MovieMate Lens cap User's Guide Remote control Batteries Power cord VGA-to-component video cable adapter The Epson MovieMate projector is designed for additional details on the use of... time. Limited Warranty in damage to moisture, dust, smoke, and other environmental factors which may result in your User's Guide for use virtually anywhere at home. See the Epson America, Inc. Epson MovieMate™ 30s Series Quick Setup 1 Unpack your MovieMate 30s...
Start Here
Page 2
...want to project against a wall, choose a flat white wall with a smooth surface for best results. MovieMate doesn't have a grounded electrical outlet, power strip, or extension cord to plug MovieMate into. See section 5 on a wall and use the built-in front of this sheet. Make sure... the wall or screen. The following pictures show four different setups. If you want an 80-inch diagonal size image, place MovieMate about anywhere-in the living room, bedroom, or even outside. The following diagram shows the approximate image size (measured diagonally) at a ...
Start Here
Page 3
... buttons can glow in the dark. If you have an optional subwoofer, set it up following the instructions included in the screen box. 3 Set up MovieMate 1 If you have an optional screen, set it up as described in the User's Guide. 2 Put the batteries in the remote control. 3 The ...remote control buttons can absorb light before using it. 4 Plug in MovieMate and turn on using the power switch. If the movie doesn't start automatically, press the Power button or the Image On/Off button. 3 Adjust the...
Start Here
Page 4
Up/down dial Left/right dial If the picture looks like this or this straight ahead. Make sure you position MovieMate at a 90-degree angle to sharpen the image. Zoom ring 3 Use the focus ring to the screen or wall. Close the tray. 3 Press the Power ...