User's Guide
Page 3
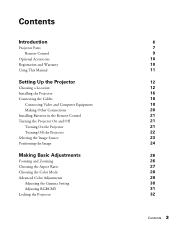
... Parts Remote Control Optional Accessories Registration and Warranty Using This Manual Setting Up the Projector Choosing a Location Installing the Projector Connecting the Cables Connecting Video and Computer Equipment Making Other Connections Installing Batteries in the Remote Control Turning the Projector On and Off Turning On the Projector Turning Off the Projector Selecting the Image Source Positioning the Image Making Basic Adjustments Focusing and Zooming Choosing the Aspect Ratio Choosing the Color Mode Advanced Color Adjustments Adjusting the Gamma Setting Adjusting RGBCMY Locking...
... Parts Remote Control Optional Accessories Registration and Warranty Using This Manual Setting Up the Projector Choosing a Location Installing the Projector Connecting the Cables Connecting Video and Computer Equipment Making Other Connections Installing Batteries in the Remote Control Turning the Projector On and Off Turning On the Projector Turning Off the Projector Selecting the Image Source Positioning the Image Making Basic Adjustments Focusing and Zooming Choosing the Aspect Ratio Choosing the Color Mode Advanced Color Adjustments Adjusting the Gamma Setting Adjusting RGBCMY Locking...
User's Guide
Page 4
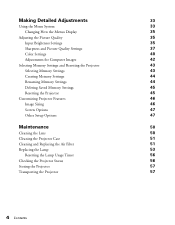
... Settings 37 Color Settings 40 Adjustments for Computer Images 42 Selecting Memory Settings and Resetting the Projector 43 Selecting Memory Settings 43 Creating Memory Settings 44 Renaming Memory Settings 44 Deleting Saved Memory Settings 45 Resetting the Projector 45 Customizing Projector Features 46 Image Sizing 46 Screen Options 47 Other Setup Options 47 Maintenance 50 Cleaning the Lens 50 Cleaning the Projector Case 51 Cleaning and Replacing the Air Filter 51 Replacing the Lamp 53 Resetting the Lamp Usage Timer 56 Checking the Projector Status...
... Settings 37 Color Settings 40 Adjustments for Computer Images 42 Selecting Memory Settings and Resetting the Projector 43 Selecting Memory Settings 43 Creating Memory Settings 44 Renaming Memory Settings 44 Deleting Saved Memory Settings 45 Resetting the Projector 45 Customizing Projector Features 46 Image Sizing 46 Screen Options 47 Other Setup Options 47 Maintenance 50 Cleaning the Lens 50 Cleaning the Projector Case 51 Cleaning and Replacing the Air Filter 51 Replacing the Lamp 53 Resetting the Lamp Usage Timer 56 Checking the Projector Status...
User's Guide
Page 6
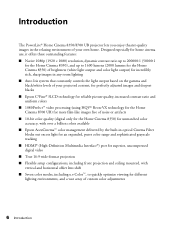
... Cinema Filter blocks out excess light for an expanded, purer color range and sophisticated grayscale tracking ■ HDMI® (High-Definition Multimedia Interface®) port for superior, uncompressed digital video ■ True 16:9 wide-format projection ■ Flexible setup configurations, including front projection and ceiling mounted, with vertical and horizontal offset lens shift ■ Seven color modes, including x.v.Color™, to 1600 lumens (2000 lumens for the Home Cinema 8350) of brightness (white light...
... Cinema Filter blocks out excess light for an expanded, purer color range and sophisticated grayscale tracking ■ HDMI® (High-Definition Multimedia Interface®) port for superior, uncompressed digital video ■ True 16:9 wide-format projection ■ Flexible setup configurations, including front projection and ceiling mounted, with vertical and horizontal offset lens shift ■ Seven color modes, including x.v.Color™, to 1600 lumens (2000 lumens for the Home Cinema 8350) of brightness (white light...
User's Guide
Page 10
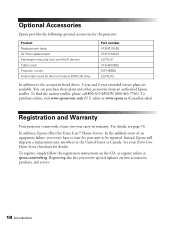
... wait for your Extra Care Home Service brochure for the projector: Product Replacement lamp Air filter replacement Kensington security lock (anti-theft device) Cable cover Projector mount Anamorphic lens kit (Home Cinema 8700 UB only) Part number V13H010L49 V13H134A21 ELPSL01 V12H003002 ELPHB550 ELPALK2 In addition to be repaired. To purchase online, visit www.epsonstore.com (U.S. To register, simply follow the registration instructions on new accessories, products, and service. 10 Introduction To find the...
... wait for your Extra Care Home Service brochure for the projector: Product Replacement lamp Air filter replacement Kensington security lock (anti-theft device) Cable cover Projector mount Anamorphic lens kit (Home Cinema 8700 UB only) Part number V13H010L49 V13H134A21 ELPSL01 V12H003002 ELPHB550 ELPALK2 In addition to be repaired. To purchase online, visit www.epsonstore.com (U.S. To register, simply follow the registration instructions on new accessories, products, and service. 10 Introduction To find the...
User's Guide
Page 20
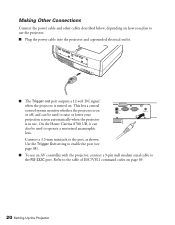
... Out setting to enable the port (see page 48). ■ To use . Refer to operate a motorized anamorphic lens. On the Home Cinema 8700 UB, it can be used to use the projector. ■ Plug the power cable into the projector and a grounded electrical outlet. ■ The Trigger out port outputs a 12-volt DC signal when the projector is in use an AV controller with the projector, connect a 9-pin null modem serial cable...
... Out setting to enable the port (see page 48). ■ To use . Refer to operate a motorized anamorphic lens. On the Home Cinema 8700 UB, it can be used to use the projector. ■ Plug the power cable into the projector and a grounded electrical outlet. ■ The Trigger out port outputs a 12-volt DC signal when the projector is in use an AV controller with the projector, connect a 9-pin null modem serial cable...
User's Guide
Page 21
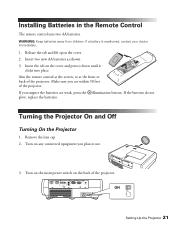
..., contact your doctor immediately. 1. Remove the lens cap. 2. If the buttons do not glow, replace the batteries. Turning the Projector On and Off Turning On the Projector 1. Aim the remote control at the screen, or at the front or back of the projector. Release the tab and lift open the cover. 2. Installing Batteries in the Remote Control The remote control uses two AA batteries. Insert two new AA batteries as shown. 3.
..., contact your doctor immediately. 1. Remove the lens cap. 2. If the buttons do not glow, replace the batteries. Turning the Projector On and Off Turning On the Projector 1. Aim the remote control at the screen, or at the front or back of the projector. Release the tab and lift open the cover. 2. Installing Batteries in the Remote Control The remote control uses two AA batteries. Insert two new AA batteries as shown. 3.
User's Guide
Page 36
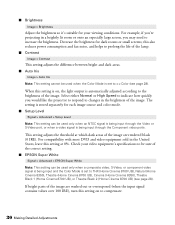
... screen, you would like the projector to respond to changes in the brightness of the image. ■ Brightness Image > Brightness Adjust the brightness so it's suitable for your video equipment's specifications to be sure of the correct setting. ■ EPSON Super White Signal > Advanced > EPSON Super White Note: This setting can be used when the Color Mode is set to THX (Home Cinema 8700 UB), Natural (Home Cinema 8350), Theatre (Home Cinema 8700 UB), Cinema (Home Cinema 8350), Theatre Black 1 (Home Cinema...
... screen, you would like the projector to respond to changes in the brightness of the image. ■ Brightness Image > Brightness Adjust the brightness so it's suitable for your video equipment's specifications to be sure of the correct setting. ■ EPSON Super White Signal > Advanced > EPSON Super White Note: This setting can be used when the Color Mode is set to THX (Home Cinema 8700 UB), Natural (Home Cinema 8350), Theatre (Home Cinema 8700 UB), Cinema (Home Cinema 8350), Theatre Black 1 (Home Cinema...
User's Guide
Page 46
... timer and reset it to 100%, try adjusting the Position as pressing the Aspect button on the screen. ■ Aspect Signal > Aspect This setting lets you change the aspect ratio of picture you install a new projector lamp. See page 27 for the type of your image, and works the same as described below. ■ Position Signal > Position Note: This setting cannot be used with a signal input through the HDMI 1 or HMDI 2 port...
... timer and reset it to 100%, try adjusting the Position as pressing the Aspect button on the screen. ■ Aspect Signal > Aspect This setting lets you change the aspect ratio of picture you install a new projector lamp. See page 27 for the type of your image, and works the same as described below. ■ Position Signal > Position Note: This setting cannot be used with a signal input through the HDMI 1 or HMDI 2 port...
User's Guide
Page 47
... switch between image sources or color modes). ■ Startup Screen Settings > Display > Startup Screen Turn this setting off if you adjust the shape and position of the image, and Zoom Caption Pos. Screen Options ■ Messages Settings > Display > Messages Turn this setting off if you want to temporarily stop projection. ■ Zoom Caption Pos. Signal > Zoom Caption Pos. Use Zoom Size to move the image up . ■ Display Background Settings > Display > Display Background Changes the screen that's used when the projector is turned on, without pressing the P power button...
... switch between image sources or color modes). ■ Startup Screen Settings > Display > Startup Screen Turn this setting off if you adjust the shape and position of the image, and Zoom Caption Pos. Screen Options ■ Messages Settings > Display > Messages Turn this setting off if you want to temporarily stop projection. ■ Zoom Caption Pos. Signal > Zoom Caption Pos. Use Zoom Size to move the image up . ■ Display Background Settings > Display > Display Background Changes the screen that's used when the projector is turned on, without pressing the P power button...
User's Guide
Page 48
... manually select your projection screen when the projector is running. For the Home Cinema 8700 UB, select Power to signal when your projector is turned on this setting to have the Trigger out port output a 12-volt signal to lower your video equipment's signal. ■ Trigger Out Settings > Trigger Out Turn on , or Anamorphic Wide to deactivate the lights on the projector's Ppower and buttons. Note: If you change this setting, the new setting...
... manually select your projection screen when the projector is running. For the Home Cinema 8700 UB, select Power to signal when your projector is turned on this setting to have the Trigger out port output a 12-volt signal to lower your video equipment's signal. ■ Trigger Out Settings > Trigger Out Turn on , or Anamorphic Wide to deactivate the lights on the projector's Ppower and buttons. Note: If you change this setting, the new setting...

User's Guide
Page 53
... be present and should be removed carefully to check how long it . Unplug the power cord and any cables. 4. It's time to replace the lamp when: ■ The projected image gets darker or starts to read the "Important Safety Information" on the screen when you start projecting. Be sure to deteriorate. ■ The projector's lamp light flashes red at half-second intervals. ■ The message Replace the lamp appears on page 71...
... be present and should be removed carefully to check how long it . Unplug the power cord and any cables. 4. It's time to replace the lamp when: ■ The projected image gets darker or starts to read the "Important Safety Information" on the screen when you start projecting. Be sure to deteriorate. ■ The projector's lamp light flashes red at half-second intervals. ■ The message Replace the lamp appears on page 71...
User's Guide
Page 56
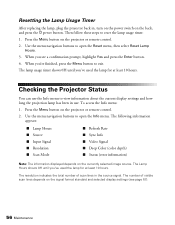
... menu. The following information appears: ■ Lamp Hours ■ Source ■ Input Signal ■ Resolution ■ Scan Mode ■ Refresh Rate ■ Sync Info ■ Video Signal ■ Deep Color (color depth) ■ Status (error information) Note: The information displayed depends on the projector or remote control. 2. The number of scan lines in the source signal. Checking the Projector Status You can use the Info menu to reset the lamp usage timer: 1. Press the Menu button on the signal format standard and selected display settings...
... menu. The following information appears: ■ Lamp Hours ■ Source ■ Input Signal ■ Resolution ■ Scan Mode ■ Refresh Rate ■ Sync Info ■ Video Signal ■ Deep Color (color depth) ■ Status (error information) Note: The information displayed depends on the projector or remote control. 2. The number of scan lines in the source signal. Checking the Projector Status You can use the Info menu to reset the lamp usage timer: 1. Press the Menu button on the signal format standard and selected display settings...
User's Guide
Page 58
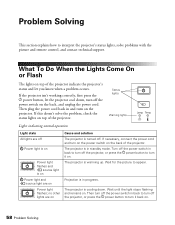
... projector, or press the P power button to turn on the power switch on top of the projector. Status lights Warning lights Lights indicating normal operation Light state All lights are off Power light is on Power light flashes; The projector is on Power light and source light are on top of the projector indicate the projector's status and let you know when a problem occurs. Wait for the picture to interpret the projector's status lights, solve problems with the picture and remote control, and contact technical support. The projector is turned off the power switch...
... projector, or press the P power button to turn on the power switch on top of the projector. Status lights Warning lights Lights indicating normal operation Light state All lights are off Power light is on Power light flashes; The projector is on Power light and source light are on top of the projector indicate the projector's status and let you know when a problem occurs. Wait for the picture to interpret the projector's status lights, solve problems with the picture and remote control, and contact technical support. The projector is turned off the power switch...

User's Guide
Page 59
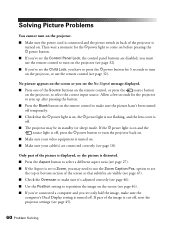
Make sure the power switch on the back of the projector is flashing The lamp needs to reset the lamp usage timer (see page 49). If you just replaced the lamp, you may have a spare lamp handy. Both warning lights are flashing red There is a fan or sensor problem. If the temperature rises further, projection will stop automatically. The lamp light flashes orange and the power light is turned on the back of the projector, and unplug it...
Make sure the power switch on the back of the projector is flashing The lamp needs to reset the lamp usage timer (see page 49). If you just replaced the lamp, you may have a spare lamp handy. Both warning lights are flashing red There is a fan or sensor problem. If the temperature rises further, projection will stop automatically. The lamp light flashes orange and the power light is turned on the back of the projector, and unplug it...
User's Guide
Page 60
... the No Signal message displayed. ■ Press one of the projector is turned on , the Ppower light is not flashing, and the lens cover is off . Allow a few seconds for 3 seconds to come on before pressing the Ppower button. ■ If you've set the Control Panel Lock, the control panel buttons are connected correctly (see page 32). option to use the remote control (see page 18). If part of the screen so...
... the No Signal message displayed. ■ Press one of the projector is turned on , the Ppower light is not flashing, and the lens cover is off . Allow a few seconds for 3 seconds to come on before pressing the Ppower button. ■ If you've set the Control Panel Lock, the control panel buttons are connected correctly (see page 32). option to use the remote control (see page 18). If part of the screen so...
User's Guide
Page 64
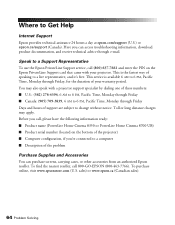
...: ■ Product name (PowerLite Home Cinema 8350 or PowerLite Home Cinema 8700 UB) ■ Product serial number (located on the Epson PrivateLine Support card that came with a projector support specialist by dialing one of these numbers: ■ U.S.: (562) 276-4394, 6 AM to 6 PM, Pacific Time, Monday through Friday ■ Canada: (905) 709-3839, 6 AM to 6 PM, Pacific Time, Monday through Friday Days and hours of support are subject to...
...: ■ Product name (PowerLite Home Cinema 8350 or PowerLite Home Cinema 8700 UB) ■ Product serial number (located on the Epson PrivateLine Support card that came with a projector support specialist by dialing one of these numbers: ■ U.S.: (562) 276-4394, 6 AM to 6 PM, Pacific Time, Monday through Friday ■ Canada: (905) 709-3839, 6 AM to 6 PM, Pacific Time, Monday through Friday Days and hours of support are subject to...
User's Guide
Page 74
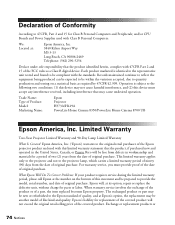
...: Epson Projector H373A/H419A PowerLite Home Cinema 8350/PowerLite Home Cinema 8700 UB Epson America, Inc. and/or CPU Boards and Power Supplies used with the standards. Trade Name: Type of the covered product. Records maintained continue to reflect the equipment being produced can be expected to be another model of quality, and at the number on a statistical basis as a Class B digital device. The exchanged product or part...
...: Epson Projector H373A/H419A PowerLite Home Cinema 8350/PowerLite Home Cinema 8700 UB Epson America, Inc. and/or CPU Boards and Power Supplies used with the standards. Trade Name: Type of the covered product. Records maintained continue to reflect the equipment being produced can be expected to be another model of quality, and at the number on a statistical basis as a Class B digital device. The exchanged product or part...
User's Guide
Page 77
..., 74 to 75 EPSON Super White setting, 36 ESC/VP21 command codes, 69 F FCC Compliance Statement, 73 Filter, see Air filter Flickering, 38, 62 Focus ring, 26 Frame Interpolation, 39 G Gain, color, 41 Gamma, 29 to 30, 41 Gamma button, 9 H HDMI, 18, 19, 36 to 37 Help, 64 High Altitude Mode, 49 Home Service, 10 I Illumination of buttons projector, 48, 58 to 59 remote control, 21 Illumination setting, 48, 59 Image adjusting, 29 to 31...
..., 74 to 75 EPSON Super White setting, 36 ESC/VP21 command codes, 69 F FCC Compliance Statement, 73 Filter, see Air filter Flickering, 38, 62 Focus ring, 26 Frame Interpolation, 39 G Gain, color, 41 Gamma, 29 to 30, 41 Gamma button, 9 H HDMI, 18, 19, 36 to 37 Help, 64 High Altitude Mode, 49 Home Service, 10 I Illumination of buttons projector, 48, 58 to 59 remote control, 21 Illumination setting, 48, 59 Image adjusting, 29 to 31...
User's Guide
Page 78
... Projector checking status, 56 cleaning, 51 control panel, 8 dimensions, 17, 66 installing, 16 lights, 48, 58 to 59 locking buttons, 32 menus, 35 to 49 parts, 7 to 8 positioning, 12 to 15 resetting menu options, 45 security lock, 7, 10 storing, 57 transporting, 57 turning on and off, 21 to 22, 60 R Registration, 10 Remote control batteries, 21 buttons, 9 lighting up buttons, 21 problems, 63 Replacing lamp, 53 to 55 Resetting lamp usage timer, 46, 56 projector settings, 45 Resolution compatible...
... Projector checking status, 56 cleaning, 51 control panel, 8 dimensions, 17, 66 installing, 16 lights, 48, 58 to 59 locking buttons, 32 menus, 35 to 49 parts, 7 to 8 positioning, 12 to 15 resetting menu options, 45 security lock, 7, 10 storing, 57 transporting, 57 turning on and off, 21 to 22, 60 R Registration, 10 Remote control batteries, 21 buttons, 9 lighting up buttons, 21 problems, 63 Replacing lamp, 53 to 55 Resetting lamp usage timer, 46, 56 projector settings, 45 Resolution compatible...
User's Guide
Page 79
setting, 27, 47 Zoom ring, 26 Zoom setting, 27 Index 79 Skin Tone setting, 40 Sleep mode, 48 Source buttons, 8, 9 Source, selecting image, 23 Specifications compatible video formats, 67 to 68 dimensions, 66 electrical, 66 environmental, 67 general, 65 lamp, 65 remote control, 66 Startup screen, selecting, 47 Static, 62 Storing projector, 57 Super-resolution, 42 Support, 11, 64 S-Video connection, 18 Sync (Synchronization) setting, 42 T Technical support, 11, 64 Test pattern, 24, 40 THX...
setting, 27, 47 Zoom ring, 26 Zoom setting, 27 Index 79 Skin Tone setting, 40 Sleep mode, 48 Source buttons, 8, 9 Source, selecting image, 23 Specifications compatible video formats, 67 to 68 dimensions, 66 electrical, 66 environmental, 67 general, 65 lamp, 65 remote control, 66 Startup screen, selecting, 47 Static, 62 Storing projector, 57 Super-resolution, 42 Support, 11, 64 S-Video connection, 18 Sync (Synchronization) setting, 42 T Technical support, 11, 64 Test pattern, 24, 40 THX...


