
User Manual
Page 21
Projector Parts - Base 1 Mounting bracket holes 2 Security cable attachment point 3 Rear adjustable feet 4 Front adjustable foot Parent topic: Projector Part Locations 21
Projector Parts - Base 1 Mounting bracket holes 2 Security cable attachment point 3 Rear adjustable feet 4 Front adjustable foot Parent topic: Projector Part Locations 21

User Manual
Page 26
... Remote Control Opening the Lens Cover Projector Placement You can also install the projector in a ceiling mount if you select a projector location: • Place the projector on a sturdy, level surface or install it using a compatible mount. • Leave plenty of space around and under the projector for use it on almost any...
... Remote Control Opening the Lens Cover Projector Placement You can also install the projector in a ceiling mount if you select a projector location: • Place the projector on a sturdy, level surface or install it using a compatible mount. • Leave plenty of space around and under the projector for use it on almost any...

User Manual
Page 43
...; Digital camera or smartphone • USB hard drive • Multimedia storage viewer • USB memory card reader Note: Digital cameras or smartphones must be USB-mounted devices, not TWAIN-compliant devices, and must be USB Mass Storage Class-compliant. Note: USB hard drives must meet these requirements: • USB Mass Storage...
...; Digital camera or smartphone • USB hard drive • Multimedia storage viewer • USB memory card reader Note: Digital cameras or smartphones must be USB-mounted devices, not TWAIN-compliant devices, and must be USB Mass Storage Class-compliant. Note: USB hard drives must meet these requirements: • USB Mass Storage...

User Manual
Page 93
2 Video, HDMI, and MHL sources (EX7240 Pro/EX9200 Pro) 3 USB port sources (computer display and external devices) 4 Network source Parent topic: Using Basic Projector Features Projection Modes Depending on how you positioned the projector, ... in front of the screen. • Front/Ceiling flips the image over top-to-bottom and horizontally to -bottom. 1. Hold down from a ceiling or wall mount. • Rear flips the image horizontally to project from behind a translucent screen. Turn on the remote control for five seconds. 93
2 Video, HDMI, and MHL sources (EX7240 Pro/EX9200 Pro) 3 USB port sources (computer display and external devices) 4 Network source Parent topic: Using Basic Projector Features Projection Modes Depending on how you positioned the projector, ... in front of the screen. • Front/Ceiling flips the image over top-to-bottom and horizontally to -bottom. 1. Hold down from a ceiling or wall mount. • Rear flips the image horizontally to project from behind a translucent screen. Turn on the remote control for five seconds. 93

User Manual
Page 117
... Equipment and Replacement Parts Projector Identification System for more elaborate presentations. Note: Do not pass drop-prevention cables through the security cable attachment point when mounting the projector on the projector to attach a wire cable and secure it to attach a Kensington lock. Then you can operate multiple projectors using one remote...
... Equipment and Replacement Parts Projector Identification System for more elaborate presentations. Note: Do not pass drop-prevention cables through the security cable attachment point when mounting the projector on the projector to attach a wire cable and secure it to attach a Kensington lock. Then you can operate multiple projectors using one remote...

User Manual
Page 154
Turn off the projector and unplug the power cord. 2. Carefully open the air filter cover. 154 You can replace the air filter while the projector is mounted to the ceiling or placed on a table. 1.
Turn off the projector and unplug the power cord. 2. Carefully open the air filter cover. 154 You can replace the air filter while the projector is mounted to the ceiling or placed on a table. 1.
User Manual
Page 156
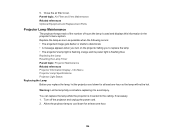
... Replacing the Lamp Resetting the Lamp Timer Parent topic: Projector Maintenance Related references Projector Information Display - You can replace the lamp while the projector is mounted to replace the lamp • The projector's lamp light is flashing orange and its power light is used and displays this information in the projector...
... Replacing the Lamp Resetting the Lamp Timer Parent topic: Projector Maintenance Related references Projector Information Display - You can replace the lamp while the projector is mounted to replace the lamp • The projector's lamp light is flashing orange and its power light is used and displays this information in the projector...

User Manual
Page 184
...) Note: Color brightness (color light output) and white brightness (white light output) will vary depending on EX5240/EX5250 Pro/EX9200 Pro/VS340: 30 inches (0.76 m) to 300 inches (7.62 m) EX7240 Pro/VS345: 33 inches (0.84 m) to 320 inches (8.13 m) EX3240/VS240: 23 inches (0.58 m) to 350 inches... m) EX3240/VS240: 34.6 inches (0.88 m) to 411.0 inches (10.44 m) EX9200 Pro: 34.3 inches (0.87 m) to 432.3 inches (10.98 m) EX5250 Pro: 33.1 inches (0.84 m) to 410.2 inches (10.42 m) Front, rear, ceiling-mounted 184 Color light output measured in accordance with ISO 21118. 13000:1 with IDMS 15.4; ...
...) Note: Color brightness (color light output) and white brightness (white light output) will vary depending on EX5240/EX5250 Pro/EX9200 Pro/VS340: 30 inches (0.76 m) to 300 inches (7.62 m) EX7240 Pro/VS345: 33 inches (0.84 m) to 320 inches (8.13 m) EX3240/VS240: 23 inches (0.58 m) to 350 inches... m) EX3240/VS240: 34.6 inches (0.88 m) to 411.0 inches (10.44 m) EX9200 Pro: 34.3 inches (0.87 m) to 432.3 inches (10.98 m) EX5250 Pro: 33.1 inches (0.84 m) to 410.2 inches (10.42 m) Front, rear, ceiling-mounted 184 Color light output measured in accordance with ISO 21118. 13000:1 with IDMS 15.4; ...

User Manual
Page 195
... eyes. • Do not place the projector on an unstable cart, stand, or table. • Do not operate the projector on its ceiling mount. Insert the plug firmly into a dusty outlet. Do not overload wall outlets, extension cords, or power strips. They provide ventilation and prevent the projector... into your eyes. Failure to one side. Do not cover the projector with this projector. • When installing or adjusting a ceiling or wall mount, do not use oils or lubricants. always be sure to the plug. • Unplug the projector from overheating. Do not use liquid or aerosol...
... eyes. • Do not place the projector on an unstable cart, stand, or table. • Do not operate the projector on its ceiling mount. Insert the plug firmly into a dusty outlet. Do not overload wall outlets, extension cords, or power strips. They provide ventilation and prevent the projector... into your eyes. Failure to one side. Do not cover the projector with this projector. • When installing or adjusting a ceiling or wall mount, do not use oils or lubricants. always be sure to the plug. • Unplug the projector from overheating. Do not use liquid or aerosol...

User Manual
Page 197
... advice immediately. • If the projector is provided in Cal. Doing so may cause damage to remove the lamp immediately after handling. (This notice is mounted overhead and the lamp breaks, be extremely hot. This could damage the projector or cause a fire. • Do not modify the power cord. If you...
... advice immediately. • If the projector is provided in Cal. Doing so may cause damage to remove the lamp immediately after handling. (This notice is mounted overhead and the lamp breaks, be extremely hot. This could damage the projector or cause a fire. • Do not modify the power cord. If you...

