Product Brochure
Page 1
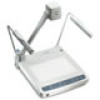
... seamless transitions between different sources. The EPSON ELPDC02 High Resolution Document Imager and the ELPDC03 Motion Presentation Camera provide two unique solutions for your presentation package. A high-value product, the ELPDC03 runs at training seminars, court hearings, videoconferences, and more. Eliminating the need to capture movement or video ELPDC02 High Resolution Document Imager ELPDC03 Motion Presentation Camera ELPDC02 High Resolution Document Imager • Built-in base light...
... seamless transitions between different sources. The EPSON ELPDC02 High Resolution Document Imager and the ELPDC03 Motion Presentation Camera provide two unique solutions for your presentation package. A high-value product, the ELPDC03 runs at training seminars, court hearings, videoconferences, and more. Eliminating the need to capture movement or video ELPDC02 High Resolution Document Imager ELPDC03 Motion Presentation Camera ELPDC02 High Resolution Document Imager • Built-in base light...

Product Brochure
Page 2
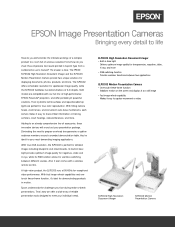
... Pre-Sales Support U.S. All other product and brand names are trademarks and/or registered trademarks of Seiko Epson Corporation. EPSON ELPDC02 and ELPDC03 Specifications ELPDC02 High Resolution Document Imager 850,000 pixel CCD XGA resolution (1077 x 788 pixels) Video: 15Hz 10x power zoom lens Front panel control and wireless remote operation Optical Specifications Lens Shooting area Zooming Focus Iris...
... Pre-Sales Support U.S. All other product and brand names are trademarks and/or registered trademarks of Seiko Epson Corporation. EPSON ELPDC02 and ELPDC03 Specifications ELPDC02 High Resolution Document Imager 850,000 pixel CCD XGA resolution (1077 x 788 pixels) Video: 15Hz 10x power zoom lens Front panel control and wireless remote operation Optical Specifications Lens Shooting area Zooming Focus Iris...
User Manual
Page 4
... Head as a Conventional Video Camera 22 Turning Off and Storing the Document Camera 23 Maintaining and Transporting the Document Camera 25 Cleaning the Lenses 26 Cleaning the Document Camera Case 27 Transporting the Document Camera 28 Solving Problems 29 Solving Problems with the Image 30 Switching Between NTSC and PAL 31 Solving Problems with the...
... Head as a Conventional Video Camera 22 Turning Off and Storing the Document Camera 23 Maintaining and Transporting the Document Camera 25 Cleaning the Lenses 26 Cleaning the Document Camera Case 27 Transporting the Document Camera 28 Solving Problems 29 Solving Problems with the Image 30 Switching Between NTSC and PAL 31 Solving Problems with the...
User Manual
Page 7
WWelcome The EPSON® ELPDC02 High Resolution Document Imager is a high resolution document camera that can be connected to all types of computers, including IBM® compatible PCs and laptops, Apple® Macintosh,® Power Macintosh™ series (including G3 and G4 systems), PowerBook® computers, many iMac™ and iBook™ series systems, and high-end workstations such as the...
WWelcome The EPSON® ELPDC02 High Resolution Document Imager is a high resolution document camera that can be connected to all types of computers, including IBM® compatible PCs and laptops, Apple® Macintosh,® Power Macintosh™ series (including G3 and G4 systems), PowerBook® computers, many iMac™ and iBook™ series systems, and high-end workstations such as the...

User Manual
Page 8
... equipment. Please follow these devices, see page 11. I Cautions must be observed to avoid damage to your document camera. 2 Welcome To connect the document camera to display its image. I Using the remote control The remote control lets you can take advantage of any or all the information ...read through it: I Warnings must be followed carefully to avoid bodily injury. Getting the Most from Your Document Camera Depending on your presentation, you control the lamps, zoom and focus your image, and switch the display from the camera to a computer. This is especially useful if your...
... equipment. Please follow these devices, see page 11. I Cautions must be observed to avoid damage to your document camera. 2 Welcome To connect the document camera to display its image. I Using the remote control The remote control lets you can take advantage of any or all the information ...read through it: I Warnings must be followed carefully to avoid bodily injury. Getting the Most from Your Document Camera Depending on your presentation, you control the lamps, zoom and focus your image, and switch the display from the camera to a computer. This is especially useful if your...

User Manual
Page 21
2Using the Document Camera Once you have set up the document camera, you're ready to turn it on the document camera and other equipment I Switching between picture sources I Adjusting the lighting I Adjusting the image position and size I Using the camera head as a conventional video camera I Turning on , adjust the image, and give your presentation. This chapter covers the following: I Turning off and storing the document camera Using the Document Camera 15
2Using the Document Camera Once you have set up the document camera, you're ready to turn it on the document camera and other equipment I Switching between picture sources I Adjusting the lighting I Adjusting the image position and size I Using the camera head as a conventional video camera I Turning on , adjust the image, and give your presentation. This chapter covers the following: I Turning off and storing the document camera Using the Document Camera 15

User Manual
Page 22
... cord to plug in and turn on your document camera, as described below, followed by any order. Always turn on the document camera: 1. Turning On the Document Camera Follow these steps to the document camera's power inlet. Then turn on your document camera and other equipment are set up and ...connected correctly, as described on the projector or monitor. 16 Using the Document Camera f power inlet 2. Connect the other end to see its image as described in Chapter 1. Turn on page 18. Turning On Your Equipment Make sure your computer and video...
... cord to plug in and turn on your document camera, as described below, followed by any order. Always turn on the document camera: 1. Turning On the Document Camera Follow these steps to the document camera's power inlet. Then turn on your document camera and other equipment are set up and ...connected correctly, as described on the projector or monitor. 16 Using the Document Camera f power inlet 2. Connect the other end to see its image as described in Chapter 1. Turn on page 18. Turning On Your Equipment Make sure your computer and video...

User Manual
Page 23
... turning it back on making adjustments. Once you 're done with your image, turn off the document camera, always wait a few moments, the Main and Upper indicator lights on the control panel and the upper lamps turn off the document camera as described on page 23. When you see your presentation, turn... to page 19 for help. You should see the next section for instructions on . 4. If your presentation material on screen. Using the Document Camera 17 Turn on . Place your image doesn't appear, see an image on the stage. note If you turn on the...
... turning it back on making adjustments. Once you 're done with your image, turn off the document camera, always wait a few moments, the Main and Upper indicator lights on the control panel and the upper lamps turn off the document camera as described on page 23. When you see your presentation, turn... to page 19 for help. You should see the next section for instructions on . 4. If your presentation material on screen. Using the Document Camera 17 Turn on . Place your image doesn't appear, see an image on the stage. note If you turn on the...

User Manual
Page 24
I If an image still doesn't appear, refer to the camera. Switching Between Picture Sources If you have external video sources connected to the document camera, such as a laptop or desktop computer, you may need to the desired video source. Press the RGB1 or RGB2 button on . Press... or monitor or page 14 for instructions. See the next section for a computer. RGB1 Control panel Main RGB1 RGB2 RGB2 Main 18 Using the Document Camera I If you can switch between them and the camera. I Make sure everything is turned on the control panel or remote control to switch...
I If an image still doesn't appear, refer to the camera. Switching Between Picture Sources If you have external video sources connected to the document camera, such as a laptop or desktop computer, you may need to the desired video source. Press the RGB1 or RGB2 button on . Press... or monitor or page 14 for instructions. See the next section for a computer. RGB1 Control panel Main RGB1 RGB2 RGB2 Main 18 Using the Document Camera I If you can switch between them and the camera. I Make sure everything is turned on the control panel or remote control to switch...

User Manual
Page 25
..., you need to use the base lamp. Remote control Base Upper Base Using the Document Camera 19 Press it again to turn on the control panel or remote control to turn off . If you may obtain a better image with the upper lamps off automatically. Press the Base button on the base lamp...
..., you need to use the base lamp. Remote control Base Upper Base Using the Document Camera 19 Press it again to turn on the control panel or remote control to turn off . If you may obtain a better image with the upper lamps off automatically. Press the Base button on the base lamp...

User Manual
Page 26
Remote control Adjusting the Image Once you see your image, see page 22. If the image is too high or too low, you can resize it . Zooming and Focusing Your Image Use the Tele button on the stage, press the Auto Focus button to focus the image. I If the image is too large or too small... focused. If you change items on the control panel or remote control to enlarge the image, and use the Near or Far button. The document camera will automatically focus the image. The following objects may need to reduce it. note The auto focus function works up to a height of field ...
Remote control Adjusting the Image Once you see your image, see page 22. If the image is too high or too low, you can resize it . Zooming and Focusing Your Image Use the Tele button on the stage, press the Auto Focus button to focus the image. I If the image is too large or too small... focused. If you change items on the control panel or remote control to enlarge the image, and use the Near or Far button. The document camera will automatically focus the image. The following objects may need to reduce it. note The auto focus function works up to a height of field ...

User Manual
Page 27
..., you can 't adjust the position or size of an image captured with the overhead camera or an image output through the RGB video output port. Using the Document Camera 21 Remote control Position arrow buttons To adjust the image position, use the right and/or down Position arrow buttons ...on the control panel. Adjusting the Image Position and Size If you are displaying a computer image using the Video or S-Video output...
..., you can 't adjust the position or size of an image captured with the overhead camera or an image output through the RGB video output port. Using the Document Camera 21 Remote control Position arrow buttons To adjust the image position, use the right and/or down Position arrow buttons ...on the control panel. Adjusting the Image Position and Size If you are displaying a computer image using the Video or S-Video output...

User Manual
Page 28
To return to a horizontal position, you can resolve images from 3.6 feet (1.1 m) to control the amount of auto iris, press the Normal button. Remote control Normal Open Close Using the Camera Head as a Conventional Video ... more light reaches the lens. note The camera shoots at 15 frames per second. camera head in horizontal position close -up lens 22 Using the Document Camera If the screen looks too light, press the Close button. If the screen looks dark, press the Open button to auto iris. To view...
To return to a horizontal position, you can resolve images from 3.6 feet (1.1 m) to control the amount of auto iris, press the Normal button. Remote control Normal Open Close Using the Camera Head as a Conventional Video ... more light reaches the lens. note The camera shoots at 15 frames per second. camera head in horizontal position close -up lens 22 Using the Document Camera If the screen looks too light, press the Close button. If the screen looks dark, press the Open button to auto iris. To view...

User Manual
Page 31
... and stage clean. You should not replace the lamps or any cover on your dealer or a qualified servicer. If any part of the document camera, turn it off and unplug the power cord. Refer all servicing to service this product yourself. All you clean any part needs replacing..., contact your presented image. Don't try to qualified service personnel. Your document camera needs little maintenance. Any dirt or smears on the lenses or stage may show up on the...
... and stage clean. You should not replace the lamps or any cover on your dealer or a qualified servicer. If any part of the document camera, turn it off and unplug the power cord. Refer all servicing to service this product yourself. All you clean any part needs replacing..., contact your presented image. Don't try to qualified service personnel. Your document camera needs little maintenance. Any dirt or smears on the lenses or stage may show up on the...

User Manual
Page 33
I To remove stubborn dirt or stains, moisten a soft cloth with a soft, dry, lint-free cloth. stage Maintaining and Transporting the Document Camera 27 I To remove dirt or dust, wipe the case with water and a neutral detergent. I Do not use wax, alcohol, benzene, thinner, or .... I Take special care when cleaning the stage, or you clean the case, first turn off the document camera and unplug the power cord. Then wipe the case. Scratches on your image. These can damage the case. Cleaning the Document Camera Case Before you may appear on the stage may scratch it.
I To remove stubborn dirt or stains, moisten a soft cloth with a soft, dry, lint-free cloth. stage Maintaining and Transporting the Document Camera 27 I To remove dirt or dust, wipe the case with water and a neutral detergent. I Do not use wax, alcohol, benzene, thinner, or .... I Take special care when cleaning the stage, or you clean the case, first turn off the document camera and unplug the power cord. Then wipe the case. Scratches on your image. These can damage the case. Cleaning the Document Camera Case Before you may appear on the stage may scratch it.

User Manual
Page 35
This chapter explains the following: I Solving problems with the image I Contacting technical support Solving Problems 29 4Solving Problems This chapter helps you solve problems with the remote control I Solving problems with your document camera, and tells you how to contact technical support for problems you can't solve yourself.
This chapter explains the following: I Solving problems with the image I Contacting technical support Solving Problems 29 4Solving Problems This chapter helps you solve problems with the remote control I Solving problems with your document camera, and tells you how to contact technical support for problems you can't solve yourself.

User Manual
Page 36
...again. Try pressing the Main, RGB1, or RGB2 button. I Check that are properly connected (see page 20). I The document camera may need to have been turned on . The image is closed. 30 Solving Problems I Some objects do not auto focus well (see Chapter 1) and everything is not in sleep... mode. Make sure the close to prevent interference. I If you're using the Near and Far buttons. Turn the document camera off, wait a...
...again. Try pressing the Main, RGB1, or RGB2 button. I Check that are properly connected (see page 20). I The document camera may need to have been turned on . The image is closed. 30 Solving Problems I Some objects do not auto focus well (see Chapter 1) and everything is not in sleep... mode. Make sure the close to prevent interference. I If you're using the Near and Far buttons. Turn the document camera off, wait a...

User Manual
Page 39
...to 6 PM, Pacific Time, Monday through Friday, for the duration of your document camera. Before you call (800) 637-7661 and enter the PIN on the rear panel of the document camera) I Computer configuration, if applicable I Canada: (905) 709-3839, ...period. Telephone Support Services To use the EPSON PrivateLine Support service, call , please have the following information ready: I Product name (EPSON ELPDC02 High Resolution Document Imager) I Product serial number (located on the EPSON PrivateLine Support card included with an EPSON document camera support specialist by dialing one of ...
...to 6 PM, Pacific Time, Monday through Friday, for the duration of your document camera. Before you call (800) 637-7661 and enter the PIN on the rear panel of the document camera) I Computer configuration, if applicable I Canada: (905) 709-3839, ...period. Telephone Support Services To use the EPSON PrivateLine Support service, call , please have the following information ready: I Product name (EPSON ELPDC02 High Resolution Document Imager) I Product serial number (located on the EPSON PrivateLine Support card included with an EPSON document camera support specialist by dialing one of ...

User Manual
Page 53
... 30 Camera head switches, adjusting, 13 Cleaning, 26 to 27 Close button, 22 Close-up lens, 22, 26 Computer, connecting, 14 Connecting document camera to a computer, 14 to a monitor, 11 to 12 to a projector, 11 to 12 to RGB video sources, 14 D Declaration of Conformity, ... 23 turning on, 16 to 17 unfolding, 8 to 9 E Electrical specifications, 36 Environmental specifications, 36 EPSON technical support, 3, 32 to 33 F Far button, 20 FCC compliance statement, 44 Focusing image, 20 Folding document camera, 23 to 24 Frame speed, 22, 35 Frequency selection switch, 13 specification, 35 G Gamma selection...
... 30 Camera head switches, adjusting, 13 Cleaning, 26 to 27 Close button, 22 Close-up lens, 22, 26 Computer, connecting, 14 Connecting document camera to a computer, 14 to a monitor, 11 to 12 to a projector, 11 to 12 to RGB video sources, 14 D Declaration of Conformity, ... 23 turning on, 16 to 17 unfolding, 8 to 9 E Electrical specifications, 36 Environmental specifications, 36 EPSON technical support, 3, 32 to 33 F Far button, 20 FCC compliance statement, 44 Focusing image, 20 Folding document camera, 23 to 24 Frame speed, 22, 35 Frequency selection switch, 13 specification, 35 G Gamma selection...

User Manual
Page 54
... NTSC mode, 31 O Open button, 22 48 Index P PAL mode, 31 Picture, see Image Position arrow buttons, 21 Positioning document camera, 10 image, 21 Power specifications, 36 switch, 17 Printouts, presenting, 19 PrivateLine Support, 3, 33 Problems blank screen, ...18 image, 30 to 31 remote control, 32, 42 Projector, connecting, 11 to 12 R Registration, 3 Remote control batteries, 7 specifications, 36 storing, 28 transporting, 28 troubleshooting, 32, 42 Resolution...
... NTSC mode, 31 O Open button, 22 48 Index P PAL mode, 31 Picture, see Image Position arrow buttons, 21 Positioning document camera, 10 image, 21 Power specifications, 36 switch, 17 Printouts, presenting, 19 PrivateLine Support, 3, 33 Problems blank screen, ...18 image, 30 to 31 remote control, 32, 42 Projector, connecting, 11 to 12 R Registration, 3 Remote control batteries, 7 specifications, 36 storing, 28 transporting, 28 troubleshooting, 32, 42 Resolution...

