

User Manual
Page 7
... 12 3-4 Hard Disk Drive Format 13 Preformat 13 Partition 13 Format 14 3-5 Helpful Hints 15 Chapter 4 KEYBOARD 1 4-1 Keyboard Layout 2 4-2 Getting Acquainted with Your Keyboard 3 Function Keys 3 Numeric Keypad 3 Mode Indicator Lights 5 Special Keys 6 QWERTY keys 7 Cursor Keys 8 Key Combinations 8 4-3 Keyboard Tilt Adjustment 9 vi
... 12 3-4 Hard Disk Drive Format 13 Preformat 13 Partition 13 Format 14 3-5 Helpful Hints 15 Chapter 4 KEYBOARD 1 4-1 Keyboard Layout 2 4-2 Getting Acquainted with Your Keyboard 3 Function Keys 3 Numeric Keypad 3 Mode Indicator Lights 5 Special Keys 6 QWERTY keys 7 Cursor Keys 8 Key Combinations 8 4-3 Keyboard Tilt Adjustment 9 vi

User Manual
Page 9
List of Figures Chapter 1 SYSTEM OVERVIEW Figure 1-1: Quick Start 3 Figure 1-2: System Configuration 6 Figure 1-3: System Unit Case 7 Figure 1-4: Front Panel 8 Figure 1-5: Keylock and Two Security-Lock Keys 9 Figure 1-6: Rear Panel 10 Figure 1-7: Connecting the Keyboard Cable 11 Figure 1-8: System Power Cord 12 Figure 1-9: Two Kinds of Display Connectors 13 Figure 1-10: Voltage ...
List of Figures Chapter 1 SYSTEM OVERVIEW Figure 1-1: Quick Start 3 Figure 1-2: System Configuration 6 Figure 1-3: System Unit Case 7 Figure 1-4: Front Panel 8 Figure 1-5: Keylock and Two Security-Lock Keys 9 Figure 1-6: Rear Panel 10 Figure 1-7: Connecting the Keyboard Cable 11 Figure 1-8: System Power Cord 12 Figure 1-9: Two Kinds of Display Connectors 13 Figure 1-10: Voltage ...

User Manual
Page 11
Chapter 4 KEYBOARD Figure 4-1: Keyboard Layout 2 Figure 4-2: Function Keys 3 Figure 4-3: Numeric Keypad 3 Figure 4-4: Indicator Lights 5 Figure 4-5: Special Keys 6 Figure 4-6: QWERTY Keys 7 Figure 4-7: Cursor Keys 8 Figure 4-8: Adjustment of Keyboard Angles 9 Chapter 6 APPENDIX Figure 6-1: Fastening Brackets on a Floppy Disk Drive 2 Figure 6-2: Installing a Floppy Disk Drive 3 Figure 6-3: Connecting a Floppy Disk Drive 4 Figure 6-4: ...
Chapter 4 KEYBOARD Figure 4-1: Keyboard Layout 2 Figure 4-2: Function Keys 3 Figure 4-3: Numeric Keypad 3 Figure 4-4: Indicator Lights 5 Figure 4-5: Special Keys 6 Figure 4-6: QWERTY Keys 7 Figure 4-7: Cursor Keys 8 Figure 4-8: Adjustment of Keyboard Angles 9 Chapter 6 APPENDIX Figure 6-1: Fastening Brackets on a Floppy Disk Drive 2 Figure 6-2: Installing a Floppy Disk Drive 3 Figure 6-3: Connecting a Floppy Disk Drive 4 Figure 6-4: ...

User Manual
Page 12
...-Bit Memory 25 Table 2-9: Onboard 32-Bit Memory 26 Table 2-10: SW1-6 Switch Setting 27 Table 2-11: Cache Memory Configuration 31 Table 2-12: DRAM Configurations 33 Table 2-13: Power Supply Pinouts 43 Chapter 4 KEYBOARD Table 4-1: Functions of Numeric Keypad...
...-Bit Memory 25 Table 2-9: Onboard 32-Bit Memory 26 Table 2-10: SW1-6 Switch Setting 27 Table 2-11: Cache Memory Configuration 31 Table 2-12: DRAM Configurations 33 Table 2-13: Power Supply Pinouts 43 Chapter 4 KEYBOARD Table 4-1: Functions of Numeric Keypad...

User Manual
Page 18
... of peripherals. Operating System Your computer uses the MS-DOS® operating system. Your system uses an Intel Corporation™ 386 microprocessor. Also, a wide variety of expansion cards are the key design features of your computer vastly exceeds them in capability and processing power. For more details on experience by following the...
... of peripherals. Operating System Your computer uses the MS-DOS® operating system. Your system uses an Intel Corporation™ 386 microprocessor. Also, a wide variety of expansion cards are the key design features of your computer vastly exceeds them in capability and processing power. For more details on experience by following the...

User Manual
Page 25
Figure 1-5: Keylock and Two Security-Lock Keys System Power Switch The system power switch is activated. In the unlock mode the keyboard is located on the control panel. In the lock mode the keyboard is turned off before modifying the hardware configuration in any way. Keylock The keylock enables or disables the keyboard. Chapter 1: System Overview 9 You should always be certain that the power is disabled to deny unauthorized users access to the computer.
Figure 1-5: Keylock and Two Security-Lock Keys System Power Switch The system power switch is activated. In the unlock mode the keyboard is located on the control panel. In the lock mode the keyboard is turned off before modifying the hardware configuration in any way. Keylock The keylock enables or disables the keyboard. Chapter 1: System Overview 9 You should always be certain that the power is disabled to deny unauthorized users access to the computer.

User Manual
Page 37
Refer to Chapter 4 for a more detailed description of function keys, cursor keys and a numeric keypad. 1-11 Keyboard Your keyboard has a set of the keyboard. The figure below shows a typical keyboard. Figure 1-15: Keyboard Chapter 1: System Overview 21
Refer to Chapter 4 for a more detailed description of function keys, cursor keys and a numeric keypad. 1-11 Keyboard Your keyboard has a set of the keyboard. The figure below shows a typical keyboard. Figure 1-15: Keyboard Chapter 1: System Overview 21

User Manual
Page 86
... drive A and close the drive lever. Your PC will see the following the RAM test: Non-system disk or disk error Replace and strike any key when ready You should follow the instructions below to copy all the DOS programs into disk drive A and close the drive lever. Loading DOS Loading...-DOS User's Guide and Reference manual for Disk Operating System. Press the reset button on your front panel (hardware reset) or hold down the , and keys at the same time (software reset) to the prompts displayed on the screen following message on the monitor.
... drive A and close the drive lever. Your PC will see the following the RAM test: Non-system disk or disk error Replace and strike any key when ready You should follow the instructions below to copy all the DOS programs into disk drive A and close the drive lever. Loading DOS Loading...-DOS User's Guide and Reference manual for Disk Operating System. Press the reset button on your front panel (hardware reset) or hold down the , and keys at the same time (software reset) to the prompts displayed on the screen following message on the monitor.
User Manual
Page 87
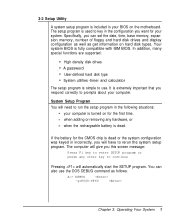
If the battery for the CMOS chip is dead or the system configuration was keyed in incorrectly, you this screen message: Press Fl key to enter SETUP program or press any hardware, or when the rechargeable battery is dead. System Setup Program You will need to run the ... and hard disk drives and display configuration as well as follows: A:> DEBUG -g=F000:FF60 Chapter 3: Operating Your System 3 The setup program is used to key in the configuration you want for your system. 3-2 Setup Utility A system setup program is included in your BIOS on for the first time, when adding...
If the battery for the CMOS chip is dead or the system configuration was keyed in incorrectly, you this screen message: Press Fl key to enter SETUP program or press any hardware, or when the rechargeable battery is dead. System Setup Program You will need to run the ... and hard disk drives and display configuration as well as follows: A:> DEBUG -g=F000:FF60 Chapter 3: Operating Your System 3 The setup program is used to key in the configuration you want for your system. 3-2 Setup Utility A system setup program is included in your BIOS on for the first time, when adding...

User Manual
Page 88
When you restart the system, press the key quickly just after the RAM test. Once you have entered the SETUP program, you will see the following message will be shown on the screen: ...
When you restart the system, press the key quickly just after the RAM test. Once you have entered the SETUP program, you will see the following message will be shown on the screen: ...

User Manual
Page 91
Note that these two utilities can be used if you press , , (on the key pad). Refer to the figure below for the Calculator. Figure 3-4: Calculator Chapter 3: Operating Your System 7 Pressing will exit this utility. Calculator The calculator can be used in the 80-column text display mode only.
Note that these two utilities can be used if you press , , (on the key pad). Refer to the figure below for the Calculator. Figure 3-4: Calculator Chapter 3: Operating Your System 7 Pressing will exit this utility. Calculator The calculator can be used in the 80-column text display mode only.

User Manual
Page 92
... is 0 : 02 : 15.00 Enter new time: 2:20 Your computer is Fri 01-01-1990 Enter new date (MM-DD-YY): For the new date, key in drive "A" and switch on your DOS user manual. If you are using a floppy disk drive, insert the DOS system disk in the month, day...
... is 0 : 02 : 15.00 Enter new time: 2:20 Your computer is Fri 01-01-1990 Enter new date (MM-DD-YY): For the new date, key in drive "A" and switch on your DOS user manual. If you are using a floppy disk drive, insert the DOS system disk in the month, day...

User Manual
Page 94
... deletion it is important to back up all your target disk has been copied, you have nothing else to be copied. Backing up a single file, key in the backup command and directory as follows: A>backup /A 70 Chapter 3: Operating Your System
... deletion it is important to back up all your target disk has been copied, you have nothing else to be copied. Backing up a single file, key in the backup command and directory as follows: A>backup /A 70 Chapter 3: Operating Your System

User Manual
Page 96
If you use the following command: DIR A: After you hit the enter key, all the file information will be displayed on a disk, you can list its directory by using the command. If you want to find out what ...files are three ways to stop the screen from scrolling: pressing the and the keys simultaneously pressing typing DIR/P to display the directory of the disk in drive A, you would use the command without a drive letter, MS-DOS lists the...
If you use the following command: DIR A: After you hit the enter key, all the file information will be displayed on a disk, you can list its directory by using the command. If you want to find out what ...files are three ways to stop the screen from scrolling: pressing the and the keys simultaneously pressing typing DIR/P to display the directory of the disk in drive A, you would use the command without a drive letter, MS-DOS lists the...

User Manual
Page 97
You can press the key quickly just after the RAM test to preformat a hard disk. See Figure 3-1. The DOS command "FDISK" handles this , you should carry out the following steps: ...
You can press the key quickly just after the RAM test to preformat a hard disk. See Figure 3-1. The DOS command "FDISK" handles this , you should carry out the following steps: ...

User Manual
Page 98
Note that you don't need to perform this system disk to boot your system later. The command should be keyed in as: A> FORMAT C:/S If you want to make two partitions, you have to format the new partition as follows: A> FORMAT D: If you want to use ...
Note that you don't need to perform this system disk to boot your system later. The command should be keyed in as: A> FORMAT C:/S If you want to make two partitions, you have to format the new partition as follows: A> FORMAT D: If you want to use ...

User Manual
Page 101
It has: QWERTY keys Function keys Cursor control keys A numeric keypad Special keys Keyboard indicator lights Chapter 4: Keyboard 1 Keyboard In this chapter you will learn: n the basics of your keyboard and its functions n how to adjust your keyboard angle A computer keyboard sends messages from you to the computer.
It has: QWERTY keys Function keys Cursor control keys A numeric keypad Special keys Keyboard indicator lights Chapter 4: Keyboard 1 Keyboard In this chapter you will learn: n the basics of your keyboard and its functions n how to adjust your keyboard angle A computer keyboard sends messages from you to the computer.

User Manual
Page 102
Function Keys Keyboard Special Keys Indicator Lights QWERTY Key Area Cursor Control Numeric Keys Keypad Figure 4-1: Keyboard Layout 2 Chapter 4: Keyboard Figure 4-1 below illustrates the basic layout of a typical enhanced keyboard. 4-1 Keyboard Layout Currently several keyboard styles are the PC keyboard, the PC/AT keyboard, and the enhanced keyboard. The most popular are available for PC/AT/XT compatible computers.
Function Keys Keyboard Special Keys Indicator Lights QWERTY Key Area Cursor Control Numeric Keys Keypad Figure 4-1: Keyboard Layout 2 Chapter 4: Keyboard Figure 4-1 below illustrates the basic layout of a typical enhanced keyboard. 4-1 Keyboard Layout Currently several keyboard styles are the PC keyboard, the PC/AT keyboard, and the enhanced keyboard. The most popular are available for PC/AT/XT compatible computers.

User Manual
Page 103
...the center of the keypad are located on the right of the keyboard. Refer to enter numbers when either the Caps Lock key or Num Lock key is pressed. These keys are used to move the cursor as well as to the previous page for the layout. Your keyboard is located on the... left or at the top of these keys. The following gives an explanation of the keyboard. Figure 4-2: Function Keys Numeric Keypad This is divided into six sections. Refer to the figure below: Figure 4-3: Numeric Keypad Chapter 4: Keyboard 3...
...the center of the keypad are located on the right of the keyboard. Refer to enter numbers when either the Caps Lock key or Num Lock key is pressed. These keys are used to move the cursor as well as to the previous page for the layout. Your keyboard is located on the... left or at the top of these keys. The following gives an explanation of the keyboard. Figure 4-2: Function Keys Numeric Keypad This is divided into six sections. Refer to the figure below: Figure 4-3: Numeric Keypad Chapter 4: Keyboard 3...

User Manual
Page 104
... of the cursor. Activating Num Lock makes 9 operative. Activating Num Lock makes 1 operative. Otherwise the key functions to the end of the line it is on . Keys Function Turns on and off the numeric mode on the numeric keypad Used for decimal points, Otherwise it... deletes characters where the cursor is positioned. Activating Num Lock makes 7 operative. Used for addition operations. Otherwise the cursor key is activated. Activating Num Lock makes 4 operative. Activating Num Lock makes 8 operative. Activating Num Lock makes 5 operative. Otherwise end moves...
... of the cursor. Activating Num Lock makes 9 operative. Activating Num Lock makes 1 operative. Otherwise the key functions to the end of the line it is on . Keys Function Turns on and off the numeric mode on the numeric keypad Used for decimal points, Otherwise it... deletes characters where the cursor is positioned. Activating Num Lock makes 7 operative. Used for addition operations. Otherwise the cursor key is activated. Activating Num Lock makes 4 operative. Activating Num Lock makes 8 operative. Activating Num Lock makes 5 operative. Otherwise end moves...