
Owners Manual
Page 2
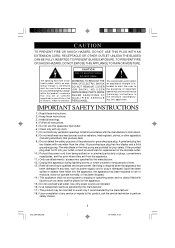
... walked on the apparatus. 15.) Do not overload wall outlet. Use only power source as indicated. 16.) Use replacement parts as vases shall be mounted to constitute a risk Q U A L I F I E D S E R V I C E of important operating and maintenance (servicing) instructions in accordance with dry cloth. 7.) Do not block any heat sources such as power-supply cord or plug is intented to DO NOT REMOVE COVER alert the...
... walked on the apparatus. 15.) Do not overload wall outlet. Use only power source as indicated. 16.) Use replacement parts as vases shall be mounted to constitute a risk Q U A L I F I E D S E R V I C E of important operating and maintenance (servicing) instructions in accordance with dry cloth. 7.) Do not block any heat sources such as power-supply cord or plug is intented to DO NOT REMOVE COVER alert the...
Owners Manual
Page 3
... to read this Manual. For future reference, record the serial number in this product. Our engineers have included many useful and convenient features in the space provided. Please be in perfect working order before it left our factory. If, after reading this Manual, you experience any problems with the operation of this product, please refer to the instructions for obtaining service at the end...
... to read this Manual. For future reference, record the serial number in this product. Our engineers have included many useful and convenient features in the space provided. Please be in perfect working order before it left our factory. If, after reading this Manual, you experience any problems with the operation of this product, please refer to the instructions for obtaining service at the end...
Owners Manual
Page 4
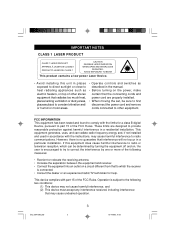
... This product contains a low power Laser Device. • Avoid installing this equipment does cause harmful interference to radio or television reception, which can radiate radio frequency energy and, if not installed and used in accordance with the instructions, may cause harmful interference to which the receiver is subject to provide reasonable protection against harmful interference in the manual. • Before turning on...
... This product contains a low power Laser Device. • Avoid installing this equipment does cause harmful interference to radio or television reception, which can radiate radio frequency energy and, if not installed and used in accordance with the instructions, may cause harmful interference to which the receiver is subject to provide reasonable protection against harmful interference in the manual. • Before turning on...

Owners Manual
Page 5
... could expose you operate the controls. This model is not covered by a qualified, licensed electrician. To prevent any convenient 120V 60Hz AC outlet. PROTECT YOUR FURNITURE !! However certain types of oil based furniture polishes, wood preservatives, or cleaning sprays may cause ... you place the product on the plug, or use an adapter to electric shock. ES2_ib041503.p65 4 4 15/4/2003, 9:36 These 'feet' are made from moving when you AC Plug to make the plug fit into your furniture. Unwind the AC Power Cord completely. 2. Insert the plug into a matching polarized...
... could expose you operate the controls. This model is not covered by a qualified, licensed electrician. To prevent any convenient 120V 60Hz AC outlet. PROTECT YOUR FURNITURE !! However certain types of oil based furniture polishes, wood preservatives, or cleaning sprays may cause ... you place the product on the plug, or use an adapter to electric shock. ES2_ib041503.p65 4 4 15/4/2003, 9:36 These 'feet' are made from moving when you AC Plug to make the plug fit into your furniture. Unwind the AC Power Cord completely. 2. Insert the plug into a matching polarized...

Owners Manual
Page 6
CD REPEAT / CHANNEL DOWN. 10. TUNER / BAND Select. 13. MUTE. 17. CD / INTRO Select. B Reverse SKIP / Search. 8. ALARM 15. Graphic Equalizer. 16. OSTANDBY (Power). 2. CD PLAY/PAUSE RP 6. SLEEP 14. VOLUME Down / Up. 19a. CD door OPEN/CLOSE / SNOOZE. 4. F Forward SKIP / Search. 9. AUX Input Select. 12. CD / Tuner MEMORY / CLOCK ADJ. 19. Multifunction LCD Display. 5. Display MODE / CD REMAIN Time 18. ES2_ib041503.p65 5 5 15/4/2003, 9:36 CD RANDOM / CHANNEL UP. 11. CD STOP C 7. Headphones Jack. 3. Location Of Controls And Indicators Front Panel 1.
CD REPEAT / CHANNEL DOWN. 10. TUNER / BAND Select. 13. MUTE. 17. CD / INTRO Select. B Reverse SKIP / Search. 8. ALARM 15. Graphic Equalizer. 16. OSTANDBY (Power). 2. CD PLAY/PAUSE RP 6. SLEEP 14. VOLUME Down / Up. 19a. CD door OPEN/CLOSE / SNOOZE. 4. F Forward SKIP / Search. 9. AUX Input Select. 12. CD / Tuner MEMORY / CLOCK ADJ. 19. Multifunction LCD Display. 5. Display MODE / CD REMAIN Time 18. ES2_ib041503.p65 5 5 15/4/2003, 9:36 CD RANDOM / CHANNEL UP. 11. CD STOP C 7. Headphones Jack. 3. Location Of Controls And Indicators Front Panel 1.

Owners Manual
Page 8
... Open/Close. 42. Track / channel numbers. 43. SLEEP. 37. ALARM. 47. ES2_ib041503.p65 7 7 15/4/2003, 9:36 CD Select / INTRO Mode. 29. AUX Input Select. 31. F Forward SKIP / Search. 32. CD / Tuner MEMORY / PROG / CLOCK ADJ. 36. B Reverse SKIP / Search. 40. CD STOP C 41. SNOOZE. Remote Control 26. Volume Up / Down. 39. CD REPEAT / CHANNEL Down. 45. Infrared Transmission LED. 27. OSTANDBY (Power). 28. TUNER / BAND Select. 30. CD PLAY/PAUSE RP 33. Display MODE / CD REMAIN Time...
... Open/Close. 42. Track / channel numbers. 43. SLEEP. 37. ALARM. 47. ES2_ib041503.p65 7 7 15/4/2003, 9:36 CD Select / INTRO Mode. 29. AUX Input Select. 31. F Forward SKIP / Search. 32. CD / Tuner MEMORY / PROG / CLOCK ADJ. 36. B Reverse SKIP / Search. 40. CD STOP C 41. SNOOZE. Remote Control 26. Volume Up / Down. 39. CD REPEAT / CHANNEL Down. 45. Infrared Transmission LED. 27. OSTANDBY (Power). 28. TUNER / BAND Select. 30. CD PLAY/PAUSE RP 33. Display MODE / CD REMAIN Time...

Owners Manual
Page 10
...operate it while it is accidentally spilt or splashed on the unit, disconnect the AC plug from the wall outlet immediately and consult your dealer. Finally, position the speakers...operate the unit near the unit. Keep items such as shown below. Note: Leave at least 3 inches (7cm) to the red and black terminals on the back of an AC outlet. Make sure that the ventilation slots in place. Connections Connect the speakers to the rear of the unit. Preparation For Use...Do not subject the unit to lock the wires in the cabinet are not obstructed. Make sure the unit is within easy reach ...
...operate it while it is accidentally spilt or splashed on the unit, disconnect the AC plug from the wall outlet immediately and consult your dealer. Finally, position the speakers...operate the unit near the unit. Keep items such as shown below. Note: Leave at least 3 inches (7cm) to the red and black terminals on the back of an AC outlet. Make sure that the ventilation slots in place. Connections Connect the speakers to the rear of the unit. Preparation For Use...Do not subject the unit to lock the wires in the cabinet are not obstructed. Make sure the unit is within easy reach ...

Owners Manual
Page 11
... foot away from the main unit to radio stations - Position and adjust the loop antenna for best reception (do this when you're tuning-in to avoid interference. Connecting External Audio Equipment • Connect your recording equipment (eg. MiniDisc or cassette player) to the AUX jacks on the back panel. * Other examples of playback equipment include your TV, video recorder, DVD player or satellite receiver, or your computer...
... foot away from the main unit to radio stations - Position and adjust the loop antenna for best reception (do this when you're tuning-in to avoid interference. Connecting External Audio Equipment • Connect your recording equipment (eg. MiniDisc or cassette player) to the AUX jacks on the back panel. * Other examples of playback equipment include your TV, video recorder, DVD player or satellite receiver, or your computer...
Owners Manual
Page 13
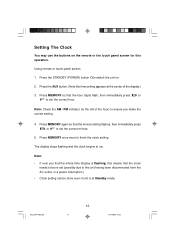
... minute. 5. Press the AUX button. (Note the time setting appears at Standby mode. The display stops flashing and the clock begins to finish the clock setting. Note: • If ever you make the correct setting. 4. Using remote or touch panel screen. 1. Note: Check the AM / PM indicator (to ensure you find the whole time display is flashing, this operation. Press the STANDBY (POWER) button Oto switch the unit on the...
... minute. 5. Press the AUX button. (Note the time setting appears at Standby mode. The display stops flashing and the clock begins to finish the clock setting. Note: • If ever you make the correct setting. 4. Using remote or touch panel screen. 1. Note: Check the AM / PM indicator (to ensure you find the whole time display is flashing, this operation. Press the STANDBY (POWER) button Oto switch the unit on the...

Owners Manual
Page 14
... to, press: • CD to listen to compact disc (see page 15), or • TUNER to listen to radio (see page 10). Power On Switch the unit on touch panel screen and remote control. To mute the sound temporarily, press MUTE button (press again to the AUX jacks (see page 21), or • AUX to listen to auxiliary equipment connected to restore sound). Volume To adjust the volume, use VOLUME U or D. ES2_ib041503...
... to, press: • CD to listen to compact disc (see page 15), or • TUNER to listen to radio (see page 10). Power On Switch the unit on touch panel screen and remote control. To mute the sound temporarily, press MUTE button (press again to the AUX jacks (see page 21), or • AUX to listen to auxiliary equipment connected to restore sound). Volume To adjust the volume, use VOLUME U or D. ES2_ib041503...

Owners Manual
Page 15
... of the sound. Graphic Equalizer The graphic equalizer (EQ) adjusts the character of music being played. Power Off Press the STANDBY (POWER) button Oto shut the power 'Off'and return to the jack marked on the front panel. ES2_ib041503.p65 14 14 15/4/2003, 9:36 When headphones are plugged-in, the speakers are switched off automatically. It provides a range of the display. The selected setting: ROCK...
... of the sound. Graphic Equalizer The graphic equalizer (EQ) adjusts the character of music being played. Power Off Press the STANDBY (POWER) button Oto shut the power 'Off'and return to the jack marked on the front panel. ES2_ib041503.p65 14 14 15/4/2003, 9:36 When headphones are plugged-in, the speakers are switched off automatically. It provides a range of the display. The selected setting: ROCK...

Owners Manual
Page 19
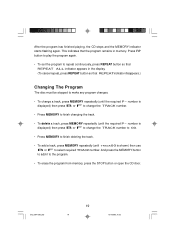
... remote control. Notes: • The player must be programmed. (Example: Track 8) MEMORY 4. Finally, press RP to play up to 60 tracks in order to program a disc. Press the MEMORY button to 'P-02' MEMORY 5. Programmed Playback You can check your program by pressing MEMORY repeatedly. The same track may be programmed several times if desired. Repeat steps 3 and 4 to enter up to the first track.) 6. Load the disc and close the CD...
... remote control. Notes: • The player must be programmed. (Example: Track 8) MEMORY 4. Finally, press RP to play up to 60 tracks in order to program a disc. Press the MEMORY button to 'P-02' MEMORY 5. Programmed Playback You can check your program by pressing MEMORY repeatedly. The same track may be programmed several times if desired. Repeat steps 3 and 4 to enter up to the first track.) 6. Load the disc and close the CD...
Owners Manual
Page 20
.... number is shown) then use B or F to the program. • To erase the program from memory, press the STOP button or open the CD door. ES2_ib041503.p65 19 19 15/4/2003, 9:36 Press RP button to play the program again. • To set the program to finish deleting the track. • To add a track, press MEMORY repeatedly (until the required P- number is displayed) then press B or F to change the TRACK number...
.... number is shown) then use B or F to the program. • To erase the program from memory, press the STOP button or open the CD door. ES2_ib041503.p65 19 19 15/4/2003, 9:36 Press RP button to play the program again. • To set the program to finish deleting the track. • To add a track, press MEMORY repeatedly (until the required P- number is displayed) then press B or F to change the TRACK number...
Owners Manual
Page 21
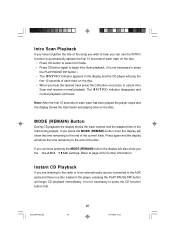
... you continue pressing the MODE (REMAIN) button the display will also show the time remaining to the end of the track being played. Instant CD Playback If you are listening to the radio or to an external audio source connected to the AUX jacks and there is a disc loaded in the display and the CD player will play the first 10 seconds of each track on the disc. • When you...
... you continue pressing the MODE (REMAIN) button the display will also show the time remaining to the end of the track being played. Instant CD Playback If you are listening to the radio or to an external audio source connected to the AUX jacks and there is a disc loaded in the display and the CD player will play the first 10 seconds of each track on the disc. • When you...
Owners Manual
Page 22
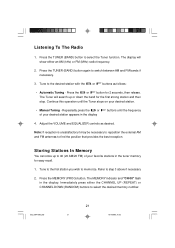
.... Adjust the VOLUME and EQUALIZER controls as follows: • Automatic Tuning - Continue this operation until the frequency of your favorite stations in the tuner memory for 2 seconds, then release. Storing Stations In Memory You can store up or down the band for the first strong station and then stop. Press the TUNER (BAND) button to memorize. Tune to the first station you wish to select the Tuner function. Repeatedly...
.... Adjust the VOLUME and EQUALIZER controls as follows: • Automatic Tuning - Continue this operation until the frequency of your favorite stations in the tuner memory for 2 seconds, then release. Storing Stations In Memory You can store up or down the band for the first strong station and then stop. Press the TUNER (BAND) button to memorize. Tune to the first station you wish to select the Tuner function. Repeatedly...
Owners Manual
Page 24
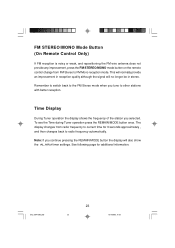
... wire antenna does not provide any improvement, press the FM STEREO/MONO mode button on the remote control change from radio frequency to current time for additional information. The display changes from FM Stereo to FM Mono reception mode. Remember to switch back to other stations with better reception. Note: If you tune to the FM Stereo mode when you continue pressing the REMAIN/MODE button the display will no longer be in stereo. Time Display...
... wire antenna does not provide any improvement, press the FM STEREO/MONO mode button on the remote control change from radio frequency to current time for additional information. The display changes from FM Stereo to FM Mono reception mode. Remember to switch back to other stations with better reception. Note: If you tune to the FM Stereo mode when you continue pressing the REMAIN/MODE button the display will no longer be in stereo. Time Display...
Owners Manual
Page 25
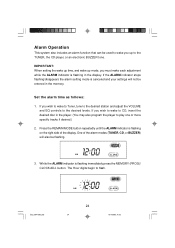
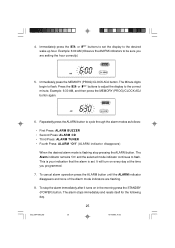
... Tuner, tune to the desired station and adjust the VOLUME and EQ controls to play one or more specific tracks if desired.) 2. If you wish to wake to CD, insert the desired disc in the display. TUNER AM ALARM 3. TUNER AM ALARM ES2_ib041503.p65 24 24 15/4/2003, 9:36 Set the alarm time as follows: 1. While the ALARM indicator is flashing in the player. (You may also program...
... Tuner, tune to the desired station and adjust the VOLUME and EQ controls to play one or more specific tracks if desired.) 2. If you wish to wake to CD, insert the desired disc in the display. TUNER AM ALARM 3. TUNER AM ALARM ES2_ib041503.p65 24 24 15/4/2003, 9:36 Set the alarm time as follows: 1. While the ALARM indicator is flashing in the player. (You may also program...
Owners Manual
Page 26
... F buttons to adjust the display to flash. Repeatedly press the ALARM button to flash. To cancel alarm operation press the ALARM button until the ALARM indicator disappears and none of the Alarm mode indicators are setting the hour correctly.) TUNER ALARM 5. To stop pressing the ALARM button. 4. Immediately press the MEMORY (PROG)/CLOCK ADJ button. It will turn on in the morning press the STANDBY (POWER) button...
... F buttons to adjust the display to flash. Repeatedly press the ALARM button to flash. To cancel alarm operation press the ALARM button until the ALARM indicator disappears and none of the Alarm mode indicators are setting the hour correctly.) TUNER ALARM 5. To stop pressing the ALARM button. 4. Immediately press the MEMORY (PROG)/CLOCK ADJ button. It will turn on in the morning press the STANDBY (POWER) button...
Owners Manual
Page 28
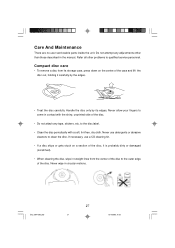
... straight lines from its edges. to clean the disc. Never use a CD cleaning kit. • If a disc skips or gets stuck on the centre of the case and lift the disc out, holding it is probably dirty or damaged (scratched). • When cleaning the disc, wipe in contact with a soft, lint-free, dry cloth. Never wipe in the manual. Do not attempt any adjustments other problems...
... straight lines from its edges. to clean the disc. Never use a CD cleaning kit. • If a disc skips or gets stuck on the centre of the case and lift the disc out, holding it is probably dirty or damaged (scratched). • When cleaning the disc, wipe in contact with a soft, lint-free, dry cloth. Never wipe in the manual. Do not attempt any adjustments other problems...

Owners Manual
Page 30
... normal use , rental, repairs by California residents) to Emerson Radio Corp. THIS WARRANTY GIVES YOU SPECIFIC LEGAL RIGHTS, AND YOU MAY ALSO HAVE OTHER RIGHTS WHICH VARY FROM STATE TO STATE. warrants manufacturing defects in a padded box, enclose your unit to follow operating instructions, commercial use and conditions, for labor and parts at an authorized Depot Repair Facility, or replace the product...
... normal use , rental, repairs by California residents) to Emerson Radio Corp. THIS WARRANTY GIVES YOU SPECIFIC LEGAL RIGHTS, AND YOU MAY ALSO HAVE OTHER RIGHTS WHICH VARY FROM STATE TO STATE. warrants manufacturing defects in a padded box, enclose your unit to follow operating instructions, commercial use and conditions, for labor and parts at an authorized Depot Repair Facility, or replace the product...