
Owners Manual
Page 2
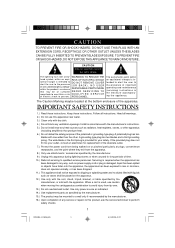
... alert the user to the presence of important operating and maintenance (servicing) instructions in accordance with the manufacturer's instructions. 5.) Do not install near water. 3.) Clean only with the apparatus. A polarized plug has two blades with arrow- PERSONNEL. A grounding type plug has two ... DO NOT USE THIS PLUG WITH AN EXTENSION CORD, RECEPTACLE OR OTHER OUTLET UNLESS THE BLADES CAN BE FULLY INSERTED TO PREVENT BLADE EXPOSURE. Servicing is provided for long periods of any ventilation openings. Use only power source as indicated. 14.) Use replacement parts as radiators,...
... alert the user to the presence of important operating and maintenance (servicing) instructions in accordance with the manufacturer's instructions. 5.) Do not install near water. 3.) Clean only with the apparatus. A polarized plug has two blades with arrow- PERSONNEL. A grounding type plug has two ... DO NOT USE THIS PLUG WITH AN EXTENSION CORD, RECEPTACLE OR OTHER OUTLET UNLESS THE BLADES CAN BE FULLY INSERTED TO PREVENT BLADE EXPOSURE. Servicing is provided for long periods of any ventilation openings. Use only power source as indicated. 14.) Use replacement parts as radiators,...
Owners Manual
Page 3
... only LED clock radio that batteries are sold. Unfortunately it in computer does everything else for your SmartSet® Clock Radio the dreaded flashing "12:00" display is a thing of all of enjoyment and dependable service. And if that it will automatically set one alarm to wake you up on time, every time. You don't have to get up early, and use the second alarm to wake you...
... only LED clock radio that batteries are sold. Unfortunately it in computer does everything else for your SmartSet® Clock Radio the dreaded flashing "12:00" display is a thing of all of enjoyment and dependable service. And if that it will automatically set one alarm to wake you up on time, every time. You don't have to get up early, and use the second alarm to wake you...
Owners Manual
Page 4
... the manual. • Before turning on the power, make certain that to operate the equipment. Operation is subject to the following measures: • Reorient or relocate the receiving antenna. • Increase the separation between the equipment and receiver. • Connect the equipment into an outlet on a circuit different from that the AC power cord is properly installed. • When moving the set...
... the manual. • Before turning on the power, make certain that to operate the equipment. Operation is subject to the following measures: • Reorient or relocate the receiving antenna. • Increase the separation between the equipment and receiver. • Connect the equipment into an outlet on a circuit different from that the AC power cord is properly installed. • When moving the set...

Owners Manual
Page 5
...the serial number on the bottom of your radio and write this number in the space provided on Warranty page of this cord. These 'feet'are made from sources of excess heat, dirt, dust, moisture, humidity, or vibration. • Unwind the AC power cord and extend it from the radio. To ... service. P R E PAR AT I O N F O R U S E Unpacking And Set Up • Remove the radio from the carton and remove all packing material from damage in transit. • Remove any descriptive labels or stickers on the front or top of the cabinet. We suggest that you operate the controls. The FM antenna ...
...the serial number on the bottom of your radio and write this number in the space provided on Warranty page of this cord. These 'feet'are made from sources of excess heat, dirt, dust, moisture, humidity, or vibration. • Unwind the AC power cord and extend it from the radio. To ... service. P R E PAR AT I O N F O R U S E Unpacking And Set Up • Remove the radio from the carton and remove all packing material from damage in transit. • Remove any descriptive labels or stickers on the front or top of the cabinet. We suggest that you operate the controls. The FM antenna ...
Owners Manual
Page 6
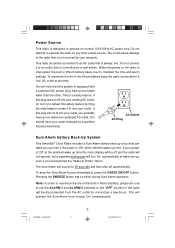
... selected wake up time the clock display will turn 'On'automatically to wake you up, even if you up even if the power is a safety feature. AC Outlet AC Plug Sure Alarm battery Back-Up System This SmartSet® Clock Radio includes a Sure Alarm battery back-up time. To stop the Sure Alarm buzzer immediately, press the RADIO ON/OFF button. CKS1862_110606.p65 5 5 6/11/2006, 9:47 You could cause damage to make...
... selected wake up time the clock display will turn 'On'automatically to wake you up, even if you up even if the power is a safety feature. AC Outlet AC Plug Sure Alarm battery Back-Up System This SmartSet® Clock Radio includes a Sure Alarm battery back-up time. To stop the Sure Alarm buzzer immediately, press the RADIO ON/OFF button. CKS1862_110606.p65 5 5 6/11/2006, 9:47 You could cause damage to make...
Owners Manual
Page 8
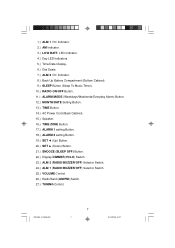
...Back Up Battery Compartment (Bottom Cabinet). 9.) SLEEP Button (Sleep To Music Timer). 10.) RADIO ON/OFF Button. 11.) ALARM MODE (Weekdays/Weekends/Everyday Alarm) Button. 12.) MONTH/DATE Setting Button. 13.) TIME Button. 14.) AC Power Cord (Back Cabinet). 15.) Speaker. 16.) TIME ZONE Button. 17.) ALARM 1 setting Button. 18.) ALARM 2 setting Button. 19.) SET (Up) Button. 20.) SET (Down) Button. 21.) SNOOZE (SLEEP OFF) Button. 22.) Display DIMMER (HI/LO) Switch. 23.) ALM 2 (RADIO/BUZZER/OFF) Selector Switch. 24.) ALM 1 (RADIO/BUZZER/OFF) Selector Switch. 25.) VOLUME Control. 26.) Radio Band (AM...
...Back Up Battery Compartment (Bottom Cabinet). 9.) SLEEP Button (Sleep To Music Timer). 10.) RADIO ON/OFF Button. 11.) ALARM MODE (Weekdays/Weekends/Everyday Alarm) Button. 12.) MONTH/DATE Setting Button. 13.) TIME Button. 14.) AC Power Cord (Back Cabinet). 15.) Speaker. 16.) TIME ZONE Button. 17.) ALARM 1 setting Button. 18.) ALARM 2 setting Button. 19.) SET (Up) Button. 20.) SET (Down) Button. 21.) SNOOZE (SLEEP OFF) Button. 22.) Display DIMMER (HI/LO) Switch. 23.) ALM 2 (RADIO/BUZZER/OFF) Selector Switch. 24.) ALM 1 (RADIO/BUZZER/OFF) Selector Switch. 25.) VOLUME Control. 26.) Radio Band (AM...
Owners Manual
Page 9
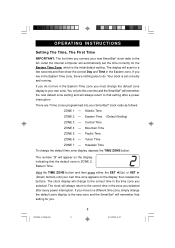
... that setting after every power interruption. The clock will always return to the new zone and the SmartSet® will always return to your SmartSet® clock radio as follows: ZONE 1 - Central Time ZONE 4 - The number "2" will automatically set correctly and running. If you move to a different time zone, simply change the default zone display to the correct time in the Eastern Time zone you must change the default time zone display, depress the TIME ZONE button...
... that setting after every power interruption. The clock will always return to the new zone and the SmartSet® will always return to your SmartSet® clock radio as follows: ZONE 1 - Central Time ZONE 4 - The number "2" will automatically set correctly and running. If you move to a different time zone, simply change the default zone display to the correct time in the Eastern Time zone you must change the default time zone display, depress the TIME ZONE button...
Owners Manual
Page 10
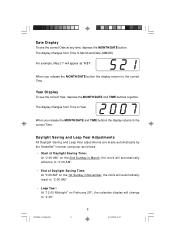
... of Daylight Saving Time: At "3:00 AM" on the 1st Sunday in November, the clock will automatically reset to "2 29". CKS1862_110606.p65 9 9 6/11/2006, 9:47 Date Display To see the correct Year, depress the MONTH/DATE and TIME buttons together. The display changes from Time to the correct Time. When you release the MONTH/DATE button the display returns to Year. When you release the MONTH/DATE and TIME buttons the display...
... of Daylight Saving Time: At "3:00 AM" on the 1st Sunday in November, the clock will automatically reset to "2 29". CKS1862_110606.p65 9 9 6/11/2006, 9:47 Date Display To see the correct Year, depress the MONTH/DATE and TIME buttons together. The display changes from Time to the correct Time. When you release the MONTH/DATE button the display returns to Year. When you release the MONTH/DATE and TIME buttons the display...
Owners Manual
Page 11
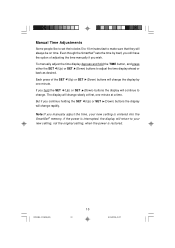
.../2006, 9:47 Manual Time Adjustments Some people like to set their clocks 5 to 10 minutes fast to make sure that they will change rapidly. If the power is interrupted, the display will change . If you still have the option of the SET (Up) or SET (Down) buttons will continue to change slowly at a time. Each press of adjusting the time manually if you manually adjust the time, your new setting, not the...
.../2006, 9:47 Manual Time Adjustments Some people like to set their clocks 5 to 10 minutes fast to make sure that they will change rapidly. If the power is interrupted, the display will change . If you still have the option of the SET (Up) or SET (Down) buttons will continue to change slowly at a time. Each press of adjusting the time manually if you manually adjust the time, your new setting, not the...

Owners Manual
Page 12
Adjusting The Wake Up Times Your SmartSet® clock radio has two separate alarms that you may use the alarms to wake two people at different times, or you have set and used independently. The procedure for adjusting the wake up time is the same for weekend wake up time appears on the display, release the ALARM 1 or ALARM 2 setting buttons. The display will change from the correct time to your desired wake up time. 3.) W hen the desired...
Adjusting The Wake Up Times Your SmartSet® clock radio has two separate alarms that you may use the alarms to wake two people at different times, or you have set and used independently. The procedure for adjusting the wake up time is the same for weekend wake up time appears on the display, release the ALARM 1 or ALARM 2 setting buttons. The display will change from the correct time to your desired wake up time. 3.) W hen the desired...

Owners Manual
Page 13
... Alarm Mode for either the ALARM 1 or ALARM 2 setting buttons. The alarm will change the Alarm Mode setting for Alarm 1, depress the ALARM 1 setting button. The display will turn on all 7 indicators are : • Everyday - Release the ALARM 1 or ALARM 2 setting buttons to return to the correct time. Selecting The Alarm Mode Your SmartSet® clock radio allows you to select from correct time to wake up time or the alarm mode settings, simply press either alarm. The alarm will return to correct time. The alarm modes...
... Alarm Mode for either the ALARM 1 or ALARM 2 setting buttons. The alarm will change the Alarm Mode setting for Alarm 1, depress the ALARM 1 setting button. The display will turn on all 7 indicators are : • Everyday - Release the ALARM 1 or ALARM 2 setting buttons to return to the correct time. Selecting The Alarm Mode Your SmartSet® clock radio allows you to select from correct time to wake up time or the alarm mode settings, simply press either alarm. The alarm will return to correct time. The alarm modes...
Owners Manual
Page 14
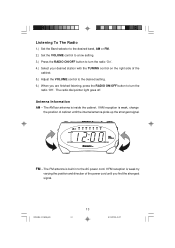
... VOLUME control to a low setting. 3.) Press the RADIO ON/OFF button to turn the radio 'Off'. If AM reception is built in to turn the radio 'On'. 4.) Select your desired station with the TUNING control on the right side of cabinet until you are finished listening, press the RADIO ON/OFF button to the AC power cord. The FM antenna is weak, change the position of the cabinet. 5.) Adjust...
... VOLUME control to a low setting. 3.) Press the RADIO ON/OFF button to turn the radio 'Off'. If AM reception is built in to turn the radio 'On'. 4.) Select your desired station with the TUNING control on the right side of cabinet until you are finished listening, press the RADIO ON/OFF button to the AC power cord. The FM antenna is weak, change the position of the cabinet. 5.) Adjust...
Owners Manual
Page 15
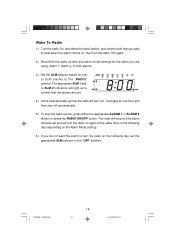
... button. Wake To Radio 1.) Turn the radio 'On'and select the band, station, and volume level that the alarms are using, Alarm 1, Alarm 2, or both alarms to the "RADIO" position. The appropriate ALM 1 and/ or ALM 2 indicators will light up to confirm that you are set. 4.) At the selected wake up time the radio will play for one or both alarms. 3.) Set the ALM selector switch for one hour and then shut off automatically. 5.) To stop...
... button. Wake To Radio 1.) Turn the radio 'On'and select the band, station, and volume level that the alarms are using, Alarm 1, Alarm 2, or both alarms to the "RADIO" position. The appropriate ALM 1 and/ or ALM 2 indicators will light up to confirm that you are set. 4.) At the selected wake up time the radio will play for one or both alarms. 3.) Set the ALM selector switch for one hour and then shut off automatically. 5.) To stop...
Owners Manual
Page 16
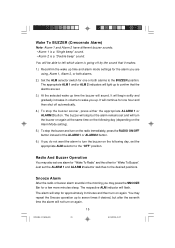
... minutes sleep. Snooze Alarm After the radio or buzzer alarm sounds in volume to wake you up time the buzzer will continue for one hour and then shut off automatically. 4.) To stop but after the seventh time the alarm will stop for approximately 9 minutes and then turn the buzzer on the following day (depending on the Alarm Mode setting). 5.) To stop the buzzer and turn on the radio immediately, press the RADIO ON/OFF button instead of the ALARM 1 or ALARM 2 button. 6.) If...
... minutes sleep. Snooze Alarm After the radio or buzzer alarm sounds in volume to wake you up time the buzzer will continue for one hour and then shut off automatically. 4.) To stop but after the seventh time the alarm will stop for approximately 9 minutes and then turn the buzzer on the following day (depending on the Alarm Mode setting). 5.) To stop the buzzer and turn on the radio immediately, press the RADIO ON/OFF button instead of the ALARM 1 or ALARM 2 button. 6.) If...
Owners Manual
Page 17
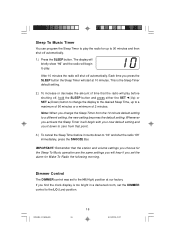
... is too bright in a darkened room, set the DIMMER control to a different setting, the new setting becomes the default setting. Dimmer Control The DIMMER control was set the alarm for the Sleep To Music operation are the same settings you change the display to the desired Sleep Time, up to "00"and shut the radio 'Off' immediately, press the SNOOZE Bar. CKS1862_110606.p65 16 16 6/11/2006, 9:47 Whenever you press the SLEEP button the Sleep Timer will...
... is too bright in a darkened room, set the DIMMER control to a different setting, the new setting becomes the default setting. Dimmer Control The DIMMER control was set the alarm for the Sleep To Music operation are the same settings you change the display to the desired Sleep Time, up to "00"and shut the radio 'Off' immediately, press the SNOOZE Bar. CKS1862_110606.p65 16 16 6/11/2006, 9:47 Whenever you press the SLEEP button the Sleep Timer will...
Owners Manual
Page 18
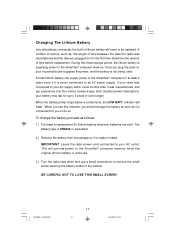
... you plugged it is never connected to install. To change the battery as soon as it in for up to your household outlet supplies the power, and the battery is removed. 3.) Turn the radio face down and use a small screwdriver to remove the small screw securing the battery holder to your radio was connected to 5 years or even longer. A number of time between the date the radio was...
... you plugged it is never connected to install. To change the battery as soon as it in for up to your household outlet supplies the power, and the battery is removed. 3.) Turn the radio face down and use a small screwdriver to remove the small screw securing the battery holder to your radio was connected to 5 years or even longer. A number of time between the date the radio was...
Owners Manual
Page 20
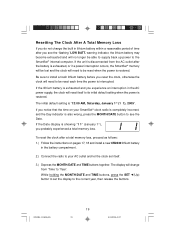
... supply back up power to its initial default setting when the power is interrupted. While holding the MONTH/DATE and TIME buttons, press the SET (Up) button to set itself to the SmartSet® internal computer. The display will change the built in the battery compartment. 2.) Connect the radio to your SmartSet® clock radio is completely incorrect, and the Day indicator is disconnected from 'Time'to see the 'flashing...
... supply back up power to its initial default setting when the power is interrupted. While holding the MONTH/DATE and TIME buttons, press the SET (Up) button to set itself to the SmartSet® internal computer. The display will change the built in the battery compartment. 2.) Connect the radio to your SmartSet® clock radio is completely incorrect, and the Day indicator is disconnected from 'Time'to see the 'flashing...

Owners Manual
Page 21
.../DATE button. The Day indicator will change from 'Time'to the correct Month and Date. When the correct Month and Date appear on the number and duration of the power outages you have set the time correctly to reset your wake up times, and alarm mode settings, and sleep timer settings as you set the time, reconfirm that the Day, and Month/Date displays are still correct. While holding the MONTH/DATE button, press the SET (Up) button to set...
.../DATE button. The Day indicator will change from 'Time'to the correct Month and Date. When the correct Month and Date appear on the number and duration of the power outages you have set the time correctly to reset your wake up times, and alarm mode settings, and sleep timer settings as you set the time, reconfirm that the Day, and Month/Date displays are still correct. While holding the MONTH/DATE button, press the SET (Up) button to set...
Owners Manual
Page 22
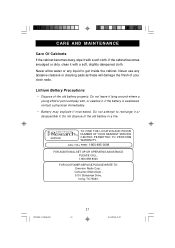
... FREE: 1-800-695-0098 FOR ADDITIONAL SET-UP OR OPERATING ASSISTANCE PLEASE CALL: 1-800-898-9020 FOR CUSTOMER SERVICE,PLEASE WRITE TO: Emerson Radio Corp., Consumer Affairs Dept., 5101 Statesman Drive, Irving, TX 75063. If the cabinet becomes smudged or dirty, clean it . Lithium Battery Precautions • Dispose of your clock radio. SERVICE TO FIND THE LOCATION AND PHONE NUMBER OF YOUR NEAREST SERVICE...
... FREE: 1-800-695-0098 FOR ADDITIONAL SET-UP OR OPERATING ASSISTANCE PLEASE CALL: 1-800-898-9020 FOR CUSTOMER SERVICE,PLEASE WRITE TO: Emerson Radio Corp., Consumer Affairs Dept., 5101 Statesman Drive, Irving, TX 75063. If the cabinet becomes smudged or dirty, clean it . Lithium Battery Precautions • Dispose of your clock radio. SERVICE TO FIND THE LOCATION AND PHONE NUMBER OF YOUR NEAREST SERVICE...
Owners Manual
Page 23
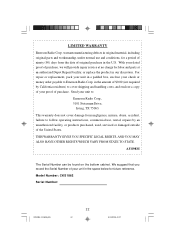
...follow operating instructions, commercial use and conditions, for labor and parts at an authorized Depot Repair Facility, or replace the product in the amount of $9.00 (not required by an unauthorized facility, or products purchased, used, serviced or damaged outside of the United States. THIS WARRANTY GIVES YOU SPECIFIC LEGAL... to : Emerson Radio Corp., 5101 Statesman Drive, Irving, TX 75063. We suggest that you record the Serial Number of purchase. With your dated proof of purchase, we will provide repair service at no charge for a period of ninety (90) days from the date of original ...
...follow operating instructions, commercial use and conditions, for labor and parts at an authorized Depot Repair Facility, or replace the product in the amount of $9.00 (not required by an unauthorized facility, or products purchased, used, serviced or damaged outside of the United States. THIS WARRANTY GIVES YOU SPECIFIC LEGAL... to : Emerson Radio Corp., 5101 Statesman Drive, Irving, TX 75063. We suggest that you record the Serial Number of purchase. With your dated proof of purchase, we will provide repair service at no charge for a period of ninety (90) days from the date of original ...


