
Owners Manual
Page 1
SPACE SAVING AM / FM CLOCK RADIO with DUAL ALARMS and NAP TIMER OWNER'S MANUAL CK5052 Visit our web site at www.emersonradio.com CK5052_ib041503.p65 17 15/4/2003, 10:30
SPACE SAVING AM / FM CLOCK RADIO with DUAL ALARMS and NAP TIMER OWNER'S MANUAL CK5052 Visit our web site at www.emersonradio.com CK5052_ib041503.p65 17 15/4/2003, 10:30
Owners Manual
Page 2
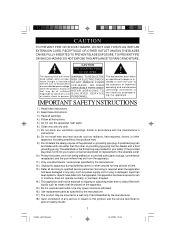
... BACK), NO USER within an equi- A grounding type plug has two blades and a third grounding prong. Use only power source as indicated. 16.) Use replacement parts as radiators, heat registers, stoves, or other . TO PREVENT FIRE OR SHOCK HAZARD, DO NOT EXPOSE THIS APPLIANCE TO RAIN OR MOISTURE. The lightning flash with the manufacturer's instructions. 8.) Do not install near water...
... BACK), NO USER within an equi- A grounding type plug has two blades and a third grounding prong. Use only power source as indicated. 16.) Use replacement parts as radiators, heat registers, stoves, or other . TO PREVENT FIRE OR SHOCK HAZARD, DO NOT EXPOSE THIS APPLIANCE TO RAIN OR MOISTURE. The lightning flash with the manufacturer's instructions. 8.) Do not install near water...
Owners Manual
Page 3
... to wake you many years of enjoyment and trouble free operation. We have managed to make sure that your wish. Thank you for purchasing this Emerson Space Saving AM/FM Clock Radio with the operation or performance of this instruction manual. The dual alarms can do more than that the radio won't take up too much space on your purchase. The Sure-Alarm battery back up time. Model: CK5052 Serial Number...
... to wake you many years of enjoyment and trouble free operation. We have managed to make sure that your wish. Thank you for purchasing this Emerson Space Saving AM/FM Clock Radio with the operation or performance of this instruction manual. The dual alarms can do more than that the radio won't take up too much space on your purchase. The Sure-Alarm battery back up time. Model: CK5052 Serial Number...
Owners Manual
Page 4
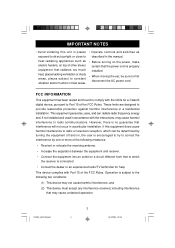
... for help. CK5052_ib041503.p65 3 3 15/4/2003, 10:30 Operation is subject to the following measures: • Reorient or relocate the receiving antenna. • Increase the separation between the equipment and receiver. • Connect the equipment into an outlet on the power, make certain that to which can radiate radio frequency energy and, if not installed and used in a residential installation...
... for help. CK5052_ib041503.p65 3 3 15/4/2003, 10:30 Operation is subject to the following measures: • Reorient or relocate the receiving antenna. • Increase the separation between the equipment and receiver. • Connect the equipment into an outlet on the power, make certain that to which can radiate radio frequency energy and, if not installed and used in a residential installation...
Owners Manual
Page 5
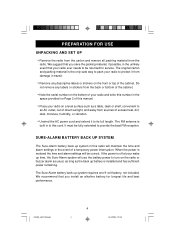
... pack your wake up time, the Sure-Alarm system will use the battery power to provide the best FM reception. We suggest that you save the packing material, if possible, in the unlikely event that you install an alkaline battery for service. When the power is restored the time and alarm settings will maintain the time and alarm settings in the event of a temporary power interruption. The Sure-Alarm battery back...
... pack your wake up time, the Sure-Alarm system will use the battery power to provide the best FM reception. We suggest that you save the packing material, if possible, in the unlikely event that you install an alkaline battery for service. When the power is restored the time and alarm settings will maintain the time and alarm settings in the event of a temporary power interruption. The Sure-Alarm battery back...
Owners Manual
Page 6
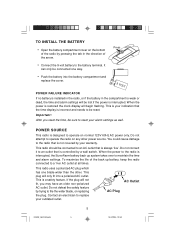
... Sure Alarm battery back up battery, keep the radio connected to a 'live '. If the plug will be connected one blade wider than the other power source. To maximize the life of the back up system takes over to maintain the time and alarm settings. This plug will begin flashing. This is restored the clock display will only fit into the battery compartment and replace the cover. 9 VOLT POWER FAILURE...
... Sure Alarm battery back up battery, keep the radio connected to a 'live '. If the plug will be connected one blade wider than the other power source. To maximize the life of the back up system takes over to maintain the time and alarm settings. This plug will begin flashing. This is restored the clock display will only fit into the battery compartment and replace the cover. 9 VOLT POWER FAILURE...
Owners Manual
Page 7
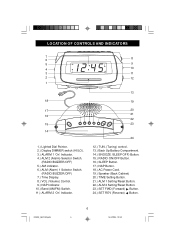
... (Alarm) 1 Selector Switch. (RADIO/BUZZER/OFF) 7.) Time Display. 8.) VOL (Volume) Control. 9.) NAP Indicator. 10.) Band (AM/FM) Switch. 11.) ALARM 2 'On'Indicator. 8 9 10 11 12 13 19 20 21 22 23 24 12.) TUN. (Tuning) control. 13.) Back Up Battery Compartment. 14.) SNOOZE /SLEEP OFF) Button. 15.) RADIO ON/OFF Button. 16.) SLEEP Button. 17.) NAP Button. 18.) AC Power Cord. 19.) Speaker (Back Cabinet) 20.) TIME Setting Button. 21.) ALM 1 Setting/Reset Button. 22.) ALM 2 Setting/Reset Button. 23.) SET FWD (Forward) Button. 24.) SET...
... (Alarm) 1 Selector Switch. (RADIO/BUZZER/OFF) 7.) Time Display. 8.) VOL (Volume) Control. 9.) NAP Indicator. 10.) Band (AM/FM) Switch. 11.) ALARM 2 'On'Indicator. 8 9 10 11 12 13 19 20 21 22 23 24 12.) TUN. (Tuning) control. 13.) Back Up Battery Compartment. 14.) SNOOZE /SLEEP OFF) Button. 15.) RADIO ON/OFF Button. 16.) SLEEP Button. 17.) NAP Button. 18.) AC Power Cord. 19.) Speaker (Back Cabinet) 20.) TIME Setting Button. 21.) ALM 1 Setting/Reset Button. 22.) ALM 2 Setting/Reset Button. 23.) SET FWD (Forward) Button. 24.) SET...
Owners Manual
Page 8
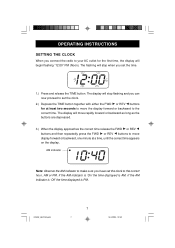
... move rapidly forward or backward as long as the buttons are depressed. 3.) When the display approaches the correct time release the FWD or REV buttons and then repeatedly press the FWD or REV buttons to move the display forward or backward to the correct time. OPERATING INSTRUCTIONS SETTING THE CLOCK When you connect the radio to your AC outlet for at least two seconds...
... move rapidly forward or backward as long as the buttons are depressed. 3.) When the display approaches the correct time release the FWD or REV buttons and then repeatedly press the FWD or REV buttons to move the display forward or backward to the correct time. OPERATING INSTRUCTIONS SETTING THE CLOCK When you connect the radio to your AC outlet for at least two seconds...

Owners Manual
Page 9
... WAKE UP TIMES This clock radio has two separate alarms that can be set the clock to the correct wake up hour, AM or PM. You may use the alarms to wake two people at a time, until the correct wake up time appears on the display. Note: Observe the AM indicator to make sure you may use one minute at different times, or you have set and used independently. The display will change...
... WAKE UP TIMES This clock radio has two separate alarms that can be set the clock to the correct wake up hour, AM or PM. You may use the alarms to wake two people at a time, until the correct wake up time appears on the display. Note: Observe the AM indicator to make sure you may use one minute at different times, or you have set and used independently. The display will change...
Owners Manual
Page 10
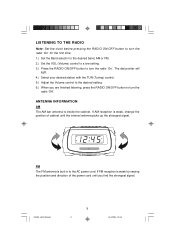
... (Volume) control to a low setting. 3.) Press the RADIO ON/OFF button to turn the radio 'Off'. ANTENNA INFORMATION AM The AM bar antenna is built in to the AC power cord. If FM reception is weak, change the position of the power cord until the internal antenna picks up the strongest signal. The dial pointer will light. 4.) Select your desired station with the TUN (Tuning) control. 5.) Adjust the Volume control to turn the radio...
... (Volume) control to a low setting. 3.) Press the RADIO ON/OFF button to turn the radio 'Off'. ANTENNA INFORMATION AM The AM bar antenna is built in to the AC power cord. If FM reception is weak, change the position of the power cord until the internal antenna picks up the strongest signal. The dial pointer will light. 4.) Select your desired station with the TUN (Tuning) control. 5.) Adjust the Volume control to turn the radio...
Owners Manual
Page 11
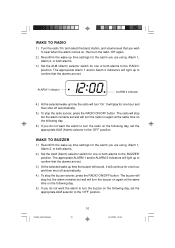
... day, set . WAKE TO RADIO 1.) Turn the radio 'On'and select the band, station, and volume level that you wish to hear when the alarm comes on, then turn the radio 'Off'again. 2.) Reconfirm the wake up time settings for the alarm you are using , Alarm 1, Alarm 2, or both alarms. 3.) Set the ALM (Alarm) selector switch for one or both alarms to the 'BUZZER' position. The radio will stop but the alarm remains set and will light up time the buzzer...
... day, set . WAKE TO RADIO 1.) Turn the radio 'On'and select the band, station, and volume level that you wish to hear when the alarm comes on, then turn the radio 'Off'again. 2.) Reconfirm the wake up time settings for the alarm you are using , Alarm 1, Alarm 2, or both alarms. 3.) Set the ALM (Alarm) selector switch for one or both alarms to the 'BUZZER' position. The radio will stop but the alarm remains set and will light up time the buzzer...
Owners Manual
Page 12
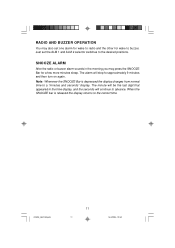
... seconds" display. RADIO AND BUZZER OPERATION You may press the SNOOZE Bar for a few more minutes sleep. Just set one alarm for wake to radio and the other for approximately 9 minutes and then turn on again. When the SNOOZE bar is depressed the display changes from normal time to the correct time. SNOOZE ALARM After the radio or buzzer alarm sounds in the time display, and the seconds will stop for wake to buzzer. The alarm will continue...
... seconds" display. RADIO AND BUZZER OPERATION You may press the SNOOZE Bar for a few more minutes sleep. Just set one alarm for wake to radio and the other for approximately 9 minutes and then turn on again. When the SNOOZE bar is depressed the display changes from normal time to the correct time. SNOOZE ALARM After the radio or buzzer alarm sounds in the time display, and the seconds will stop for wake to buzzer. The alarm will continue...
Owners Manual
Page 13
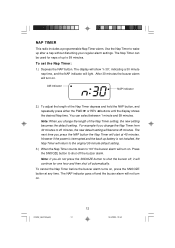
... setting. For example if you change the Nap Timer from 30 minutes to 45 minutes, the new default setting will light. The next time you do not press the SNOOZE button to shut off and the buzzer alarm will turn on . The Nap Timer can select between 1 minute and 99 minutes. CK5052_ib041503.p65 12 12 15/4/2003, 10:30 Use the Nap Timer to wake up battery is not installed, the Nap Timer...
... setting. For example if you change the Nap Timer from 30 minutes to 45 minutes, the new default setting will light. The next time you do not press the SNOOZE button to shut off and the buzzer alarm will turn on . The Nap Timer can select between 1 minute and 99 minutes. CK5052_ib041503.p65 12 12 15/4/2003, 10:30 Use the Nap Timer to wake up battery is not installed, the Nap Timer...
Owners Manual
Page 14
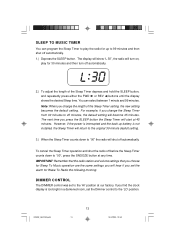
... time you press the SLEEP button the Sleep Timer will hear if you change the Sleep Timer from 30 minutes to the 'HI'position at 45 minutes. However, if the power is too bright in a darkened room, set the alarm for 30 minutes and then turn off automatically. Note: When you set the Dimmer control to "00", press the SNOOZE button at any time. For example, if you find the clock display...
... time you press the SLEEP button the Sleep Timer will hear if you change the Sleep Timer from 30 minutes to the 'HI'position at 45 minutes. However, if the power is too bright in a darkened room, set the alarm for 30 minutes and then turn off automatically. Note: When you set the Dimmer control to "00", press the SNOOZE button at any time. For example, if you find the clock display...
Owners Manual
Page 15
... a soft dust cloth only. Reset the clock and wake up battery compartment, the Time and Alarm settings will be wiped with a soft cloth that has been slightly dampened with a mild soap and water solution. CALL TOLL FREE: 1-800-695-0098 FOR ADDITIONAL SET-UP OR OPERATING ASSISTANCE PLEASE CALL: 1-800-898-9020 FOR CUSTOMER SERVICE, PLEASE WRITE TO: Emerson Radio Corp. Consumer Affairs Dept...
... a soft dust cloth only. Reset the clock and wake up battery compartment, the Time and Alarm settings will be wiped with a soft cloth that has been slightly dampened with a mild soap and water solution. CALL TOLL FREE: 1-800-695-0098 FOR ADDITIONAL SET-UP OR OPERATING ASSISTANCE PLEASE CALL: 1-800-898-9020 FOR CUSTOMER SERVICE, PLEASE WRITE TO: Emerson Radio Corp. Consumer Affairs Dept...
Owners Manual
Page 16
... from negligence, misuse, abuse, accident, failure to follow operating instructions, commercial use and conditions, for a period of ninety (90) days from the date of purchase, we will provide repair service at no charge for labor and parts at an authorized Depot Repair Facility, or replace the product in a padded box, enclose your unit to Emerson Radio Corp. AU898H ( CK5052_ib041503.p65 15 15 15/4/2003...
... from negligence, misuse, abuse, accident, failure to follow operating instructions, commercial use and conditions, for a period of ninety (90) days from the date of purchase, we will provide repair service at no charge for labor and parts at an authorized Depot Repair Facility, or replace the product in a padded box, enclose your unit to Emerson Radio Corp. AU898H ( CK5052_ib041503.p65 15 15 15/4/2003...


