
Owners Manual
Page 1
AM / FM CLOCK RADIO with DUAL ALARMS and NAP TIMER OWNER'S MANUAL CK5038 Visit our web site at www.emersonradio.com CK5038_032404.p65 19 24/3/2004, 11:27
AM / FM CLOCK RADIO with DUAL ALARMS and NAP TIMER OWNER'S MANUAL CK5038 Visit our web site at www.emersonradio.com CK5038_032404.p65 19 24/3/2004, 11:27
Owners Manual
Page 2
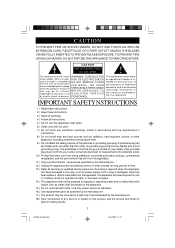
... periods of any way, such as power-supply cord or plug is provided for replacement of the obsolete outlet. 10.) Protect the power cord from being walked on the apparatus. 15.) Do not overload wall outlet. Servicing is required when the apparatus has been damaged in any service or repairs to this product, ask the service technician to perform safety checks. 1 CK5038_032404...
... periods of any way, such as power-supply cord or plug is provided for replacement of the obsolete outlet. 10.) Protect the power cord from being walked on the apparatus. 15.) Do not overload wall outlet. Servicing is required when the apparatus has been damaged in any service or repairs to this product, ask the service technician to perform safety checks. 1 CK5038_032404...
Owners Manual
Page 3
... wake you up system will operate the radio or buzzer alarm to radio if you wish. We have taken great care to use. Thank you for purchasing this Emerson Compact AM/FM Clock Radio with the operation or performance of this product please refer to the service and warranty information at the end of this instruction manual. All of course, but it left our factory. Model: CK5038 Serial Number...
... wake you up system will operate the radio or buzzer alarm to radio if you wish. We have taken great care to use. Thank you for purchasing this Emerson Compact AM/FM Clock Radio with the operation or performance of this product please refer to the service and warranty information at the end of this instruction manual. All of course, but it left our factory. Model: CK5038 Serial Number...
Owners Manual
Page 4
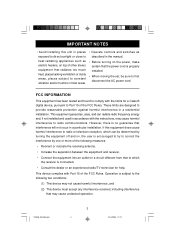
..., on top of other stereo equipment that radiates too much heat, places lacking ventilation or dusty areas, places subject to constant vibration and/or humid or moist areas. • Operate controls and switches as described in the manual. • Before turning on the power, make certain that the power cord is properly installed. • When moving the set, be determined by...
..., on top of other stereo equipment that radiates too much heat, places lacking ventilation or dusty areas, places subject to constant vibration and/or humid or moist areas. • Operate controls and switches as described in the manual. • Before turning on the power, make certain that the power cord is properly installed. • When moving the set, be determined by...
Owners Manual
Page 5
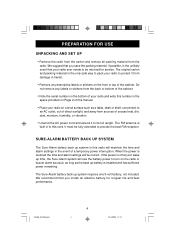
... your radio ever needs to turn on the front or top of a temporary power interruption. CK5038_032404.p65 4 4 24/3/2004, 11:27 The Sure-Alarm battery back up time, the Sure-Alarm system will maintain the time and alarm settings in the unlikely event that you install an alkaline battery for service. We suggest that your wake up system requires one 9-volt battery, not included. PREPARATION FOR USE...
... your radio ever needs to turn on the front or top of a temporary power interruption. CK5038_032404.p65 4 4 24/3/2004, 11:27 The Sure-Alarm battery back up time, the Sure-Alarm system will maintain the time and alarm settings in the unlikely event that you install an alkaline battery for service. We suggest that your wake up system requires one 9-volt battery, not included. PREPARATION FOR USE...
Owners Manual
Page 6
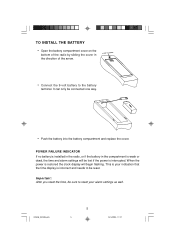
... direction of the radio by sliding the cover in the compartment is weak or dead, the time and alarm settings will begin flashing. Important: After you reset the time, be sure to the battery terminal. When the power is restored the clock display will be lost if the power is incorrect and needs to be connected one way. • Push the battery into the battery compartment and replace...
... direction of the radio by sliding the cover in the compartment is weak or dead, the time and alarm settings will begin flashing. Important: After you reset the time, be sure to the battery terminal. When the power is restored the clock display will be lost if the power is incorrect and needs to be connected one way. • Push the battery into the battery compartment and replace...
Owners Manual
Page 7
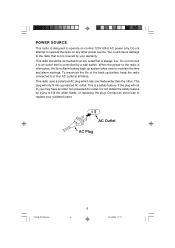
... time and alarm settings. Contact an electrician to replace your warranty. When the power to the radio is interrupted, the Sure Alarm battery back up battery, keep the radio connected to a 'live '. You could cause damage to the radio that is always 'live 'AC outlet at all times. This radio should be connected to an AC outlet that is not covered by your outdated outlet. This radio uses...
... time and alarm settings. Contact an electrician to replace your warranty. When the power to the radio is interrupted, the Sure Alarm battery back up battery, keep the radio connected to a 'live '. You could cause damage to the radio that is always 'live 'AC outlet at all times. This radio should be connected to an AC outlet that is not covered by your outdated outlet. This radio uses...

Owners Manual
Page 10
OPERATING INSTRUCTIONS SETTING THE CLOCK When you connect the radio to your AC outlet for at least two seconds to move display forward or backward, one minute at a time, until the correct time appears on the display. The flashing will stop flashing and you can now proceed to set the clock. 2.) Depress the TIME button together with either the UP or DOWN buttons for the first time, the display will begin...
OPERATING INSTRUCTIONS SETTING THE CLOCK When you connect the radio to your AC outlet for at least two seconds to move display forward or backward, one minute at a time, until the correct time appears on the display. The flashing will stop flashing and you can now proceed to set the clock. 2.) Depress the TIME button together with either the UP or DOWN buttons for the first time, the display will begin...

Owners Manual
Page 11
... correct wake up times. SETTING THE WAKE UP TIMES This clock radio has two separate alarms that can be set the clock to the correct wake up time is the same for both Alarm 1 and Alarm 2. 1.) Depress and hold either the UP or DOWN buttons for at least two seconds to move display forward or backward, one alarm for weekdays and the other for adjusting the wake up hour, AM...
... correct wake up times. SETTING THE WAKE UP TIMES This clock radio has two separate alarms that can be set the clock to the correct wake up time is the same for both Alarm 1 and Alarm 2. 1.) Depress and hold either the UP or DOWN buttons for at least two seconds to move display forward or backward, one alarm for weekdays and the other for adjusting the wake up hour, AM...
Owners Manual
Page 12
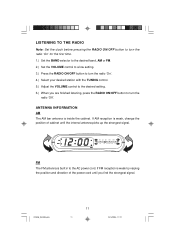
... the power cord until the internal antenna picks up the strongest signal. If AM reception is inside the cabinet. CK5038_032404.p65 11 11 24/3/2004, 11:27 LISTENING TO THE RADIO Note: Set the clock before pressing the RADIO ON/OFF button to turn the radio 'On'for the first time. 1.) Set the BAND selector to the desired band, AM or FM. 2.) Set the VOLUME control to a low setting...
... the power cord until the internal antenna picks up the strongest signal. If AM reception is inside the cabinet. CK5038_032404.p65 11 11 24/3/2004, 11:27 LISTENING TO THE RADIO Note: Set the clock before pressing the RADIO ON/OFF button to turn the radio 'On'for the first time. 1.) Set the BAND selector to the desired band, AM or FM. 2.) Set the VOLUME control to a low setting...

Owners Manual
Page 13
... band, station, and volume level that you wish to hear when the alarm comes on, then turn the radio 'Off'again. 2.) Reconfirm the wake up time settings for the alarm you are using , Alarm 1, Alarm 2, or both alarms. 2.) Set the ALARM selector switch for one hour and then shut off automatically. 4.) To stop the buzzer sooner, press the RADIO ON/OFF button. It will turn the radio on again at the same time on the following day...
... band, station, and volume level that you wish to hear when the alarm comes on, then turn the radio 'Off'again. 2.) Reconfirm the wake up time settings for the alarm you are using , Alarm 1, Alarm 2, or both alarms. 2.) Set the ALARM selector switch for one hour and then shut off automatically. 4.) To stop the buzzer sooner, press the RADIO ON/OFF button. It will turn the radio on again at the same time on the following day...

Owners Manual
Page 14
SNOOZE ALARM After the radio or buzzer alarm sounds in the time display, and the seconds will stop for approximately 9 minutes and then turn on again. The minute will be the last digit that appeared in the morning you may also set the ALARM 1 and ALARM 2 selector switches to the correct time. When the SNOOZE bar is depressed the display changes from normal time to buzzer. Just set one alarm for wake to radio and...
SNOOZE ALARM After the radio or buzzer alarm sounds in the time display, and the seconds will stop for approximately 9 minutes and then turn on again. The minute will be the last digit that appeared in the morning you may also set the ALARM 1 and ALARM 2 selector switches to the correct time. When the SNOOZE bar is depressed the display changes from normal time to buzzer. Just set one alarm for wake to radio and...
Owners Manual
Page 15
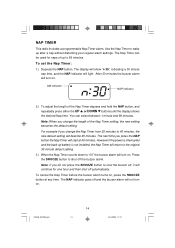
... the buzzer alarm will become 45 minutes. Note: If you change the Nap Timer from 30 minutes to shut off automatically. To set the Nap Timer: 1.) Depress the NAP button. For example if you press the NAP button the Nap Timer will light. The next time you change the length of the Nap Timer depress and hold the NAP button, and repeatedly press either the UP or DOWN buttons until the display shows the desired Nap time. NAP TIMER This radio...
... the buzzer alarm will become 45 minutes. Note: If you change the Nap Timer from 30 minutes to shut off automatically. To set the Nap Timer: 1.) Depress the NAP button. For example if you press the NAP button the Nap Timer will light. The next time you change the length of the Nap Timer depress and hold the NAP button, and repeatedly press either the UP or DOWN buttons until the display shows the desired Nap time. NAP TIMER This radio...
Owners Manual
Page 16
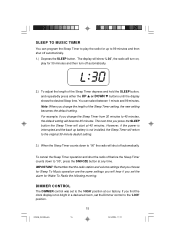
... next time you change the Sleep Timer from 30 minutes to 45 minutes, the default setting will turn off before the Sleep Timer counts down to play for 30 minutes and then turn on, play the radio for up battery is too bright in a darkened room, set the alarm for Sleep To Music operation are the same settings you set the Dimmer control to 99 minutes and then shut off automatically. If you find the clock display...
... next time you change the Sleep Timer from 30 minutes to 45 minutes, the default setting will turn off before the Sleep Timer counts down to play for 30 minutes and then turn on, play the radio for up battery is too bright in a darkened room, set the alarm for Sleep To Music operation are the same settings you set the Dimmer control to 99 minutes and then shut off automatically. If you find the clock display...
Owners Manual
Page 17
... FOR CUSTOMER SERVICE, PLEASE WRITE TO: Emerson Radio Corp. Consumer Affairs Dept. 1901 Diplomat Drive, Farmers Branch, TX 75234. Reset the clock and wake up battery compartment, the Time and Alarm settings will be wiped with a soft cloth that has been slightly dampened with a soft dust cloth only. Please refer all service problems to get inside this manual for cleaning. Always disconnect the power cord from...
... FOR CUSTOMER SERVICE, PLEASE WRITE TO: Emerson Radio Corp. Consumer Affairs Dept. 1901 Diplomat Drive, Farmers Branch, TX 75234. Reset the clock and wake up battery compartment, the Time and Alarm settings will be wiped with a soft cloth that has been slightly dampened with a soft dust cloth only. Please refer all service problems to get inside this manual for cleaning. Always disconnect the power cord from...
Owners Manual
Page 18
... repair service at an authorized Depot Repair Facility, or replace the product in our discretion. For repair or replacement, pack your unit in the U.S. warrants manufacturing defects in original material, including original parts and workmanship, under normal use and conditions, for labor and parts at no charge for a period of ninety (90) days from negligence, misuse, abuse, accident, failure to follow operating instructions, commercial use...
... repair service at an authorized Depot Repair Facility, or replace the product in our discretion. For repair or replacement, pack your unit in the U.S. warrants manufacturing defects in original material, including original parts and workmanship, under normal use and conditions, for labor and parts at no charge for a period of ninety (90) days from negligence, misuse, abuse, accident, failure to follow operating instructions, commercial use...

Owners Manual
Page 19
EMERSON Part No. : 16-2944 403-01 CK5038_032404.p65 18 Printed in China 24/3/2004, 11:27
EMERSON Part No. : 16-2944 403-01 CK5038_032404.p65 18 Printed in China 24/3/2004, 11:27


