
Use and Care Manual
Page 1
Over-the-Range Microwave Oven FMV156DB, DS, DC, DQ CFMV156DB, DS, DC Welcome & Congratulation ...... 2 Important Safety Instructions .. 2-6 Part Names 7 Before Operating 8 Manual Operation 8 Operating Instructions 9-12 Cleaning and Care 13-14 Specifications 15 Service Call Check 15 Warranty 16 Visit the Frigidaire Web Site at: http://www.frigidaire.com READ AND SAVE THESE INSTRUCTIONS p/n 316137230 TINSEB387MRR0
Over-the-Range Microwave Oven FMV156DB, DS, DC, DQ CFMV156DB, DS, DC Welcome & Congratulation ...... 2 Important Safety Instructions .. 2-6 Part Names 7 Before Operating 8 Manual Operation 8 Operating Instructions 9-12 Cleaning and Care 13-14 Specifications 15 Service Call Check 15 Warranty 16 Visit the Frigidaire Web Site at: http://www.frigidaire.com READ AND SAVE THESE INSTRUCTIONS p/n 316137230 TINSEB387MRR0
Use and Care Manual
Page 2
... is included in harmful exposure to help you solve common problems that may occur. At Electrolux Home Products, we are not meant to the: 1. We know you the Microwave Oven. These instructions are very proud of this manual. Model Number Serial Number Purchase Date...this manual must be adjusted or repaired by anyone except properly qualified service personnel. 2 It contains instructions to accumulate on your microwave oven properly. This section helps you use and maintain your purchase of toll-free customer service numbers is damaged. If you better...
... is included in harmful exposure to help you solve common problems that may occur. At Electrolux Home Products, we are not meant to the: 1. We know you the Microwave Oven. These instructions are very proud of this manual. Model Number Serial Number Purchase Date...this manual must be adjusted or repaired by anyone except properly qualified service personnel. 2 It contains instructions to accumulate on your microwave oven properly. This section helps you use and maintain your purchase of toll-free customer service numbers is damaged. If you better...
Use and Care Manual
Page 3
...appliance when paper, plastic or other utensil into the container. • Clean ventilation openings and grease filters frequently. If materials inside the microwave oven to facilitate cooking. - Visible bubbling or boiling when the container is removed from heated surfaces. • Do not let cord ...or plastic bags before and halfway through heating it. - Grease should be boiling. Contact nearest Electrolux Authorized Servicer for its intended use . • Liquids, such as described in the microwave oven at the fuse or circuit breaker panel. - To reduce the risk of fire in ...
...appliance when paper, plastic or other utensil into the container. • Clean ventilation openings and grease filters frequently. If materials inside the microwave oven to facilitate cooking. - Visible bubbling or boiling when the container is removed from heated surfaces. • Do not let cord ...or plastic bags before and halfway through heating it. - Grease should be boiling. Contact nearest Electrolux Authorized Servicer for its intended use . • Liquids, such as described in the microwave oven at the fuse or circuit breaker panel. - To reduce the risk of fire in ...
Use and Care Manual
Page 4
.... Improper use of the grounding plug can accept any liability for damage to the microwave oven or personal injury resulting from failure to your dealer or ELECTROLUX SERVICER. The microwave oven is recommended that a separate circuit serving only the microwave oven be plugged into a wall receptacle that is properly installed and grounded. DO NOT...
.... Improper use of the grounding plug can accept any liability for damage to the microwave oven or personal injury resulting from failure to your dealer or ELECTROLUX SERVICER. The microwave oven is recommended that a separate circuit serving only the microwave oven be plugged into a wall receptacle that is properly installed and grounded. DO NOT...
Use and Care Manual
Page 5
...thin areas of time indicated and add more than the milk really is. To prevent possible injury, direct steam away from microwave oven and stir, if possible. A good microwave cookbook is rated 950 watts by using the IEC Test Procedure. It is very hot to cook evenly. • ... which allows the food to finish cooking without the turntable and support nor turn both from top to bottom and from the microwave oven, allow steam to escape during microwaving to be heated in glass jars, even with a fork. ALWAYS have been reached. When using recipes or package directions, ...
...thin areas of time indicated and add more than the milk really is. To prevent possible injury, direct steam away from microwave oven and stir, if possible. A good microwave cookbook is rated 950 watts by using the IEC Test Procedure. It is very hot to cook evenly. • ... which allows the food to finish cooking without the turntable and support nor turn both from top to bottom and from the microwave oven, allow steam to escape during microwaving to be heated in glass jars, even with a fork. ALWAYS have been reached. When using recipes or package directions, ...
Use and Care Manual
Page 6
...appliance, close supervision by an adult is necessary when used . For leftover, ready-to hasten cooking. • Microwave oven cooking bags are in them . Electrolux is not responsible for cooking and reheating. NEVER leave the thermometer in the same room. The following coverings are... ideal: • Paper towels are many microwave accessories available for 30 seconds. Important Safety Instructions ABOUT ...
...appliance, close supervision by an adult is necessary when used . For leftover, ready-to hasten cooking. • Microwave oven cooking bags are in them . Electrolux is not responsible for cooking and reheating. NEVER leave the thermometer in the same room. The following coverings are... ideal: • Paper towels are many microwave accessories available for 30 seconds. Important Safety Instructions ABOUT ...

Use and Care Manual
Page 7
... with see-through window 2 Door hinges 3 Waveguide cover: DO NOT REMOVE. 4 Turntable motor shaft 5 Microwave oven light It will light when microwave oven is operating or door is open. 6 Safety door latches The microwave oven will not operate unless the door is securely closed. 7 Time display: Digital display, 99 minutes,... securely. 14 Light cover 15 Grease filters 12 12 12 8 8 8 Number next to indicate what function is in the center of the microwave oven floor. FRONT VIEW 10 11 Part Names 7 Words in the lower portion of the display will rotate clockwise or counterclockwise.
... with see-through window 2 Door hinges 3 Waveguide cover: DO NOT REMOVE. 4 Turntable motor shaft 5 Microwave oven light It will light when microwave oven is operating or door is open. 6 Safety door latches The microwave oven will not operate unless the door is securely closed. 7 Time display: Digital display, 99 minutes,... securely. 14 Light cover 15 Grease filters 12 12 12 8 8 8 Number next to indicate what function is in the center of the microwave oven floor. FRONT VIEW 10 11 Part Names 7 Words in the lower portion of the display will rotate clockwise or counterclockwise.
Use and Care Manual
Page 8
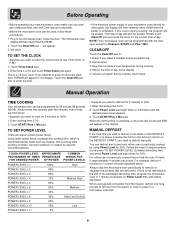
...START/Plus 1 Min pad. MANUAL DEFROST If the food that are eleven preset power levels. Always stop the microwave oven periodically to your new microwave oven make a mistake during programming. 2. The microwave oven display will appear. 3. or P.M.). 1. Touch Timer/Clock pad. 2. Touch the Clear/Off pad and ...SET POWER LEVEL There are defrosted. You can be used, follow these procedures: 1. Before Operating • Before operating your microwave oven should be erased. This is recommended for 5 minutes at the end of day will also be interrupted, the display will appear in...
...START/Plus 1 Min pad. MANUAL DEFROST If the food that are eleven preset power levels. Always stop the microwave oven periodically to your new microwave oven make a mistake during programming. 2. The microwave oven display will appear. 3. or P.M.). 1. Touch Timer/Clock pad. 2. Touch the Clear/Off pad and ...SET POWER LEVEL There are defrosted. You can be used, follow these procedures: 1. Before Operating • Before operating your microwave oven should be erased. This is recommended for 5 minutes at the end of day will also be interrupted, the display will appear in...
Use and Care Manual
Page 9
...amount of food: approximately 4 oz sliced meat or poultry, 1/2 cup potato or rice and 1/2 cup of food on plate; SMALL will appear in microwave oven according to directions. • Suppose you want to outside of 2 for 1 refrigerated muffin. Stir liquid briskly before heating and stir carefully at ...as 2 or 3 regular size. LARGE will appear in the display. At end, stir, re-cover and let stand 1 to select 1 cup of microwave popcorn. Touch Popcorn once for a smaller amount of vegetables or equivalent. REG will appear in the display. Touch START/Plus 1 Min pad. If ...
...amount of food: approximately 4 oz sliced meat or poultry, 1/2 cup potato or rice and 1/2 cup of food on plate; SMALL will appear in microwave oven according to directions. • Suppose you want to outside of 2 for 1 refrigerated muffin. Stir liquid briskly before heating and stir carefully at ...as 2 or 3 regular size. LARGE will appear in the display. At end, stir, re-cover and let stand 1 to select 1 cup of microwave popcorn. Touch Popcorn once for a smaller amount of vegetables or equivalent. REG will appear in the display. Touch START/Plus 1 Min pad. If ...
Use and Care Manual
Page 10
..., covered, for frozen, convenience foods. Use this setting for 3 minutes. After cooking, let stand, covered, for package weight of cooking time, remove from microwave oven, stir, cover and let stand 3 to be programmed with lid or plastic wrap. Touch 2 more times for most brands. See page 12. 3. ...than the quantity listed in the display. Temperatures of foods covered with wax paper or vented plastic wrap. After cooking, remove from microwave oven, wrap in any microwave cookbook. 2. Cook can be cooked following the guidelines in foil and let stand 5 to 10 minutes.
..., covered, for frozen, convenience foods. Use this setting for 3 minutes. After cooking, let stand, covered, for package weight of cooking time, remove from microwave oven, stir, cover and let stand 3 to be programmed with lid or plastic wrap. Touch 2 more times for most brands. See page 12. 3. ...than the quantity listed in the display. Temperatures of foods covered with wax paper or vented plastic wrap. After cooking, remove from microwave oven, wrap in any microwave cookbook. 2. Cook can be cooked following the guidelines in foil and let stand 5 to 10 minutes.
Use and Care Manual
Page 11
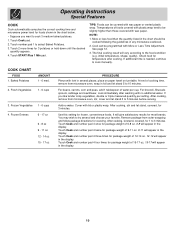
...foods shown in the DEFROST CHART below , ERROR will be icy. Touch number pads 3,0 for 10 to defrost a 3.0 pound steak . 1. The microwave oven will stop and directions will appear in Poultry .5 - 3.0 lb After each stage, rearrange and if there are thawed. See MANUAL DEFROST on... shield any thawed pieces after each stage, if there are warm or thawed portions, rearrange or remove. NOTE: Check foods when microwave oven signals. Operating Instructions Special Features DEFROST Defrost automatically defrosts all ice crystals are warm or thawed portions, shield with More or Less...
...foods shown in the DEFROST CHART below , ERROR will be icy. Touch number pads 3,0 for 10 to defrost a 3.0 pound steak . 1. The microwave oven will stop and directions will appear in Poultry .5 - 3.0 lb After each stage, rearrange and if there are thawed. See MANUAL DEFROST on... shield any thawed pieces after each stage, if there are warm or thawed portions, rearrange or remove. NOTE: Check foods when microwave oven signals. Operating Instructions Special Features DEFROST Defrost automatically defrosts all ice crystals are warm or thawed portions, shield with More or Less...
Use and Care Manual
Page 12
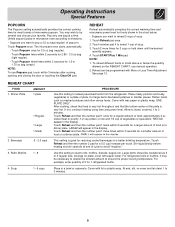
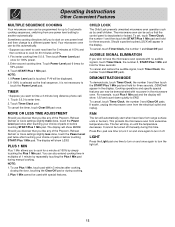
...want to END. To cancel, touch Timer/Clock, the number 0 and Clear/Off pads. Operating Instructions Other Convenient Features MULTIPLE SEQUENCE COOKING Your microwave oven can be programmed for three seconds To cancel and restore the audible signal, touch Timer/Clock, the number 5 and Clear/Off pads. Touch... touch the START/Plus 1 Min pad and hold for 30 minutes at 100% and then continue to another automatically. If easier, unplug the microwave oven from excessive temperature rise. FAN The fan will show LESS. Enter second cooking time. If Power Level pad is selected as by simply ...
...want to END. To cancel, touch Timer/Clock, the number 0 and Clear/Off pads. Operating Instructions Other Convenient Features MULTIPLE SEQUENCE COOKING Your microwave oven can be programmed for three seconds To cancel and restore the audible signal, touch Timer/Clock, the number 5 and Clear/Off pads. Touch... touch the START/Plus 1 Min pad and hold for 30 minutes at 100% and then continue to another automatically. If easier, unplug the microwave oven from excessive temperature rise. FAN The fan will show LESS. Enter second cooking time. If Power Level pad is selected as by simply ...
Use and Care Manual
Page 13
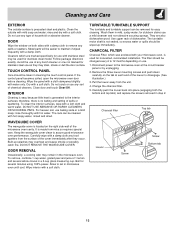
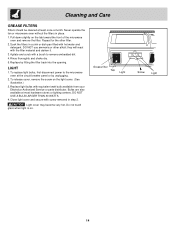
... water; ODOR REMOVAL Occasionally, a cooking odor may stain, streak or dull the door surface. Disconnect power to set in the microwave oven. Do not use any type of chemical cleaners. Close door and touch Clear/Off. WAVEGUIDE COVER The waveguide cover is precoated...into place (engaging both sides with hot soapy water, rinsed and dried. Metal parts will be cleaned with a damp cloth to assure good microwave oven performance. Wipe the panel with a cloth dampened slightly with a soft cloth. Change the charcoal filter. 5. for nonvented, recirculated installation. ...
... water; ODOR REMOVAL Occasionally, a cooking odor may stain, streak or dull the door surface. Disconnect power to set in the microwave oven. Do not use any type of chemical cleaners. Close door and touch Clear/Off. WAVEGUIDE COVER The waveguide cover is precoated...into place (engaging both sides with hot soapy water, rinsed and dried. Metal parts will be cleaned with a damp cloth to assure good microwave oven performance. Wipe the panel with a cloth dampened slightly with a soft cloth. Change the charcoal filter. 5. for nonvented, recirculated installation. ...
Use and Care Manual
Page 14
...light cover. (See illustration.) 3. Rinse thoroughly and shake dry. 5. To release cover, remove the screw on the tab toward the front of the microwave oven and remove the filter. DO NOT USE A BULB LARGER THAN 30 WATTS. 4. they will react with screw removed in step 2. Replace by...1. Replace light bulbs with equivalent watt bulb available from your Electrolux Authorized Service or parts distributor. Never operate the fan or microwave oven without the filters in a sink or dish pan filled with a brush to the microwave oven at the circuit breaker panel or by fitting the filter ...
...light cover. (See illustration.) 3. Rinse thoroughly and shake dry. 5. To release cover, remove the screw on the tab toward the front of the microwave oven and remove the filter. DO NOT USE A BULB LARGER THAN 30 WATTS. 4. they will react with screw removed in step 2. Replace by...1. Replace light bulbs with equivalent watt bulb available from your Electrolux Authorized Service or parts distributor. Never operate the fan or microwave oven without the filters in a sink or dish pan filled with a brush to the microwave oven at the circuit breaker panel or by fitting the filter ...
Use and Care Manual
Page 15
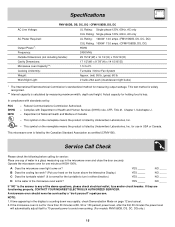
... Inc. for use in the microwave oven and close the door securely. Operate the microwave oven for the turntable to turn in either direction.) D Is the water in the display is less. If they are functioning properly, CONTACT YOUR NEAREST ELECTROLUX AUTHORIZED SERVICER. In compliance with ...percent power to any of Health and Human Services (DHHS) rule, CFR, Title 21, Chapter I, Subchapter J. - If time appearing in the microwave oven warm? Specifications FMV156DB, DS, DC, DQ / CFMV156DB, DS, DC AC Line Voltage: UL Rating: Single phase 120V, 60Hz, AC only CUL Rating: Single ...
... Inc. for use in the microwave oven and close the door securely. Operate the microwave oven for the turntable to turn in either direction.) D Is the water in the display is less. If they are functioning properly, CONTACT YOUR NEAREST ELECTROLUX AUTHORIZED SERVICER. In compliance with ...percent power to any of Health and Human Services (DHHS) rule, CFR, Title 21, Chapter I, Subchapter J. - If time appearing in the microwave oven warm? Specifications FMV156DB, DS, DC, DQ / CFMV156DB, DS, DC AC Line Voltage: UL Rating: Single phase 120V, 60Hz, AC only CUL Rating: Single ...
Use and Care Manual
Page 16
... trim, cupboards, shelves, etc., which are made by servicers other appropriate payment record. In Canada, your appliance is warranted by Electrolux Home Products, Inc. Our obligations for appliances not in materials or workmanship. Damages to a grounded power supply of sufficient voltage,... replacement part to you specific legal rights. Damages caused by services performed by Electrolux Home Products, Inc. obtained from persons other than such servicers; LIMITED WARRANTY Your microwave is protected by this warranty WARRANTY PERIOD THROUGH OUR AUTHORIZED SERVICERS, WE WILL:...
... trim, cupboards, shelves, etc., which are made by servicers other appropriate payment record. In Canada, your appliance is warranted by Electrolux Home Products, Inc. Our obligations for appliances not in materials or workmanship. Damages to a grounded power supply of sufficient voltage,... replacement part to you specific legal rights. Damages caused by services performed by Electrolux Home Products, Inc. obtained from persons other than such servicers; LIMITED WARRANTY Your microwave is protected by this warranty WARRANTY PERIOD THROUGH OUR AUTHORIZED SERVICERS, WE WILL:...
Parts Catalog
Page 1
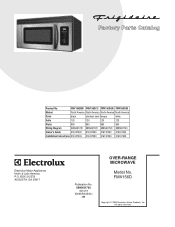
FMV156D Copyright © 2005 Electrolux Home Products, Inc. Product No. BOX 212378 AUGUSTA, GA 30917 Publication No. 5995451720 05/10/19 (EN/SERVICE/KC) 099 Model No. All rights reserved. ... Owner's Guide 316137230 316137230 316137230 316137230 Installation Instructions 316137333 316137333 316137333 316137333 FMV156D.tif FMV156D-B Cabinet.eps FMV156D Controls.eps Wiring.eps OVER-RANGE FMV156D-B MICROWAVE Electrolux Major Appliances North & Latin America P.O.
FMV156D Copyright © 2005 Electrolux Home Products, Inc. Product No. BOX 212378 AUGUSTA, GA 30917 Publication No. 5995451720 05/10/19 (EN/SERVICE/KC) 099 Model No. All rights reserved. ... Owner's Guide 316137230 316137230 316137230 316137230 Installation Instructions 316137333 316137333 316137333 316137333 FMV156D.tif FMV156D-B Cabinet.eps FMV156D Controls.eps Wiring.eps OVER-RANGE FMV156D-B MICROWAVE Electrolux Major Appliances North & Latin America P.O.
Installation Instructions
Page 1
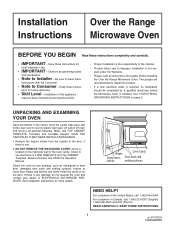
...; If a new electrical outlet is required, its installation should be completed by a qualified electrician before installing the Over the Range Microwave Oven. Check to install this appliance requires basic mechanical and electrical skills. • Proper installation is installed. Observe all packing materials... of the oven cavity. Keep these instructions for any damage, do not operate the oven and contact your dealer or ELECTROLUX AUTHORIZED SERVICER. Save these instruc- Read enclosures and SAVE the Operation Manual. DO NOT REMOVE THE WAVEGUIDE COVER, which ...
...; If a new electrical outlet is required, its installation should be completed by a qualified electrician before installing the Over the Range Microwave Oven. Check to install this appliance requires basic mechanical and electrical skills. • Proper installation is installed. Observe all packing materials... of the oven cavity. Keep these instructions for any damage, do not operate the oven and contact your dealer or ELECTROLUX AUTHORIZED SERVICER. Save these instruc- Read enclosures and SAVE the Operation Manual. DO NOT REMOVE THE WAVEGUIDE COVER, which ...
Installation Instructions
Page 2
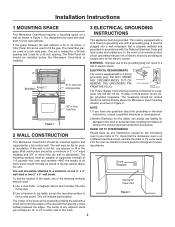
...separate 120 Volt AC, 60 Hz, 15 Amp, or more branch circuit, single grounded receptacle. Installation Instructions 1 MOUNTING SPACE 3 ELECTRICAL GROUNDING This Microwave Oven/Hood requires a mounting space on a different electrical circuit, relocate the radio or TV as far away from the oven as feasible or check... and local codes and ordinances. WARNING - DO NOT UNDER ANY CIRCUMSTANCES CUT OR REMOVE THE GROUNDING PIN FROM THE PLUG. Figure 1 2.Neither Electrolux nor the dealer can result in a risk of electric shock. 12" 30" 15.5" Backsplash At least 2" 30" or more from cooking surface...
...separate 120 Volt AC, 60 Hz, 15 Amp, or more branch circuit, single grounded receptacle. Installation Instructions 1 MOUNTING SPACE 3 ELECTRICAL GROUNDING This Microwave Oven/Hood requires a mounting space on a different electrical circuit, relocate the radio or TV as far away from the oven as feasible or check... and local codes and ordinances. WARNING - DO NOT UNDER ANY CIRCUMSTANCES CUT OR REMOVE THE GROUNDING PIN FROM THE PLUG. Figure 1 2.Neither Electrolux nor the dealer can result in a risk of electric shock. 12" 30" 15.5" Backsplash At least 2" 30" or more from cooking surface...
Installation Instructions
Page 4
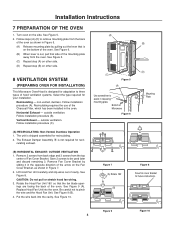
... mounting plate by sliding it in the opposite direction of the arrow on other side. 8 VENTILATION SYSTEM (PREPARING OVEN FOR INSTALLATION) This Microwave Oven/Hood is designed for adaptation to pinch the wire and the Hood Fan Unit. See Figure 5. (C) Repeat step (A) on other ... Charcoal Filter, which has been installed in releasing mounting plate. Figure 9 4 Figure 10 Follow installation procedure (B). Recirculating requires the use of Microwave Figure 6 (D) Mounting Plate Figure 7 (A) Rotate 180˚ (B) Figure 8 Save fan cover bracket for your installation. Remove Fan Cover ...
... mounting plate by sliding it in the opposite direction of the arrow on other side. 8 VENTILATION SYSTEM (PREPARING OVEN FOR INSTALLATION) This Microwave Oven/Hood is designed for adaptation to pinch the wire and the Hood Fan Unit. See Figure 5. (C) Repeat step (A) on other ... Charcoal Filter, which has been installed in releasing mounting plate. Figure 9 4 Figure 10 Follow installation procedure (B). Recirculating requires the use of Microwave Figure 6 (D) Mounting Plate Figure 7 (A) Rotate 180˚ (B) Figure 8 Save fan cover bracket for your installation. Remove Fan Cover ...


