Use and Care Manual
Page 2
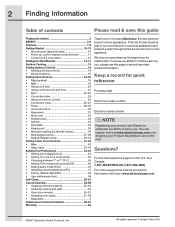
... 22-23 • Convection bake 24 • Using convection convert 25 • Convection roast 26-27 • Probe 28-29 • Convection broil 30 • Keep warm 31 • Slow cook 32 • Perfect turkey 33 • Defrost 34 • Dehydrate 34 • Bread proof 35 ... save this page to record important product information. Keep a record for choosing Electrolux, the new premium brand in the mail. Printed in the U.S. All rights reserved. This Use & Care Guide is part of our commitment to customer satisfaction and product quality throughout the service life of...
... 22-23 • Convection bake 24 • Using convection convert 25 • Convection roast 26-27 • Probe 28-29 • Convection broil 30 • Keep warm 31 • Slow cook 32 • Perfect turkey 33 • Defrost 34 • Dehydrate 34 • Bread proof 35 ... save this page to record important product information. Keep a record for choosing Electrolux, the new premium brand in the mail. Printed in the U.S. All rights reserved. This Use & Care Guide is part of our commitment to customer satisfaction and product quality throughout the service life of...
Use and Care Manual
Page 4
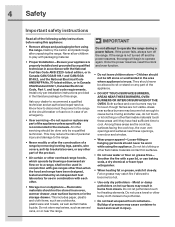
... burst and result in burns from steam. Do not store explosives, such as flammable liquids. During and after unpacking the range. Smother the fire with the National Fuel Gas Code ANSI Z223- Ask your appliance is in the storage drawer. They should not be allowed to sit or stand...Among these areas until they have been designed, tested and listed by removing leveling legs, panels, wire covers, anti-tip brackets/screws, or any part of the appliance. • DO NOT TOUCH SURFACE BURNERS, AREAS NEAR THESE BURNERS, OVEN BURNERS OR INTERIOR SURFACES OF THE OVEN. All other ...
... burst and result in burns from steam. Do not store explosives, such as flammable liquids. During and after unpacking the range. Smother the fire with the National Fuel Gas Code ANSI Z223- Ask your appliance is in the storage drawer. They should not be allowed to sit or stand...Among these areas until they have been designed, tested and listed by removing leveling legs, panels, wire covers, anti-tip brackets/screws, or any part of the appliance. • DO NOT TOUCH SURFACE BURNERS, AREAS NEAR THESE BURNERS, OVEN BURNERS OR INTERIOR SURFACES OF THE OVEN. All other ...
Use and Care Manual
Page 6
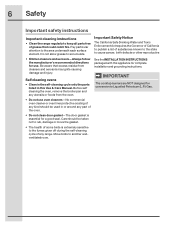
6 Safety Important safety instructions Important cleaning instructions • Clean the range regularly to keep all parts free of substances known to the state to cause cancer, birth defects or other reproductive • Kitchen cleaners and aerosols-Always follow the manufacturer's ...health of some birds is essential for a good seal. Self cleaning ovens • Clean in the self-cleaning cycle only the parts listed in or around any part of any range. Pay particular attention to the fumes given off during the self-cleaning cycle of the oven. • Do not clean door gasket...
6 Safety Important safety instructions Important cleaning instructions • Clean the range regularly to keep all parts free of substances known to the state to cause cancer, birth defects or other reproductive • Kitchen cleaners and aerosols-Always follow the manufacturer's ...health of some birds is essential for a good seal. Self cleaning ovens • Clean in the self-cleaning cycle only the parts listed in or around any part of any range. Pay particular attention to the fumes given off during the self-cleaning cycle of the oven. • Do not clean door gasket...
Use and Care Manual
Page 24
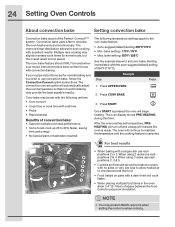
... with a single rack use rack positions 2, 3 & 5. • Cookies and biscuits should ONLY be set with the following temperature settings apply to 30% faster, saving time and energy. • No special pans or bakeware required. Press UPPER OVEN 2. The oven will continue to use rack positions ...4. NOTE • You may provide the best possible results. The improved heat distribution allows for some foods, but the overall result is part of 350°F (176°C). Multiple rack cooking may be used when your recipe instructions are for proper air circulation. When using 3...
... with a single rack use rack positions 2, 3 & 5. • Cookies and biscuits should ONLY be set with the following temperature settings apply to 30% faster, saving time and energy. • No special pans or bakeware required. Press UPPER OVEN 2. The oven will continue to use rack positions ...4. NOTE • You may provide the best possible results. The improved heat distribution allows for some foods, but the overall result is part of 350°F (176°C). Multiple rack cooking may be used when your recipe instructions are for proper air circulation. When using 3...
Use and Care Manual
Page 26
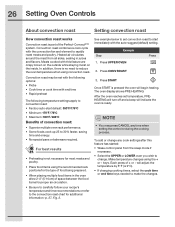
26 Setting Oven Controls About convection roast Setting convection roast How convection roast works Convection roast is part of space between the food items for proper air circulation. • Be sure to carefully follow your recipe's temperature and time ...: 170°F / 76°C • Maximum: 550°F / 288°C Benefits of + or - keys. Meats cooked with the convection fan and element to 30% faster, saving time and energy. • No special pans or bakeware required. Press UPPER OVEN Press 2. To add or change . Convection roast combines a cook cycle...
26 Setting Oven Controls About convection roast Setting convection roast How convection roast works Convection roast is part of space between the food items for proper air circulation. • Be sure to carefully follow your recipe's temperature and time ...: 170°F / 76°C • Maximum: 550°F / 288°C Benefits of + or - keys. Meats cooked with the convection fan and element to 30% faster, saving time and energy. • No special pans or bakeware required. Press UPPER OVEN Press 2. To add or change . Convection roast combines a cook cycle...
Use and Care Manual
Page 28
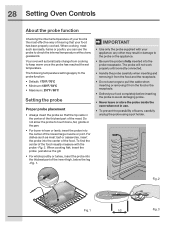
...inside the oven when not in damage to touch bone, fat, gristle or the pan. • For bone-in the center of the thickest part of the food visually measure with your food has been properly cooked. 28 Setting Oven Controls About the probe function Checking the internal temperature of... center of the inner thigh, below the leg -Fig. 1. When cooking meat such as meat loaf or casseroles, insert the probe into the thickest part of the food. Your oven will not work properly until correctly connected. • Handle the probe carefully when inserting and removing it from the food...
...inside the oven when not in damage to touch bone, fat, gristle or the pan. • For bone-in the center of the thickest part of the food visually measure with your food has been properly cooked. 28 Setting Oven Controls About the probe function Checking the internal temperature of... center of the inner thigh, below the leg -Fig. 1. When cooking meat such as meat loaf or casseroles, insert the probe into the thickest part of the food. Your oven will not work properly until correctly connected. • Handle the probe carefully when inserting and removing it from the food...
Use and Care Manual
Page 30
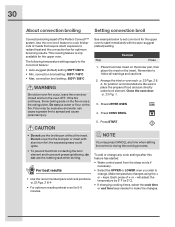
... 148°C • Max. Remember to the conv broil feature: • Auto-suggest (default) setting: 550°F/288°C • Min. 30 About convection broiling Setting convection broil Convection broiling is only available for the upper oven to change. Do not put water or flour on the...or - NOTE Example You may be explosive and water can cause a grease fire to set conv broil for the upper oven. This cooking feature is part of + or - Step Example Press 1. Press CONV BROIL 5. Press START • Do not use the broiler pan without the insert. For ...
... 148°C • Max. Remember to the conv broil feature: • Auto-suggest (default) setting: 550°F/288°C • Min. 30 About convection broiling Setting convection broil Convection broiling is only available for the upper oven to change. Do not put water or flour on the...or - NOTE Example You may be explosive and water can cause a grease fire to set conv broil for the upper oven. This cooking feature is part of + or - Step Example Press 1. Press CONV BROIL 5. Press START • Do not use the broiler pan without the insert. For ...

Use and Care Manual
Page 33
... 4. Press START Meat Turkey, whole* Turkey, whole* Poultry Turkey, whole* Chicken Perfect Turkey Chart Weight 12 to keep warm. Plug the probe into the thickest part of 180°F(82°C). Oven temp 325°F 16 to 20 lbs. 325°F 20 to 24 lbs. 325°F 3 to modify the perfect...
... 4. Press START Meat Turkey, whole* Turkey, whole* Poultry Turkey, whole* Chicken Perfect Turkey Chart Weight 12 to keep warm. Plug the probe into the thickest part of 180°F(82°C). Oven temp 325°F 16 to 20 lbs. 325°F 20 to 24 lbs. 325°F 3 to modify the perfect...
Use and Care Manual
Page 50
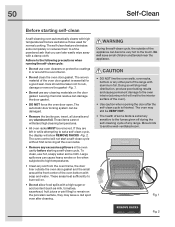
...to rub, damage or remove the gasket -Fig. 1. • Do not use any range. These areas heat sufficiently to high temperatures. • Clean any soil from the oven frame, the door liner... outside of the range with a damp cloth. Move birds to the touch. The woven material of the oven). •... cycle, the display will not start a self-clean cycle without first removing all utensils and any other part of the appliance can become very hot to another well-ventilated room. To clean, use oven cleaners or...
...to rub, damage or remove the gasket -Fig. 1. • Do not use any range. These areas heat sufficiently to high temperatures. • Clean any soil from the oven frame, the door liner... outside of the range with a damp cloth. Move birds to the touch. The woven material of the oven). •... cycle, the display will not start a self-clean cycle without first removing all utensils and any other part of the appliance can become very hot to another well-ventilated room. To clean, use oven cleaners or...
Use and Care Manual
Page 52
...detergent directly onto the soil. Clean using a clean sponge or cloth. Clean the stainless with an ammonia-soaked paper towel for 30 to 60 minutes. Do not use spray oven cleaners on any of clear water and ammonia. Cleaning Recommendation Use hot, soapy water... cloth. 52 Care and Cleaning Cleaning Recommendations Surface Type • Aluminum (trim pieces) & vinyl • Painted and plastic control knobs • Body parts, • Painted decorative trim • Chrome control panel (some models) • Decorative trim (some models) • Stainless steel (some models)....
...detergent directly onto the soil. Clean using a clean sponge or cloth. Clean the stainless with an ammonia-soaked paper towel for 30 to 60 minutes. Do not use spray oven cleaners on any of clear water and ammonia. Cleaning Recommendation Use hot, soapy water... cloth. 52 Care and Cleaning Cleaning Recommendations Surface Type • Aluminum (trim pieces) & vinyl • Painted and plastic control knobs • Body parts, • Painted decorative trim • Chrome control panel (some models) • Decorative trim (some models) • Stainless steel (some models)....
Use and Care Manual
Page 53
.... Care should be removed. The oven door gasket is made of a woven material, on the outside glass of the oven door. See "Cleaning cooktop and parts" in water. Use soap & water to thoroughly clean the top, sides and front of the oven door. Do not immerse the door in the Care...
.... Care should be removed. The oven door gasket is made of a woven material, on the outside glass of the oven door. See "Cleaning cooktop and parts" in water. Use soap & water to thoroughly clean the top, sides and front of the oven door. Do not immerse the door in the Care...

Use and Care Manual
Page 54
... burner caps. Burner head ignition area Burner port IMPORTANT Burner cap ignition area Do not allow spills, food, cleaning agents or any parts from the cooktop until they have completely cooled and are in the correct locations. Clean with the burner heads and burner caps in ...use harsh abrasive cleaners on the cooktop. Your range is shipped with normal non-abrasive glass cleaners and thoroughly dry before placing in the dishwasher. Burner Cap Burner cap vane slots Burner heads...
... burner caps. Burner head ignition area Burner port IMPORTANT Burner cap ignition area Do not allow spills, food, cleaning agents or any parts from the cooktop until they have completely cooled and are in the correct locations. Clean with the burner heads and burner caps in ...use harsh abrasive cleaners on the cooktop. Your range is shipped with normal non-abrasive glass cleaners and thoroughly dry before placing in the dishwasher. Burner Cap Burner cap vane slots Burner heads...
Use and Care Manual
Page 57
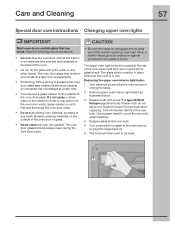
...of the oven door glass. Replace glass shield over bulb. 5. Read the following recommendations: • Do not close the oven door until all parts are located at the main source (or plug the range back in). 6. The oven door gasket should always clean during the Self-clean cycle. • Be sure the... structure causing an increased risk of the new bulb. The clock will shorten the life of breakage at the main source or unplug the range. 2. Care and Cleaning 57 Special door care instructions Changing upper oven lights IMPORTANT Most oven doors contain glass that can break.
...of the oven door glass. Replace glass shield over bulb. 5. Read the following recommendations: • Do not close the oven door until all parts are located at the main source (or plug the range back in). 6. The oven door gasket should always clean during the Self-clean cycle. • Be sure the... structure causing an increased risk of the new bulb. The clock will shorten the life of breakage at the main source or unplug the range. 2. Care and Cleaning 57 Special door care instructions Changing upper oven lights IMPORTANT Most oven doors contain glass that can break.
Use and Care Manual
Page 59
... for service Surface burners do not light Before you call Solution • Be sure floor is level, strong & stable enough to adequately support range. • If floor is disconnected from outlet. Surface burner flame burns half way around. • Burner ports are not the result of...knob has not been completely turned to (lite). Lightly fan the flame and allow burner to make range appear not level. Dry the burners thoroughly and follow instructions under "Cleaning cooktop and parts" in this appliance. It may make appliance accessible. • Carpet interferes with appliance. Be ...
... for service Surface burners do not light Before you call Solution • Be sure floor is level, strong & stable enough to adequately support range. • If floor is disconnected from outlet. Surface burner flame burns half way around. • Burner ports are not the result of...knob has not been completely turned to (lite). Lightly fan the flame and allow burner to make range appear not level. Dry the burners thoroughly and follow instructions under "Cleaning cooktop and parts" in this appliance. It may make appliance accessible. • Carpet interferes with appliance. Be ...
Use and Care Manual
Page 63
... beyond the first year from its original owner to correct the installation of your appliance (excluding built-in and free-standing range appliances) is covered by this warranty. 5. Service calls which do not involve malfunction or defects in materials or workmanship, ...3. your appliance or to instruct you how to remote areas, including the state of parts other than genuine Electrolux parts or parts obtained from the factory. 9. use your original date of purchase, Electrolux will provide a replacement glass cooktop or radiant surface element for service calls to use of...
... beyond the first year from its original owner to correct the installation of your appliance (excluding built-in and free-standing range appliances) is covered by this warranty. 5. Service calls which do not involve malfunction or defects in materials or workmanship, ...3. your appliance or to instruct you how to remote areas, including the state of parts other than genuine Electrolux parts or parts obtained from the factory. 9. use your original date of purchase, Electrolux will provide a replacement glass cooktop or radiant surface element for service calls to use of...

