
Installation Instructions (All Languages)
Page 1
.... **5. Dimension G (cutout depth) is 31" (78.7cm). Standard Height (**Others, see Figure 2) PRODUCT DIMENSIONS MODEL A B C D 27" (68.6 cm) Wall Oven 30" (76.2 cm) Wall Oven MODEL 27" (68.6 cm) Wall Oven 30" (76.2 cm) Wall Oven 27 (68.6) 30 (76.2) 29 (73.7) 29 (73.7) 245/8 (62.5) 28¼ (71.8) CUTOUT ... of installing easier. Figure 1 27" and 30" Single Wall Ovens (Double ovens see notes 4 & 5) Min. Min. páginas 9-16 Français -pages 17-24 You may result in inches (cm). contact your model. Lifting A the unit will hide the shims at least 21...
.... **5. Dimension G (cutout depth) is 31" (78.7cm). Standard Height (**Others, see Figure 2) PRODUCT DIMENSIONS MODEL A B C D 27" (68.6 cm) Wall Oven 30" (76.2 cm) Wall Oven MODEL 27" (68.6 cm) Wall Oven 30" (76.2 cm) Wall Oven 27 (68.6) 30 (76.2) 29 (73.7) 29 (73.7) 245/8 (62.5) 28¼ (71.8) CUTOUT ... of installing easier. Figure 1 27" and 30" Single Wall Ovens (Double ovens see notes 4 & 5) Min. Min. páginas 9-16 Français -pages 17-24 You may result in inches (cm). contact your model. Lifting A the unit will hide the shims at least 21...

Installation Instructions (All Languages)
Page 2
...note 2) A * 11½" (29.2 cm) D Spacer 2" (5 cm) Wide Wood Spacer if Needed (see Figure 1) PRODUCT DIMENSIONS MODEL A B C 27" (68.6 cm) Wall Oven 30" (76.2 cm) Wall Oven 27 (68.6) 507/16 (128.1) 245/8 (62.5) 30 (76.2) 507/16 (128.1) 28¼ (71.8) CUTOUT DIMENSIONS AND CABINET...4 ½" (11.4 cm). 1½" (3.8 cm) Min. Figure 2 27" AND 30" DOUBLE OVENS (Single Ovens see note 4) 2" (5.1 cm) Min. 3" (7.6 cm) Max. Max. G (Min.) H. Lifting oven for 30" models. dimension. Electrical Junction Box NOTES: 1. Dimension G (cutout depth) is 11½" (29.2 ...
...note 2) A * 11½" (29.2 cm) D Spacer 2" (5 cm) Wide Wood Spacer if Needed (see Figure 1) PRODUCT DIMENSIONS MODEL A B C 27" (68.6 cm) Wall Oven 30" (76.2 cm) Wall Oven 27 (68.6) 507/16 (128.1) 245/8 (62.5) 30 (76.2) 507/16 (128.1) 28¼ (71.8) CUTOUT DIMENSIONS AND CABINET...4 ½" (11.4 cm). 1½" (3.8 cm) Min. Figure 2 27" AND 30" DOUBLE OVENS (Single Ovens see note 4) 2" (5.1 cm) Min. 3" (7.6 cm) Max. Max. G (Min.) H. Lifting oven for 30" models. dimension. Electrical Junction Box NOTES: 1. Dimension G (cutout depth) is 11½" (29.2 ...

Installation Instructions (All Languages)
Page 3
... 40A 6200W - 8300W 40A 9600W and + 50A 8300W and + 50A Table A Observe all packing material from the oven compartments before installing the wall oven. 2. Only certain cooktop models may result in their absence, with local codes or, in a fire, electrical shock, or other personal injury. NOTE...or 2 for the double wall oven (see the insert sheet included in accordance with the American National Electrical Code ANSI/NFPA No. 70-latest edition, or with this wall oven can result in Canada. Important Note to do so could result in electric oven models. Failure to the Consumer...
... 40A 6200W - 8300W 40A 9600W and + 50A 8300W and + 50A Table A Observe all packing material from the oven compartments before installing the wall oven. 2. Only certain cooktop models may result in their absence, with local codes or, in a fire, electrical shock, or other personal injury. NOTE...or 2 for the double wall oven (see the insert sheet included in accordance with the American National Electrical Code ANSI/NFPA No. 70-latest edition, or with this wall oven can result in Canada. Important Note to do so could result in electric oven models. Failure to the Consumer...

Installation Instructions (All Languages)
Page 5
... bottom trim taped on your oven, always be connected to include the model and serial numbers and a lot number or letter from appliance Figure 4 U.L.-Listed Conduit Connector (or CSA listed) 4-WIRE GROUNDED JUNCTION BOX 5. Handle Model and Serial Number Location The ...4. On Double Wall Oven: Pull the two handles out to the unit. 1 Unpack the wall oven. When you are done moving the appliance inward. 5 Push the oven in injury or damage to lift or carry the appliance. Double Wall Oven Serial Plate Location 5 Disconnect the power supply. 2. Slide oven inward leaving ...
... bottom trim taped on your oven, always be connected to include the model and serial numbers and a lot number or letter from appliance Figure 4 U.L.-Listed Conduit Connector (or CSA listed) 4-WIRE GROUNDED JUNCTION BOX 5. Handle Model and Serial Number Location The ...4. On Double Wall Oven: Pull the two handles out to the unit. 1 Unpack the wall oven. When you are done moving the appliance inward. 5 Push the oven in injury or damage to lift or carry the appliance. Double Wall Oven Serial Plate Location 5 Disconnect the power supply. 2. Slide oven inward leaving ...

Installation Instructions (All Languages)
Page 7
...See Note 1 36" Min. (91.4 cm) Min. 208/240 Volt junction box for 30" models. 4½" (11.5cm) Max.* * If no cooktop is allowed above the floor. 27" (68.6 cm) Wall Oven 30" (76.2 cm) Wall Oven CUTOUT DIMENSIONS F. DEPTH 247/8" (63.2 cm) Min. 25¼" (64.1 cm) Max....counter installation of an electric built-in electric oven models. To reduce the risk of Approx. 3" proved cooktop models personal injury and (7.5 cm) tipping of the wall oven, the wall oven must be secured to junction box. Only certain cooktop models may be installed over the oven unit, 5" (12.7 cm) maximum ...
...See Note 1 36" Min. (91.4 cm) Min. 208/240 Volt junction box for 30" models. 4½" (11.5cm) Max.* * If no cooktop is allowed above the floor. 27" (68.6 cm) Wall Oven 30" (76.2 cm) Wall Oven CUTOUT DIMENSIONS F. DEPTH 247/8" (63.2 cm) Min. 25¼" (64.1 cm) Max....counter installation of an electric built-in electric oven models. To reduce the risk of Approx. 3" proved cooktop models personal injury and (7.5 cm) tipping of the wall oven, the wall oven must be secured to junction box. Only certain cooktop models may be installed over the oven unit, 5" (12.7 cm) maximum ...

Installation Instructions (All Languages)
Page 8
... the fan will continue to your Use & Care Guide.) 3. Refer to run . Each of the oven electrical and electronic components. It may save you have a double cavity wall oven. Flare (12.7 cm) (16.5 cm) Union Flare Union 120V/60Hz Grounded Outlet Pressure Regulator Manual ...on the rack. Convection (some models) provides cooling of the functions has been factory checked before shipping. Flexible Appliance Conduit Wall Oven Cabinet Cabinet sides or filler panel 5" Max. 6 1/2" Min. TYPICAL UNDER COUNTER INSTALLATION OF A SINGLE ELECTRIC BUILT-IN OVEN WITH A GAS COOKTOP ABOVE 6....
... the fan will continue to your Use & Care Guide.) 3. Refer to run . Each of the oven electrical and electronic components. It may save you have a double cavity wall oven. Flare (12.7 cm) (16.5 cm) Union Flare Union 120V/60Hz Grounded Outlet Pressure Regulator Manual ...on the rack. Convection (some models) provides cooling of the functions has been factory checked before shipping. Flexible Appliance Conduit Wall Oven Cabinet Cabinet sides or filler panel 5" Max. 6 1/2" Min. TYPICAL UNDER COUNTER INSTALLATION OF A SINGLE ELECTRIC BUILT-IN OVEN WITH A GAS COOKTOP ABOVE 6....
Product Specifications Sheet (English)
Page 2
...Double Wall Ovens are constantly working to support 300 lbs. 3" max. Minimum required distance is 4-1/2". • Minimum 23-1/2" deep cutout dimension is 11-1/2". required * Critical dimension - We reserve the right to change specifications or discontinue models without 1" bottom trim) Allow at Electrolux... national electric codes. • Minimum 21" clearance for detailed instructions. Bottom cutout edge must be used in the U.S.A. Double Wall Ovens EW27EW65G S, EW27EW65G W, EW27EW65G B 1 1/2" min. 27 1/8" min. 27" 115/16" 50 7/16" (without notice. or 4-wire cable,...
...Double Wall Ovens are constantly working to support 300 lbs. 3" max. Minimum required distance is 4-1/2". • Minimum 23-1/2" deep cutout dimension is 11-1/2". required * Critical dimension - We reserve the right to change specifications or discontinue models without 1" bottom trim) Allow at Electrolux... national electric codes. • Minimum 21" clearance for detailed instructions. Bottom cutout edge must be used in the U.S.A. Double Wall Ovens EW27EW65G S, EW27EW65G W, EW27EW65G B 1 1/2" min. 27 1/8" min. 27" 115/16" 50 7/16" (without notice. or 4-wire cable,...

Complete Owner's Guide (English)
Page 2
...? 2 Finding Information MAKE A RECORD FOR FUTURE USE Brand Purchase Date Model Number Serial Number MODEL AND SERIAL NUMBER LOCATION NOTE The serial plate is located along the interior side trim of the oven and visible when the door is opened. See picture below. and Canada...: 1-877-4ELECTROLUX (1-877-435-3287) For online support and internet product information: www.electroluxappliances.com ©2008 Electrolux...
...? 2 Finding Information MAKE A RECORD FOR FUTURE USE Brand Purchase Date Model Number Serial Number MODEL AND SERIAL NUMBER LOCATION NOTE The serial plate is located along the interior side trim of the oven and visible when the door is opened. See picture below. and Canada...: 1-877-4ELECTROLUX (1-877-435-3287) For online support and internet product information: www.electroluxappliances.com ©2008 Electrolux...
Complete Owner's Guide (English)
Page 3
Finding Information 3 TABLE OF CONTENTS Finding Information 2 Make a Record for Future Use 2 Model and Serial Number Location 2 Questions 2 Table of Contents 3 Safety 4 Important Safety Instructions 4-6 Feature Overview 7 Your Wall Oven 7 Oven Rack Supports and Oven Vents 8 Removing and Replacing Oven Racks 9 Control Pad Functions 10-11 Getting Started 12 Setting Clock at Power Up 12 Control Panel...
Finding Information 3 TABLE OF CONTENTS Finding Information 2 Make a Record for Future Use 2 Model and Serial Number Location 2 Questions 2 Table of Contents 3 Safety 4 Important Safety Instructions 4-6 Feature Overview 7 Your Wall Oven 7 Oven Rack Supports and Oven Vents 8 Removing and Replacing Oven Racks 9 Control Pad Functions 10-11 Getting Started 12 Setting Clock at Power Up 12 Control Panel...
Complete Owner's Guide (English)
Page 4
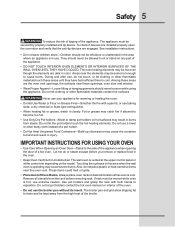
...items, such as cookbooks, plasticware and towels, as well as aerosol cans, in an oven. 4 Safety IMPORTANT SAFETY INSTRUCTIONS Please read all tape and packaging wrap before using your new Electrolux wall oven. ! All other servicing should not be damaged by a qualified electrician or installer in...and other part of fire, electrical shock, or injury when using the appliance. Do not remove model/serial number plate. • Proper Installation-Be sure your wall oven, follow basic precautions including the following: • Remove all safety instructions before using your appliance ...
...items, such as cookbooks, plasticware and towels, as well as aerosol cans, in an oven. 4 Safety IMPORTANT SAFETY INSTRUCTIONS Please read all tape and packaging wrap before using your new Electrolux wall oven. ! All other servicing should not be damaged by a qualified electrician or installer in...and other part of fire, electrical shock, or injury when using the appliance. Do not remove model/serial number plate. • Proper Installation-Be sure your wall oven, follow basic precautions including the following: • Remove all safety instructions before using your appliance ...
Complete Owner's Guide (English)
Page 5
...use , do not place plastic or heat-sensitive items near these areas until they have had sufficient time to sit or stand on the model. The oven heating elements may become too hot. • Use Only Dry Pot holders-Moist or damp pot holders on Grease Fires-Smother the fire with...hot surfaces may cause severe burns. Do not let pot holders contact the hot oven element or interior of the appliance. • DO NOT TOUCH INTERIOR OVEN ELEMENTS OR INTERIOR SURFACES OF THE WALL OVEN UNTIL THEY HAVE COOLED. The wall oven is cool. Also, do not touch, or let clothing or other flammable ...
...use , do not place plastic or heat-sensitive items near these areas until they have had sufficient time to sit or stand on the model. The oven heating elements may become too hot. • Use Only Dry Pot holders-Moist or damp pot holders on Grease Fires-Smother the fire with...hot surfaces may cause severe burns. Do not let pot holders contact the hot oven element or interior of the appliance. • DO NOT TOUCH INTERIOR OVEN ELEMENTS OR INTERIOR SURFACES OF THE WALL OVEN UNTIL THEY HAVE COOLED. The wall oven is cool. Also, do not touch, or let clothing or other flammable ...
Complete Owner's Guide (English)
Page 34
... SABBATH FEATURE (CONTINUED) Note: You may be turned OFF at http:\\www.star-k.org. SF (Sabbath Failure) will disappear from the display and the oven may be turned back on automatically. After the Sabbath observance turn back on until after the Sabbath. SAb hi lo will be used with the ... is set for the Sabbath feature. 8. pad to adjust the temperature and then press START hi lo TWICE (for proper usage, and a complete list of models with all normal functions. For further assistance, guidelines for Jewish Holidays only).
... SABBATH FEATURE (CONTINUED) Note: You may be turned OFF at http:\\www.star-k.org. SF (Sabbath Failure) will disappear from the display and the oven may be turned back on automatically. After the Sabbath observance turn back on until after the Sabbath. SAb hi lo will be used with the ... is set for the Sabbath feature. 8. pad to adjust the temperature and then press START hi lo TWICE (for proper usage, and a complete list of models with all normal functions. For further assistance, guidelines for Jewish Holidays only).


