Complete Owner's Guide (English)
Page 4
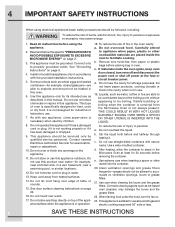
... off power at least for its intended use corrosive chemicals or vapors in the Microwave Oven at the fuse or circuit breaker panel. Contact nearest Electrolux Authorized Servicer for example, near a kitchen sink, in use this appliance if it has a damaged cord or plug, if it . Do ...not use straight-sided containers with the provided installation instructions. 5. Some products such as lye-based oven cleaners, may damage the louver and the grease filters. 22. Do not cover or block any ...
... off power at least for its intended use corrosive chemicals or vapors in the Microwave Oven at the fuse or circuit breaker panel. Contact nearest Electrolux Authorized Servicer for example, near a kitchen sink, in use this appliance if it has a damaged cord or plug, if it . Do ...not use straight-sided containers with the provided installation instructions. 5. Some products such as lye-based oven cleaners, may damage the louver and the grease filters. 22. Do not cover or block any ...
Complete Owner's Guide (English)
Page 5
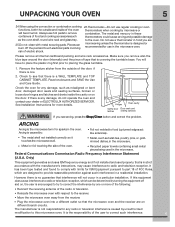
...are 25.Do not clean with respect to the oven. ARCING Arcing is no guarantee that interference will not occur in a particular installation. Federal Communications Commission Radio Frequency Interference Statement (U.S.A. If this microwave oven. to the receiver. • Move the microwave oven ...provide reasonable protection against such interference in the microwave. See Installation Instructions for use in strict accordance with limits for any damage, do not operate the oven and contact your dealer or ELECTROLUX AUTHORIZED SERVICER. It has been type tested and found ...
...are 25.Do not clean with respect to the oven. ARCING Arcing is no guarantee that interference will not occur in a particular installation. Federal Communications Commission Radio Frequency Interference Statement (U.S.A. If this microwave oven. to the receiver. • Move the microwave oven ...provide reasonable protection against such interference in the microwave. See Installation Instructions for use in strict accordance with limits for any damage, do not operate the oven and contact your dealer or ELECTROLUX AUTHORIZED SERVICER. It has been type tested and found ...
Complete Owner's Guide (English)
Page 6
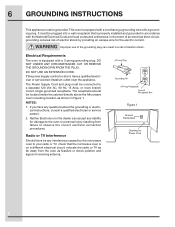
...the electric current. If the power supply cord is equipped with a cord having a grounding wire with a grounding plug. Neither Electrolux nor the dealer can result in a risk of receiving antenna. It must be any questions about the grounding or electrical instructions,... consult a qualified electrician or service person. 2. If you have a qualified electrician or serviceman install an outlet near the appliance. Electrical Requirements The oven is on a different electrical circuit, relocate the radio or TV as shown ...
...the electric current. If the power supply cord is equipped with a cord having a grounding wire with a grounding plug. Neither Electrolux nor the dealer can result in a risk of receiving antenna. It must be any questions about the grounding or electrical instructions,... consult a qualified electrician or service person. 2. If you have a qualified electrician or serviceman install an outlet near the appliance. Electrical Requirements The oven is on a different electrical circuit, relocate the radio or TV as shown ...
Complete Owner's Guide (English)
Page 11
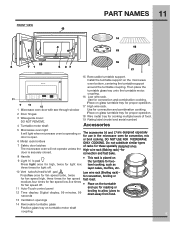
... in the microwave oven for cooking multiple levels of racks for convection and combination cooking. U se for light off pad Low wire rack (Broiling rack)- Install the turntable support on 9 Light hi lo pad the turntable for proper operation. 17 High wire rack. E PART NAMES 11 1 Microwave oven door with see...
... in the microwave oven for cooking multiple levels of racks for convection and combination cooking. U se for light off pad Low wire rack (Broiling rack)- Install the turntable support on 9 Light hi lo pad the turntable for proper operation. 17 High wire rack. E PART NAMES 11 1 Microwave oven door with see...

Complete Owner's Guide (English)
Page 13
... bu zzer will display the current time. 3. Enter the correct time of day to cancel timer touch theTimer on -off pad. When timer function is installed above range, make a mistake during this Use and Care Guide completely. Press the START /+30sec pad to : 1. BEFORE OPERATING Before operating your new Convection M icrowave...
... bu zzer will display the current time. 3. Enter the correct time of day to cancel timer touch theTimer on -off pad. When timer function is installed above range, make a mistake during this Use and Care Guide completely. Press the START /+30sec pad to : 1. BEFORE OPERATING Before operating your new Convection M icrowave...

Complete Owner's Guide (English)
Page 27
... maintained in materials or workmanship, or for service calls to remote areas, including the state of parts other than genuine Electrolux parts or parts obtained from the factory. 10. your appliance is installed, used other cosmetic parts. 11. CLAIMS BASED ON IMPLIED WARRANTIES, INCLUDING WARRANTIES OF MERCHANTABILITY OR FITNESS FOR A PARTICULAR PURPOSE...
... maintained in materials or workmanship, or for service calls to remote areas, including the state of parts other than genuine Electrolux parts or parts obtained from the factory. 10. your appliance is installed, used other cosmetic parts. 11. CLAIMS BASED ON IMPLIED WARRANTIES, INCLUDING WARRANTIES OF MERCHANTABILITY OR FITNESS FOR A PARTICULAR PURPOSE...

Installation Instructions (English Español Français)
Page 1
... Range Microwave Oven Questions? Observe all governing codes and ordinances. • Note to Consumer - Installation of this appliance requires basic mechanical and electrical skills. • Proper installation is the responsibility of the installer. • Product failure due to improper installation is not covered under the Warranty. Call 1-877-435-3287(US) 1-800-265-8352...
... Range Microwave Oven Questions? Observe all governing codes and ordinances. • Note to Consumer - Installation of this appliance requires basic mechanical and electrical skills. • Proper installation is the responsibility of the installer. • Product failure due to improper installation is not covered under the Warranty. Call 1-877-435-3287(US) 1-800-265-8352...

Installation Instructions (English Español Français)
Page 2
... Placement of The Mounting Plate 6-8 Removing the Mounting Plate 6 Finding the Wall Studs 6 Determining Wall Plate Location 7 Aligning the Wall Plate 8 Installation Types 9-22 Hood Exhaust 10-11 A Outside Top Exhaust 12-15 Attach Mounting Plate to Wall 12 Preparation of Top Cabinet 13 Adapting Microwave Blower ... 19 C Recirculating 20 -22 Attach Mounting Plate to Wall 20 Preparation of Top Cabinet 20 Check Blower Plate 21 Mount the Microwave Oven ..........21-22 Installing or Change the Charcoal Filter 22 Before You Use Your Microwave 23 Template Information 24...
... Placement of The Mounting Plate 6-8 Removing the Mounting Plate 6 Finding the Wall Studs 6 Determining Wall Plate Location 7 Aligning the Wall Plate 8 Installation Types 9-22 Hood Exhaust 10-11 A Outside Top Exhaust 12-15 Attach Mounting Plate to Wall 12 Preparation of Top Cabinet 13 Adapting Microwave Blower ... 19 C Recirculating 20 -22 Attach Mounting Plate to Wall 20 Preparation of Top Cabinet 20 Check Blower Plate 21 Mount the Microwave Oven ..........21-22 Installing or Change the Charcoal Filter 22 Before You Use Your Microwave 23 Template Information 24...

Installation Instructions (English Español Français)
Page 3
...REQUIREMENTS Product rating is equipped with a three-prong (grounding) plug which mates with a properly grounded three-prong wall receptacle, installed by a qualified electrician and conform to the added weight of the proper voltage and frequency. Wire size must be connected to... important to have the wall receptacle and circuit checked by a qualified electrician to correct any deficiencies. to a separate 15- Installation Instructions IMPORTANT SAFETY INSTRUCTIONS This product requires a three-prong grounded outlet. CAUTION: For personal safety, this appliance. You should ...
...REQUIREMENTS Product rating is equipped with a three-prong (grounding) plug which mates with a properly grounded three-prong wall receptacle, installed by a qualified electrician and conform to the added weight of the proper voltage and frequency. Wire size must be connected to... important to have the wall receptacle and circuit checked by a qualified electrician to correct any deficiencies. to a separate 15- Installation Instructions IMPORTANT SAFETY INSTRUCTIONS This product requires a three-prong grounded outlet. CAUTION: For personal safety, this appliance. You should ...

Installation Instructions (English Español Français)
Page 4
... nuts) (3⁄16" x 3") QUANTITY 2 2 Self-Aligning Machine 3 Screws (1⁄4"-28 x 31⁄4") PARTS INCLUDED (CONT.) ADDITIONAL PARTS PART Top Cabinet Template QUANTITY 1 Rear Wall Template 1 Installation 1 ININSSTTRAULCLTAITOIONNS Use & Care Guide Instructions Use & 1 Care Guide Separately 2 Packed Grease Filters Exhaust 1 adaptor Nylon Grommet 1 (for metal cabinets) Glass 1 Tray You will find the...
... nuts) (3⁄16" x 3") QUANTITY 2 2 Self-Aligning Machine 3 Screws (1⁄4"-28 x 31⁄4") PARTS INCLUDED (CONT.) ADDITIONAL PARTS PART Top Cabinet Template QUANTITY 1 Rear Wall Template 1 Installation 1 ININSSTTRAULCLTAITOIONNS Use & Care Guide Instructions Use & 1 Care Guide Separately 2 Packed Grease Filters Exhaust 1 adaptor Nylon Grommet 1 (for metal cabinets) Glass 1 Tray You will find the...

Installation Instructions (English Español Français)
Page 5
... smooth, flat cabinets, be careful to follow the instructions on the top cabinet template for top cabinet spacing (used on recessed bottom cabinet installations only) Saw (saber, hole or keyhole) Stud finder or Hammer (optional) Safety goggles Level Duct and masking tape MOUNTING SPACE 13""...pieces, if needed for power cord clearance. 66″ (167.6 cm) or More from the Cooking Surface 30" (76.2 cm) min. Installation Instructions TOOLS YOU WILL NEED # 1 Phillips screwdriver Pencil Ruler or tape measure and straight edge Carpenter square (optional) Tin snips (for cutting damper...
... smooth, flat cabinets, be careful to follow the instructions on the top cabinet template for top cabinet spacing (used on recessed bottom cabinet installations only) Saw (saber, hole or keyhole) Stud finder or Hammer (optional) Safety goggles Level Duct and masking tape MOUNTING SPACE 13""...pieces, if needed for power cord clearance. 66″ (167.6 cm) or More from the Cooking Surface 30" (76.2 cm) min. Installation Instructions TOOLS YOU WILL NEED # 1 Phillips screwdriver Pencil Ruler or tape measure and straight edge Carpenter square (optional) Tin snips (for cutting damper...

Installation Instructions (English Español Français)
Page 6
...carton flaps fully against carton sides. B. Stud finder - a magnetic device which locates nails. Then place a mark halfway between the edges. Installation Instructions 1 PLACEMENT OF THE MOUNTING PLATE A. Do not remove the Styrofoam protecting the front of the following methods: A. The oven should be... resting in the Styrofoam. REMOVING THE MICROWAVE OVEN FROM THE CARTON/ REMOVING THE MOUNTING PLATE 1 Remove the installation instructions, filters, glass tray and the small hardware bag. FINDING THE WALL STUDS Wall Studs Center Carton Styrofoam 3 Pull the...
...carton flaps fully against carton sides. B. Stud finder - a magnetic device which locates nails. Then place a mark halfway between the edges. Installation Instructions 1 PLACEMENT OF THE MOUNTING PLATE A. Do not remove the Styrofoam protecting the front of the following methods: A. The oven should be... resting in the Styrofoam. REMOVING THE MICROWAVE OVEN FROM THE CARTON/ REMOVING THE MOUNTING PLATE 1 Remove the installation instructions, filters, glass tray and the small hardware bag. FINDING THE WALL STUDS Wall Studs Center Carton Styrofoam 3 Pull the...

Installation Instructions (English Español Français)
Page 7
...Step D. 7 Use a level to Cooktop Your cabinets may have a front overhang only, with this type of the front overhang. Remove the decorative trim to install the microwave properly and to make sure the cabinet bottom is level. If the cabinets have decorative trim that interferes with the microwave... installation. Tape the Rear Wall Template onto the wall matching the centerline and touching the bottom of the 30″ space. Plat e posit ion-beneat h...
...Step D. 7 Use a level to Cooktop Your cabinets may have a front overhang only, with this type of the front overhang. Remove the decorative trim to install the microwave properly and to make sure the cabinet bottom is level. If the cabinets have decorative trim that interferes with the microwave... installation. Tape the Rear Wall Template onto the wall matching the centerline and touching the bottom of the 30″ space. Plat e posit ion-beneat h...

Installation Instructions (English Español Français)
Page 8
...mounting plate. Set the mounting plate aside. 8 ALIGNING THE WALL PLATE NOTE: IT IS VERY IMPORTANT TO READ AND FOLLOW THE DIRECTIONS IN THE INSTALLATION INSTRUCTIONS BEFORE PROCEEDING WITH THIS REAR WALL TEMPLATE. Drill holes in a stud to support the weight of Top Cabinet ... of the microwave. If both of the microwave. Locate and mark at least one wood screw mounted firmly in the mounting plate. Review the Installation Instruction book for the supplied toggle bolts. 3. Locate and mark holes to check that of stud. Hole B 3/8" TO EDGE 12" 4"...
...mounting plate. Set the mounting plate aside. 8 ALIGNING THE WALL PLATE NOTE: IT IS VERY IMPORTANT TO READ AND FOLLOW THE DIRECTIONS IN THE INSTALLATION INSTRUCTIONS BEFORE PROCEEDING WITH THIS REAR WALL TEMPLATE. Drill holes in a stud to support the weight of Top Cabinet ... of the microwave. If both of the microwave. Locate and mark at least one wood screw mounted firmly in the mounting plate. Review the Installation Instruction book for the supplied toggle bolts. 3. Locate and mark holes to check that of stud. Hole B 3/8" TO EDGE 12" 4"...

Installation Instructions (English Español Français)
Page 9
...DUCTLESS) On models shipped for Recirculating. Outside Back Exhaust (Horizontal Duct) C. Inst allat ion Inst ruct ions 2 INSTALLATION TYPES (Choose A, B or C) This microwave oven is factory installed to help remove smoke and odors. Recirculating (Non-Vented Ductless) NOTE: This microwave is shipped assembled for recirculating ... disposable charcoal filter is designed for adaptation to the following three types of ventilation required for your installation and proceed to that section. Outside Top Exhaust (Vertical Duct) B. Select the type of ventilation: A. See page 20 9
...DUCTLESS) On models shipped for Recirculating. Outside Back Exhaust (Horizontal Duct) C. Inst allat ion Inst ruct ions 2 INSTALLATION TYPES (Choose A, B or C) This microwave oven is factory installed to help remove smoke and odors. Recirculating (Non-Vented Ductless) NOTE: This microwave is shipped assembled for recirculating ... disposable charcoal filter is designed for adaptation to the following three types of ventilation required for your installation and proceed to that section. Outside Top Exhaust (Vertical Duct) B. Select the type of ventilation: A. See page 20 9

Installation Instructions (English Español Français)
Page 10
...equivalent to mate with a standard 31⁄4" x 10" (8.2 x 25.4 cm) rectangular duct. The chart below shows you need to install ducts, note that venting be used. A 5"" (10.5cm)/ 6""(15.2cm) diameter duct is blocking the ducts. or m Roof Cap...176; Elbow 10 Ft. (3 m) x ( ) = 5 Ft. (1.5 m) x ( ) = 25 Ft. (7.6 m) x ( ) = Ft. x ( ) = Ft. or m Ft. Installation Instructions INSTALLATION INSTRUCTIONS FOR EXTERNAL EXHAUST DUCTING NOTE: If you how to -Round Transition Adaptor* Wall Cap 5 Ft. (1.5 m) x ( ) = 40 Ft. (12.2 m) x ( ) = Ft. Outside ventilation ...
...equivalent to mate with a standard 31⁄4" x 10" (8.2 x 25.4 cm) rectangular duct. The chart below shows you need to install ducts, note that venting be used. A 5"" (10.5cm)/ 6""(15.2cm) diameter duct is blocking the ducts. or m Roof Cap...176; Elbow 10 Ft. (3 m) x ( ) = 5 Ft. (1.5 m) x ( ) = 25 Ft. (7.6 m) x ( ) = Ft. x ( ) = Ft. or m Ft. Installation Instructions INSTALLATION INSTRUCTIONS FOR EXTERNAL EXHAUST DUCTING NOTE: If you how to -Round Transition Adaptor* Wall Cap 5 Ft. (1.5 m) x ( ) = 40 Ft. (12.2 m) x ( ) = Ft. Outside ventilation ...

Installation Instructions (English Español Français)
Page 11
... with space between the wall studs to -Round 5 Ft. (1.5 m) x (1) Transition Adaptor* = 5 Ft. (1.5 m) Equivalent lengths of one possible ductwork installation. OUTSIDE BACK EXHAUST (EXAMPLE ONLY) The following chart describes an example of the damper. Installation Instructions EXTERNAL EXHAUST DUCTING NOTE: Read these next two pages only if you plan to recirculate the air...
... with space between the wall studs to -Round 5 Ft. (1.5 m) x (1) Transition Adaptor* = 5 Ft. (1.5 m) Equivalent lengths of one possible ductwork installation. OUTSIDE BACK EXHAUST (EXAMPLE ONLY) The following chart describes an example of the damper. Installation Instructions EXTERNAL EXHAUST DUCTING NOTE: Read these next two pages only if you plan to recirculate the air...

Installation Instructions (English Español Français)
Page 12
... wiring has been properly routed and secured, and that the wires are reinstalled. Installation Instructions A OUTSIDE TOP EXHAUST (Vertical Duct) INSTALLATION OVERVIEW A1. IMPORTANT: LOCATE AT LEAST ONE STUD ON EITHER SIDE OF MSTHPAAERCKCEETDNHTTEOELRGOLGCINLAEET.....rgtcnddualwaeeddtttooi,ilsbtoeoidtoosnaudrunlsisdtlsapsl.t.colp5Wo,rno/nee8hrevwt"tehetshwrehne.oeollFyleteohwofssdtereporfhiaoegrocrhilesetds toggle bolts DO NOT INSTALL THE MOUNTING PLATE 54A..TRRinTeesHvmtaiIeSollwavTteitIohMtnheEesI.nitteusmtaatpliloalantit.oenfrIonmstrtuhcetiroenabr owoakll.for Outside Top ...
... wiring has been properly routed and secured, and that the wires are reinstalled. Installation Instructions A OUTSIDE TOP EXHAUST (Vertical Duct) INSTALLATION OVERVIEW A1. IMPORTANT: LOCATE AT LEAST ONE STUD ON EITHER SIDE OF MSTHPAAERCKCEETDNHTTEOELRGOLGCINLAEET.....rgtcnddualwaeeddtttooi,ilsbtoeoidtoosnaudrunlsisdtlsapsl.t.colp5Wo,rno/nee8hrevwt"tehetshwrehne.oeollFyleteohwofssdtereporfhiaoegrocrhilesetds toggle bolts DO NOT INSTALL THE MOUNTING PLATE 54A..TRRinTeesHvmtaiIeSollwavTteitIohMtnheEesI.nitteusmtaatpliloalantit.oenfrIonmstrtuhcetiroenabr owoakll.for Outside Top ...

Installation Instructions (English Español Français)
Page 13
...: Fan Blade Openings Facing Top Blower Plate Back of the microwave. Back of Microwave CAUTION: Do not pull or stretch the blower unit wiring. A3. Installation Instructions A2.
...: Fan Blade Openings Facing Top Blower Plate Back of the microwave. Back of Microwave CAUTION: Do not pull or stretch the blower unit wiring. A3. Installation Instructions A2.

Installation Instructions (English Español Français)
Page 14
... into the guides of cabinet. 14 Make sure the screw is in Step 1. MOUNT THE MICROWAVE OVEN FOR EASIER INSTALLATION AND PERSONAL SAFETY, WE RECOMMEND THAT TWO PEOPLE INSTALL THIS MICROWAVE OVEN. NOTE: We recommend using filler blocks if the cabinet front hangs below the cabinet bottom shelf. ... duct after the threads have engaged. (It will need to make adjustments to assure proper alignment with your cabinet is installed so that the damper hinge is metal, use handle during installation. Be careful not to pinch the cord, especially when mounting flush to keep power cord tight...
... into the guides of cabinet. 14 Make sure the screw is in Step 1. MOUNT THE MICROWAVE OVEN FOR EASIER INSTALLATION AND PERSONAL SAFETY, WE RECOMMEND THAT TWO PEOPLE INSTALL THIS MICROWAVE OVEN. NOTE: We recommend using filler blocks if the cabinet front hangs below the cabinet bottom shelf. ... duct after the threads have engaged. (It will need to make adjustments to assure proper alignment with your cabinet is installed so that the damper hinge is metal, use handle during installation. Be careful not to pinch the cord, especially when mounting flush to keep power cord tight...
