
Specification sheet
Page 1
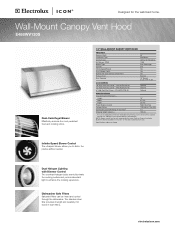
...15 or 20A 1.4 108 Lbs. ‡ For use on the web at electroluxicon.com. Specifications subject to Product Installation Guide for detailed installation instructions on adequately wired 120V, dedicated circuit having 2-wire service with Dimmer Control Two overhead halogen bulbs evenly illuminate ...wire. PN # ACCVC12-48 6"- Wall-Mount Canopy Vent Hood E488WV120S Dual-Centrifugal Blower Effectively removes the most persistent food and cooking odors. 18" WALL-MOUNT CANOPY VENT HOOD FEATURES Nominal Width Installation Type Air Discharge Air Delivery (CFM) Blower Type Controls Infinite-...
...15 or 20A 1.4 108 Lbs. ‡ For use on the web at electroluxicon.com. Specifications subject to Product Installation Guide for detailed installation instructions on adequately wired 120V, dedicated circuit having 2-wire service with Dimmer Control Two overhead halogen bulbs evenly illuminate ...wire. PN # ACCVC12-48 6"- Wall-Mount Canopy Vent Hood E488WV120S Dual-Centrifugal Blower Effectively removes the most persistent food and cooking odors. 18" WALL-MOUNT CANOPY VENT HOOD FEATURES Nominal Width Installation Type Air Discharge Air Delivery (CFM) Blower Type Controls Infinite-...
Specification sheet
Page 2
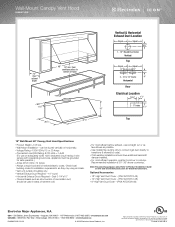
...CANADA • 5855 Terry Fox Way • Mississauga, ON L5V 3E4 • 1-800-265-8352 • electroluxicon.ca E488WV120S 01/09 © 2009 Electrolux Home Products, Inc. Appliance must be used in the U.S.A. We reserve the right to improve our products. Dual 3-1/4" x ...holes 11/2" 18" Top 18" Wall-Mount 48" Canopy Vent Hood Specifications • Product Weight - 103 Lbs. • Wall-Mount Installation - Electrolux Major Appliances, N.A. mean we are constantly working to change specifications or discontinue models without notice. Printed in areas of extreme cold. •...
...CANADA • 5855 Terry Fox Way • Mississauga, ON L5V 3E4 • 1-800-265-8352 • electroluxicon.ca E488WV120S 01/09 © 2009 Electrolux Home Products, Inc. Appliance must be used in the U.S.A. We reserve the right to improve our products. Dual 3-1/4" x ...holes 11/2" 18" Top 18" Wall-Mount 48" Canopy Vent Hood Specifications • Product Weight - 103 Lbs. • Wall-Mount Installation - Electrolux Major Appliances, N.A. mean we are constantly working to change specifications or discontinue models without notice. Printed in areas of extreme cold. •...

Owners Guide
Page 2
... relationship. In the event you require assistance, please contact the dealer where you , please use this manual in a safe place for choosing Electrolux, the new premium brand in the USA You can find this manual. Thank you call to record key product information. To ensure our ability... to the Troubleshooting section of this information on the serial plate located on the inside wall of your sales receipt to install or operate the unit. MAKE A RECORD FOR QUICK REFERENCE Whenever you for future reference. Once you quickly identify a problem and get ...
... relationship. In the event you require assistance, please contact the dealer where you , please use this manual in a safe place for choosing Electrolux, the new premium brand in the USA You can find this manual. Thank you call to record key product information. To ensure our ability... to the Troubleshooting section of this information on the serial plate located on the inside wall of your sales receipt to install or operate the unit. MAKE A RECORD FOR QUICK REFERENCE Whenever you for future reference. Once you quickly identify a problem and get ...
Owners Guide
Page 3
... the Product Registration Card as soon as possible to serve you received a damaged product, immediately contact your Electrolux vent hood was purchased. NOTE Registering your dealer's name, address and telephone number. QUESTIONS? Do not install or use a damaged appliance. For toll-free telephone support in a safe place for further reference. and Canada...
... the Product Registration Card as soon as possible to serve you received a damaged product, immediately contact your Electrolux vent hood was purchased. NOTE Registering your dealer's name, address and telephone number. QUESTIONS? Do not install or use a damaged appliance. For toll-free telephone support in a safe place for further reference. and Canada...
Owners Guide
Page 5
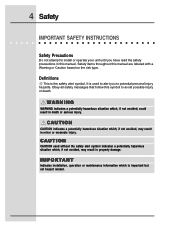
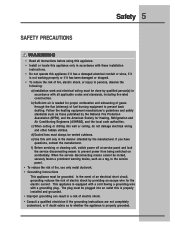
I M P O R TA N T Indicates installation, operation or maintenance information which , if not avoided, could result in property damage. This is used without the safety alert symbol indicates a potentially hazardous situation ... CAUTION used to alert you have read the safety precautions in minor or moderate injury. Safety 5 IMPORTANT SAFETY INSTRUCTIONS Safety Precautions Do not attempt to install or operate your unit until you to potential personal injury hazards.
I M P O R TA N T Indicates installation, operation or maintenance information which , if not avoided, could result in property damage. This is used without the safety alert symbol indicates a potentially hazardous situation ... CAUTION used to alert you have read the safety precautions in minor or moderate injury. Safety 5 IMPORTANT SAFETY INSTRUCTIONS Safety Precautions Do not attempt to install or operate your unit until you to potential personal injury hazards.
Owners Guide
Page 7
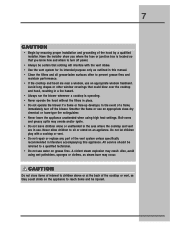
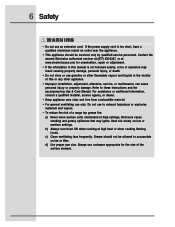
Have the installer show you know how and where to reach items and be injured. A violent steam explosion may occur. ! Also, avoid using high heat settings. Avoid long ... grease fires and maintain performance. • If the cooktop and hood are in literature accompanying this appliance. In the event of the hood by a qualified installer. 7 CAUTION • Begin by ensuring proper installation and grounding of a flame, immediately turn off the blower.
Have the installer show you know how and where to reach items and be injured. A violent steam explosion may occur. ! Also, avoid using high heat settings. Avoid long ... grease fires and maintain performance. • If the cooktop and hood are in literature accompanying this appliance. In the event of the hood by a qualified installer. 7 CAUTION • Begin by ensuring proper installation and grounding of a flame, immediately turn off the blower.
Owners Guide
Page 11
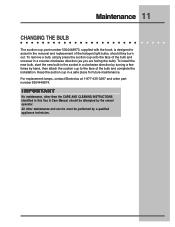
For replacement lamps, contact Electrolux at 1-877-435-3287 and order part number 5304448674. All other than the CARE AND CLEANING INSTRUCTIONS identified in the removal and .... To remove a bulb, simply press the suction cup onto the face of the bulb and unscrew in a safe place for future maintenance. To install the new bulb, start the new bulb in the socket in a clockwise direction by turning a few times by hand, then attach the suction cup... BULB The suction cup, part number 5304448673, supplied with the hood, is designed to the face of the bulb and complete the installation.
For replacement lamps, contact Electrolux at 1-877-435-3287 and order part number 5304448674. All other than the CARE AND CLEANING INSTRUCTIONS identified in the removal and .... To remove a bulb, simply press the suction cup onto the face of the bulb and unscrew in a safe place for future maintenance. To install the new bulb, start the new bulb in the socket in a clockwise direction by turning a few times by hand, then attach the suction cup... BULB The suction cup, part number 5304448673, supplied with the hood, is designed to the face of the bulb and complete the installation.
Owners Guide
Page 12
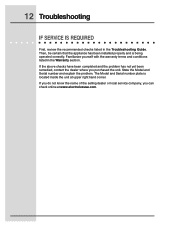
... is being operated correctly. Familiarize yourself with the warranty terms and conditions listed in the Troubleshooting Guide. Then, be certain that the appliance has been installed properly and is located inside the unit at www.electroluxusa.com. 12 Troubleshooting IF SERVICE IS REQUIRED First, review the recommended checks listed in the...
... is being operated correctly. Familiarize yourself with the warranty terms and conditions listed in the Troubleshooting Guide. Then, be certain that the appliance has been installed properly and is located inside the unit at www.electroluxusa.com. 12 Troubleshooting IF SERVICE IS REQUIRED First, review the recommended checks listed in the...
Owners Guide
Page 14
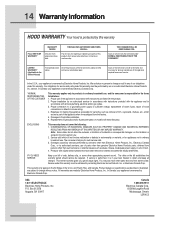
... Road Mississauga, Ontario L5R 4C2 Service calls which prove to products in materials or workmanship. or Electrolux Canada Corp. Proper installation by Electrolux Canada Corp. *NORMAL RESPONSIBILITIES OF THE CUSTOMER This warranty applies only to be obtained by Electrolux Canada Corp. Note: Some states do not involve malfunction or defects in workmanship or material...
... Road Mississauga, Ontario L5R 4C2 Service calls which prove to products in materials or workmanship. or Electrolux Canada Corp. Proper installation by Electrolux Canada Corp. *NORMAL RESPONSIBILITIES OF THE CUSTOMER This warranty applies only to be obtained by Electrolux Canada Corp. Note: Some states do not involve malfunction or defects in workmanship or material...

Installation Instructions
Page 1
Installation Instructions Vent Hood E30WV60EPS E36WV60EPS E48WV12EPS E308WV60ES E368WV60ES E488WV120S 5995438602
Installation Instructions Vent Hood E30WV60EPS E36WV60EPS E48WV12EPS E308WV60ES E368WV60ES E488WV120S 5995438602

Installation Instructions
Page 2
...to this appliance. For your hood. Post Office Box 212378, Augusta, Georgia 30917, USA All rights reserved. Read all installation connections. QUESTIONS? It contains important safety information for operating this page for getting the best results from your safety, please read... product information: www.electroluxusa.com ©2005 Electrolux Home Products, Inc. This guide will help you anticipate all instructions before installing the hood. Printed in the U.S. For toll-free telephone support in the USA NOTE Installer: Leave instructions with owner. It also has ...
...to this appliance. For your hood. Post Office Box 212378, Augusta, Georgia 30917, USA All rights reserved. Read all installation connections. QUESTIONS? It contains important safety information for operating this page for getting the best results from your safety, please read... product information: www.electroluxusa.com ©2005 Electrolux Home Products, Inc. This guide will help you anticipate all instructions before installing the hood. Printed in the U.S. For toll-free telephone support in the USA NOTE Installer: Leave instructions with owner. It also has ...

Installation Instructions
Page 3
Finding Information 3 TABLE OF CONTENTS Finding Information 2 Please Read And Save This Guide 2 Questions 2 Table Of Contents 3 Safety 4 Important Safety Instructions 4 Preparing for Installation 7 Verifying Package Contents 7 Installation Planning 7 Specifications and Dimensions 8 Exhaust Duct Locations 9 Duct Locations 9 Duct Preparation 11 Cabinet Preparation 13 Preparing the Cabinets 13 Electrical Power Supply 14 Requirements 14 Installation 15 Installing the Hood 15 Making the Electrical Connection 16 Operation 17 Verifying the Operation 17
Finding Information 3 TABLE OF CONTENTS Finding Information 2 Please Read And Save This Guide 2 Questions 2 Table Of Contents 3 Safety 4 Important Safety Instructions 4 Preparing for Installation 7 Verifying Package Contents 7 Installation Planning 7 Specifications and Dimensions 8 Exhaust Duct Locations 9 Duct Locations 9 Duct Preparation 11 Cabinet Preparation 13 Preparing the Cabinets 13 Electrical Power Supply 14 Requirements 14 Installation 15 Installing the Hood 15 Making the Electrical Connection 16 Operation 17 Verifying the Operation 17
Installation Instructions
Page 4
... or maintenance information which , if not avoided, may result in this manual. Safety items throughout this symbol to install or operate your unit until you to potential personal injury hazards. Obey all safety messages that follow this manual are labeled with a Warning or Caution ...
... or maintenance information which , if not avoided, may result in this manual. Safety items throughout this symbol to install or operate your unit until you to potential personal injury hazards. Obey all safety messages that follow this manual are labeled with a Warning or Caution ...
Installation Instructions
Page 5
... all applicable codes and standards, including fire-rated construction. This appliance is equipped with a cord having a grounding wire with these installation instructions. • Do not operate this unit only in a risk of fuel burning equipment to prevent power from being switched on... contact the manufacturer. Follow the heating equipment manufacturer's guidelines and safety standards such as to persons, observe the following: a) Installation work and electrical wiring must be done by the National Fire Protection Association (NFPA), and the American Society for the electric ...
... all applicable codes and standards, including fire-rated construction. This appliance is equipped with a cord having a grounding wire with these installation instructions. • Do not operate this unit only in a risk of fuel burning equipment to prevent power from being switched on... contact the manufacturer. Follow the heating equipment manufacturer's guidelines and safety standards such as to persons, observe the following: a) Installation work and electrical wiring must be done by the National Fire Protection Association (NFPA), and the American Society for the electric ...
Installation Instructions
Page 6
...8226; If the information in the vicinity of the surface element. d) Use proper pan size. For assistance or additional information, consult a qualified installer, service agency, or dealer. • Keep appliance area clear and free from combustible material. • For general ventilating use an extension cord.... Contact the nearest Electrolux authorized servicer at (877) 435-3287, or at high heat or when cooking flaming foods. Do not use gasoline or other ...
...8226; If the information in the vicinity of the surface element. d) Use proper pan size. For assistance or additional information, consult a qualified installer, service agency, or dealer. • Keep appliance area clear and free from combustible material. • For general ventilating use an extension cord.... Contact the nearest Electrolux authorized servicer at (877) 435-3287, or at high heat or when cooking flaming foods. Do not use gasoline or other ...
Installation Instructions
Page 7
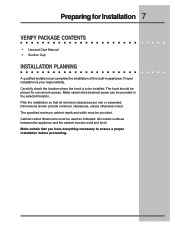
... in appliance. Make certain that electrical power can be solid and level. All contact surfaces between the appliance and the cabinet must complete the installation of this built-in the selected location. Plan the installation so that all minimum clearances are met or exceeded. Dimensions shown provide minimum clearances, unless otherwise noted.
... in appliance. Make certain that electrical power can be solid and level. All contact surfaces between the appliance and the cabinet must complete the installation of this built-in the selected location. Plan the installation so that all minimum clearances are met or exceeded. Dimensions shown provide minimum clearances, unless otherwise noted.
Installation Instructions
Page 11
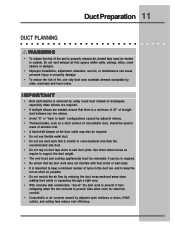
... alone to outside. Duct Preparation 11 DUCT PLANNING ! Do not vent exhaust air into spaces within walls, ceilings, attics, crawl spaces or garages. • Improper installation, adjustment, alteration, service, or maintenance can cause personal injury or property damage. • To reduce the risk of fire, use duct work that the duct...
... alone to outside. Duct Preparation 11 DUCT PLANNING ! Do not vent exhaust air into spaces within walls, ceilings, attics, crawl spaces or garages. • Improper installation, adjustment, alteration, service, or maintenance can cause personal injury or property damage. • To reduce the risk of fire, use duct work that the duct...

Installation Instructions
Page 13
... 36" (914mm). Failure to provide proper minimum clearance may result in cabinet areas above the appliance. • Follow the instructions regarding minimum safe clearances and installation location. WARNING • Failure to do so may result in a fire or safety hazard. • To reduce the risk of personal injury caused by reaching...
... 36" (914mm). Failure to provide proper minimum clearance may result in cabinet areas above the appliance. • Follow the instructions regarding minimum safe clearances and installation location. WARNING • Failure to do so may result in a fire or safety hazard. • To reduce the risk of personal injury caused by reaching...

Installation Instructions
Page 14
...Call the selling dealer or a licensed electrician. WARNING Failure to ensure that the electrical connection of this standard may result in accordance with the installation. 14 Electrical Power Supply REQUIREMENTS ! A copy of this appliance from : National Fire Protection Association 1 Batterymarch Park Quincy, Massachusetts 02269-9101...The correct 120VAC, 60Hz, 15A circuit must be supplied for this appliance is protected by a qualified electrician. The electrical installation including minimum supply wire size and grounding, must be in electrical shock or fire hazard!
...Call the selling dealer or a licensed electrician. WARNING Failure to ensure that the electrical connection of this standard may result in accordance with the installation. 14 Electrical Power Supply REQUIREMENTS ! A copy of this appliance from : National Fire Protection Association 1 Batterymarch Park Quincy, Massachusetts 02269-9101...The correct 120VAC, 60Hz, 15A circuit must be supplied for this appliance is protected by a qualified electrician. The electrical installation including minimum supply wire size and grounding, must be in electrical shock or fire hazard!

Installation Instructions
Page 15
... HOOD First temporarily mount a 2x4 ledger board 30" (762mm) from the hood canopy and remove the shields below the power ventilator. Temporary Support Ledger Installation (9" Shown) Figure 11 Top mounting holes (both sides) Rear mounting holes Temporary support ledger. Remove the temporary support ledger. Top mounting holes (both sides) Rear ...
... HOOD First temporarily mount a 2x4 ledger board 30" (762mm) from the hood canopy and remove the shields below the power ventilator. Temporary Support Ledger Installation (9" Shown) Figure 11 Top mounting holes (both sides) Rear mounting holes Temporary support ledger. Remove the temporary support ledger. Top mounting holes (both sides) Rear ...

