
Specification sheet
Page 1
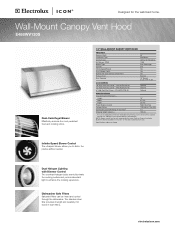
... 26-7/8" Right Rear Top 120V/60Hz /15 or 20A 1.4 108 Lbs. ‡ For use on the web at electroluxicon.com. Appliance must be rinsed and cycled through the dishwasher. The stainless steel filter provides strength and durability not found in the precise airflow needed. ...abundant light to Product Installation Guide for safe operation. Specifications subject to dial in foam filters. Wall-Mount Canopy Vent Hood E488WV120S Dual-Centrifugal Blower Effectively removes the most persistent food and cooking odors. 18" WALL-MOUNT CANOPY VENT HOOD FEATURES Nominal Width...
... 26-7/8" Right Rear Top 120V/60Hz /15 or 20A 1.4 108 Lbs. ‡ For use on the web at electroluxicon.com. Appliance must be rinsed and cycled through the dishwasher. The stainless steel filter provides strength and durability not found in the precise airflow needed. ...abundant light to Product Installation Guide for safe operation. Specifications subject to dial in foam filters. Wall-Mount Canopy Vent Hood E488WV120S Dual-Centrifugal Blower Effectively removes the most persistent food and cooking odors. 18" WALL-MOUNT CANOPY VENT HOOD FEATURES Nominal Width...
Specification sheet
Page 2
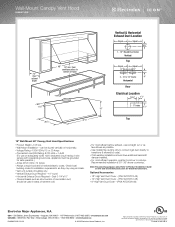
...11/2" 18" Top 18" Wall-Mount 48" Canopy Vent Hood Specifications • Product Weight - 103 Lbs. • Wall-Mount Installation - Appliance must be grounded for detailed instructions. Note: For planning purposes only. Optional Accessories • 18"- High Vent Duct Cover - (PN # ACCVC06... 5855 Terry Fox Way • Mississauga, ON L5V 3E4 • 1-800-265-8352 • electroluxicon.ca E488WV120S 01/09 © 2009 Electrolux Home Products, Inc. Electrolux Major Appliances, N.A. We reserve the right to improve our products. from cooktop surface to cooktop. High Vent Duct Cover -...
...11/2" 18" Top 18" Wall-Mount 48" Canopy Vent Hood Specifications • Product Weight - 103 Lbs. • Wall-Mount Installation - Appliance must be grounded for detailed instructions. Note: For planning purposes only. Optional Accessories • 18"- High Vent Duct Cover - (PN # ACCVC06... 5855 Terry Fox Way • Mississauga, ON L5V 3E4 • 1-800-265-8352 • electroluxicon.ca E488WV120S 01/09 © 2009 Electrolux Home Products, Inc. Electrolux Major Appliances, N.A. We reserve the right to improve our products. from cooktop surface to cooktop. High Vent Duct Cover -...

Owners Guide
Page 2
... you purchased your model number and serial number. In the event you require assistance, please contact the dealer where you keep this page for choosing Electrolux, the new premium brand in the USA I M P O R TA N T PLEASE READ all instructions completely before attempting to this manual in a safe...to request information or service, you , please use this information on the serial plate located on the product registration card. ©2005 Electrolux Home Products, Inc. You can find this page to know your unit. To ensure our ability to continue serving you will help you...
... you purchased your model number and serial number. In the event you require assistance, please contact the dealer where you keep this page for choosing Electrolux, the new premium brand in the USA I M P O R TA N T PLEASE READ all instructions completely before attempting to this manual in a safe...to request information or service, you , please use this information on the serial plate located on the product registration card. ©2005 Electrolux Home Products, Inc. You can find this page to know your unit. To ensure our ability to continue serving you will help you...
Owners Guide
Page 3
... to serve you received a damaged product, immediately contact your product with Electrolux enhances our ability to validate the registration date. If you . Please record the purchase date of your Electrolux unit and your Product Registration Card in the mail. and Canada: 1-...information: www.electroluxusa.com Do not install or use a damaged appliance. QUESTIONS? Purchase Date Electrolux Model Number Electrolux Serial Number Dealer Name Dealer Address Dealer Telephone Keep this manual also includes your Electrolux vent hood was purchased. You can register online (at the ...
... to serve you received a damaged product, immediately contact your product with Electrolux enhances our ability to validate the registration date. If you . Please record the purchase date of your Electrolux unit and your Product Registration Card in the mail. and Canada: 1-...information: www.electroluxusa.com Do not install or use a damaged appliance. QUESTIONS? Purchase Date Electrolux Model Number Electrolux Serial Number Dealer Name Dealer Address Dealer Telephone Keep this manual also includes your Electrolux vent hood was purchased. You can register online (at the ...
Owners Guide
Page 6
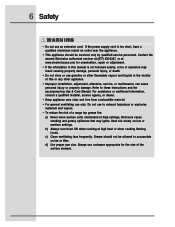
... the following : a) SMOTHER FLAMES with your back to an exit. • To reduce the risk of a range top grease fire, observe the following : a) Use this appliance from the power supply before servicing. ! BE CAREFUL TO PREVENT BURNS. WARNING • To reduce the risk of injury to exhaust hazardous or explosive materials...
... the following : a) SMOTHER FLAMES with your back to an exit. • To reduce the risk of a range top grease fire, observe the following : a) Use this appliance from the power supply before servicing. ! BE CAREFUL TO PREVENT BURNS. WARNING • To reduce the risk of injury to exhaust hazardous or explosive materials...
Owners Guide
Page 7
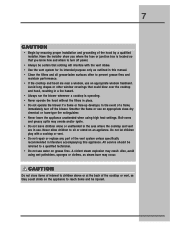
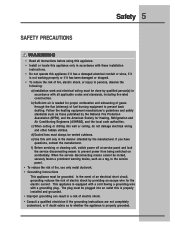
...surfaces often to a qualified technician. • Do not use an appropriate class dry chemical or foam-type fire extinguisher. • Never leave the appliance unattended when using wet potholders, sponges or clothes, as they could blow over the cooktop and hood, resulting in a fire hazard. • Always...children above or at the back of the cooktop or vent, as steam burn may occur. ! Smother the flame or use water on an appliance. 7 CAUTION • Begin by ensuring proper installation and grounding of the vent system unless specifically recommended in place. • Do not ...
...surfaces often to a qualified technician. • Do not use an appropriate class dry chemical or foam-type fire extinguisher. • Never leave the appliance unattended when using wet potholders, sponges or clothes, as they could blow over the cooktop and hood, resulting in a fire hazard. • Always...children above or at the back of the cooktop or vent, as steam burn may occur. ! Smother the flame or use water on an appliance. 7 CAUTION • Begin by ensuring proper installation and grounding of the vent system unless specifically recommended in place. • Do not ...
Owners Guide
Page 8
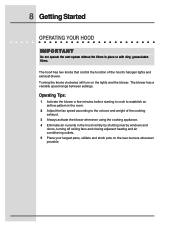
... lights and the blower. The hood has two knobs that control the function of the cooking exhaust. 3 Always activate the blower whenever using the cooking appliance. 4 Eliminate air currents in place or with dirty, grease-laden filters.
... lights and the blower. The hood has two knobs that control the function of the cooking exhaust. 3 Always activate the blower whenever using the cooking appliance. 4 Eliminate air currents in place or with dirty, grease-laden filters.
Owners Guide
Page 11
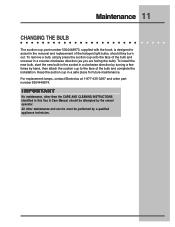
... they burn out. To install the new bulb, start the new bulb in the socket in a clockwise direction by turning a few times by a qualified appliance technician. I M P O R TA N T No maintenance, other maintenance and service must be performed by hand, then attach the suction cup to assist... in the removal and replacement of the halogen light bulbs, should be attempted by the owner/ operator. For replacement lamps, contact Electrolux at 1-877-435-3287 and order part number 5304448674. Maintenance 11 CHANGING THE BULB The suction cup, part number 5304448673, supplied with ...
... they burn out. To install the new bulb, start the new bulb in the socket in a clockwise direction by turning a few times by a qualified appliance technician. I M P O R TA N T No maintenance, other maintenance and service must be performed by hand, then attach the suction cup to assist... in the removal and replacement of the halogen light bulbs, should be attempted by the owner/ operator. For replacement lamps, contact Electrolux at 1-877-435-3287 and order part number 5304448674. Maintenance 11 CHANGING THE BULB The suction cup, part number 5304448673, supplied with ...
Owners Guide
Page 12
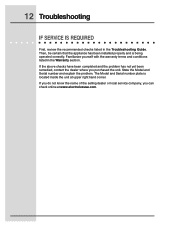
... the problem has not yet been remedied, contact the dealer where you can check online at upper right hand corner. Then, be certain that the appliance has been installed properly and is located inside the unit at www.electroluxusa.com.
... the problem has not yet been remedied, contact the dealer where you can check online at upper right hand corner. Then, be certain that the appliance has been installed properly and is located inside the unit at www.electroluxusa.com.
Owners Guide
Page 14
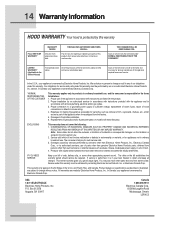
...purchase date. EXCLUSIONS This warranty does not cover the following: 1. obtained from the factory. 5. In Canada, your appliance is warranted by Electrolux Canada Corp. *NORMAL RESPONSIBILITIES OF THE CUSTOMER This warranty applies only to change without notice. THE CONSUMER WILL BE RESPONSIBLE...such as removal of trim, cupboards, shelves, etc., which are listed under this warranty must be defective in your appliance is warranted by Electrolux Canada Corp. This warranty only applies in house wiring. 4. All warranties are subject to change or add to finish...
...purchase date. EXCLUSIONS This warranty does not cover the following: 1. obtained from the factory. 5. In Canada, your appliance is warranted by Electrolux Canada Corp. *NORMAL RESPONSIBILITIES OF THE CUSTOMER This warranty applies only to change without notice. THE CONSUMER WILL BE RESPONSIBLE...such as removal of trim, cupboards, shelves, etc., which are listed under this warranty must be defective in your appliance is warranted by Electrolux Canada Corp. This warranty only applies in house wiring. 4. All warranties are subject to change or add to finish...

Installation Instructions
Page 2
... USA and Canada: 1-877- 4ELECTROLUX (1-877-435-3287) For online support and Internet product information: www.electroluxusa.com ©2005 Electrolux Home Products, Inc. Owner: Read your hood. QUESTIONS? Read all installation connections. Post Office Box 212378, Augusta, Georgia 30917, ...suggestions for future reference. Printed in the U.S. 2 Finding Information READ AND SAVE THESE INSTRUCTIONS Attach your sales receipt to this appliance. It contains important safety information for operating this page for getting the best results from your Hood Use & Care Manual. ...
... USA and Canada: 1-877- 4ELECTROLUX (1-877-435-3287) For online support and Internet product information: www.electroluxusa.com ©2005 Electrolux Home Products, Inc. Owner: Read your hood. QUESTIONS? Read all installation connections. Post Office Box 212378, Augusta, Georgia 30917, ...suggestions for future reference. Printed in the U.S. 2 Finding Information READ AND SAVE THESE INSTRUCTIONS Attach your sales receipt to this appliance. It contains important safety information for operating this page for getting the best results from your Hood Use & Care Manual. ...
Installation Instructions
Page 5
...by the manufacturer. f) Before servicing or cleaning unit, switch power off at service panel and lock the service disconnecting means to whether the appliance is equipped with a cord having a grounding wire with these installation instructions. • Do not operate this is properly installed and grounded... for Heating, Refrigeration and Air Conditioning Engineers (ASHRAE), and the local code authorities. c) When cutting or drilling into an outlet this appliance if it has a damaged electrical conduit or wires, if it has been damaged or dropped. • To reduce the risk of ...
...by the manufacturer. f) Before servicing or cleaning unit, switch power off at service panel and lock the service disconnecting means to whether the appliance is equipped with a cord having a grounding wire with these installation instructions. • Do not operate this is properly installed and grounded... for Heating, Refrigeration and Air Conditioning Engineers (ASHRAE), and the local code authorities. c) When cutting or drilling into an outlet this appliance if it has a damaged electrical conduit or wires, if it has been damaged or dropped. • To reduce the risk of ...
Installation Instructions
Page 6
...other flammable vapors and liquids in the vicinity of this manual is too short, have a qualified electrician install an outlet near the appliance. • This appliance should not be serviced only by qualified service personnel. c) Clean ventilating fans frequently. For assistance or additional information, consult a .... d) Use proper pan size. If the power supply cord is not followed exactly, a fire or explosion may ignite. Contact the nearest Electrolux authorized servicer at (877) 435-3287, or at www.electroluxusa.com for the size of a range top grease fire: a) Never leave...
...other flammable vapors and liquids in the vicinity of this manual is too short, have a qualified electrician install an outlet near the appliance. • This appliance should not be serviced only by qualified service personnel. c) Clean ventilating fans frequently. For assistance or additional information, consult a .... d) Use proper pan size. If the power supply cord is not followed exactly, a fire or explosion may ignite. Contact the nearest Electrolux authorized servicer at (877) 435-3287, or at www.electroluxusa.com for the size of a range top grease fire: a) Never leave...
Installation Instructions
Page 7
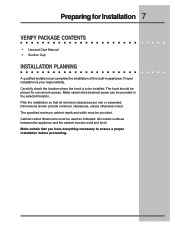
Carefully check the location where the hood is your responsibility. Cabinet cutout dimensions must be provided in appliance. Make certain that electrical power can be provided. Make certain that all minimum clearances are met or exceeded. Proper installation...be installed. Dimensions shown provide minimum clearances, unless otherwise noted. The hood should be solid and level. All contact surfaces between the appliance and the cabinet must complete the installation of this built-in the selected location. Preparing for Installation 7 VERIFY PACKAGE CONTENTS • Use...
Carefully check the location where the hood is your responsibility. Cabinet cutout dimensions must be provided in appliance. Make certain that electrical power can be provided. Make certain that all minimum clearances are met or exceeded. Proper installation...be installed. Dimensions shown provide minimum clearances, unless otherwise noted. The hood should be solid and level. All contact surfaces between the appliance and the cabinet must complete the installation of this built-in the selected location. Preparing for Installation 7 VERIFY PACKAGE CONTENTS • Use...
Installation Instructions
Page 11
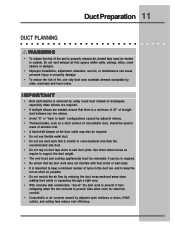
... keep the run , and to seal duct joints. Use sheet metal screws as require to support the duct weight. • The vent hood and cooking appliance(s) must be required. • Do not use flexible metal duct. • Do not use only duct work materials deemed acceptable by using round duct instead...
... keep the run , and to seal duct joints. Use sheet metal screws as require to support the duct weight. • The vent hood and cooking appliance(s) must be required. • Do not use flexible metal duct. • Do not use only duct work materials deemed acceptable by using round duct instead...

Installation Instructions
Page 13
...so may result in a fire or safety hazard. • To reduce the risk of personal injury caused by reaching over a hot appliance, cabinet storage space located directly above the cooktop should be avoided. • Do not store combustible materials or items adversely affected by heat...30") is 36" (914mm). Maximum effective clearance from cooking surface to provide proper minimum clearance may result in cabinet areas above the appliance. • Follow the instructions regarding minimum safe clearances and installation location. WARNING • Failure to bottom of hood is the minimum...
...so may result in a fire or safety hazard. • To reduce the risk of personal injury caused by reaching over a hot appliance, cabinet storage space located directly above the cooktop should be avoided. • Do not store combustible materials or items adversely affected by heat...30") is 36" (914mm). Maximum effective clearance from cooking surface to provide proper minimum clearance may result in cabinet areas above the appliance. • Follow the instructions regarding minimum safe clearances and installation location. WARNING • Failure to bottom of hood is the minimum...

Installation Instructions
Page 14
... selling dealer or a licensed electrician. The electrical installation including minimum supply wire size and grounding, must be supplied for this appliance from : National Fire Protection Association 1 Batterymarch Park Quincy, Massachusetts 02269-9101 The correct 120VAC, 60Hz, 15A circuit must be... REQUIREMENTS ! If the electric service provided does not meet the product specifications, do not proceed with the latest revision of this appliance is protected by a qualified electrician. It is the owner's responsibility to disconnect power may be in electrical shock or fire hazard...
... selling dealer or a licensed electrician. The electrical installation including minimum supply wire size and grounding, must be supplied for this appliance from : National Fire Protection Association 1 Batterymarch Park Quincy, Massachusetts 02269-9101 The correct 120VAC, 60Hz, 15A circuit must be... REQUIREMENTS ! If the electric service provided does not meet the product specifications, do not proceed with the latest revision of this appliance is protected by a qualified electrician. It is the owner's responsibility to disconnect power may be in electrical shock or fire hazard...

Installation Instructions
Page 16
... is disconnected before proceeding. • Verify that the power supply matches the ratings found on the appliance data plate before proceeding. • The complete appliance must be connected through the top or back of the power ventilator. 16 Installation MAKING THE ELECTRICAL ...CONNECTION ! WARNING • Ensure that the power supply is applied. • Do not ground the appliance with special connectors designed and agency-certified for this purpose. Follow the connector manufacturer's recommended procedure carefully. Follow the wiring diagrams...
... is disconnected before proceeding. • Verify that the power supply matches the ratings found on the appliance data plate before proceeding. • The complete appliance must be connected through the top or back of the power ventilator. 16 Installation MAKING THE ELECTRICAL ...CONNECTION ! WARNING • Ensure that the power supply is applied. • Do not ground the appliance with special connectors designed and agency-certified for this purpose. Follow the connector manufacturer's recommended procedure carefully. Follow the wiring diagrams...
Installation Instructions
Page 17
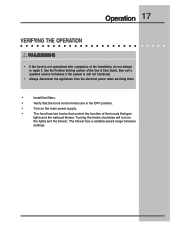
... operational after completion of the hoods Halogen lights and the exhaust blower. WARNING • If the hood is still not functional. • Always disconnect the appliances from the electrical power when servicing them. • Install the filters. • Verify that control the function of the installation, do not attempt to repair...
... operational after completion of the hoods Halogen lights and the exhaust blower. WARNING • If the hood is still not functional. • Always disconnect the appliances from the electrical power when servicing them. • Install the filters. • Verify that control the function of the installation, do not attempt to repair...