Owners Manual
Page 2
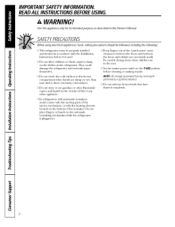
... the shelves in the vicinity of the iceinaker. Be careful closh_g doors when children are necesseaily small. a, WARNING! SAFETYPRECAUTIONS When using electrical appliances, basic safety precautions should be properly hlstalled a]ld located in . Set the master power switch to these extreinely cold surfaces. In refligerators ... moving pea'ts of the "pinch point" areas; Use this Owner's Manual. Do not touch the cold surfaces in this appliance only for its intended purpose as described in the fl'eezer coinpartinent when hands are damp or wet. IMPORTANTSAFETYINFORMATION.
... the shelves in the vicinity of the iceinaker. Be careful closh_g doors when children are necesseaily small. a, WARNING! SAFETYPRECAUTIONS When using electrical appliances, basic safety precautions should be properly hlstalled a]ld located in . Set the master power switch to these extreinely cold surfaces. In refligerators ... moving pea'ts of the "pinch point" areas; Use this Owner's Manual. Do not touch the cold surfaces in this appliance only for its intended purpose as described in the fl'eezer coinpartinent when hands are damp or wet. IMPORTANTSAFETYINFORMATION.

Owners Manual
Page 4
... Do not use a cord that have it i.syour personal responsibility auld obligation to have become fl'ayed or otherwise daanaged. For personal safety, this appliance i.sequipped with a 3-prong (grounding) plug, which could cause a fire hazard fl'oin overheated wires. Never unplug your refl'igerator by a qualified...When moving the refl'igeratoL be properly grounded. Do not use an adapter plug to connect the refrigerator to roll over or daanage the power cord. Tile power coid of this appliance must be cax'eflfl not to a 2-prong outlet. Tile refl'igerator should always be plugged ...
... Do not use a cord that have it i.syour personal responsibility auld obligation to have become fl'ayed or otherwise daanaged. For personal safety, this appliance i.sequipped with a 3-prong (grounding) plug, which could cause a fire hazard fl'oin overheated wires. Never unplug your refl'igerator by a qualified...When moving the refl'igeratoL be properly grounded. Do not use an adapter plug to connect the refrigerator to roll over or daanage the power cord. Tile power coid of this appliance must be cax'eflfl not to a 2-prong outlet. Tile refl'igerator should always be plugged ...

Owners Manual
Page 12
...inild liquid dish detergent. Dispenser drip area, Cleaning the Outside The spill sheff and the area beneath it to a quea't (1 liter) of the refrigerator. DU with a illild lklukl dish deteigent. Cleaning the Inside Turnoff power at the circuit breaker or fuse box before cleaning. Use wealn water eald baking... (15 ml) of baMng soda to shatter. 12 lean with a cloth deanpened with warm water eald a mild liquid dish deteigent. Do not use appliance wax oi" polish on the stainless steel. Careand cleaning of water. Clean with soapy water. Dry with a clean, soft cloth.
...inild liquid dish detergent. Dispenser drip area, Cleaning the Outside The spill sheff and the area beneath it to a quea't (1 liter) of the refrigerator. DU with a illild lklukl dish deteigent. Cleaning the Inside Turnoff power at the circuit breaker or fuse box before cleaning. Use wealn water eald baking... (15 ml) of baMng soda to shatter. 12 lean with a cloth deanpened with warm water eald a mild liquid dish deteigent. Do not use appliance wax oi" polish on the stainless steel. Careand cleaning of water. Clean with soapy water. Dry with a clean, soft cloth.
Owners Manual
Page 14
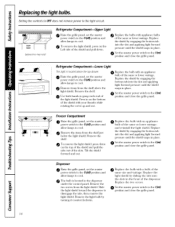
... power switch to the 0 (off ) position eald allow lmnps to the I (on the bottom of the shield with an appliance bulb of the light shield. Replace the bulb with appliance bulbs of the saine or lower wattage. Remove the iteins fl'oin the shelf just below the light sh>ld. Tilt..., set the master power switch to the ] (on the Left side of the same size and wattage. Set the master power switch to cool. Refrigerator Compartment--Lower This light is located in the front of the slots. Remove the light bulb by turning it counterclockwise. Replace the bulb with a bulb...
... power switch to the 0 (off ) position eald allow lmnps to the I (on the bottom of the shield with an appliance bulb of the light shield. Replace the bulb with appliance bulbs of the saine or lower wattage. Remove the iteins fl'oin the shelf just below the light sh>ld. Tilt..., set the master power switch to the ] (on the Left side of the same size and wattage. Set the master power switch to cool. Refrigerator Compartment--Lower This light is located in the front of the slots. Remove the light bulb by turning it counterclockwise. Replace the bulb with a bulb...
Owners Manual
Page 15
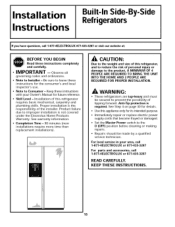
...to improper installation is not covered under the Electrolux Home Products Warranty. Proper installation is required. Anti-Tip protection is the responsibility of the installer, Product failure due to Installer - Installation Instructions Built-In Side-By-Side Refrigerators I If you have questions, call 1-877...the O (OFF) position before cleaning or making repairs, • Repairs should be made by a qualified service technician. Installation of this appliance only for the consumer's and local inspector's use. • Note to the product, A MINIMUM OF 4 PEOPLE ARE REQUIRED TO BRING...
...to improper installation is not covered under the Electrolux Home Products Warranty. Proper installation is required. Anti-Tip protection is the responsibility of the installer, Product failure due to Installer - Installation Instructions Built-In Side-By-Side Refrigerators I If you have questions, call 1-877...the O (OFF) position before cleaning or making repairs, • Repairs should be made by a qualified service technician. Installation of this appliance only for the consumer's and local inspector's use. • Note to the product, A MINIMUM OF 4 PEOPLE ARE REQUIRED TO BRING...

Owners Manual
Page 16
...8226; Special 3M Dual Lock adhesive strips for Anti-Tip bracket • Screws to secure refrigerator to cut banding • Stepladder • Bucket • Level • Appliance dolly • Tubing cutter • Flathead screwdriver • 1/2"open-end wrench •... 7/32", 1/2" sockets • Safety glasses • 7/16" open-end • Pliers wrench Drill& Bits Sockets Appliance Dolly SaFetGy lasses Open-endWrenches FlatheadScrewdriver Stepladder PhillipsHead Screwdriver Tubing Cutter Level Bucket Pliers Tinsnips 16 CopperWater Line Tubing WaterShutofVf alve #...
...8226; Special 3M Dual Lock adhesive strips for Anti-Tip bracket • Screws to secure refrigerator to cut banding • Stepladder • Bucket • Level • Appliance dolly • Tubing cutter • Flathead screwdriver • 1/2"open-end wrench •... 7/32", 1/2" sockets • Safety glasses • 7/16" open-end • Pliers wrench Drill& Bits Sockets Appliance Dolly SaFetGy lasses Open-endWrenches FlatheadScrewdriver Stepladder PhillipsHead Screwdriver Tubing Cutter Level Bucket Pliers Tinsnips 16 CopperWater Line Tubing WaterShutofVf alve #...

Owners Manual
Page 27
... that is your personal responsibility and obligation to support a fully loaded refrigerator, or approximately 1500 lb. FLOORING For proper installation, this appliance. GROUNDING THE REFRIGERATOR IMPORTANTiplease read carefully FOR PERSONAL SAFETY, THIS APPLIANCE MUST BE PROPERLY GROUNDED. Installation Instructions SIDE PANELS Side panels (not ...case trim. NOTE: Protect the finish of the cardboard carton and place under the refrigerator where you are working. DO NOT USE AN EXTENSION CORD WITH THIS APPLIANCE. 27 Cut a large section of the flooring. This surface should be strong ...
... that is your personal responsibility and obligation to support a fully loaded refrigerator, or approximately 1500 lb. FLOORING For proper installation, this appliance. GROUNDING THE REFRIGERATOR IMPORTANTiplease read carefully FOR PERSONAL SAFETY, THIS APPLIANCE MUST BE PROPERLY GROUNDED. Installation Instructions SIDE PANELS Side panels (not ...case trim. NOTE: Protect the finish of the cardboard carton and place under the refrigerator where you are working. DO NOT USE AN EXTENSION CORD WITH THIS APPLIANCE. 27 Cut a large section of the flooring. This surface should be strong ...

Owners Manual
Page 28
...posts are too long, cut banding at the top and bottom; Installation Instructions [] REMOVE PACKAGING CAUTION: Refrigerator is secured to the skid with the appliance dolly. • Remove toekick taped to the refrigerator, • Remove the three 1/2" nuts and washers from the Freezer side. • Remove nut ...Lift the unit off top of the unit, • Set toekick aside for final installation. CAUTION: MAKE SURE THE WATER LINE IS CLEAR OF APPLIANCE DOLLY TO AVOID DAMAGE. 28 remove outer carton. • Slide out rear corner posts (2). • Slide carton off the skid with six...
...posts are too long, cut banding at the top and bottom; Installation Instructions [] REMOVE PACKAGING CAUTION: Refrigerator is secured to the skid with the appliance dolly. • Remove toekick taped to the refrigerator, • Remove the three 1/2" nuts and washers from the Freezer side. • Remove nut ...Lift the unit off top of the unit, • Set toekick aside for final installation. CAUTION: MAKE SURE THE WATER LINE IS CLEAR OF APPLIANCE DOLLY TO AVOID DAMAGE. 28 remove outer carton. • Slide out rear corner posts (2). • Slide carton off the skid with six...
Owners Manual
Page 41
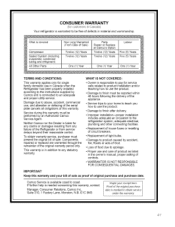
... how to use the product. • Damage to finish after delivery. • Improper installation--proper installation includes adequate air circulation to the refrigeration system, adequate electrical, plumbing and other connecting facilities. • Replacement of house fuses or resetting of circuit breakers. • Replacement of light.../or teaching how to use the product. • Damage to finish must be reported within 48 hours following the delivery of the appliance. • Service trips to your bill of sale as listed in the owner's manual, proper setting of controls. • WARRANTOR...
... how to use the product. • Damage to finish after delivery. • Improper installation--proper installation includes adequate air circulation to the refrigeration system, adequate electrical, plumbing and other connecting facilities. • Replacement of house fuses or resetting of circuit breakers. • Replacement of light.../or teaching how to use the product. • Damage to finish must be reported within 48 hours following the delivery of the appliance. • Service trips to your bill of sale as listed in the owner's manual, proper setting of controls. • WARRANTOR...
Owners Manual
Page 42
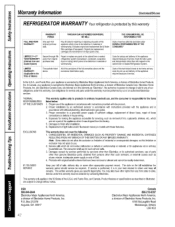
... or add to you specific legal rights. If service is warranted by Electrolux Major Appliances North America, a division of sale, delivery slip, or some other ...42 and Puerto Rico, your appliance is performed, it was shipped from the factory. 5. In Canada, your appliance is responsible for appliances not in accordance with the appliance...parts other than Electrolux, or its authorized servicers; USA 800-944-9044 ElectroluxMajorAppliancesNorthAmerica, a divisionof ElectroluxHomeProducts,Inc. WarrantyInformation ElectroluxUSA.¢o REFRIGERATOR WARRANTY Yourrefrigeratoris protected...
... or add to you specific legal rights. If service is warranted by Electrolux Major Appliances North America, a division of sale, delivery slip, or some other ...42 and Puerto Rico, your appliance is performed, it was shipped from the factory. 5. In Canada, your appliance is responsible for appliances not in accordance with the appliance...parts other than Electrolux, or its authorized servicers; USA 800-944-9044 ElectroluxMajorAppliancesNorthAmerica, a divisionof ElectroluxHomeProducts,Inc. WarrantyInformation ElectroluxUSA.¢o REFRIGERATOR WARRANTY Yourrefrigeratoris protected...