

Owners Guide
Page 2
... this manual. In the event you require assistance, please contact the dealer where you purchased your unit installed, we suggest you , please use this manual in a safe place for choosing Electrolux, the new premium brand in the USA Post Office Box 212378, Augusta, Georgia 30917, USA All rights... reserved. To ensure our ability to continue serving you keep this page to install or operate the unit. Once you quickly identify a...
... this manual. In the event you require assistance, please contact the dealer where you purchased your unit installed, we suggest you , please use this manual in a safe place for choosing Electrolux, the new premium brand in the USA Post Office Box 212378, Augusta, Georgia 30917, USA All rights... reserved. To ensure our ability to continue serving you keep this page to install or operate the unit. Once you quickly identify a...
Owners Guide
Page 3
... Number Dealer Name Dealer Address Dealer Telephone Keep this manual also includes your product with Electrolux enhances our ability to validate the registration date. Do not install or use a damaged appliance. Complete and mail the Product Registration Card as soon as possible to serve you ...package containing this manual and the sales receipt together in a safe place for further reference. Please record the purchase date of your Electrolux unit and your dealer or builder. QUESTIONS? If you . For toll-free telephone support in the mail. You can register online...
... Number Dealer Name Dealer Address Dealer Telephone Keep this manual also includes your product with Electrolux enhances our ability to validate the registration date. Do not install or use a damaged appliance. Complete and mail the Product Registration Card as soon as possible to serve you ...package containing this manual and the sales receipt together in a safe place for further reference. Please record the purchase date of your Electrolux unit and your dealer or builder. QUESTIONS? If you . For toll-free telephone support in the mail. You can register online...
Owners Guide
Page 5
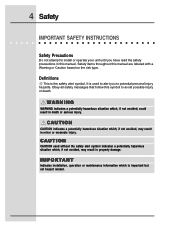
... hazard related. Safety 5 IMPORTANT SAFETY INSTRUCTIONS Safety Precautions Do not attempt to potential personal injury hazards. Definitions ! I M P O R TA N T Indicates installation, operation or maintenance information which , if not avoided, may result in death or serious injury. ! CAUTION CAUTION used to alert you to... install or operate your unit until you have read the safety precautions in property damage. Safety items throughout this symbol to avoid possible...
... hazard related. Safety 5 IMPORTANT SAFETY INSTRUCTIONS Safety Precautions Do not attempt to potential personal injury hazards. Definitions ! I M P O R TA N T Indicates installation, operation or maintenance information which , if not avoided, may result in death or serious injury. ! CAUTION CAUTION used to alert you to... install or operate your unit until you have read the safety precautions in property damage. Safety items throughout this symbol to avoid possible...
Owners Guide
Page 7
.... • Use the vent system for its intended purpose only as outlined in this appliance. Also, avoid using high heat settings. Have the installer show you know how and where to turn off power. • Always be referred to reach items and be injured. Smother the flame or ...• Clean the filters and all grease-laden surfaces often to children above or at the back of the hood by a qualified installer. 7 CAUTION • Begin by ensuring proper installation and grounding of the cooktop or vent, as they could blow over the cooktop and hood, resulting in a fire hazard. •...
.... • Use the vent system for its intended purpose only as outlined in this appliance. Also, avoid using high heat settings. Have the installer show you know how and where to turn off power. • Always be referred to reach items and be injured. Smother the flame or ...• Clean the filters and all grease-laden surfaces often to children above or at the back of the hood by a qualified installer. 7 CAUTION • Begin by ensuring proper installation and grounding of the cooktop or vent, as they could blow over the cooktop and hood, resulting in a fire hazard. •...
Owners Guide
Page 11
To install the new bulb, start the new bulb in the socket in a clockwise direction by turning a few times by a qualified appliance technician. Keep the suction cup in a counter-clockwise direction (as you are facing the bulb). For replacement lamps, contact Electrolux at 1-877-435-3287 and order ... 11 CHANGING THE BULB The suction cup, part number 5304448673, supplied with the hood, is designed to the face of the bulb and complete the installation. I M P O R TA N T No maintenance, other maintenance and service must be performed by hand, then attach the suction cup to assist in this ...
To install the new bulb, start the new bulb in the socket in a clockwise direction by turning a few times by a qualified appliance technician. Keep the suction cup in a counter-clockwise direction (as you are facing the bulb). For replacement lamps, contact Electrolux at 1-877-435-3287 and order ... 11 CHANGING THE BULB The suction cup, part number 5304448673, supplied with the hood, is designed to the face of the bulb and complete the installation. I M P O R TA N T No maintenance, other maintenance and service must be performed by hand, then attach the suction cup to assist in this ...
Owners Guide
Page 12
... is being operated correctly. Familiarize yourself with the warranty terms and conditions listed in the Troubleshooting Guide. Then, be certain that the appliance has been installed properly and is located inside the unit at www.electroluxusa.com. If you do not know the name of the selling dealer or local service...
... is being operated correctly. Familiarize yourself with the warranty terms and conditions listed in the Troubleshooting Guide. Then, be certain that the appliance has been installed properly and is located inside the unit at www.electroluxusa.com. If you do not know the name of the selling dealer or local service...
Owners Guide
Page 14
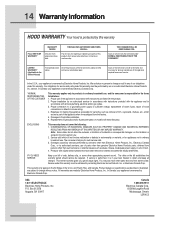
...to you specific legal rights. and Puerto Rico, and Canada. P.O. Proper installation by an authorized servicer in accordance with instructions provided with the appliance and in your appliance is warranted by Electrolux Canada Corp. *NORMAL RESPONSIBILITIES OF THE CUSTOMER This warranty applies only to... FROM ANY BREACH OF THIS WRITTEN OR ANY IMPLIED WARRANTY. We authorize no person to finish after installation. 6. Proper use , and the consumer is warranted by Electrolux Home Products, Inc. EXCLUSIONS This warranty does not cover the following: 1. All warranties are listed...
...to you specific legal rights. and Puerto Rico, and Canada. P.O. Proper installation by an authorized servicer in accordance with instructions provided with the appliance and in your appliance is warranted by Electrolux Canada Corp. *NORMAL RESPONSIBILITIES OF THE CUSTOMER This warranty applies only to... FROM ANY BREACH OF THIS WRITTEN OR ANY IMPLIED WARRANTY. We authorize no person to finish after installation. 6. Proper use , and the consumer is warranted by Electrolux Home Products, Inc. EXCLUSIONS This warranty does not cover the following: 1. All warranties are listed...

Installation Instructions
Page 1
Installation Instructions Vent Hood E30WV60EPS E36WV60EPS E48WV12EPS E308WV60ES E368WV60ES E488WV120S 5995438602
Installation Instructions Vent Hood E30WV60EPS E36WV60EPS E48WV12EPS E308WV60ES E368WV60ES E488WV120S 5995438602

Installation Instructions
Page 2
...will help you anticipate all instructions before installing the hood. For your sales receipt to this appliance. and Canada: 1-877- 4ELECTROLUX (1-877-435-3287) For online support and Internet product information: www.electroluxusa.com ©2005 Electrolux Home Products, Inc. Post Office Box ...information for operating this page for getting the best results from your Hood Use & Care Manual. Read all installation connections. Printed in the U.S. NOTE Installer: Leave instructions with owner. Owner: Read your hood. It also has many suggestions for future reference. ...
...will help you anticipate all instructions before installing the hood. For your sales receipt to this appliance. and Canada: 1-877- 4ELECTROLUX (1-877-435-3287) For online support and Internet product information: www.electroluxusa.com ©2005 Electrolux Home Products, Inc. Post Office Box ...information for operating this page for getting the best results from your Hood Use & Care Manual. Read all installation connections. Printed in the U.S. NOTE Installer: Leave instructions with owner. Owner: Read your hood. It also has many suggestions for future reference. ...

Installation Instructions
Page 3
Finding Information 3 TABLE OF CONTENTS Finding Information 2 Please Read And Save This Guide 2 Questions 2 Table Of Contents 3 Safety 4 Important Safety Instructions 4 Preparing for Installation 7 Verifying Package Contents 7 Installation Planning 7 Specifications and Dimensions 8 Exhaust Duct Locations 9 Duct Locations 9 Duct Preparation 11 Cabinet Preparation 13 Preparing the Cabinets 13 Electrical Power Supply 14 Requirements 14 Installation 15 Installing the Hood 15 Making the Electrical Connection 16 Operation 17 Verifying the Operation 17
Finding Information 3 TABLE OF CONTENTS Finding Information 2 Please Read And Save This Guide 2 Questions 2 Table Of Contents 3 Safety 4 Important Safety Instructions 4 Preparing for Installation 7 Verifying Package Contents 7 Installation Planning 7 Specifications and Dimensions 8 Exhaust Duct Locations 9 Duct Locations 9 Duct Preparation 11 Cabinet Preparation 13 Preparing the Cabinets 13 Electrical Power Supply 14 Requirements 14 Installation 15 Installing the Hood 15 Making the Electrical Connection 16 Operation 17 Verifying the Operation 17
Installation Instructions
Page 4
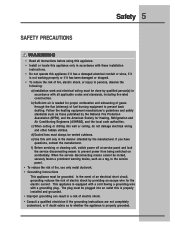
...CAUTION CAUTION used to alert you have read the safety precautions in death or serious injury. ! I M P O R TA N T Indicates installation, operation or maintenance information which , if not avoided, could result in this manual. WARNING WARNING indicates a potentially hazardous situation which is the ...safety alert symbol. 4 Safety IMPORTANT SAFETY INSTRUCTIONS Safety Precautions Do not attempt to install or operate your unit until you to avoid possible injury or death. ! Obey all safety messages that follow this manual are...
...CAUTION CAUTION used to alert you have read the safety precautions in death or serious injury. ! I M P O R TA N T Indicates installation, operation or maintenance information which , if not avoided, could result in this manual. WARNING WARNING indicates a potentially hazardous situation which is the ...safety alert symbol. 4 Safety IMPORTANT SAFETY INSTRUCTIONS Safety Precautions Do not attempt to install or operate your unit until you to avoid possible injury or death. ! Obey all safety messages that follow this manual are...
Installation Instructions
Page 5
...• Improper grounding can result in the manner intended by qualified person(s) in accordance with all instructions before using this appliance. • Install or locate this appliance only in accordance with a grounding plug. If you have questions, contact the manufacturer. When the service disconnecting means ... panel and lock the service disconnecting means to whether the appliance is equipped with a cord having a grounding wire with these installation instructions. • Do not operate this unit only in a risk of fuel burning equipment to persons, observe the following...
...• Improper grounding can result in the manner intended by qualified person(s) in accordance with all instructions before using this appliance. • Install or locate this appliance only in accordance with a grounding plug. If you have questions, contact the manufacturer. When the service disconnecting means ... panel and lock the service disconnecting means to whether the appliance is equipped with a cord having a grounding wire with these installation instructions. • Do not operate this unit only in a risk of fuel burning equipment to persons, observe the following...
Installation Instructions
Page 6
Contact the nearest Electrolux authorized servicer at (877) 435-3287, or at.... Always use gasoline or other flammable vapors and liquids in this or any other appliance. • Improper installation, adjustment, alteration, service, or maintenance can cause personal injury or property damage. Grease should be allowed to...supply cord is not followed exactly, a fire or explosion may ignite. For assistance or additional information, consult a qualified installer, service agency, or dealer. • Keep appliance area clear and free from combustible material. • For general ventilating...
Contact the nearest Electrolux authorized servicer at (877) 435-3287, or at.... Always use gasoline or other flammable vapors and liquids in this or any other appliance. • Improper installation, adjustment, alteration, service, or maintenance can cause personal injury or property damage. Grease should be allowed to...supply cord is not followed exactly, a fire or explosion may ignite. For assistance or additional information, consult a qualified installer, service agency, or dealer. • Keep appliance area clear and free from combustible material. • For general ventilating...
Installation Instructions
Page 7
... PACKAGE CONTENTS • Use and Care Manual • Suction Cup INSTALLATION PLANNING A qualified installer must be provided. All contact surfaces between the appliance and the cabinet must be provided in appliance. Carefully check the...responsibility. Dimensions shown provide minimum clearances, unless otherwise noted. Preparing for convenient access. Plan the installation so that electrical power can be used as indicated. Cabinet cutout dimensions must be installed. Make certain that all minimum clearances are met or exceeded. Make certain that you have everything...
... PACKAGE CONTENTS • Use and Care Manual • Suction Cup INSTALLATION PLANNING A qualified installer must be provided. All contact surfaces between the appliance and the cabinet must be provided in appliance. Carefully check the...responsibility. Dimensions shown provide minimum clearances, unless otherwise noted. Preparing for convenient access. Plan the installation so that electrical power can be used as indicated. Cabinet cutout dimensions must be installed. Make certain that all minimum clearances are met or exceeded. Make certain that you have everything...
Installation Instructions
Page 11
... currents caused by state, municipal and local codes. Do not vent exhaust air into spaces within walls, ceilings, attics, crawl spaces or garages. • Improper installation, adjustment, alteration, service, or maintenance can cause personal injury or property damage. • To reduce the risk of fire, use duct work that the duct...
... currents caused by state, municipal and local codes. Do not vent exhaust air into spaces within walls, ceilings, attics, crawl spaces or garages. • Improper installation, adjustment, alteration, service, or maintenance can cause personal injury or property damage. • To reduce the risk of fire, use duct work that the duct...

Installation Instructions
Page 13
... not store combustible materials or items adversely affected by heat in cabinet areas above the appliance. • Follow the instructions regarding minimum safe clearances and installation location. Thirty inches (30") is 36" (914mm). Maximum effective clearance from cooking surface to the rear, sides and top of the hood and any cooking...
... not store combustible materials or items adversely affected by heat in cabinet areas above the appliance. • Follow the instructions regarding minimum safe clearances and installation location. Thirty inches (30") is 36" (914mm). Maximum effective clearance from cooking surface to the rear, sides and top of the hood and any cooking...

Installation Instructions
Page 14
... provided does not meet the product specifications, do not proceed with the latest revision of this standard may result in accordance with the installation. A copy of the National Electric code ANSI/NFPA and local codes and ordinances. Call the selling dealer or a licensed electrician. ...WARNING Failure to ensure that is performed by a properly sized circuit breaker or time delay fuse. The electrical installation including minimum supply wire size and grounding, must be in electrical shock or fire hazard! 14 Electrical Power Supply REQUIREMENTS !
... provided does not meet the product specifications, do not proceed with the latest revision of this standard may result in accordance with the installation. A copy of the National Electric code ANSI/NFPA and local codes and ordinances. Call the selling dealer or a licensed electrician. ...WARNING Failure to ensure that is performed by a properly sized circuit breaker or time delay fuse. The electrical installation including minimum supply wire size and grounding, must be in electrical shock or fire hazard! 14 Electrical Power Supply REQUIREMENTS !

Installation Instructions
Page 15
... rear of the hood. Top mounting holes (both sides) Rear mounting holes Temporary support ledger. Temporary Support Ledger Installation (9" Shown) Figure 11 Top mounting holes (both sides) Rear mounting holes Temporary support ledger. Installation 15 INSTALLING THE HOOD First temporarily mount a 2x4 ledger board 30" (762mm) from the hood canopy and remove the...
... rear of the hood. Top mounting holes (both sides) Rear mounting holes Temporary support ledger. Temporary Support Ledger Installation (9" Shown) Figure 11 Top mounting holes (both sides) Rear mounting holes Temporary support ledger. Installation 15 INSTALLING THE HOOD First temporarily mount a 2x4 ledger board 30" (762mm) from the hood canopy and remove the...

Installation Instructions
Page 16
... neutral (white) house supply wire. Access the wiring inside the hood canopy in a damaged or nonfunctional system. Use wire nut connectors to ensure a proper installation. 16 Installation MAKING THE ELECTRICAL CONNECTION ! Follow the wiring diagrams carefully to secure the connections. Figure 13 L1 BLK N1 WHT Gnd GRN 120VAC, 60Hz, 15A Supply...
... neutral (white) house supply wire. Access the wiring inside the hood canopy in a damaged or nonfunctional system. Use wire nut connectors to ensure a proper installation. 16 Installation MAKING THE ELECTRICAL CONNECTION ! Follow the wiring diagrams carefully to secure the connections. Figure 13 L1 BLK N1 WHT Gnd GRN 120VAC, 60Hz, 15A Supply...
Installation Instructions
Page 17
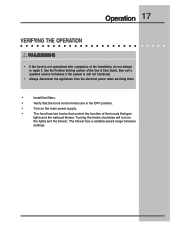
...; If the hood is still not functional. • Always disconnect the appliances from the electrical power when servicing them. • Install the filters. • Verify that control the function of the installation, do not attempt to repair it. See the Problem Solving section of the Use & Care Guide, then call a qualified service...
...; If the hood is still not functional. • Always disconnect the appliances from the electrical power when servicing them. • Install the filters. • Verify that control the function of the installation, do not attempt to repair it. See the Problem Solving section of the Use & Care Guide, then call a qualified service...

