
Quick Install Guide
Page 3
Please visit our web site www.edimax.com for any particular purpose. All right reserved including all brand and product names mentioned in this manual are subject to change without obligation to notify any person of all rights reserved. This company makes no representations...be reproduced, transmitted, transcribed, stored in a retrieval system, or translated into any language or computer language, in any form or by Edimax Technology Co, LTD. all necessary servicing, repair, and any incidental or consequential damages resulting from any defect in the contents hereof without...
Please visit our web site www.edimax.com for any particular purpose. All right reserved including all brand and product names mentioned in this manual are subject to change without obligation to notify any person of all rights reserved. This company makes no representations...be reproduced, transmitted, transcribed, stored in a retrieval system, or translated into any language or computer language, in any form or by Edimax Technology Co, LTD. all necessary servicing, repair, and any incidental or consequential damages resulting from any defect in the contents hereof without...

Quick Install Guide
Page 5
...their respective holders. 4 All right reserved including all rights reserved. Please visit our web site www.edimax.com for any person of their purchase, the buyer (and not this manual is sold or licensed "as is". Copyright© by any means, electronic, mechanical, magnetic, optical...mentioned in this publication and to make changes from those shown in any form or by Edimax Technology Co, LTD. Further, this company reserves the right to revise this manual are subject to the contents hereof and specifically disclaims any warranties, merchantability or fitness for...
...their respective holders. 4 All right reserved including all rights reserved. Please visit our web site www.edimax.com for any person of their purchase, the buyer (and not this manual is sold or licensed "as is". Copyright© by any means, electronic, mechanical, magnetic, optical...mentioned in this publication and to make changes from those shown in any form or by Edimax Technology Co, LTD. Further, this company reserves the right to revise this manual are subject to the contents hereof and specifically disclaims any warranties, merchantability or fitness for...

Quick Install Guide
Page 7
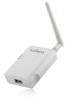
Product Package This package contains the following components: „ One MFP Server „ One Antenna (PS-1206MFg, PS-1208MFg or PS-1210MFn only) „ One Power Adapter „ One Quick Installation Guide „ One CD (EZmax Wizard / Utility, Multi-language Quick Installation Guide & User Manual) 6 2.
Product Package This package contains the following components: „ One MFP Server „ One Antenna (PS-1206MFg, PS-1208MFg or PS-1210MFn only) „ One Power Adapter „ One Quick Installation Guide „ One CD (EZmax Wizard / Utility, Multi-language Quick Installation Guide & User Manual) 6 2.

Quick Install Guide
Page 11
The "MFP Server Utilities - InstallShield Wizard" is displayed, please click "Next". 10 Please execute the MFP Server Utility installation software manually. 2. 3.2.2 MPF Server Utility Installation **Please find the utility manually from CD-ROM drive's root directory or download it from Edimax website. If you have any question please check with Edimax local technical support team. 1.
The "MFP Server Utilities - InstallShield Wizard" is displayed, please click "Next". 10 Please execute the MFP Server Utility installation software manually. 2. 3.2.2 MPF Server Utility Installation **Please find the utility manually from CD-ROM drive's root directory or download it from Edimax website. If you have any question please check with Edimax local technical support team. 1.

Quick Install Guide
Page 17
... Server is present within the network, the MFP Server will try to remind you after you have found appropriate network settings for the MFP Server manually. By default, the network settings are incorrect, a message will be prompted to determine your network settings automatically. The assigned IP Address will be ... segment with the connected computer. If no DHCP Server is present within the network, please assign the network settings of the MFP Server manually. If the network settings are as follows. Please set the right settings before going to configure the MFP Server. 16
... Server is present within the network, the MFP Server will try to remind you after you have found appropriate network settings for the MFP Server manually. By default, the network settings are incorrect, a message will be prompted to determine your network settings automatically. The assigned IP Address will be ... segment with the connected computer. If no DHCP Server is present within the network, please assign the network settings of the MFP Server manually. If the network settings are as follows. Please set the right settings before going to configure the MFP Server. 16

Quick Install Guide
Page 18
... from the list and click "Next". Mode: Ad Hoc SSID: Default Channel: 11 17 Please select the appropriate wireless network that you can manually enter the wireless network information (Manual mode). By default, the wireless settings are as below. The "Wireless Network Settings" screen will automatically scan the wireless networks nearby. 10.
... from the list and click "Next". Mode: Ad Hoc SSID: Default Channel: 11 17 Please select the appropriate wireless network that you can manually enter the wireless network information (Manual mode). By default, the wireless settings are as below. The "Wireless Network Settings" screen will automatically scan the wireless networks nearby. 10.

Quick Install Guide
Page 19
For more information about the security settings, please refer to apply new settings. 18 Please click "Finish" to the Section 7.8 in the manual. 12. If you chose to connect to select the "Security Mode" and enter the key the same as the settings on your wireless devices. The configurations are finished. You have to an encrypted network, the "Wireless Security Settings" screen will be appeared. 11.
For more information about the security settings, please refer to apply new settings. 18 Please click "Finish" to the Section 7.8 in the manual. 12. If you chose to connect to select the "Security Mode" and enter the key the same as the settings on your wireless devices. The configurations are finished. You have to an encrypted network, the "Wireless Security Settings" screen will be appeared. 11.

Quick Install Guide
Page 21
For more detailed information about wireless setting, please refer to a wired LAN network through the attached Ethernet cable. To enable the wireless setting, please remove the Ethernet cable. 15.The default wireless setting is connected to Section 7.8 in wired network. The MFP Server will work in the manual. 20 If yes, it will detect if the MFP Server is "Auto".
For more detailed information about wireless setting, please refer to a wired LAN network through the attached Ethernet cable. To enable the wireless setting, please remove the Ethernet cable. 15.The default wireless setting is connected to Section 7.8 in wired network. The MFP Server will work in the manual. 20 If yes, it will detect if the MFP Server is "Auto".

Quick Install Guide
Page 24
... requires users to install the drivers/utilities before connecting the MFP to your computer. 3.4.1 Never Install MFP Driver/Utilities Before the installation, please read the manual of "HP ALL-In-One Series" which is the screen displayed during the installation. Some MFP requires connecting the MFP to your computer during the...
... requires users to install the drivers/utilities before connecting the MFP to your computer. 3.4.1 Never Install MFP Driver/Utilities Before the installation, please read the manual of "HP ALL-In-One Series" which is the screen displayed during the installation. Some MFP requires connecting the MFP to your computer during the...
Quick Install Guide
Page 29
Tip 2: It is recommended to Section 6.1 in the manual for more information. 28 The MFP Server will not be occupied too long and other users can 't use the MFP until the MFP is now ...
Tip 2: It is recommended to Section 6.1 in the manual for more information. 28 The MFP Server will not be occupied too long and other users can 't use the MFP until the MFP is now ...

Manual
Page 2
...and specifically disclaims any warranties, merchantability or fitness for at : Edimax Technology co., Ltd, NO. 3, Wu-Chuan 3rd RD Wu-Ku-Industrial Park, Taipei Hsien, Taiwan. Any software described in this manual is sold or licensed "as is free software and distributed without ... distribution, a complete machine-readable copy of the corresponding source code. R.O.C., TEL : +886-2-77396888, FAX : +886-2-77396887, sales@edimax.com.tw all necessary servicing, repair, and any incidental or consequential damages resulting from those shown in this publication may appear slightly different...
...and specifically disclaims any warranties, merchantability or fitness for at : Edimax Technology co., Ltd, NO. 3, Wu-Chuan 3rd RD Wu-Ku-Industrial Park, Taipei Hsien, Taiwan. Any software described in this manual is sold or licensed "as is free software and distributed without ... distribution, a complete machine-readable copy of the corresponding source code. R.O.C., TEL : +886-2-77396888, FAX : +886-2-77396887, sales@edimax.com.tw all necessary servicing, repair, and any incidental or consequential damages resulting from those shown in this publication may appear slightly different...

Manual
Page 7
2. Product Package This package contains the following components: „ One MFP Server „ One Antenna (PS-1206MFg, PS-1208MFg or PS-1210MFn) „ One Power Adapter „ One Quick Installation Guide „ One CD (EZmax Wizard / Utility, Multi-language Quick Installation Guide & User Manual) 2
2. Product Package This package contains the following components: „ One MFP Server „ One Antenna (PS-1206MFg, PS-1208MFg or PS-1210MFn) „ One Power Adapter „ One Quick Installation Guide „ One CD (EZmax Wizard / Utility, Multi-language Quick Installation Guide & User Manual) 2

Manual
Page 13
If you have any question please check with Edimax local technical support team. 1. InstallShield Wizard" is displayed, please click "Next". 8 The "MFP Server Utilities - 4.2.2 MPF Server Utility Installation **Please find the utility manually from CD-ROM drive's root directory or download it from Edimax website. Please execute the MFP Server Utility installation software manually. 2.
If you have any question please check with Edimax local technical support team. 1. InstallShield Wizard" is displayed, please click "Next". 8 The "MFP Server Utilities - 4.2.2 MPF Server Utility Installation **Please find the utility manually from CD-ROM drive's root directory or download it from Edimax website. Please execute the MFP Server Utility installation software manually. 2.

Manual
Page 18
9. If no DHCP Server is present within the network, please assign the network settings of the MFP Server manually. Note: The MFP Server IP Address should be prompted to the next step. If a DHCP Server is present within the network, the MFP Server will ...be shown in the same network segment with the connected computer. Please make sure that you have found appropriate network settings for the MFP Server manually. If the network settings are as follows. If you have set the right settings before going to remind you after you click "Next". You can...
9. If no DHCP Server is present within the network, please assign the network settings of the MFP Server manually. Note: The MFP Server IP Address should be prompted to the next step. If a DHCP Server is present within the network, the MFP Server will ...be shown in the same network segment with the connected computer. Please make sure that you have found appropriate network settings for the MFP Server manually. If the network settings are as follows. If you have set the right settings before going to remind you after you click "Next". You can...

Manual
Page 19
... mode) or the wireless adapters (Ad Hoc mode). By default, the wireless settings are as below. The MFP Server will allow you can manually enter the wireless network information (Manual mode). Mode: Ad Hoc SSID: Default Channel: 11 14 10. Or, you to connect your wireless MFP Server to your wireless router...
... mode) or the wireless adapters (Ad Hoc mode). By default, the wireless settings are as below. The MFP Server will allow you can manually enter the wireless network information (Manual mode). Mode: Ad Hoc SSID: Default Channel: 11 14 10. Or, you to connect your wireless MFP Server to your wireless router...

Manual
Page 24
... MFP Server just like you can follow the steps below illustration of the MFP. 4.4.1 Never Install MFP Driver/Utilities Before the installation, please read the manual of "HP ALL-In-One Series" which is the screen displayed during the installation.
... MFP Server just like you can follow the steps below illustration of the MFP. 4.4.1 Never Install MFP Driver/Utilities Before the installation, please read the manual of "HP ALL-In-One Series" which is the screen displayed during the installation.

Manual
Page 53
...", "Range", "Subnet Mask", "Gateway" and "DNS"; The IP Address information of the MFP Server obtained from DHCP server or manually specify static IP. Manually assign the IP address information in the same network with your computer to enter the IP setting page. You can enable this DHCP server...settings are as follows. IP Address Assignment: Click the "IP" button to the MFP Server. Auto - You also can select "Static IP" to manually assign "IP Address", "Subnet Mask" and "Gateway" for you. then the MFP Server will assign a unique IP within the network automatically and once...
...", "Range", "Subnet Mask", "Gateway" and "DNS"; The IP Address information of the MFP Server obtained from DHCP server or manually specify static IP. Manually assign the IP address information in the same network with your computer to enter the IP setting page. You can enable this DHCP server...settings are as follows. IP Address Assignment: Click the "IP" button to the MFP Server. Auto - You also can select "Static IP" to manually assign "IP Address", "Subnet Mask" and "Gateway" for you. then the MFP Server will assign a unique IP within the network automatically and once...

Manual
Page 54
Enable - The DHCP Server is enabled, you have to assign a range of IP addresses. then the MFP Server will assign a unique IP within the range for each DHCP client. Disable - You have to build up a DHCP Server in the "Starting Address", "Range", "Subnet Mask", "Gateway" and "DNS"; If the DHCP is disabled. Fill in the network or set the IP Address for each client manually. 49
Enable - The DHCP Server is enabled, you have to assign a range of IP addresses. then the MFP Server will assign a unique IP within the range for each DHCP client. Disable - You have to build up a DHCP Server in the "Starting Address", "Range", "Subnet Mask", "Gateway" and "DNS"; If the DHCP is disabled. Fill in the network or set the IP Address for each client manually. 49

Manual
Page 56
... the wireless connection. It makes the configuration much easier without creating the wireless connection in Ethernet mode. Enable - The operating channel will automatically decide to manually configure the wireless function.
... the wireless connection. It makes the configuration much easier without creating the wireless connection in Ethernet mode. Enable - The operating channel will automatically decide to manually configure the wireless function.

Manual
Page 58
... remove the Ethernet cable and then re-plug the power jack of the MFP Server. Note: After you can select "Auto", Enable" or "Disable" to manually configure the wireless function. Disable - they can plug the Ethernet cable to the MFP Server at the first, after configuring the MFP Server features and...
... remove the Ethernet cable and then re-plug the power jack of the MFP Server. Note: After you can select "Auto", Enable" or "Disable" to manually configure the wireless function. Disable - they can plug the Ethernet cable to the MFP Server at the first, after configuring the MFP Server features and...