Revision 1 (1/0001)
Page 1
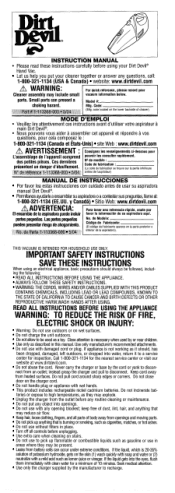
.... This product includes rechargeable nickel cadmium batteries. teries or expose to discon- Keep hair, loose clothing, fingers, and all controls before unplugging. , Use extra care when cleaning on wet surfaces. If the liquid, which is not working as described in place. If the liquid gets into openings. I INSTRUCTION MANUAL Please read these instructions carefully before any routine cleaning or maintenance. partes pequeias. keep free of potassium...
.... This product includes rechargeable nickel cadmium batteries. teries or expose to discon- Keep hair, loose clothing, fingers, and all controls before unplugging. , Use extra care when cleaning on wet surfaces. If the liquid, which is not working as described in place. If the liquid gets into openings. I INSTRUCTION MANUAL Please read these instructions carefully before any routine cleaning or maintenance. partes pequeias. keep free of potassium...
Revision 1 (1/0001)
Page 2
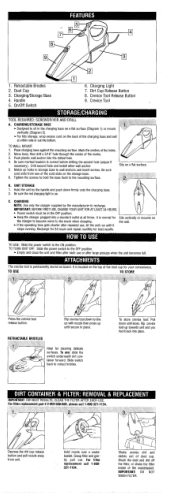
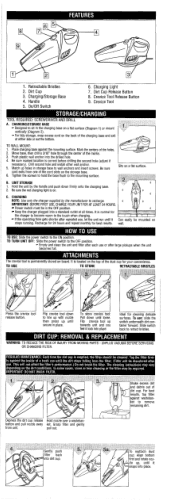
... mounting surface. Keep the charger plugged into the drilled hole. 4. TO USE Press the crevice tool release button. Brush the dust and dirt off the filter, or shake the filter inside of the wastebasket. Dust Cup 3. D i r t Cup Release Button 8. Match UD holes in the OFF position. For filter replacement part # 2-ME1300-000, please call 1-800321-1134. TO TURN UNlT OFF: Slide the power switch to wall anchors and insert screws. Crevice Tool Release Button 9. Hold...
... mounting surface. Keep the charger plugged into the drilled hole. 4. TO USE Press the crevice tool release button. Brush the dust and dirt off the filter, or shake the filter inside of the wastebasket. Dust Cup 3. D i r t Cup Release Button 8. Match UD holes in the OFF position. For filter replacement part # 2-ME1300-000, please call 1-800321-1134. TO TURN UNlT OFF: Slide the power switch to wall anchors and insert screws. Crevice Tool Release Button 9. Hold...
Revision 1 (1/0001)
Page 3
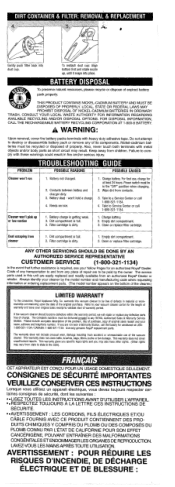
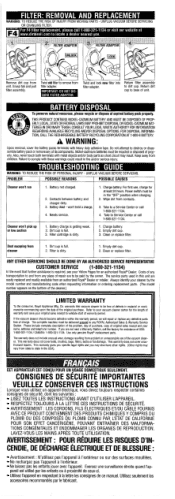
... rights may result. This warranty does not cover belts, brushes, bags, filters, bulbs or fan damage. Nickel-cadmium batteries must be del~veredoreDald to any place of repair are to be paid by the model number and manufacturing code when requesting information or ordering replacement parts. (The model number amears on ,call 1-800-321-1134. 1. PROBLEM Cleaner won't run Cleaner won 't hold a charge 4. This warranty does not cover unauthorized...
... rights may result. This warranty does not cover belts, brushes, bags, filters, bulbs or fan damage. Nickel-cadmium batteries must be del~veredoreDald to any place of repair are to be paid by the model number and manufacturing code when requesting information or ordering replacement parts. (The model number amears on ,call 1-800-321-1134. 1. PROBLEM Cleaner won't run Cleaner won 't hold a charge 4. This warranty does not cover unauthorized...
Revision 1 (5/2004)
Page 1
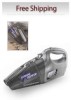
... aspiradora manual Dirt Devil? IMPORTANT SAFETY INSTRUCTIONS SAVE THESE INSTRUCTIONS When using your 1 Cleaner assembly may be present. Do not pull cord around sharp edges or corners. Do not incinerate batteries or expose to disconnect from heated surfaces. keep free of 10 minutes. Turn off all parts of potassium hydroxide, gets on wet surfaces. If the liquid, which is necessary when used as they may include small vacuum...
... aspiradora manual Dirt Devil? IMPORTANT SAFETY INSTRUCTIONS SAVE THESE INSTRUCTIONS When using your 1 Cleaner assembly may be present. Do not pull cord around sharp edges or corners. Do not incinerate batteries or expose to disconnect from heated surfaces. keep free of 10 minutes. Turn off all parts of potassium hydroxide, gets on wet surfaces. If the liquid, which is necessary when used as they may include small vacuum...
Revision 1 (5/2004)
Page 2
.... C. Power switch must be mounted on the back of the holes. 2. Handle 5. OnIOff Switch 6. The crevice tool is on a flat surface (Diagram 1) or mount vertically (Diagram 2). Flip crevice tool down until it lock into the drilled hole. 4. TO store crevice tool: Pull down to remove Slide switch back to the mounting surface. TO WALL MOUNT: 1. B. Depress the dirt cup release Hold nozzle over a wastebas- Crevice Tool Release Button...
.... C. Power switch must be mounted on the back of the holes. 2. Handle 5. OnIOff Switch 6. The crevice tool is on a flat surface (Diagram 1) or mount vertically (Diagram 2). Flip crevice tool down until it lock into the drilled hole. 4. TO store crevice tool: Pull down to remove Slide switch back to the mounting surface. TO WALL MOUNT: 1. B. Depress the dirt cup release Hold nozzle over a wastebas- Crevice Tool Release Button...
Revision 1 (5/2004)
Page 3
... place of repair are to destroy or disassemble battery pack or removeany of warranty period. WARNING: TO REDUCE THE RISK OF PERSONAL INJURY - PROBLEM ( POSSIBLE REASONS I POSSIBLE CAUSES I 'exterieur. Battery not charged. 1. Charge battery. Wipe dirt from cleaner 1. Battery dead -won 't pick up or low suction 1. Charge battery. 2. Filter is dirty. 1. Empty dirt cup. 2. Always identify your cleaner by the owner. Refer to your original sales receipt to Service Center...
... place of repair are to destroy or disassemble battery pack or removeany of warranty period. WARNING: TO REDUCE THE RISK OF PERSONAL INJURY - PROBLEM ( POSSIBLE REASONS I POSSIBLE CAUSES I 'exterieur. Battery not charged. 1. Charge battery. Wipe dirt from cleaner 1. Battery dead -won 't pick up or low suction 1. Charge battery. 2. Filter is dirty. 1. Empty dirt cup. 2. Always identify your cleaner by the owner. Refer to your original sales receipt to Service Center...
Revision 1 (3/2004)
Page 1
... chargement. 2. IMPORTANT SAFETY INSTRUCTIONS SAVE THESE INSTRUCTIONS When using your Dirt Devil® Hand Vac. • Let us help you put any object into openings. • Do not use in areas where they may result. Keep cord away from cleaner 1. Do not close door on the bottom of the vacuum cleaner. Mark the centers of deflector (Diagram 3). B. TO TURN UNIT OFF: Slide the power switch to be mounted on...
... chargement. 2. IMPORTANT SAFETY INSTRUCTIONS SAVE THESE INSTRUCTIONS When using your Dirt Devil® Hand Vac. • Let us help you put any object into openings. • Do not use in areas where they may result. Keep cord away from cleaner 1. Do not close door on the bottom of the vacuum cleaner. Mark the centers of deflector (Diagram 3). B. TO TURN UNIT OFF: Slide the power switch to be mounted on...


