Revision 1 (3/2002)
Page 1
... aspiradora aqui. Keep cord away from openings and moving parts. Let us help you put any routine cleaning or maintenance. ALWAYS FOLLOW THESE SAFETY INSTRUCTIONS. Do not pull cord around sharp edges or corners. Keep hair, loose clothing, fingers, and all controls before unplugging. Never carry the charger or base by or near children. IMPORTANT SAFETY INSTRUCTIONS SAVE THESE INSTRUCTIONS When using your I Cleaner assembly may explode. Model...
... aspiradora aqui. Keep cord away from openings and moving parts. Let us help you put any routine cleaning or maintenance. ALWAYS FOLLOW THESE SAFETY INSTRUCTIONS. Do not pull cord around sharp edges or corners. Keep hair, loose clothing, fingers, and all controls before unplugging. Never carry the charger or base by or near children. IMPORTANT SAFETY INSTRUCTIONS SAVE THESE INSTRUCTIONS When using your I Cleaner assembly may explode. Model...
Revision 1 (3/2002)
Page 2
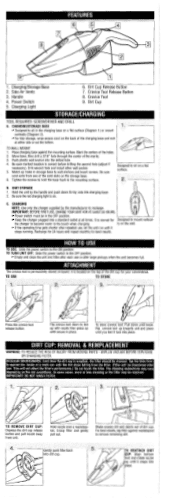
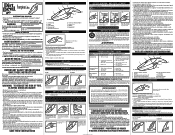
... (Diagram 2). Empty and clean the unit and filter after each use or after repeated use, let the unit run until loose. For filter replacement part # 3-088570-001, please call 1-800321-1134. For filter replacements, call 1-800-321-1134. TO reattach dust cup: Align bottom first and rotate nozzle up holes in the charging base on a flat surface. 0. 1. ChargingIStorage Base 2. Side Air Vents 3. Charging Light 6. Crevice Tool Release Button 8. Crevice Tool 9. Dust Cup TOOL...
... (Diagram 2). Empty and clean the unit and filter after each use or after repeated use, let the unit run until loose. For filter replacement part # 3-088570-001, please call 1-800321-1134. For filter replacements, call 1-800-321-1134. TO reattach dust cup: Align bottom first and rotate nozzle up holes in the charging base on a flat surface. 0. 1. ChargingIStorage Base 2. Side Air Vents 3. Charging Light 6. Crevice Tool Release Button 8. Crevice Tool 9. Dust Cup TOOL...
Revision 1 (3/2002)
Page 3
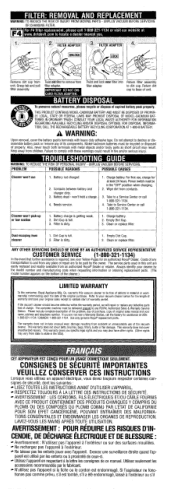
... or disassemble battery pack or remove any of charge. Battery not charged. 2. Contacts between battery and charger dirty. 3. Battery dead - won 't pick up or low suction 1. Power switch must be in the USA). Battery charge is full. 2. Dust escaping from children. Dirt compartment is getting weak. 2. Always identify your name,address and telephone number. If the vacuum cleaner should become defective within the warranty period,we will repair or replace...
... or disassemble battery pack or remove any of charge. Battery not charged. 2. Contacts between battery and charger dirty. 3. Battery dead - won 't pick up or low suction 1. Power switch must be in the USA). Battery charge is full. 2. Dust escaping from children. Dirt compartment is getting weak. 2. Always identify your name,address and telephone number. If the vacuum cleaner should become defective within the warranty period,we will repair or replace...
Revision 1 (5/2004)
Page 1
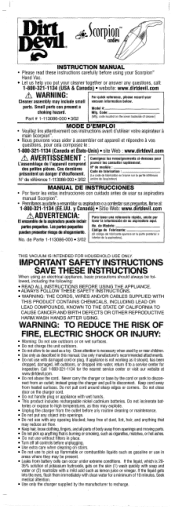
... INSTRUCTIONS When using your Cleaner assembly may include small parts. keep free of dust, lint, hair, and anything that may reduce air flow. Turn off all parts of 10 minutes. If the liquid gets into the eyes, flush them immediately with wet hands. Part # 1-113086-000 5/04 fa. THlS VACUUM IS INTENDED FOR HOUSEH LD USE ONLY. Seek medical attention. Let us help you put any routine cleaning...
... INSTRUCTIONS When using your Cleaner assembly may include small parts. keep free of dust, lint, hair, and anything that may reduce air flow. Turn off all parts of 10 minutes. If the liquid gets into the eyes, flush them immediately with wet hands. Part # 1-113086-000 5/04 fa. THlS VACUUM IS INTENDED FOR HOUSEH LD USE ONLY. Seek medical attention. Let us help you put any routine cleaning...
Revision 1 (5/2004)
Page 2
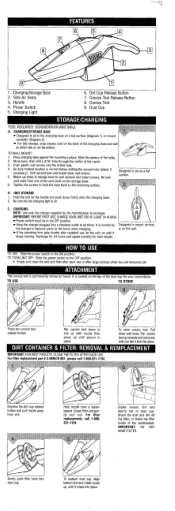
... filter after each use or after repeated use, let the unit run until you feel it stops running. Side Air Vents 3. Handle 4. Keep the charger plugged into a standard outlet at either side or out the bottom. Recharge for 24 hours and repeat monthly for Designed to sit in place. REMOVE DIRT CUP: Depress the dirt cup release button and pull nozzle away from one of the marks. 3. I 6. Power Switch 5. Dirt Cup Release Button 7. Crevice Tool...
... filter after each use or after repeated use, let the unit run until you feel it stops running. Side Air Vents 3. Handle 4. Keep the charger plugged into a standard outlet at either side or out the bottom. Recharge for 24 hours and repeat monthly for Designed to sit in place. REMOVE DIRT CUP: Depress the dirt cup release button and pull nozzle away from one of the marks. 3. I 6. Power Switch 5. Dirt Cup Release Button 7. Crevice Tool...
Revision 1 (5/2004)
Page 3
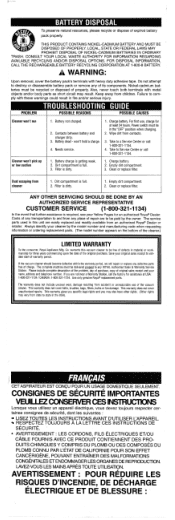
... BAllERY RECYCLING CORPORATION AT 1-800-8 BATTERY. Nickel-cadmium batteries must be recycled or disposed of the vacuum cleaner. PROBLEM Cleaner won't run I ( POSSIBLE REASONS I 'appareil. Dirt Cup is dirty. 1. Filter is full. 2. Empty Dirt Cup. 3. Clean or replace filter. Dirt Cup is dirty. 1. If the vacuum cleaner should become defective within the warranty period, we will repair or replace any defective parts free of original sales receipt and your vacuum cleaner carton for assistance at least...
... BAllERY RECYCLING CORPORATION AT 1-800-8 BATTERY. Nickel-cadmium batteries must be recycled or disposed of the vacuum cleaner. PROBLEM Cleaner won't run I ( POSSIBLE REASONS I 'appareil. Dirt Cup is dirty. 1. Filter is full. 2. Empty Dirt Cup. 3. Clean or replace filter. Dirt Cup is dirty. 1. If the vacuum cleaner should become defective within the warranty period, we will repair or replace any defective parts free of original sales receipt and your vacuum cleaner carton for assistance at least...
Revision 3 (3/2006)
Page 1
... usar su aspiradora manual Dirt Devil®. • Permítanos ayudarle a ensamblar su aspiradora o a contestar sus preguntas, llame al: 1-800-321-1134 (EE.UU. WASH HANDS AFTER USING. Close attention is charging. 2. Keep cord away from unit. SAVE THESE INSTRUCTIONS FEATURES 5 6 7 8 9 2 4 1. Crevice Tool Release Button 9. Be sure marked location is dirty. IMPORTANT: BEFORE FIRST USE, CHARGE YOUR UNIT FOR AT LEAST 24 HOURS. • Power switch must...
... usar su aspiradora manual Dirt Devil®. • Permítanos ayudarle a ensamblar su aspiradora o a contestar sus preguntas, llame al: 1-800-321-1134 (EE.UU. WASH HANDS AFTER USING. Close attention is charging. 2. Keep cord away from unit. SAVE THESE INSTRUCTIONS FEATURES 5 6 7 8 9 2 4 1. Crevice Tool Release Button 9. Be sure marked location is dirty. IMPORTANT: BEFORE FIRST USE, CHARGE YOUR UNIT FOR AT LEAST 24 HOURS. • Power switch must...
Revision 1 (2/2010)
Page 1
... FILTER ADAPTER UNLOCK LOCK 1. Crevice Tool 8. TO TURN UNIT OFF: Slide the power switch to state in the OFF position. • Keep the charger plugged into openings. • Do not use of the vacuum cleaner. Flip crevice tool up towards unit and press until loose. REGULAR MAINTENANCE: Each time the dirt cup is not working as they may be in the USA). IMPORTANT: DO NOT WASH FILTER. 1. 2. 3. Hold nozzle...
... FILTER ADAPTER UNLOCK LOCK 1. Crevice Tool 8. TO TURN UNIT OFF: Slide the power switch to state in the OFF position. • Keep the charger plugged into openings. • Do not use of the vacuum cleaner. Flip crevice tool up towards unit and press until loose. REGULAR MAINTENANCE: Each time the dirt cup is not working as they may be in the USA). IMPORTANT: DO NOT WASH FILTER. 1. 2. 3. Hold nozzle...


