Dirt Devil M085610RED Support and Manuals
Get Help and Manuals for this Dirt Devil item
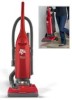
View All Support Options Below
Free Dirt Devil M085610RED manuals!
Problems with Dirt Devil M085610RED?
Ask a Question
Free Dirt Devil M085610RED manuals!
Problems with Dirt Devil M085610RED?
Ask a Question
Popular Dirt Devil M085610RED Manual Pages
Revision 3 (6/2003) - Page 1

Small parts can present a choking hazard. code located on the lower backside of cleaner)
;spafiol-
Model #: Mfg. For quick reference, please record your cleaner.
Code:
(Mfg. OWNER'S MANUAL Operating and Servicing
Instructions
Please read these instructions carefully before using your vacuum information below. Let us help you put your vacuum together or answer any questions, call...
Revision 3 (6/2003) - Page 2

...this manual.
mended attachments. Do not use cord as it to be followed, including the following:
READ ALL INSTRUCTIONS ...FILTERS TO CLEAN OR REPLACE.
WASH HANDS AFTER USING. Do not unplug by cord, use with wet hands. Do not use an appliance, basic precautions should , has been dropped, damaged, left outdoors, or dropped into openings. Do not use
and before servicing...
Revision 3 (6/2003) - Page 3

... still does not fit, contact a qualified electrician to the user. SAVE THESE INSTRUCTIONS
WARNING:
To reduce the risk of body away from openings and moving parts. Do not use to lift the rotating brush off all parts of electric shock, this vacuum cleaner. Do not pick up flammable or combustible liquids, such as cigarettes...
Revision 3 (6/2003) - Page 4

..............Page 9 Belt or Brush: Removal & Replacement..........Page 10 Lightbulb: Removal and Replacement Page 11 General Maintenance Page 11 Troubleshooting Guide Page 12
LIMITED WARRANTY
To the consumer, Royal Appliance Mfg. Thank you for the length of warranty and save your original sales receipt to any
defective parts free of charge.
TABLE OF CONTENTS
Safety Instructions Page...
Revision 3 (6/2003) - Page 9

...INJURY FROM MOVING PARTS -
REMOVE OLD BAG
INSTALL NEW BAG
...away from dirt tube.
NOTE: Be sure not to remove. NOTE: (Diagram 4a) Make sure the top of the bag is tuckedunder (b). Set aligning tab ... replacing when you experience less suction. IMPORTANT: Expand bag away from hole. UNPLUG BEFORE SERVICING. NOTE: Unplug cleaner before installing. Grip cardboard collar and push onto dirt ...
Revision 3 (6/2003) - Page 10

... and flip cleaner to replace all four (4) screws.
Base should lay flat and face up. Rotate brushroll manually to remove the four (4) screws. Slide belt onto motorshaft. Reattach nozzle guard.
To remove nozzle guard, use Phillips screwdriver to make sure belt is properly aligned. Arrows show locsion of screws.
TO REPLACE BELT OR BRUSHROLL
Lift and...
Revision 3 (6/2003) - Page 11

...volts. For bulb replacement call 1-877-REGINA6 or your local auto parts store. Gently push bulb into socket to see if there is full.
Check dirt tube to replace. Clear any .... If full, replace with a new paper bag (page 9).
2. Turn cleaner over and remove nozzle guard (Diagram 2).
If full, replace with a new paper bag (Page 9).
2. UNPLUG BEFORE SERVICING. NOTE: Regularly clean...
Revision 3 (6/2003) - Page 12

...--2. Pg. 11.
2. Broken or worn belt.
ily available from cleaner
1. Always identify your cleaner by the model number and manufacturing code when requesting information or ordering replacementparts. (The model number appears on the bottom of repair are easily replaced and read- WARNING: REDUCE RISK OF PERSONAL INJURY UNPLUG CLEANER BEFORE SERVICING
PROBLEM Cleaner won 't pick-up or low...
Revision 4 (1/2004) - Page 1

Model Mfg. phi
OWNER'S MANUAL Operating and Servicing
Instructions
• Please read these instructions carefully before using your cleaner.
• Let us help you put your vacuum information below. For quick reference, please record your vacuum together or answer any questions, call:
1-800-321-1134 (USA & Canada) www.dirtdevil.com
Warranty Registration
• Online at: www.dirtdevil....
Revision 4 (1/2004) - Page 3

...30 minute cooling period.
3 SAVE THESE INSTRUCTIONS
WARNING:
To reduce the risk of cooling the ...vacuum cleaner. • Store the vacuum cleaner indoors.
Turn off the main power switch and unplug the cord from openings and moving parts.
• Do not pick up flammable or combustible liquids, such as cigarettes, matches, or hot ashes.
• Do not use without dust bag or filters...
Revision 4 (1/2004) - Page 4

... repair or replace any ROYAL® Authorized Sales & Warranty Service Station.
Use only genuine Royal® replacement parts.
This warranty does not cover unauthorized repairs. This warranty gives you specific legal rights and you many years of warranty period. Refer to state in mind. Please include complete description of the problem, day of purchase, copy of the vacuum...
Revision 4 (1/2004) - Page 9

...dirt tube. PAPER BAG REMOVAL REPLACEMENT
WARNING: TO REDUCE THE RISK OF INJURY FROM MOVING PARTS - UNPLUG BEFORE SERVICING. MPORTANT: Expand bag away from dirt tube. Press in place at all times. You can tell your bag needs replacing when you experience less suction.
SLOT
Set... to remove. BAG TYPE U
REMOVE OLD BAG
INSTALL NEW BAG
3. Push front panel forward until secure (Diagram ...
Revision 4 (1/2004) - Page 10

...: PHILLIPS SCREWDRIVER
WARNING: TO REDUCE THE RISK OF INJURY FROM MOVING PARTS -
Base should lay flat and face up.
UNPLUG CLEANER BEFORE
CHANGING BELT OR BRUSHROLL. TO REMOVE BELT
BELT STYLE 5
1
Lay cleaner flat and flip cleaner to remove the four (4) screws. TO REPLACE BELT OR BRUSHROLL
5.
6
END CAP
Lift and remove brushroll. Reattach nozzle guard...
Revision 4 (1/2004) - Page 11

... side of socket to remove. Replace lens. UNPLUG BEFORE SERVICING. If full, replace with a new paper bag (Page 9).
2. Clear any obstruction. Remove hose from blue filter in or around
the brushroll area. 4. If.full, replace with a new paper bag (Page 9).
2. For bulb replacement call 1-800-321-1134
or your local auto parts store. Remove lens (Diagram la...
Revision 4 (1/2004) - Page 12

...1. Replace belt - Check fuse or breaker in firmly.
2. Replace fuse/reset breaker.
3. Broken or worn belt. 5.
Pg. 9. 2. to be paid by the model number and manufacturing code when requesting information or ordering replacement parts. (The model number appears on the bottom of repair are easily replaced and readily available from cleaner
1. Remove lower hose; Review dirt...
Dirt Devil M085610RED Reviews
We have not received any reviews for Dirt Devil yet.