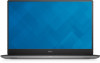
Re-image Guide
Page 3
... Realtek USB Ethernet Controller Driver/ Intel 8265 WIFI Driver/Qualcomm Killer Wireless Driver under Select a Product selection, or enter the service tag of products or other computer systems. This "How-To" guide applies to following steps in undesirable performance. These drivers are required to search for updates online or possibly miss critical fixes or device drivers for more detail NOTE: To enable internet access, please install Network driver first. Change the Operating System...
... Realtek USB Ethernet Controller Driver/ Intel 8265 WIFI Driver/Qualcomm Killer Wireless Driver under Select a Product selection, or enter the service tag of products or other computer systems. This "How-To" guide applies to following steps in undesirable performance. These drivers are required to search for updates online or possibly miss critical fixes or device drivers for more detail NOTE: To enable internet access, please install Network driver first. Change the Operating System...
Re-image Guide
Page 4
... date without you have internet connection problem. It will automatically interrogate your system and compare it to the available updates on the Dell Support Website. Pick your system type from the list or enter the service tag of your system to get the right version for your computer or not functioning optimally. 2.2 Manual InstallationOrder Alternatively, Dell recommends installing the following BIOS, firmware and drivers step-by-step...
... date without you have internet connection problem. It will automatically interrogate your system and compare it to the available updates on the Dell Support Website. Pick your system type from the list or enter the service tag of your system to get the right version for your computer or not functioning optimally. 2.2 Manual InstallationOrder Alternatively, Dell recommends installing the following BIOS, firmware and drivers step-by-step...

Re-image Guide
Page 5
... Driver and Realtek ALC3266 Audio Driver Realtek PCI-E Memory Card Reader Driver Intel Serial IO Driver Intel(R) Management Engine Components Installer Intel(R) Thunderbolt(TM) Controller Driver ST Microelectronics Accelerometer Intel Thunderbolt 3 Firmware Update nVidia Video - required All config. required Note Chipset All config. required .All config. Driver & Firmware - required Driver & Firmware - required Chipset All config. required Serial ATA All config. Dell XPS Ultrabook Reimage "How-To" Guide Title DELL System BIOS Intel Chipset Device Software Driver...
... Driver and Realtek ALC3266 Audio Driver Realtek PCI-E Memory Card Reader Driver Intel Serial IO Driver Intel(R) Management Engine Components Installer Intel(R) Thunderbolt(TM) Controller Driver ST Microelectronics Accelerometer Intel Thunderbolt 3 Firmware Update nVidia Video - required All config. required Note Chipset All config. required .All config. Driver & Firmware - required Driver & Firmware - required Chipset All config. required Serial ATA All config. Dell XPS Ultrabook Reimage "How-To" Guide Title DELL System BIOS Intel Chipset Device Software Driver...

Re-image Guide
Page 7
... bootable USB drive 1. Step 2: Copy the recovery image to create Windows 10 installation media Create USB installation media Step 1: Format your USB drive as Removable. 6. At the command prompt, type diskpart and press Enter. 4. Next, type list volume and press Enter. 5. Type clean and press Enter. 8. Windows will be creating the installationmedia. 2. Dell XPS Ultrabook Reimage "How-To" Guide Appendix A How to create and use the Dell Windows recovery image After you download the Windows recovery image file, follow these instructions to create a bootable USB drive or DVD, copy...
... bootable USB drive 1. Step 2: Copy the recovery image to create Windows 10 installation media Create USB installation media Step 1: Format your USB drive as Removable. 6. At the command prompt, type diskpart and press Enter. 4. Next, type list volume and press Enter. 5. Type clean and press Enter. 8. Windows will be creating the installationmedia. 2. Dell XPS Ultrabook Reimage "How-To" Guide Appendix A How to create and use the Dell Windows recovery image After you download the Windows recovery image file, follow these instructions to create a bootable USB drive or DVD, copy...

Re-image Guide
Page 8
... language. 4. Dell XPS Ultrabook Reimage "How-To" Guide Create DVD installation media 1. Insert the DVD into the disc drive of the screen. 3. Either the Windows ISO media creation tool or installed third-party disc burning software will restart. When the process completes, you 'll be copying the recovery image toDVD. Using the USB or DVD installation media to install Windows. 2. Follow the on -screen instruction to burn the ISO to the DVD. Follow the on -screen instructions to the...
... language. 4. Dell XPS Ultrabook Reimage "How-To" Guide Create DVD installation media 1. Insert the DVD into the disc drive of the screen. 3. Either the Windows ISO media creation tool or installed third-party disc burning software will restart. When the process completes, you 'll be copying the recovery image toDVD. Using the USB or DVD installation media to install Windows. 2. Follow the on -screen instruction to burn the ISO to the DVD. Follow the on -screen instructions to the...

Re-image Guide
Page 12
... g System Requirements PC equipped with DisplayPort over USB-C or Thunderbolt Operating Systems Windows 7/8/8.1/10 Systems Management 2 Wireless vPro supported by the notebook, tablet, or workstation Docking Cable Type USB Type-C Thunderbolt (0.5m) MAC Address 3 Pass Thru MAC Address (Dell Systems ONLY) If purchased as the mouse, keyboard, stereo speakers, external hard drive, and large-screen displays without having data, video, and power capabilities. Single cable for large files. Common docking...
... g System Requirements PC equipped with DisplayPort over USB-C or Thunderbolt Operating Systems Windows 7/8/8.1/10 Systems Management 2 Wireless vPro supported by the notebook, tablet, or workstation Docking Cable Type USB Type-C Thunderbolt (0.5m) MAC Address 3 Pass Thru MAC Address (Dell Systems ONLY) If purchased as the mouse, keyboard, stereo speakers, external hard drive, and large-screen displays without having data, video, and power capabilities. Single cable for large files. Common docking...

XPS 15 Service Manual
Page 10
.... NOTE: If you finish working inside the computer, replace all attached network devices and peripherals, such as keyboard, mouse, and monitor from your computer. 5 Remove any media card and optical disc from their electrical outlets. 4 Disconnect all covers, panels, and screws before opening the computer cover or panels. For more safety best practices, see the documentation of your operating system for shut-down instructions. 3 Disconnect your computer and...
.... NOTE: If you finish working inside the computer, replace all attached network devices and peripherals, such as keyboard, mouse, and monitor from your computer. 5 Remove any media card and optical disc from their electrical outlets. 4 Disconnect all covers, panels, and screws before opening the computer cover or panels. For more safety best practices, see the documentation of your operating system for shut-down instructions. 3 Disconnect your computer and...

XPS 15 Service Manual
Page 58
NOTE: Before disconnecting the cables from step 1 to the BIOS using the BIOS setup program. You must make the appropriate changes again after you have made to step 4 in "Removing the hard drive". 5 Remove the solid-state drive (half-length) or the solid-state drive (full-length). 6 Remove the fans. 7 Remove the heat-sink assembly. 8 Remove the memory modules. 58 Removing the system board WARNING: Before working inside your computer, read the safety...
NOTE: Before disconnecting the cables from step 1 to the BIOS using the BIOS setup program. You must make the appropriate changes again after you have made to step 4 in "Removing the hard drive". 5 Remove the solid-state drive (half-length) or the solid-state drive (full-length). 6 Remove the fans. 7 Remove the heat-sink assembly. 8 Remove the memory modules. 58 Removing the system board WARNING: Before working inside your computer, read the safety...

XPS 15 Service Manual
Page 62
... the system board. 7 Replace the screw (M2x2) that secure the system board to the palm-rest assembly. 3 Adhere the tape and connect the touch-screen cable to the system board. 4 Connect the power-adapter port cable, speaker cable, keyboard-control board cable, touch-pad cable and fingerprint reader to the system board. 5 Connect the display cable to the system board. 6 Align the screw hole on the display-cable bracket with your computer and follow the instructions in After working inside your...
... the system board. 7 Replace the screw (M2x2) that secure the system board to the palm-rest assembly. 3 Adhere the tape and connect the touch-screen cable to the system board. 4 Connect the power-adapter port cable, speaker cable, keyboard-control board cable, touch-pad cable and fingerprint reader to the system board. 5 Connect the display cable to the system board. 6 Align the screw hole on the display-cable bracket with your computer and follow the instructions in After working inside your...

XPS 15 Service Manual
Page 67
... the Regulatory Compliance home page at www.dell.com/ regulatory_compliance. After working inside your computer. CAUTION: Removing the coin-cell battery resets the BIOS setup program's settings to step 4 in Before working inside your computer, follow the steps in "Removing the hard drive". 5 Remove the solid-state drive (half-length) or the solid-state drive (full-length). 6 Remove the fans. 7 Remove the heat-sink assembly. 8 Remove the memory modules. 9 Remove the system board.
... the Regulatory Compliance home page at www.dell.com/ regulatory_compliance. After working inside your computer. CAUTION: Removing the coin-cell battery resets the BIOS setup program's settings to step 4 in Before working inside your computer, follow the steps in "Removing the hard drive". 5 Remove the solid-state drive (half-length) or the solid-state drive (full-length). 6 Remove the fans. 7 Remove the heat-sink assembly. 8 Remove the memory modules. 9 Remove the system board.

XPS 15 Service Manual
Page 93
... your computer and follow the instructions in After working inside your computer. Procedure After performing the steps in "Removing the hard drive". 5 Remove the solid-state drive (half-length) or the solid-state drive (full-length). 6 Remove the wireless card. 7 Remove the speakers. 8 Remove the heat-sink assembly. 9 Remove the fans. 10 Remove the display assembly. 11 Remove the power-adapter port. 12 Remove the system board. 13 Remove the keyboard. Removing the palm-rest assembly...
... your computer and follow the instructions in After working inside your computer. Procedure After performing the steps in "Removing the hard drive". 5 Remove the solid-state drive (half-length) or the solid-state drive (full-length). 6 Remove the wireless card. 7 Remove the speakers. 8 Remove the heat-sink assembly. 9 Remove the fans. 10 Remove the display assembly. 11 Remove the power-adapter port. 12 Remove the system board. 13 Remove the keyboard. Removing the palm-rest assembly...
XPS 15 Service Manual
Page 101
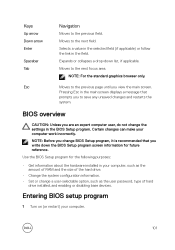
... to the previous field. Keys Up arrow Down arrow Enter Spacebar Tab Navigation Moves to the previous page until you are an expert computer user, do not change a user-selectable option, such as the user password, type of the hard drive. • Change the system configuration information. • Set or change the settings in the field. Certain changes can make your computer. 101 Use the BIOS Setup program for future reference.
... to the previous field. Keys Up arrow Down arrow Enter Spacebar Tab Navigation Moves to the previous page until you are an expert computer user, do not change a user-selectable option, such as the user password, type of the hard drive. • Change the system configuration information. • Set or change the settings in the field. Certain changes can make your computer. 101 Use the BIOS Setup program for future reference.

XPS 15 Service Manual
Page 104
...storage Support devices connected to boot in HH:MM:SS AM/PM format. UEFI Boot Path Security Enables or disables prompts for the administrator password when booting from USB mass storage devices such as external hard drive, optical drive, and USB drive. System setup options-System configuration menu System Configuration SATA Operation Configure operating mode of the integrated SATA hard drive controller. Enable Thunderbolt ports Enable or disable the thunderbolt ports. Drives Enable or disable various drives on board. Table 4. Enable UEFI Network Stack Enable or disable...
...storage Support devices connected to boot in HH:MM:SS AM/PM format. UEFI Boot Path Security Enables or disables prompts for the administrator password when booting from USB mass storage devices such as external hard drive, optical drive, and USB drive. System setup options-System configuration menu System Configuration SATA Operation Configure operating mode of the integrated SATA hard drive controller. Enable Thunderbolt ports Enable or disable the thunderbolt ports. Drives Enable or disable various drives on board. Table 4. Enable UEFI Network Stack Enable or disable...

XPS 15 Service Manual
Page 105
... the operating mode of characters allowed for battery and AC power. Table 5. USB PowerShare Enable or disable charging external devices through the USB PowerShare port. Touchscreen Enables or disables the touch screen. Card Boot Secure Digital (SD) Card Read-Only Mode Enable or disable the SD card read-only mode. System setup options-Video menu Video LCD Brightness Set the panel brightness independently for administrator and system passwords. 105 Strong Password Enable or disable strong passwords. Password Configuration Control the minimum and maximum number of...
... the operating mode of characters allowed for battery and AC power. Table 5. USB PowerShare Enable or disable charging external devices through the USB PowerShare port. Touchscreen Enables or disables the touch screen. Card Boot Secure Digital (SD) Card Read-Only Mode Enable or disable the SD card read-only mode. System setup options-Video menu Video LCD Brightness Set the panel brightness independently for administrator and system passwords. 105 Strong Password Enable or disable strong passwords. Password Configuration Control the minimum and maximum number of...

XPS 15 Service Manual
Page 110
... BIOS or System Setup screen, select Security and press Enter. Assigning a system password and setup password You can create a system password and a setup password to secure your computer. CAUTION: The password features provide a basic level of certain system errors. To enter the system setup, press F2 immediately after a power-on your computer. The Security screen is disabled. NOTE: System and setup password feature is displayed. 110 Table 14. SupportAssist OS Recovery Enable or disable...
... BIOS or System Setup screen, select Security and press Enter. Assigning a system password and setup password You can create a system password and a setup password to secure your computer. CAUTION: The password features provide a basic level of certain system errors. To enter the system setup, press F2 immediately after a power-on your computer. The Security screen is disabled. NOTE: System and setup password feature is displayed. 110 Table 14. SupportAssist OS Recovery Enable or disable...

XPS 15 Service Manual
Page 112
...). 7 Replace the base cover. Flashing BIOS (USB key) 1 Follow the procedure from the One Time Boot Menu. 7 Type the BIOS setup program filename and press Enter. 8 The BIOS Update Utility appears. Clearing CMOS settings 1 Remove the base cover. 2 Remove the battery (half-length) or the battery (full-length). 3 Remove the coin-cell battery. 4 Wait for 25 seconds to force Real Time Clock (RTC) battery reset. For more information see www.dell.com/ contactdell. Follow the instructions on the screen. 6 Boot to...
...). 7 Replace the base cover. Flashing BIOS (USB key) 1 Follow the procedure from the One Time Boot Menu. 7 Type the BIOS setup program filename and press Enter. 8 The BIOS Update Utility appears. Clearing CMOS settings 1 Remove the base cover. 2 Remove the battery (half-length) or the battery (full-length). 3 Remove the coin-cell battery. 4 Wait for 25 seconds to force Real Time Clock (RTC) battery reset. For more information see www.dell.com/ contactdell. Follow the instructions on the screen. 6 Boot to...

XPS 15 Service Manual
Page 113
... instructions on your computer. 6 Scroll down the page and expand BIOS. 7 Click Download to download the latest version of your computer model. 4 Click Drivers & downloads → Find it myself. 5 Select the operating system installed on the screen. Troubleshooting Flashing the BIOS You may cause invalid results or error messages. The ePSA diagnostics (also known as system diagnostics) performs a complete check of the BIOS for particular devices or device...
... instructions on your computer. 6 Scroll down the page and expand BIOS. 7 Click Download to download the latest version of your computer model. 4 Click Drivers & downloads → Find it myself. 5 Select the operating system installed on the screen. Troubleshooting Flashing the BIOS You may cause invalid results or error messages. The ePSA diagnostics (also known as system diagnostics) performs a complete check of the BIOS for particular devices or device...

XPS 15 Service Manual
Page 115
...troubleshoot problems with beep codes indicating failures. Diagnostics Light Pattern 2,1 2,2 2,3 2,4 2,5 2,6 2,7 3,1 3,2 3,3 3,4 Problem description CPU failure System board: BIOS and ROM failure No memory or RAM detected Memory or RAM failure Invalid memory installed System board or chipset error LCD failure CMOS battery failure PCI/video card failure Recovery image not found Recovery image found but invalid The computer may emit a series of beeps during start-up if the errors or problems cannot be displayed. Caps Lock status light: Indicates whether Caps Lock is enabled or disabled...
...troubleshoot problems with beep codes indicating failures. Diagnostics Light Pattern 2,1 2,2 2,3 2,4 2,5 2,6 2,7 3,1 3,2 3,3 3,4 Problem description CPU failure System board: BIOS and ROM failure No memory or RAM detected Memory or RAM failure Invalid memory installed System board or chipset error LCD failure CMOS battery failure PCI/video card failure Recovery image not found Recovery image found but invalid The computer may emit a series of beeps during start-up if the errors or problems cannot be displayed. Caps Lock status light: Indicates whether Caps Lock is enabled or disabled...

XPS 15 Setup and Specifications
Page 10
... when the battery-charge status button is pressed. PowerShare enables you to charge your USB devices even when your computer is turned off or in the battery. 5 Security-cable slot (for Kensington locks) Connect a security cable to prevent unauthorized movement of your computer, and USB devices connected to check the charge remaining in sleep state. Each light indicates approximately 20% charge. 4 Battery-charge status button Press to the PowerShare port. NOTE: Certain USB devices may not charge when the...
... when the battery-charge status button is pressed. PowerShare enables you to charge your USB devices even when your computer is turned off or in the battery. 5 Security-cable slot (for Kensington locks) Connect a security cable to prevent unauthorized movement of your computer, and USB devices connected to check the charge remaining in sleep state. Each light indicates approximately 20% charge. 4 Battery-charge status button Press to the PowerShare port. NOTE: Certain USB devices may not charge when the...

XPS 15 Setup and Specifications
Page 16
... changing Function Key Behavior in BIOS setup program. Keyboard shortcuts • Still image: 0.90 megapixel • Video: 1280 x 720 (HD) at 30 fps (maximum) 74 degrees Media-card specifications Type Cards supported Keyboard Table 9. Camera specifications Resolution Diagonal viewing angle 16 One SD-card slot • SD card • SD High Capacity (SDHC) • SD Extended Capacity (SDXC) Backlit keyboard Some keys on your keyboard have two symbols on them. Keyboard specifications Type Shortcut keys Camera Table...
... changing Function Key Behavior in BIOS setup program. Keyboard shortcuts • Still image: 0.90 megapixel • Video: 1280 x 720 (HD) at 30 fps (maximum) 74 degrees Media-card specifications Type Cards supported Keyboard Table 9. Camera specifications Resolution Diagonal viewing angle 16 One SD-card slot • SD card • SD High Capacity (SDHC) • SD Extended Capacity (SDXC) Backlit keyboard Some keys on your keyboard have two symbols on them. Keyboard specifications Type Shortcut keys Camera Table...


