User Manual
Page 3
... your printer's environmental impact 8 Finding information about the printer...9 Understanding the parts of the printer 11 Ordering and replacing supplies 14 Ordering ink cartridges...14 Replacing ink cartridges...15 Recycling Dell products...16 Using the printer control panel buttons and menus 18 Replacing the language sheet...18 Using the printer control panel...20...
... your printer's environmental impact 8 Finding information about the printer...9 Understanding the parts of the printer 11 Ordering and replacing supplies 14 Ordering ink cartridges...14 Replacing ink cartridges...15 Recycling Dell products...16 Using the printer control panel buttons and menus 18 Replacing the language sheet...18 Using the printer control panel...20...
User Manual
Page 5
......81 Faxing FAQ...82 Networking 89 Installing the printer on a wireless network 89 Advanced wireless setup...96 Networking FAQ...103 Maintaining the printer 117 Maintaining ink cartridges...117 Cleaning the exterior of the printer...118 Cleaning the scanner glass...119 Moving the printer to another location 119 Troubleshooting 121 Before you...
......81 Faxing FAQ...82 Networking 89 Installing the printer on a wireless network 89 Advanced wireless setup...96 Networking FAQ...103 Maintaining the printer 117 Maintaining ink cartridges...117 Cleaning the exterior of the printer...118 Cleaning the scanner glass...119 Moving the printer to another location 119 Troubleshooting 121 Before you...
User Manual
Page 9
...programs, depending on the installation software CD. For updates, check our Web site at http://support.dell.com. These cartridges let you adjust the darkness of the printer that require less ink. Initial setup instructions: • Connecting the printer • Installing the printer software Find it...on your printer model • Configuring printer settings • Viewing and printing documents and photos • Setting up and using less ink than normal and are ideal for printing documents that are you purchased. Note: Your printer may not come with the printer. Finding ...
...programs, depending on the installation software CD. For updates, check our Web site at http://support.dell.com. These cartridges let you adjust the darkness of the printer that require less ink. Initial setup instructions: • Connecting the printer • Installing the printer software Find it...on your printer model • Configuring printer settings • Viewing and printing documents and photos • Setting up and using less ink than normal and are ideal for printing documents that are you purchased. Note: Your printer may not come with the printer. Finding ...

User Manual
Page 13
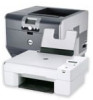
About your printer 13 Use the To 22 Jam clearance cover Access and clear paper jams. 23 Ink cartridge access area Install, replace, or remove ink cartridges. 24 Scanner unit • Access the ink cartridges and printhead. • Clear paper jams.
About your printer 13 Use the To 22 Jam clearance cover Access and clear paper jams. 23 Ink cartridge access area Install, replace, or remove ink cartridges. 24 Scanner unit • Access the ink cartridges and printhead. • Clear paper jams.
User Manual
Page 14
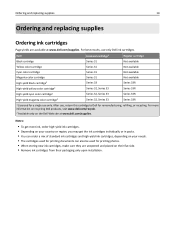
...; The cartridges used for printing documents can also be used for printing photos. • When storing new ink cartridges, make sure they are available at www.dell.com/supplies. Ordering and replacing supplies 14 Ordering and replacing supplies Ordering ink cartridges Page yields are unopened and placed on their flat side. • Remove...
...; The cartridges used for printing documents can also be used for printing photos. • When storing new ink cartridges, make sure they are available at www.dell.com/supplies. Ordering and replacing supplies 14 Ordering and replacing supplies Ordering ink cartridges Page yields are unopened and placed on their flat side. • Remove...
User Manual
Page 15
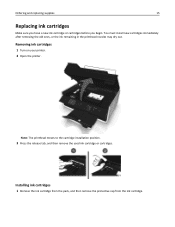
... the release tab, and then remove the used ink cartridge or cartridges. Ordering and replacing supplies 15 Replacing ink cartridges Make sure you have a new ink cartridge or cartridges before you begin. Installing ink cartridges 1 Remove the ink cartridge from the pack, and then remove the ...protective cap from the ink cartridge. You must install new cartridges ...
... the release tab, and then remove the used ink cartridge or cartridges. Ordering and replacing supplies 15 Replacing ink cartridges Make sure you have a new ink cartridge or cartridges before you begin. Installing ink cartridges 1 Remove the ink cartridge from the pack, and then remove the ...protective cap from the ink cartridge. You must install new cartridges ...
User Manual
Page 16
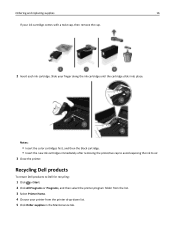
...Notes: • Insert the color cartridges first, and then the black cartridge. • Insert the new ink cartridges immediately after removing the protective cap to avoid exposing the ink to Dell for recycling: 1 Click or Start. 2 Click All Programs or Programs, and then select the printer ... list. 3 Select Printer Home. 4 Choose your finger along the ink cartridge until the cartridge clicks into place. Recycling Dell products To return Dell products to air. 3 Close the printer. Ordering and replacing supplies 16 If your ink cartridge comes with a twist cap, then remove the cap. 2 ...
...Notes: • Insert the color cartridges first, and then the black cartridge. • Insert the new ink cartridges immediately after removing the protective cap to avoid exposing the ink to Dell for recycling: 1 Click or Start. 2 Click All Programs or Programs, and then select the printer ... list. 3 Select Printer Home. 4 Choose your finger along the ink cartridge until the cartridge clicks into place. Recycling Dell products To return Dell products to air. 3 Close the printer. Ordering and replacing supplies 16 If your ink cartridge comes with a twist cap, then remove the cap. 2 ...
User Manual
Page 25
... run the installation software, and then click Advanced Options > Install Additional Software. Access your favorite settings in Microsoft Office 2007. Order ink. Note: This program is installed automatically with a word‑processing program. • Set up the wireless printer on a wireless network... capability. Printer software Use the Dell Printer Home (referred to as Printer Home) Dell Ink Management System Dell Phone Book (referred to as Phone Book) Abbyy Sprint OCR Dell Wireless Setup Utility (referred to as Wireless Setup Utility) Dell Tools for Office Printer Setup Utility...
... run the installation software, and then click Advanced Options > Install Additional Software. Access your favorite settings in Microsoft Office 2007. Order ink. Note: This program is installed automatically with a word‑processing program. • Set up the wireless printer on a wireless network... capability. Printer software Use the Dell Printer Home (referred to as Printer Home) Dell Ink Management System Dell Phone Book (referred to as Phone Book) Abbyy Sprint OCR Dell Wireless Setup Utility (referred to as Wireless Setup Utility) Dell Tools for Office Printer Setup Utility...

User Manual
Page 32
Loading paper and original documents 32 Load up . If you want to set the paper type, then navigate to avoid ink smudging. Notes: - or letter-size transparencies. • If the transparencies have loaded in the printer. 1 From the printer control panel, press . 2 Adjust the settings as ...
Loading paper and original documents 32 Load up . If you want to set the paper type, then navigate to avoid ink smudging. Notes: - or letter-size transparencies. • If the transparencies have loaded in the printer. 1 From the printer control panel, press . 2 Adjust the settings as ...

User Manual
Page 34
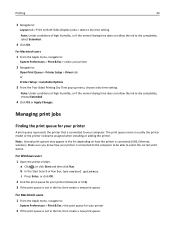
.... 5 From the Printer pop‑up menu, choose your print job. • Select a higher print quality for better prints. • Make sure there is enough ink in the ink cartridges. • Remove each copy as a set (collated) or to print each sheet as groups of pages (not collated).
.... 5 From the Printer pop‑up menu, choose your print job. • Select a higher print quality for better prints. • Make sure there is enough ink in the ink cartridges. • Remove each copy as a set (collated) or to print each sheet as groups of pages (not collated).
User Manual
Page 44
Note: Under conditions of high humidity, or if the normal drying time does not allow the ink to : Open Print Queue > Printer Setup > Driver tab or Printer Setup > Installable Options 3 From the Two‑Sided Printing Dry Time pop‑up menu, ... on Both Sides (Duplex) area > select a dry time setting Note: Under conditions of high humidity, or if the normal drying time does not allow the ink to dry completely, select Extended. 4 Click OK. Printing 44 3 Navigate to: Layout tab > Print on how the printer is connected (USB, Ethernet, wireless). Managing print...
Note: Under conditions of high humidity, or if the normal drying time does not allow the ink to : Open Print Queue > Printer Setup > Driver tab or Printer Setup > Installable Options 3 From the Two‑Sided Printing Dry Time pop‑up menu, ... on Both Sides (Duplex) area > select a dry time setting Note: Under conditions of high humidity, or if the normal drying time does not allow the ink to dry completely, select Extended. 4 Click OK. Printing 44 3 Navigate to: Layout tab > Print on how the printer is connected (USB, Ethernet, wireless). Managing print...

User Manual
Page 46
... then click Hold. • If you can select a different mode from the Print dialog before sending the print job. It uses less ink and is recommended for all print jobs in the queue, then click Printer, and then select Pause Printing. For Windows users 1 With a... choose Quality & Media. 4 From the Print Quality pop‑up menu, choose a print quality. 5 Click OK. Printing 46 Changing the default printing mode To conserve ink, you want to : Quality tab > select a print quality > OK For Macintosh users 1 With a document open , click File > Print. 2 Click Properties, Preferences...
... then click Hold. • If you can select a different mode from the Print dialog before sending the print job. It uses less ink and is recommended for all print jobs in the queue, then click Printer, and then select Pause Printing. For Windows users 1 With a... choose Quality & Media. 4 From the Print Quality pop‑up menu, choose a print quality. 5 Click OK. Printing 46 Changing the default printing mode To conserve ink, you want to : Quality tab > select a print quality > OK For Macintosh users 1 With a document open , click File > Print. 2 Click Properties, Preferences...
User Manual
Page 86
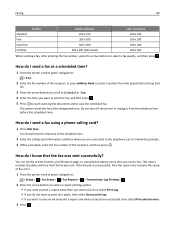
... from the Speed Dial or Group Dial list. 3 Press the arrow buttons to scroll to Schedule Fax. 4 Enter the time you want to save on ink and print a report only when a fax job is unsuccessful, then select Print only for error. 3 Press . You should hear the dial tone of the telephone...
... from the Speed Dial or Group Dial list. 3 Press the arrow buttons to scroll to Schedule Fax. 4 Enter the time you want to save on ink and print a report only when a fax job is unsuccessful, then select Print only for error. 3 Press . You should hear the dial tone of the telephone...
User Manual
Page 88
... incoming faxes, the error report lets you know who sent the fax and how many pages were not sent. If the printer runs out of ink or runs out of paper, then you can block up to block. In this case, the printer automatically prints an error report the next time...
... incoming faxes, the error report lets you know who sent the fax and how many pages were not sent. If the printer runs out of ink or runs out of paper, then you can block up to block. In this case, the printer automatically prints an error report the next time...

User Manual
Page 117
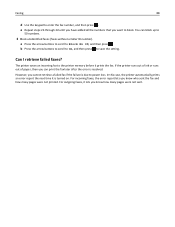
... Using the printer control panel From the printer control panel, navigate to: > Setup > >Maintenance > > Check Ink Levels > Using the printer software For Windows users 1 Click or Start. 2 Click All Programs or Programs, and then select the printer ...Preferences > Print & Fax > select your printer 2 Click Options & Supplies or Print Queue. 3 Click Supply Levels. Maintaining the printer 117 Maintaining the printer Maintaining ink cartridges In addition to the following tasks that you aligned the cartridges to improve print quality, then print your document again. Aligning the printhead If...
... Using the printer control panel From the printer control panel, navigate to: > Setup > >Maintenance > > Check Ink Levels > Using the printer software For Windows users 1 Click or Start. 2 Click All Programs or Programs, and then select the printer ...Preferences > Print & Fax > select your printer 2 Click Options & Supplies or Print Queue. 3 Click Supply Levels. Maintaining the printer 117 Maintaining the printer Maintaining ink cartridges In addition to the following tasks that you aligned the cartridges to improve print quality, then print your document again. Aligning the printhead If...
User Manual
Page 118
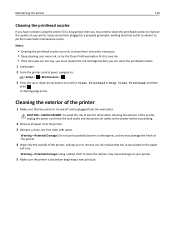
... the exterior of the printer, unplug the power cord from the wall outlet and disconnect all cables to save ink. • If the ink levels are too low, you must replace the ink cartridges before beginning a new print job. A cleaning page prints. Notes: • Cleaning the printhead nozzles uses... paper. 2 From the printer control panel, navigate to: > Setup > > Maintenance > 3 Press the up or down arrow button to scroll to remove any ink residue that the printer is turned off and unplugged from the printer. 3 Dampen a clean, lint‑free cloth with water. Keep your printer plugged to...
... the exterior of the printer, unplug the power cord from the wall outlet and disconnect all cables to save ink. • If the ink levels are too low, you must replace the ink cartridges before beginning a new print job. A cleaning page prints. Notes: • Cleaning the printhead nozzles uses... paper. 2 From the printer control panel, navigate to: > Setup > > Maintenance > 3 Press the up or down arrow button to scroll to remove any ink residue that the printer is turned off and unplugged from the printer. 3 Dampen a clean, lint‑free cloth with water. Keep your printer plugged to...
User Manual
Page 119
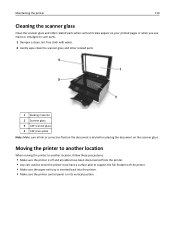
... cart used to move the printer must have a surface able to another location, follow these precautions: • Make sure the printer is off and all ink or corrective fluid on the document is in its vertical position.
... cart used to move the printer must have a surface able to another location, follow these precautions: • Make sure the printer is off and all ink or corrective fluid on the document is in its vertical position.
User Manual
Page 120
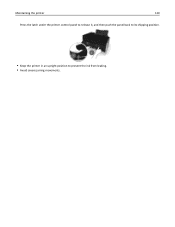
Maintaining the printer 120 Press the latch under the printer control panel to release it, and then push the panel back to its shipping position. • Keep the printer in an upright position to prevent the ink from leaking. • Avoid severe jarring movements.
Maintaining the printer 120 Press the latch under the printer control panel to release it, and then push the panel back to its shipping position. • Keep the printer in an upright position to prevent the ink from leaking. • Avoid severe jarring movements.
User Manual
Page 121
If Troubleshooting does not solve your problem Visit our Web site at http://support.dell.com to find the following: • Live online customer support • Contact numbers for paper jam messages, and clear any jams. • Check the ink cartridges, and install new cartridges if necessary. • Turn the printer off, wait...
If Troubleshooting does not solve your problem Visit our Web site at http://support.dell.com to find the following: • Live online customer support • Contact numbers for paper jam messages, and clear any jams. • Check the ink cartridges, and install new cartridges if necessary. • Turn the printer off, wait...
User Manual
Page 122
... seconds to Yes, and then press . Press and hold for any obvious damage. Note: If you reinstall the software, do the following : MAKE SURE THE INK CARTRIDGES ARE INSERTED CORRECTLY 1 Turn the printer on the computer. Troubleshooting 122 3 To confirm the setting, press the left or right arrow button to scroll...
... seconds to Yes, and then press . Press and hold for any obvious damage. Note: If you reinstall the software, do the following : MAKE SURE THE INK CARTRIDGES ARE INSERTED CORRECTLY 1 Turn the printer on the computer. Troubleshooting 122 3 To confirm the setting, press the left or right arrow button to scroll...


