

Dell Users Guide
Page 3
... Universal Serial Bus (USB) Interface 20 LCD Monitor Quality and Pixel Policy 21 Maintenance Guidelines 22 2 Setting Up the Monitor 23 Attaching the Stand 23 Connecting Your Monitor 23 Organizing Your Cables 29 Attaching the Cable Cover 30 Removing the Monitor Stand 30 Removing the Cable Cover 31 Wall Mounting (Optional...
... Universal Serial Bus (USB) Interface 20 LCD Monitor Quality and Pixel Policy 21 Maintenance Guidelines 22 2 Setting Up the Monitor 23 Attaching the Stand 23 Connecting Your Monitor 23 Organizing Your Cables 29 Attaching the Cable Cover 30 Removing the Monitor Stand 30 Removing the Cable Cover 31 Wall Mounting (Optional...

Dell Users Guide
Page 6
.... • Removable stand and Video Electronics Standards Association (VESA™) 100 mm mounting holes for flexible mounting solutions. • Extensive all digital connectivity with DisplayPort, mini DisplayPort, HDMI (MHL), USB 3.0 helps future proof your monitor. • Plug and play capability if supported by your system...) • Drivers and Documentation Media • Quick Setup Guide • Product and Safety Information Guide Product Features The Dell U2414H flat panel display has an active matrix, Thin-Film Transistor (TFT), Liquid Crystal Display (LCD) and LED backlight.
.... • Removable stand and Video Electronics Standards Association (VESA™) 100 mm mounting holes for flexible mounting solutions. • Extensive all digital connectivity with DisplayPort, mini DisplayPort, HDMI (MHL), USB 3.0 helps future proof your monitor. • Plug and play capability if supported by your system...) • Drivers and Documentation Media • Quick Setup Guide • Product and Safety Information Guide Product Features The Dell U2414H flat panel display has an active matrix, Thin-Film Transistor (TFT), Liquid Crystal Display (LCD) and LED backlight.

Dell Users Guide
Page 8
Back View Back View with security lock (security lock not included). Lists the regulatory approvals. Connects your USB device. Refer to this connector after you need to contact Dell for technical support. Uses to the computer and USB upstream connector on the monitor. Secures monitor with monitor stand Label Description 1 VESA ...mount monitor using VESAcompatible wall mount kit (100 mm x 100 mm). Releases stand from monitor. You can only use this label if you have connected the USB cable to organize cables by placing them through the slot. 8 | About Your Monitor
Back View Back View with security lock (security lock not included). Lists the regulatory approvals. Connects your USB device. Refer to this connector after you need to contact Dell for technical support. Uses to the computer and USB upstream connector on the monitor. Secures monitor with monitor stand Label Description 1 VESA ...mount monitor using VESAcompatible wall mount kit (100 mm x 100 mm). Releases stand from monitor. You can only use this label if you have connected the USB cable to organize cables by placing them through the slot. 8 | About Your Monitor

Dell Users Guide
Page 9
... enable MST, refer to DP cable. Side View Bottom View Bottom view without monitor stand Label Description 1 AC power cord connector 2 Dell Soundbar mounting slots 3 DP in connector 4 Mini DisplayPort in the MST chain. Attach the optional Dell Soundbar. (Concealed below removable plastic sheets) Connect your computer with DP cable. About Your Monitor | 9
... enable MST, refer to DP cable. Side View Bottom View Bottom view without monitor stand Label Description 1 AC power cord connector 2 Dell Soundbar mounting slots 3 DP in connector 4 Mini DisplayPort in the MST chain. Attach the optional Dell Soundbar. (Concealed below removable plastic sheets) Connect your computer with DP cable. About Your Monitor | 9
Dell Users Guide
Page 10
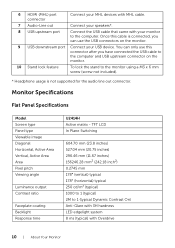
...Viewing angle Luminance output Contrast ratio Faceplate coating Backlight Response time U2414H Active matrix - 6 HDMI (MHL) port connector Connect your MHL devices with MHL cable. 7 Audio-Line out Connect your speakers*. 8 USB upstream port Connect the USB cable that came with your USB device. You can... use this cable is connected, you have connected the USB cable to the computer and USB upstream connector on the monitor. 9 USB downstream port Connect your monitor to 1 (typical Dynamic Contrast On) Anti-Glare with 3H hardness...
...Viewing angle Luminance output Contrast ratio Faceplate coating Backlight Response time U2414H Active matrix - 6 HDMI (MHL) port connector Connect your MHL devices with MHL cable. 7 Audio-Line out Connect your speakers*. 8 USB upstream port Connect the USB cable that came with your USB device. You can... use this cable is connected, you have connected the USB cable to the computer and USB upstream connector on the monitor. 9 USB downstream port Connect your monitor to 1 (typical Dynamic Contrast On) Anti-Glare with 3H hardness...

Dell Users Guide
Page 16
Pin Assignments DisplayPort Connector Pin Number 1 2 3 4 5 6 7 8 9 10 11 12 13 14 15 16 17 18 19 20 20-pin Side of the Connected Signal Cable ML0(p) GND ML0(n) ML1(p) GND ML1(n) ML2(p) GND ML2(n) ML3(p) GND ML3(n) GND GND AUX(p) GND AUX(n) GND Re-PWR +3.3 V DP_PWR 16 | About Your Monitor
Pin Assignments DisplayPort Connector Pin Number 1 2 3 4 5 6 7 8 9 10 11 12 13 14 15 16 17 18 19 20 20-pin Side of the Connected Signal Cable ML0(p) GND ML0(n) ML1(p) GND ML1(n) ML2(p) GND ML2(n) ML3(p) GND ML3(n) GND GND AUX(p) GND AUX(n) GND Re-PWR +3.3 V DP_PWR 16 | About Your Monitor

Dell Users Guide
Page 17
Mini DisplayPort Connector Pin Number 1 2 3 4 5 6 7 8 9 10 11 12 13 14 15 16 17 18 19 20 20-pin Side of the Connected Signal Cable GND Hot Plug Detect ML3(n) GND ML3(n) GND GND GND ML2(n) ML0(p) ML2(p) ML0(p) GND GND ML1(n) AUX(p) ML1(p) AUX(n) GND +3.3 V DP_PWR About Your Monitor | 17
Mini DisplayPort Connector Pin Number 1 2 3 4 5 6 7 8 9 10 11 12 13 14 15 16 17 18 19 20 20-pin Side of the Connected Signal Cable GND Hot Plug Detect ML3(n) GND ML3(n) GND GND GND ML2(n) ML0(p) ML2(p) ML0(p) GND GND ML1(n) AUX(p) ML1(p) AUX(n) GND +3.3 V DP_PWR About Your Monitor | 17

Dell Users Guide
Page 18
on device) DDC CLOCK (SCL) DDC DATA (SDA) DDC/CEC Ground +5V POWER HOT PLUG DETECT 18 | About Your Monitor HDMI Connector Pin Number 1 2 3 4 5 6 7 8 9 10 11 12 13 14 15 16 17 18 19 19-pin Side of the Connected Signal Cable TMDS DATA 2+ TMDS DATA 2 SHIELD TMDS DATA 2TMDS DATA 1+ TMDS DATA 1 SHIELD TMDS DATA 1TMDS DATA 0+ TMDS DATA 0 SHIELD TMDS DATA 0TMDS CLOCK+ TMDS CLOCK SHIELD TMDS CLOCKCEC Reserved (N.C.
on device) DDC CLOCK (SCL) DDC DATA (SDA) DDC/CEC Ground +5V POWER HOT PLUG DETECT 18 | About Your Monitor HDMI Connector Pin Number 1 2 3 4 5 6 7 8 9 10 11 12 13 14 15 16 17 18 19 19-pin Side of the Connected Signal Cable TMDS DATA 2+ TMDS DATA 2 SHIELD TMDS DATA 2TMDS DATA 1+ TMDS DATA 1 SHIELD TMDS DATA 1TMDS DATA 0+ TMDS DATA 0 SHIELD TMDS DATA 0TMDS CLOCK+ TMDS CLOCK SHIELD TMDS CLOCKCEC Reserved (N.C.

Dell Users Guide
Page 19
MHL Connector Pin Number 1 2 3 4 5 6 7 8 9 10 11 12 13 14 15 16 17 18 19 19-pin Side of the Connected Signal Cable TMDS DATA 2+ TMDS DATA 2 SHIELD TMDS DATA 2TMDS DATA 1+ GND TMDS DATA 1MHL+ TMDS DATA 0 SHIELD MHLTMDS CLOCK+ GND TMDS CLOCKCEC Reserved (N.C. About ...
MHL Connector Pin Number 1 2 3 4 5 6 7 8 9 10 11 12 13 14 15 16 17 18 19 19-pin Side of the Connected Signal Cable TMDS DATA 2+ TMDS DATA 2 SHIELD TMDS DATA 2TMDS DATA 1+ GND TMDS DATA 1MHL+ TMDS DATA 0 SHIELD MHLTMDS CLOCK+ GND TMDS CLOCKCEC Reserved (N.C. About ...

Dell Users Guide
Page 23
... attach the monitor stand: 1. Remove the cover and place the monitor on the back of the procedures in this section, follow the Safety Instructions. Connect the DP/Mini-DP to DP/HDMI/MHL cable from the factory. NOTE: This is shipped from your monitor to the respective stand setup guide... begin any other stand is bought, please refer to the computer: 1. Turn Off your computer and disconnect the power cable. NOTE: Do not connect all cables to the computer. 2 Setting Up the Monitor Attaching the Stand NOTE: The stand is detached when the monitor is applicable for the set...
... attach the monitor stand: 1. Remove the cover and place the monitor on the back of the procedures in this section, follow the Safety Instructions. Connect the DP/Mini-DP to DP/HDMI/MHL cable from the factory. NOTE: This is shipped from your monitor to the respective stand setup guide... begin any other stand is bought, please refer to the computer: 1. Turn Off your computer and disconnect the power cable. NOTE: Do not connect all cables to the computer. 2 Setting Up the Monitor Attaching the Stand NOTE: The stand is detached when the monitor is applicable for the set...

Dell Users Guide
Page 24
Connecting the HDMI cable Connecting the MHL cable Connecting the black DisplayPort (Mini-DP to DP) cable 24 | Setting Up the Monitor
Connecting the HDMI cable Connecting the MHL cable Connecting the black DisplayPort (Mini-DP to DP) cable 24 | Setting Up the Monitor

Dell Users Guide
Page 25
To enable MST connection, please use of factory setting in box (or other DP1.2 certified cable) and change the DP setting to DP1.2 by performing the below steps: A) Monitor ....1a. Use OSD button to navigate to show content 1. The default out of this feature, your PC Graphics Card must be certified to DP) cable Connecting the monitor for DP Multi-Stream Transport (MST) function NOTE: U2414H supports the DP MST feature. To make use only DP cable as provided in the...
To enable MST connection, please use of factory setting in box (or other DP1.2 certified cable) and change the DP setting to DP1.2 by performing the below steps: A) Monitor ....1a. Use OSD button to navigate to show content 1. The default out of this feature, your PC Graphics Card must be certified to DP) cable Connecting the monitor for DP Multi-Stream Transport (MST) function NOTE: U2414H supports the DP MST feature. To make use only DP cable as provided in the...

Dell Users Guide
Page 28
.... NOTE: To use the MHL function, use only MHL certified cable and source devices that support MHL output. To enable MHL connection, please perform the below to connect the USB 3.0 cable to the computer and complete your monitor setup: 1. Plug the power cables for details.) 2. If your ...computer and monitor into a nearby outlet. 4. NOTE: When the connected MHL source device enters Standby mode, the monitor will display black screen or show the massage below, depending on the monitor. 3. If it does not...
.... NOTE: To use the MHL function, use only MHL certified cable and source devices that support MHL output. To enable MHL connection, please perform the below to connect the USB 3.0 cable to the computer and complete your monitor setup: 1. Plug the power cables for details.) 2. If your ...computer and monitor into a nearby outlet. 4. NOTE: When the connected MHL source device enters Standby mode, the monitor will display black screen or show the massage below, depending on the monitor. 3. If it does not...

Dell Users Guide
Page 29
... monitor to HDMI (MHL) 1 or HDMI (MHL) 2 port on the monitor with a MHL certified cable (See Bottom View for details.) 3. Connect the (micro) USB port on your monitor and computer, (See Connecting Your Monitor for details.) 5. Setting Up the Monitor | 29 If it does not display an image, see Mobile High-Definition...
... monitor to HDMI (MHL) 1 or HDMI (MHL) 2 port on the monitor with a MHL certified cable (See Bottom View for details.) 3. Connect the (micro) USB port on your monitor and computer, (See Connecting Your Monitor for details.) 5. Setting Up the Monitor | 29 If it does not display an image, see Mobile High-Definition...

Dell Users Guide
Page 38
... you are using HDMI (MHL) 2 the HDMI connectors. Input Source Use the Input Source menu to select between the different video signals that may be connected to select the DisplayPort input source.
... you are using HDMI (MHL) 2 the HDMI connectors. Input Source Use the Input Source menu to select between the different video signals that may be connected to select the DisplayPort input source.

Dell Users Guide
Page 39
Gamma Allows you to set the Gamma to PC or MAC. YPbPr: Select this option if your monitor is connected to a DVD player by YPbPr using HDMI cable (or DisplayPort cable); or MHL devices by YPbPr using MHL cable. Operating the Monitor | 39 Or if the DVD (or MHL devices) color output setting is connected to a computer (or DVD player) using MHL cable. Input Color Format Allows you to set the video input mode to: RGB: Select this option if your monitor is not RGB. or MHL devices using the HDMI cable (or DisplayPort cable);
Gamma Allows you to set the Gamma to PC or MAC. YPbPr: Select this option if your monitor is connected to a DVD player by YPbPr using HDMI cable (or DisplayPort cable); or MHL devices by YPbPr using MHL cable. Operating the Monitor | 39 Or if the DVD (or MHL devices) color output setting is connected to a computer (or DVD player) using MHL cable. Input Color Format Allows you to set the video input mode to: RGB: Select this option if your monitor is not RGB. or MHL devices using the HDMI cable (or DisplayPort cable);

Dell Users Guide
Page 47
If you press any button other than the power button, one of the following message appears: Activate the computer and wake up the monitor to gain access to the OSD. When the monitor enters the Power Save mode, the following messages will appear depending on the selected input: HDMI (MHL)/Mini DisplayPort/DP input or If either HDMI (MHL), Mini DisplayPort, or DP input is selected and the corresponding cable is not connected, a floating dialog box as shown below appears. or Operating the Monitor | 47
If you press any button other than the power button, one of the following message appears: Activate the computer and wake up the monitor to gain access to the OSD. When the monitor enters the Power Save mode, the following messages will appear depending on the selected input: HDMI (MHL)/Mini DisplayPort/DP input or If either HDMI (MHL), Mini DisplayPort, or DP input is selected and the corresponding cable is not connected, a floating dialog box as shown below appears. or Operating the Monitor | 47

Dell Users Guide
Page 55
... screen. Turn on -screen (against a black background), if the monitor cannot sense a video signal and is functioning properly. If your monitor and computer are properly connected but the monitor screen remains dark, run the monitor self-test by performing the following steps: 1. or Troubleshooting | 55 Also, depending upon the selected input...
... screen. Turn on -screen (against a black background), if the monitor cannot sense a video signal and is functioning properly. If your monitor and computer are properly connected but the monitor screen remains dark, run the monitor self-test by performing the following steps: 1. or Troubleshooting | 55 Also, depending upon the selected input...

Dell Users Guide
Page 57
... possible solutions: Common Symptoms What You Experience Possible Solutions No Video/Power No picture LED off • Ensure that the video cable connecting the monitor and the computer is properly connected and secure. • Verify that the screen is selected via the Input Source menu. Inspect the display for abnormalities. 5. Repeat steps...
... possible solutions: Common Symptoms What You Experience Possible Solutions No Video/Power No picture LED off • Ensure that the video cable connecting the monitor and the computer is properly connected and secure. • Verify that the screen is selected via the Input Source menu. Inspect the display for abnormalities. 5. Repeat steps...

Dell Users Guide
Page 58
... connector. • Restart the computer in the safe mode. • Do not perform any troubleshooting steps. • Contact Dell immediately. • Ensure that the video cable connecting the monitor to the computer is connected properly and is secure. • Reset the monitor to Factory Settings. • Perform monitor self-test feature check to...
... connector. • Restart the computer in the safe mode. • Do not perform any troubleshooting steps. • Contact Dell immediately. • Ensure that the video cable connecting the monitor to the computer is connected properly and is secure. • Reset the monitor to Factory Settings. • Perform monitor self-test feature check to...


