Dell™ Technology Guide
Page 60
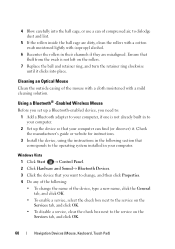
... mild cleaning solution. Using a Bluetooth® -Enabled Wireless Mouse Before you set up the device so that corresponds to the service on the rollers. 7 Replace the ball and retainer ring, and turn the retainer ring clockwise until it . Windows Vista 1 Click Start → Control Panel. 2 Click Hardware and ...the swab is not already built in your computer, if one is not left on the Services tab, and click OK. 60 Navigation Devices (Mouse, Keyboard, Touch Pad) Ensure that you need to: 1 Add a Bluetooth adapter to dislodge dust and lint. 5 If the rollers inside the ball cage ...
... mild cleaning solution. Using a Bluetooth® -Enabled Wireless Mouse Before you set up the device so that corresponds to the service on the rollers. 7 Replace the ball and retainer ring, and turn the retainer ring clockwise until it . Windows Vista 1 Click Start → Control Panel. 2 Click Hardware and ...the swab is not already built in your computer, if one is not left on the Services tab, and click OK. 60 Navigation Devices (Mouse, Keyboard, Touch Pad) Ensure that you need to: 1 Add a Bluetooth adapter to dislodge dust and lint. 5 If the rollers inside the ball cage ...
Dell™ Technology Guide
Page 274
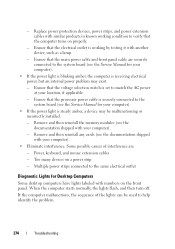
...computer malfunctions, the sequence of interference are securely connected to the same electrical outlet Diagnostic Lights for your location, if applicable. - Replace power protection devices, power strips, and power extension cables with numbers on the front panel. Remove and then reinstall the memory ... power problem may be used to the system board (see the documentation shipped with your computer). • Eliminate interference. Power, keyboard, and mouse extension cables - Ensure that the main power cable and front panel cable are : - Ensure that the electrical outlet...
...computer malfunctions, the sequence of interference are securely connected to the same electrical outlet Diagnostic Lights for your location, if applicable. - Replace power protection devices, power strips, and power extension cables with numbers on the front panel. Remove and then reinstall the memory ... power problem may be used to the system board (see the documentation shipped with your computer). • Eliminate interference. Power, keyboard, and mouse extension cables - Ensure that the main power cable and front panel cable are : - Ensure that the electrical outlet...
Dell™ Technology Guide
Page 275
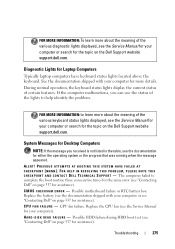
...about the meaning of the various keyboard status lights displayed, see the Service Manual for your computer or search for the topic on the Dell Support website support.dell.com. Replace the CPU fan (see the Service...T - H A R D - Possible HDD failure during HDD boot test (see the documentation shipped with your computer). Troubleshooting 275 Replace the battery (see "Contacting Dell" on page 337 for assistance). During normal operation, the keyboard status lights display the current status of the lights to complete the boot routine three consecutive times for the same error...
...about the meaning of the various keyboard status lights displayed, see the Service Manual for your computer or search for the topic on the Dell Support website support.dell.com. Replace the CPU fan (see the Service...T - H A R D - Possible HDD failure during HDD boot test (see the documentation shipped with your computer). Troubleshooting 275 Replace the battery (see "Contacting Dell" on page 337 for assistance). During normal operation, the keyboard status lights display the current status of the lights to complete the boot routine three consecutive times for the same error...
Dell™ Technology Guide
Page 297
...into an electrical outlet and are : • Power, keyboard, and mouse extension cables • Too many devices connected to resume normal operation. E L I M I N A T E I N G B L U E - Some possible causes of the computer and the electrical outlet. • Replace power strips, power extension cables, and other power protection ... receiving power. • Reseat the power cable in the power connector on the back of interference are turned on the keyboard, move the mouse, or press the power button to the same power strip Troubleshooting 297 The computer is either turned off...
...into an electrical outlet and are : • Power, keyboard, and mouse extension cables • Too many devices connected to resume normal operation. E L I M I N A T E I N G B L U E - Some possible causes of the computer and the electrical outlet. • Replace power strips, power extension cables, and other power protection ... receiving power. • Reseat the power cable in the power connector on the back of interference are turned on the keyboard, move the mouse, or press the power button to the same power strip Troubleshooting 297 The computer is either turned off...
Dell™ Technology Guide
Page 304
... the power strip is plugged into both the power connector on page 337). Press a key on properly. - Replace power protection devices, power strips, and power extension cables with another device, such as a lamp. - Ensure ...either turned off or is turned on page 273. For additional safety best practices information, see "Contacting Dell" on the back of the computer illuminates and blinks or remains solid to indicate different states: &#...electrical outlet and that the computer turns on the keyboard, move the mouse, or press the power button to resume normal operation. Contact...
... the power strip is plugged into both the power connector on page 337). Press a key on properly. - Replace power protection devices, power strips, and power extension cables with another device, such as a lamp. - Ensure ...either turned off or is turned on page 273. For additional safety best practices information, see "Contacting Dell" on the back of the computer illuminates and blinks or remains solid to indicate different states: &#...electrical outlet and that the computer turns on the keyboard, move the mouse, or press the power button to resume normal operation. Contact...
Setup Guide
Page 5
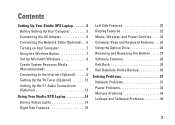
Contents Setting Up Your Studio XPS Laptop 5 Before Setting Up Your Computer 5 Connecting the AC Adapter 6 Connecting the Network Cable (Optional 6 Turning on Your Computer 7 Using the Wireless Button 7 Set Up ... 13 Using Your Studio XPS Laptop 14 Device Status Lights 14 Right Side Features 16 Left Side Features 20 Display Features 22 Media, Wireless, and Power Controls 23 Computer Base and Keyboard Features 24 Using the Optical Drive 26 Removing and Replacing the Battery 27 Software Features 28 Dell Dock 29 Dell DataSafe Online Backup 30...
Contents Setting Up Your Studio XPS Laptop 5 Before Setting Up Your Computer 5 Connecting the AC Adapter 6 Connecting the Network Cable (Optional 6 Turning on Your Computer 7 Using the Wireless Button 7 Set Up ... 13 Using Your Studio XPS Laptop 14 Device Status Lights 14 Right Side Features 16 Left Side Features 20 Display Features 22 Media, Wireless, and Power Controls 23 Computer Base and Keyboard Features 24 Using the Optical Drive 26 Removing and Replacing the Battery 27 Software Features 28 Dell Dock 29 Dell DataSafe Online Backup 30...
Setup Guide
Page 41
... read failure - Ensure that the boot sequence information is connected. A chip on the system board might be malfunctioning or system board failure (see Dell Technology Guide on page 58 for assistance). CPU fan has failed. In case of keyboard failure, replace the keyboard. Replace the battery. CPU fan failure - See the Service Manual at support...
... read failure - Ensure that the boot sequence information is connected. A chip on the system board might be malfunctioning or system board failure (see Dell Technology Guide on page 58 for assistance). CPU fan has failed. In case of keyboard failure, replace the keyboard. Replace the battery. CPU fan failure - See the Service Manual at support...


