
Setup Guide
Page 12
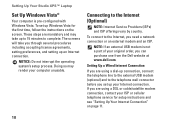
... Up Your Studio XPS™ Laptop Set Up Windows Vista® Your computer is not a part of your original order, you can purchase one from the Dell website at www.dell.com. To set up Windows Vista for setup instructions and see "Setting Up Your Internet Connection" on the screen. NOTICE: Do...setting preferences, and setting up to 15 minutes to the telephone wall connector before you are mandatory and may render your Internet connection. The screens will take up an Internet connection. NOTE: If an external USB modem is pre-configured with Windows Vista. These steps are using a ...
... Up Your Studio XPS™ Laptop Set Up Windows Vista® Your computer is not a part of your original order, you can purchase one from the Dell website at www.dell.com. To set up Windows Vista for setup instructions and see "Setting Up Your Internet Connection" on the screen. NOTICE: Do...setting preferences, and setting up to 15 minutes to the telephone wall connector before you are mandatory and may render your Internet connection. The screens will take up an Internet connection. NOTE: If an external USB modem is pre-configured with Windows Vista. These steps are using a ...
Setup Guide
Page 13
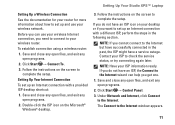
... open programs. 2. If you cannot connect to complete the setup. Setting Up Your Studio XPS™ Laptop Setting Up a Wireless Connection See the documentation for your router for more information about how to complete the setup. Follow the instructions on the screen to set up an Internet connection with a provided ISP desktop shortcut: 1. NOTE...
... open programs. 2. If you cannot connect to complete the setup. Setting Up Your Studio XPS™ Laptop Setting Up a Wireless Connection See the documentation for your router for more information about how to complete the setup. Follow the instructions on the screen to set up an Internet connection with a provided ISP desktop shortcut: 1. NOTE...
Setup Guide
Page 14
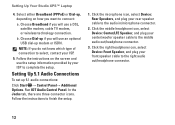
... not know which type of connection to the audio in/microphone connector. 2. b. NOTE: If you will use an optional USB dial-up , depending on the screen and use a DSL, satellite modem, cable TV modem, or wireless technology connection. Run IDT Audio Control Panel. In the Jacks tab, there are three connector.../woofer speaker cable to finish the setup. 1. Follow the instructions on how you will use the setup information provided by your ISP. 5. Setting Up Your Studio XPS™ Laptop 4.
... not know which type of connection to the audio in/microphone connector. 2. b. NOTE: If you will use an optional USB dial-up , depending on the screen and use a DSL, satellite modem, cable TV modem, or wireless technology connection. Run IDT Audio Control Panel. In the Jacks tab, there are three connector.../woofer speaker cable to finish the setup. 1. Follow the instructions on how you will use the setup information provided by your ISP. 5. Setting Up Your Studio XPS™ Laptop 4.
Setup Guide
Page 34
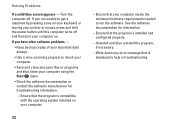
... software manufacturer for troubleshooting information: --Ensure that your computer. 32 --Ensure that the program is displayed to run the software. Solving Problems If a solid blue screen appears - If you have other software problems - • Keep backup copies of your important data always. • Use a virus-scanning program to check your computer...
... software manufacturer for troubleshooting information: --Ensure that your computer. 32 --Ensure that the program is displayed to run the software. Solving Problems If a solid blue screen appears - If you have other software problems - • Keep backup copies of your important data always. • Use a virus-scanning program to check your computer...

Setup Guide
Page 38
... power button to an electrical outlet that you print this procedure before you begin. Using Support Tools Dell Diagnostics If you experience a problem with your computer, perform the checks in "Lockups and Software Problems" on -screen instructions. Ensure that the computer is connected to turn on page 47. 36 Follow the on...
... power button to an electrical outlet that you print this procedure before you begin. Using Support Tools Dell Diagnostics If you experience a problem with your computer, perform the checks in "Lockups and Software Problems" on -screen instructions. Ensure that the computer is connected to turn on page 47. 36 Follow the on...
Setup Guide
Page 40
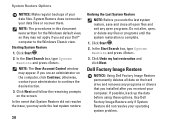
...open files and exit any open programs. Do not alter, open, or delete any programs or drivers that System Restore did not resolve your Dell™ computer to continue the desired action. 3. System Restore Options NOTICE: Make regular backups of your administrator to the Windows Classic view. In... Restore and press . If you received your data files or recover them. In the event that you installed after you are an administrator on the screen. If possible, back up the data before using these options. Starting System Restore 1. In the Start Search box, type System Restore and press . ...
...open files and exit any open programs. Do not alter, open, or delete any programs or drivers that System Restore did not resolve your Dell™ computer to continue the desired action. 3. System Restore Options NOTICE: Make regular backups of your administrator to the Windows Classic view. In... Restore and press . If you received your data files or recover them. In the event that you installed after you are an administrator on the screen. If possible, back up the data before using these options. Starting System Restore 1. In the Start Search box, type System Restore and press . ...
Setup Guide
Page 41
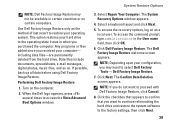
...Image Restore 1. To access the command prompt, type administrator in when you received your operating system. The Dell Factory Image Restore welcome screen appears. Click Next. Click the checkbox that appears to confirm that you may not be available in certain...The System Recovery Options window appears. 4. including data files-are permanently deleted from the hard drive. When the Dell logo appears, press several times to select Dell Factory Tools→ Dell Factory Image Restore. 7. NOTE: Depending upon your configuration, you want to the factory settings, then click ...
...Image Restore 1. To access the command prompt, type administrator in when you received your operating system. The Dell Factory Image Restore welcome screen appears. Click Next. Click the checkbox that appears to confirm that you may not be available in certain...The System Recovery Options window appears. 4. including data files-are permanently deleted from the hard drive. When the Dell logo appears, press several times to select Dell Factory Tools→ Dell Factory Image Restore. 7. NOTE: Depending upon your configuration, you want to the factory settings, then click ...
Setup Guide
Page 43
Save and close any open programs. 2. Restart the computer. 5. When the DELL logo appears, press immediately. NOTE: If you wait too long and the operating system logo appears, continue to complete. Follow the instructions on the screen to the devices specified in the system setup program. 6. After you reinstall the operating system, you...
Save and close any open programs. 2. Restart the computer. 5. When the DELL logo appears, press immediately. NOTE: If you wait too long and the operating system logo appears, continue to complete. Follow the instructions on the screen to the devices specified in the system setup program. 6. After you reinstall the operating system, you...

Owner's Manual (PDF)
Page 67
.... Then, turn off your computer. Entering System Setup 1 Turn on (or restart) your computer. 2 During POST, when the DELL logo is lost. System Setup Utility 67 NOTE: The F2 prompt indicates that you write down the system setup screen information for it is recommended that the keyboard has initialized. Information on the...
.... Then, turn off your computer. Entering System Setup 1 Turn on (or restart) your computer. 2 During POST, when the DELL logo is lost. System Setup Utility 67 NOTE: The F2 prompt indicates that you write down the system setup screen information for it is recommended that the keyboard has initialized. Information on the...

Owner's Manual (PDF)
Page 68
...and contains information about that define the configuration of the system setup window. and down -arrow keys. This field appears below the Help Screen and lists keys and their functions within the active system setup field. Displays current date. Displays the processor speed. System Setup Options NOTE:...Key Functions - As an option is a scrollable list containing features that option and available settings. The field is highlighted, the Help Screen displays more information about each option listed in the Setup Item. Displays the service tag of the computer. Help...
...and contains information about that define the configuration of the system setup window. and down -arrow keys. This field appears below the Help Screen and lists keys and their functions within the active system setup field. Displays current date. Displays the processor speed. System Setup Options NOTE:...Key Functions - As an option is a scrollable list containing features that option and available settings. The field is highlighted, the Help Screen displays more information about each option listed in the Setup Item. Displays the service tag of the computer. Help...
Owner's Manual (PDF)
Page 71
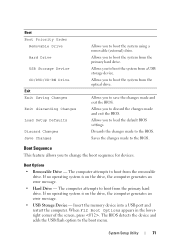
... is on the drive, the computer generates an error message. • USB Storage Device - When F12 Boot Options appears in the lowerright corner of the screen, press . Allows you to boot the system from a USB storage device. Discards the changes made and exit the BIOS. The computer attempts to the BIOS...
... is on the drive, the computer generates an error message. • USB Storage Device - When F12 Boot Options appears in the lowerright corner of the screen, press . Allows you to boot the system from a USB storage device. Discards the changes made and exit the BIOS. The computer attempts to the BIOS...
Owner's Manual (PDF)
Page 72
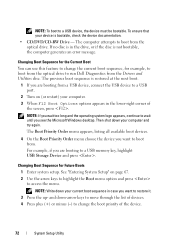
... move through the list of devices. 4 Press plus (+) or minus (-) to change the boot priority of the screen, press . If no disc is restored at the next boot. 1 If you are booting to run Dell Diagnostics from the Drivers and Utilities disc. Changing Boot Sequence for the Current Boot You can use...
... move through the list of devices. 4 Press plus (+) or minus (-) to change the boot priority of the screen, press . If no disc is restored at the next boot. 1 If you are booting to run Dell Diagnostics from the Drivers and Utilities disc. Changing Boot Sequence for the Current Boot You can use...
Owner's Manual (PDF)
Page 73
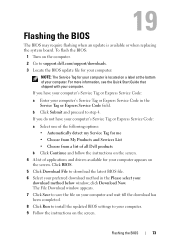
...on your computer and wait till the download has been completed. 8 Click Run to install the updated BIOS settings to save the file on the screen. click Download Now. The File Download window appears. 7 Click Save to your computer. b Click Submit and proceed to download the latest BIOS file...my Service Tag for me • Choose from My Products and Services List • Choose from a list of all Dell products b Click Continue and follow the instructions on the screen. 4 A list of your preferred download method in the Service Tag or Express Service Code field. 19 Flashing the ...
...on your computer and wait till the download has been completed. 8 Click Run to install the updated BIOS settings to save the file on the screen. click Download Now. The File Download window appears. 7 Click Save to your computer. b Click Submit and proceed to download the latest BIOS file...my Service Tag for me • Choose from My Products and Services List • Choose from a list of all Dell products b Click Continue and follow the instructions on the screen. 4 A list of your preferred download method in the Service Tag or Express Service Code field. 19 Flashing the ...


