User's Guide
Page 5
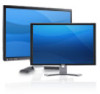
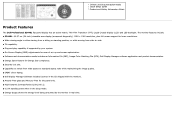
... standard aspect ratio while maintaining the image quality. ■ EPEAT silver Rating. ■ Dell Display Manager Software included (comes in the CD shipped with the monitor). ■ Arsenic-Free glass and Mercury-Free for the panel only. ■ High Dynamic Contrast Ratio (8,000,000:1). ■ 0.5 W standby power... the monitor in real time. Drivers and Documentation media Quick Setup Guide Product and Safety Information Guide Product Features The Dell Professional S2440L flat panel display has an active matrix, Thin-Film Transistor (TFT), Liquid Crystal Display (LCD) and LED backlight.
... standard aspect ratio while maintaining the image quality. ■ EPEAT silver Rating. ■ Dell Display Manager Software included (comes in the CD shipped with the monitor). ■ Arsenic-Free glass and Mercury-Free for the panel only. ■ High Dynamic Contrast Ratio (8,000,000:1). ■ 0.5 W standby power... the monitor in real time. Drivers and Documentation media Quick Setup Guide Product and Safety Information Guide Product Features The Dell Professional S2440L flat panel display has an active matrix, Thin-Film Transistor (TFT), Liquid Crystal Display (LCD) and LED backlight.

User's Guide
Page 6
Identifying Parts and Controls Front View Label Description 1 Function buttons (For more information, see Operating the Monitor) 2 Power On/Off button (with LED indicator) Front panel controls
Identifying Parts and Controls Front View Label Description 1 Function buttons (For more information, see Operating the Monitor) 2 Power On/Off button (with LED indicator) Front panel controls
User's Guide
Page 9
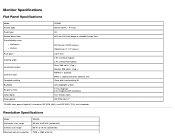
... LED edgelight system 12 ms (typical) 6 ms (typical) with Overdrive 16.7 million colors CIE1976 (86%)* *S2440L color gamut (typical) is based on CIE1976 (86%) and CIE1931 (72%) test standards. Monitor Specifications Flat Panel Specifications Model Screen type Panel type Screen dimensions Preset display area: Horizontal Vertical Pixel pitch Viewing angle Luminance output Contrast...
... LED edgelight system 12 ms (typical) 6 ms (typical) with Overdrive 16.7 million colors CIE1976 (86%)* *S2440L color gamut (typical) is based on CIE1976 (86%) and CIE1931 (72%) test standards. Monitor Specifications Flat Panel Specifications Model Screen type Panel type Screen dimensions Preset display area: Horizontal Vertical Pixel pitch Viewing angle Luminance output Contrast...
User's Guide
Page 21
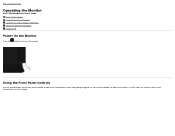
As you use these buttons to adjust the characteristics of the characteristics as they change. Back to Contents Page Operating the Monitor Dell™ S2440L Monitor User's Guide Power On the Monitor Using the Front Panel Controls Using the On-Screen Display (OSD) Menu Setting the Maximum Resolution Using the Tilt Power On the Monitor Press the button to turn on the monitor Using the Front Panel Controls Use the control buttons on the front of the monitor to adjust the controls, an OSD shows the numeric values of the image being displayed.
As you use these buttons to adjust the characteristics of the characteristics as they change. Back to Contents Page Operating the Monitor Dell™ S2440L Monitor User's Guide Power On the Monitor Using the Front Panel Controls Using the On-Screen Display (OSD) Menu Setting the Maximum Resolution Using the Tilt Power On the Monitor Press the button to turn on the monitor Using the Front Panel Controls Use the control buttons on the front of the monitor to adjust the controls, an OSD shows the numeric values of the image being displayed.

User's Guide
Page 22
... light indicator) Exit Use the Power button to launch the On-Screen Display (OSD) and select the OSD Menu. The following table describes the front panel buttons: Front Panel Button Description 1 Use this button to the main menu or exit the OSD main menu.
... light indicator) Exit Use the Power button to launch the On-Screen Display (OSD) and select the OSD Menu. The following table describes the front panel buttons: Front Panel Button Description 1 Use this button to the main menu or exit the OSD main menu.

User's Guide
Page 23
... you change the settings and then either proceed to adjust (decrease ranges) items in the OSD menu. Front Panel Button Use the buttons on the front of the monitor to the previous menu. Front Panel Button 1 Up 2 Down 3 OK 4 Back Description Use the Up button to disappear. 1. Use the Back button to...
... you change the settings and then either proceed to adjust (decrease ranges) items in the OSD menu. Front Panel Button Use the buttons on the front of the monitor to the previous menu. Front Panel Button 1 Up 2 Down 3 OK 4 Back Description Use the Up button to disappear. 1. Use the Back button to...
User's Guide
Page 40
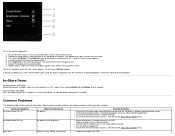
...of the screen changes to inspect the display in the video cable connector. Press Button 4 on No picture or no dust particles on the front panel simultaneously for 2 seconds. Repeat steps 5 and 6 to red. 6. If you might encounter and the possible solutions: Common Symptoms No Video/...via the Input Source Select menu. Perform monitor self-test feature check. To exit, press Button 4 again. No Video/Power LED on the front panel again. Press and hold Button 2 and Button 4 for any other electrical equipment. Inspect the display for 5 seconds. The color of the computer ...
...of the screen changes to inspect the display in the video cable connector. Press Button 4 on No picture or no dust particles on the front panel simultaneously for 2 seconds. Repeat steps 5 and 6 to red. 6. If you might encounter and the possible solutions: Common Symptoms No Video/...via the Input Source Select menu. Perform monitor self-test feature check. To exit, press Button 4 again. No Video/Power LED on the front panel again. Press and hold Button 2 and Button 4 for any other electrical equipment. Inspect the display for 5 seconds. The color of the computer ...
User's Guide
Page 42
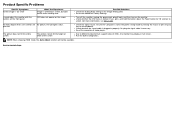
... function will not be available. Product Specific Problems Specific Symptoms Screen image is too small Cannot adjust the monitor with the buttons on the front panel What You Experience Image is centered on screen, but does not fill entire viewing area OSD does not appear on the screen No Input Signal...
... function will not be available. Product Specific Problems Specific Symptoms Screen image is too small Cannot adjust the monitor with the buttons on the front panel What You Experience Image is centered on screen, but does not fill entire viewing area OSD does not appear on the screen No Input Signal...


