

Owners Manual
Page 4
......45 4 Contents Coin-cell battery...23 Removing the coin cell battery...23 Installing the coin cell battery...24 Power connector port...24 Removing the power connector port...24 Installing the power connector port...25 Palm rest...25 Removing the palmrest...25 Installing the palmrest...26 Fingerprint reader...27 Removing the fingerprint reader...27...
......45 4 Contents Coin-cell battery...23 Removing the coin cell battery...23 Installing the coin cell battery...24 Power connector port...24 Removing the power connector port...24 Installing the power connector port...25 Palm rest...25 Removing the palmrest...25 Installing the palmrest...26 Fingerprint reader...27 Removing the fingerprint reader...27...

Owners Manual
Page 5
... 54 USB features...55 HDMI 1.4...56 4 System specifications...58 System information...58 Processor...58 Memory...59 Graphics...59 Audio...59 Communication...59 Expansion bus...60 Ports and connectors...60 Display...60 Keyboard...61 Touchpad...61 Camera...62 Storage...62 Battery...62 AC adpter...63 Contactless smart card...63 Physical dimension...63...
... 54 USB features...55 HDMI 1.4...56 4 System specifications...58 System information...58 Processor...58 Memory...59 Graphics...59 Audio...59 Communication...59 Expansion bus...60 Ports and connectors...60 Display...60 Keyboard...61 Touchpad...61 Camera...62 Storage...62 Battery...62 AC adpter...63 Contactless smart card...63 Physical dimension...63...

Owners Manual
Page 9
...CAUTION: To avoid damage to the computer, use batteries designed for other Dell computers. 1. Do not use only the battery designed for about 6 seconds to turn off . Connect any external devices, such as a port replicator or media base, and replace any installed ExpressCards or Smart Cards ...you complete any telephone or network cables to ground the system board. Connect any replacement procedure, ensure that your computer has an RJ45 port, disconnect the network cable by periodically touching an unpainted metal surface at the same time as an ExpressCard. 2. Windows CAUTION: To...
...CAUTION: To avoid damage to the computer, use batteries designed for other Dell computers. 1. Do not use only the battery designed for about 6 seconds to turn off . Connect any external devices, such as a port replicator or media base, and replace any installed ExpressCards or Smart Cards ...you complete any telephone or network cables to ground the system board. Connect any replacement procedure, ensure that your computer has an RJ45 port, disconnect the network cable by periodically touching an unpainted metal surface at the same time as an ExpressCard. 2. Windows CAUTION: To...

Owners Manual
Page 24
... b) battery c) base cover 3. Installing the coin cell battery 1. Install the: a) base cover b) battery c) battery cover 4. Power connector port Removing the power connector port 1. b) Remove the M2.5x5.0 screw to the comupter. To remove power connector port: a) Disconnect the power connector cable from the computer [4]. 24 Disassembly and reassembly c) Remove the bracket from the...
... b) battery c) base cover 3. Installing the coin cell battery 1. Install the: a) base cover b) battery c) battery cover 4. Power connector port Removing the power connector port 1. b) Remove the M2.5x5.0 screw to the comupter. To remove power connector port: a) Disconnect the power connector cable from the computer [4]. 24 Disassembly and reassembly c) Remove the bracket from the...

Owners Manual
Page 25
... and reassembly 25 Palm rest Removing the palmrest 1. Route the cable through the routing channel 3. Replace the M2.5x5.0 screw to secure the power connector port to the computer . Remove the: a) battery cover b) battery c) base cover d) hard drive e) keyboard 3. Replace the bracket. 4. Follow the procedure in Before working inside your computer... the procedure in After working inside your computer. 2. Replace the power connector cable on the computer. 2. Connect the power connector cable. 6. Installing the power connector port 1.
... and reassembly 25 Palm rest Removing the palmrest 1. Route the cable through the routing channel 3. Replace the M2.5x5.0 screw to secure the power connector port to the computer . Remove the: a) battery cover b) battery c) base cover d) hard drive e) keyboard 3. Replace the bracket. 4. Follow the procedure in Before working inside your computer... the procedure in After working inside your computer. 2. Replace the power connector cable on the computer. 2. Connect the power connector cable. 6. Installing the power connector port 1.

Owners Manual
Page 27
... b) battery cover c) battery d) base cover e) hard drive f) keyboard g) hard drive cable h) secondary memory i) primary memory j) WLAN card k) WWAN card l) M.2 SSD card m) graphic card n) power connector port o) palmrest 3. 4. b) Remove and lift the M2.0X3 screws that secures fingerprint reader [1]. Flip the computer and tighten the 15 screws (M2.5x5.0, M2.0x3.0) at...
... b) battery cover c) battery d) base cover e) hard drive f) keyboard g) hard drive cable h) secondary memory i) primary memory j) WLAN card k) WWAN card l) M.2 SSD card m) graphic card n) power connector port o) palmrest 3. 4. b) Remove and lift the M2.0X3 screws that secures fingerprint reader [1]. Flip the computer and tighten the 15 screws (M2.5x5.0, M2.0x3.0) at...

Owners Manual
Page 28
... the chassis. 2. Power switch board Removing the power switch board 28 Disassembly and reassembly Connect the finger print reader cable. 3. Install the: a) palmrest b) power connector port c) graphic card d) M.2 SSD card e) WWAN card f) WLAN card g) primary memory h) secondary memory i) HDD cable j) keyboard k) hard drive l) base cover m) battery n) battery cover o) SD card 7. Affix...
... the chassis. 2. Power switch board Removing the power switch board 28 Disassembly and reassembly Connect the finger print reader cable. 3. Install the: a) palmrest b) power connector port c) graphic card d) M.2 SSD card e) WWAN card f) WLAN card g) primary memory h) secondary memory i) HDD cable j) keyboard k) hard drive l) base cover m) battery n) battery cover o) SD card 7. Affix...

Owners Manual
Page 36
... b) battery cover c) battery d) base cover e) hard drive f) keyboard g) hard drive cable h) secondary memory i) primary memory j) WLAN card k) WWAN card l) M.2 SSD card m) graphic card n) power connector port o) palmrest p) I/O board (left) q) I/O board (right) r) heat sink 3. d) Lift the tab and disconnect the power connector cable [4]. 36 Disassembly and reassembly Follow the procedure in Before...
... b) battery cover c) battery d) base cover e) hard drive f) keyboard g) hard drive cable h) secondary memory i) primary memory j) WLAN card k) WWAN card l) M.2 SSD card m) graphic card n) power connector port o) palmrest p) I/O board (left) q) I/O board (right) r) heat sink 3. d) Lift the tab and disconnect the power connector cable [4]. 36 Disassembly and reassembly Follow the procedure in Before...

Owners Manual
Page 38
...: a) Lift the tab and disconnect the LED-board cable from the computer [2]. 38 Disassembly and reassembly a) heat sink b) I/O board (right) c) I/O board (left) d) palmrest e) power connector port f) graphic card g) M.2 SSD card h) WWAN card i) WLAN card j) primary memory k) secondary memory l) HDD cable m) keyboard n) hard drive o) base cover p) battery q) battery cover r) SD card...
...: a) Lift the tab and disconnect the LED-board cable from the computer [2]. 38 Disassembly and reassembly a) heat sink b) I/O board (right) c) I/O board (left) d) palmrest e) power connector port f) graphic card g) M.2 SSD card h) WWAN card i) WLAN card j) primary memory k) secondary memory l) HDD cable m) keyboard n) hard drive o) base cover p) battery q) battery cover r) SD card...

Owners Manual
Page 58
... depending on processor type 58 System specifications Topics: • System information • Processor • Memory • Graphics • Audio • Communication • Expansion bus • Ports and connectors • Display • Keyboard • Touchpad • Camera • Storage • Battery • AC adpter • Contactless smart card • Physical dimension •...
... depending on processor type 58 System specifications Topics: • System information • Processor • Memory • Graphics • Audio • Communication • Expansion bus • Ports and connectors • Display • Keyboard • Touchpad • Camera • Storage • Battery • AC adpter • Contactless smart card • Physical dimension •...

Owners Manual
Page 60
...bus Feature Bus Type Bus Width BIOS Chip (NVRAM) Specification PCI Express 1.0, 2.0 and 3.0, SATA 1.0A, 2.0 and 3.0, USB 2.0 and 3.0 PCIe X16 128 Mb (16 MB) Ports and connectors Feature Specification Audio Universal audio jack connector Network Adapter one RJ45 connector USB C connector one (optional) with Thunderbolt USB 3.1 with Gen 1 four (with... WLAN options: • Intel WiFi Link 8265 2x2 802.11ac+BT 4.2 (vPro) • Intel WiFi Link 8265 2x2 802.11ac NBT (vPro) • Dell DW 1820 2x2 802.11ac+BT 4.2 US Optional Mobile broadband and GPS • DW5811e (Gobi 4G/LTE -
...bus Feature Bus Type Bus Width BIOS Chip (NVRAM) Specification PCI Express 1.0, 2.0 and 3.0, SATA 1.0A, 2.0 and 3.0, USB 2.0 and 3.0 PCIe X16 128 Mb (16 MB) Ports and connectors Feature Specification Audio Universal audio jack connector Network Adapter one RJ45 connector USB C connector one (optional) with Thunderbolt USB 3.1 with Gen 1 four (with... WLAN options: • Intel WiFi Link 8265 2x2 802.11ac+BT 4.2 (vPro) • Intel WiFi Link 8265 2x2 802.11ac NBT (vPro) • Dell DW 1820 2x2 802.11ac+BT 4.2 US Optional Mobile broadband and GPS • DW5811e (Gobi 4G/LTE -

Owners Manual
Page 67
... the SATA drives on the docking station. The options are : • Enable Boot support (by default enable) • Enable Thunderbolt ports (by default enable) • Always Allow dell docks • Enable external USB ports Others: • Enable Thubderbolt Boot Support • Enable Thunderbolt (and PCIE behind TBT) Pre-boot • Security level-no...
... the SATA drives on the docking station. The options are : • Enable Boot support (by default enable) • Enable Thunderbolt ports (by default enable) • Always Allow dell docks • Enable external USB ports Others: • Enable Thubderbolt Boot Support • Enable Thunderbolt (and PCIE behind TBT) Pre-boot • Security level-no...
Owners Manual
Page 68
... you to support the various illumination levels. Keyboard Illumination will continue to charge external devices using the stored system battery power through the USB PowerShare port (disabled by default) • 15 sec • 30 sec • 1 min • 5 min • 15 min • never Keyboard The Keyboard Backlight Time-out dims...
... you to support the various illumination levels. Keyboard Illumination will continue to charge external devices using the stored system battery power through the USB PowerShare port (disabled by default) • 15 sec • 30 sec • 1 min • 5 min • 15 min • never Keyboard The Keyboard Backlight Time-out dims...

Owners Manual
Page 69
... delete the administrator password. On Battery(50% is default) and On AC (100 % default). • Enable Switchable Graphics (selected by default) • Enable Dock Display Port(selected by the admin password. • allow wireless switch changes System setup 69 Non-Admin Setup Changes Allows you to determine whether changes to the...
... delete the administrator password. On Battery(50% is default) and On AC (100 % default). • Enable Switchable Graphics (selected by default) • Enable Dock Display Port(selected by the admin password. • allow wireless switch changes System setup 69 Non-Admin Setup Changes Allows you to determine whether changes to the...

Owners Manual
Page 72
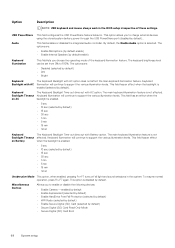
... charging algorithm and other techniques, during the non-work hours to select the charging mode for all the USB ports to conserve battery power. • Enable USB Wake Support • Wake on Dell USB-C dock Wireless Radio Control Allows you to enable or disable the feature that automatically switches from wired or... (disabled) • Set battery threshold Advanced Battery This option enables you to minimize the AC power consumption during the peak power times of time using Dell's fast charging technology.
... charging algorithm and other techniques, during the non-work hours to select the charging mode for all the USB ports to conserve battery power. • Enable USB Wake Support • Wake on Dell USB-C dock Wireless Radio Control Allows you to enable or disable the feature that automatically switches from wired or... (disabled) • Set battery threshold Advanced Battery This option enables you to minimize the AC power consumption during the peak power times of time using Dell's fast charging technology.


