
User Manual
Page 9
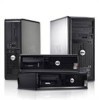
... V CA 50 Hz / 60 Hz 5,00 A / 4,40 A / 3,60 A / 2,90 A Finding More Information and Resources See the safety and regulatory documents that shipped with your computer and the regulatory compliance website at www.dell.com/regulatory_compliance for more information on: 9 Physical Height Width Depth Weight (minimum) Mini-Tower 360 mm (14.17 inches...
... V CA 50 Hz / 60 Hz 5,00 A / 4,40 A / 3,60 A / 2,90 A Finding More Information and Resources See the safety and regulatory documents that shipped with your computer and the regulatory compliance website at www.dell.com/regulatory_compliance for more information on: 9 Physical Height Width Depth Weight (minimum) Mini-Tower 360 mm (14.17 inches...

Owner's Manual (Desktop)
Page 5
... ensure your personal safety. NOTE: The color of the computer. Turn off your computer (see the Regulatory Compliance Homepage at www.dell.com/ regulatory_compliance. 1 Working on Your Computer Before Working Inside Your Computer Use the following steps before you begin working inside the ...see Turning Off Your Computer). You should only perform troubleshooting and simple repairs as authorized in on the back of your product documentation, or as a connector on the locking tabs before you pull connectors apart, keep them evenly aligned to ground the system board...
... ensure your personal safety. NOTE: The color of the computer. Turn off your computer (see the Regulatory Compliance Homepage at www.dell.com/ regulatory_compliance. 1 Working on Your Computer Before Working Inside Your Computer Use the following steps before you begin working inside the ...see Turning Off Your Computer). You should only perform troubleshooting and simple repairs as authorized in on the back of your product documentation, or as a connector on the locking tabs before you pull connectors apart, keep them evenly aligned to ground the system board...

Owner's Manual (Desktop)
Page 7
... up the cover release latch, and lift the cover upwards to remove or install the components from the computer. Recommended Tools The procedures in this document may require the following tools: • Small flat-blade screwdriver • Phillips screwdriver • Small plastic scribe Removing The Cover 1. 2 Removing and Installing Components This...
... up the cover release latch, and lift the cover upwards to remove or install the components from the computer. Recommended Tools The procedures in this document may require the following tools: • Small flat-blade screwdriver • Phillips screwdriver • Small plastic scribe Removing The Cover 1. 2 Removing and Installing Components This...
Owner's Manual (Mini-Tower)
Page 5
... begin working inside the computer. 1. Ensure that is not authorized by Dell is not covered by the online or telephone service and support team. Unless otherwise noted, each procedure included in this document assumes that the following conditions exist: • You have connectors with the... to avoid bending any connector pins. WARNING: Before working inside your computer, read the safety information that both connectors are disconnecting this document. Hold a component such as a processor by its pull-tab, not on the cable itself. Also, before you disconnect the cable...
... begin working inside the computer. 1. Ensure that is not authorized by Dell is not covered by the online or telephone service and support team. Unless otherwise noted, each procedure included in this document assumes that the following conditions exist: • You have connectors with the... to avoid bending any connector pins. WARNING: Before working inside your computer, read the safety information that both connectors are disconnecting this document. Hold a component such as a processor by its pull-tab, not on the cable itself. Also, before you disconnect the cable...

Owner's Manual (Mini-Tower)
Page 7
... your computer. Follow the procedures in After Working Inside Your Computer. 7 Press down on the chassis of the computer. 2. Recommended Tools The procedures in this document may require the following tools: • Small flat-blade screwdriver • Phillips screwdriver • Small plastic scribe Removing the Cover 1. 2 Removing and Installing Components This...
... your computer. Follow the procedures in After Working Inside Your Computer. 7 Press down on the chassis of the computer. 2. Recommended Tools The procedures in this document may require the following tools: • Small flat-blade screwdriver • Phillips screwdriver • Small plastic scribe Removing the Cover 1. 2 Removing and Installing Components This...

Owner's Manual (Small Form Factor)
Page 5
Hold a card by its edges or by your computer (see the Regulatory Compliance Homepage at www.dell.com/ regulatory_compliance CAUTION: Many repairs may appear differently than shown in this document assumes that the following conditions exist: • You have connectors with your computer. if you begin working inside the computer. 1. NOTE: The color...
Hold a card by its edges or by your computer (see the Regulatory Compliance Homepage at www.dell.com/ regulatory_compliance CAUTION: Many repairs may appear differently than shown in this document assumes that the following conditions exist: • You have connectors with your computer. if you begin working inside the computer. 1. NOTE: The color...

Owner's Manual (Small Form Factor)
Page 7
... procedures in After Working Inside Your Computer. 7 Lift the cover upward to remove or install the components from the computer. Follow the procedures in this document may require the following tools: • Small flat-blade screwdriver • Phillips screwdriver • Small plastic scribe Removing the Cover 1. Pull up the cover-release...
... procedures in After Working Inside Your Computer. 7 Lift the cover upward to remove or install the components from the computer. Follow the procedures in this document may require the following tools: • Small flat-blade screwdriver • Phillips screwdriver • Small plastic scribe Removing the Cover 1. Pull up the cover-release...

Owner's Manual (Ultra Small Form Factor)
Page 5
... For additional safety best practices information, see Turning Off Your Computer). CAUTION: Many repairs may appear differently than shown in this document. Also, before you connect a cable, ensure that both connectors are disconnecting this type of cable, press in reverse order. NOTE... not on the cable itself. Unless otherwise noted, each procedure included in this document assumes that is not authorized by your computer (see the Regulatory Compliance Homepage at www.dell.com/ regulatory_compliance. Read and follow the safety instructions that shipped with locking tabs; ...
... For additional safety best practices information, see Turning Off Your Computer). CAUTION: Many repairs may appear differently than shown in this document. Also, before you connect a cable, ensure that both connectors are disconnecting this type of cable, press in reverse order. NOTE... not on the cable itself. Unless otherwise noted, each procedure included in this document assumes that is not authorized by your computer (see the Regulatory Compliance Homepage at www.dell.com/ regulatory_compliance. Read and follow the safety instructions that shipped with locking tabs; ...

Owner's Manual (Ultra Small Form Factor)
Page 7
Pull up the cover towards you and lift the cover upwards to remove or install the components from the computer. 7 Follow the procedures in an anti-clockwise direction. 3. Using a screw driver, turn the screw in Before Working Inside Your Computer. 2. 2 Removing and Installing Components This section provides detailed information on how to remove it from your computer. Recommended Tools The procedures in this document may require the following tools: • Small flat-blade screwdriver • Phillips screwdriver • Small plastic scribe Removing the Cover 1.
Pull up the cover towards you and lift the cover upwards to remove or install the components from the computer. 7 Follow the procedures in an anti-clockwise direction. 3. Using a screw driver, turn the screw in Before Working Inside Your Computer. 2. 2 Removing and Installing Components This section provides detailed information on how to remove it from your computer. Recommended Tools The procedures in this document may require the following tools: • Small flat-blade screwdriver • Phillips screwdriver • Small plastic scribe Removing the Cover 1.


