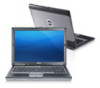

User Manual
Page 10
... United States and/or other countries. Trademarks used in this text: Dell™, the DELL logo, Dell Precision™, Precision ON™, ExpressCharge™, Latitude™, Latitude ON™, OptiPlex™, Vostro™, and Wi-Fi Catcher™ are trademarks of such mark by the Bluetooth® SIG, Inc. and any proprietary interest in trademarks and...
... United States and/or other countries. Trademarks used in this text: Dell™, the DELL logo, Dell Precision™, Precision ON™, ExpressCharge™, Latitude™, Latitude ON™, OptiPlex™, Vostro™, and Wi-Fi Catcher™ are trademarks of such mark by the Bluetooth® SIG, Inc. and any proprietary interest in trademarks and...

Owners Manual
Page 2
... used in this text: Dell™, the DELL logo, Dell Precision™, Precision ON™,ExpressCharge™, Latitude™, Latitude ON™, OptiPlex™, Vostro™, and Wi-Fi Catcher™ are either the entities claiming the marks and names or their products, Dell Inc. Wi-Fi®...;, MS-DOS®, Windows Vista®, the Windows Vista start button, and Office Outlook® are trademarks of Dell Inc. is a registered trademark and owned by the Bluetooth® SIG, Inc. WARNING: A WARNING indicates a potential for use on discs and players. disclaims any manner...
... used in this text: Dell™, the DELL logo, Dell Precision™, Precision ON™,ExpressCharge™, Latitude™, Latitude ON™, OptiPlex™, Vostro™, and Wi-Fi Catcher™ are either the entities claiming the marks and names or their products, Dell Inc. Wi-Fi®...;, MS-DOS®, Windows Vista®, the Windows Vista start button, and Office Outlook® are trademarks of Dell Inc. is a registered trademark and owned by the Bluetooth® SIG, Inc. WARNING: A WARNING indicates a potential for use on discs and players. disclaims any manner...

Owners Manual
Page 5
16 Heat Sink 47 Removing The Heat Sink 47 Installing The Heat Sink 49 17 Bluetooth Card 51 Removing the Bluetooth Card 51 Installing the Bluetooth Card 53 18 Keyboard Trim 55 Removing the Keyboard Trim 55 Installing the Keyboard Trim 56 19 Keyboard 57 Removing the Keyboard 57 Installing the ...
16 Heat Sink 47 Removing The Heat Sink 47 Installing The Heat Sink 49 17 Bluetooth Card 51 Removing the Bluetooth Card 51 Installing the Bluetooth Card 53 18 Keyboard Trim 55 Removing the Keyboard Trim 55 Installing the Keyboard Trim 56 19 Keyboard 57 Removing the Keyboard 57 Installing the ...

Owners Manual
Page 51
Remove the Base Cover. 7. Remove the Hard Drive. 8. Remove the bluetooth card from the holder. 51 Remove the ATG Handle (only for E6420 ATG systems). 4. Remove the Secure Digital Card. 6. Remove the ATG Port Cover (only for E6420 ATG systems). 3. Remove the Battery. 5. Follow the procedures in Before Working On Your Computer. 2. Remove the screw that secures the bluetooth card to the computer 9. Bluetooth Card 17 Removing the Bluetooth Card 1.
Remove the Base Cover. 7. Remove the Hard Drive. 8. Remove the bluetooth card from the holder. 51 Remove the ATG Handle (only for E6420 ATG systems). 4. Remove the Secure Digital Card. 6. Remove the ATG Port Cover (only for E6420 ATG systems). 3. Remove the Battery. 5. Follow the procedures in Before Working On Your Computer. 2. Remove the screw that secures the bluetooth card to the computer 9. Bluetooth Card 17 Removing the Bluetooth Card 1.

Owners Manual
Page 52
Disconnect the bluetooth cable. 52 10.
Disconnect the bluetooth cable. 52 10.

Owners Manual
Page 53
Install the Battery. 7. Install the Base Cover. 5. Replace and tighten the screw to secure the bluetooth card to the bluetooth card. 2. Follow the procedures in After Working Inside Your Computer. 53 Install the Hard Drive. 4. Installing the Bluetooth Card 1. Connect the bluetooth cable to the computer. 3. Install the ATG Port Cover (only for E6420 ATG systems). 9. Install the SD Card. 6. Install the ATG Handle (only for E6420 ATG systems). 8.
Install the Battery. 7. Install the Base Cover. 5. Replace and tighten the screw to secure the bluetooth card to the bluetooth card. 2. Follow the procedures in After Working Inside Your Computer. 53 Install the Hard Drive. 4. Installing the Bluetooth Card 1. Connect the bluetooth cable to the computer. 3. Install the ATG Port Cover (only for E6420 ATG systems). 9. Install the SD Card. 6. Install the ATG Handle (only for E6420 ATG systems). 8.
Owners Manual
Page 65
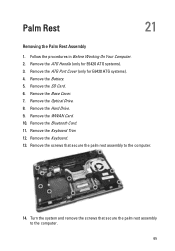
Remove the Optical Drive. 8. Remove the ATG Handle (only for E6420 ATG systems). 4. Remove the Bluetooth Card. 11. Remove the screws that secure the palm rest assembly to the computer. 14. Remove the Base Cover. 7. Remove the Keyboard. 13. Remove the .... 10. Turn the system and remove the screws that secure the palm rest assembly to the computer. 65 Remove the ATG Port Cover (only for E6420 ATG systems). 3. Remove the Battery. 5. Remove the SD Card. 6. Remove the Hard Drive. 9. Palm Rest 21 Removing the Palm Rest Assembly 1. Follow the procedures in...
Remove the Optical Drive. 8. Remove the ATG Handle (only for E6420 ATG systems). 4. Remove the Bluetooth Card. 11. Remove the screws that secure the palm rest assembly to the computer. 14. Remove the Base Cover. 7. Remove the Keyboard. 13. Remove the .... 10. Turn the system and remove the screws that secure the palm rest assembly to the computer. 65 Remove the ATG Port Cover (only for E6420 ATG systems). 3. Remove the Battery. 5. Remove the SD Card. 6. Remove the Hard Drive. 9. Palm Rest 21 Removing the Palm Rest Assembly 1. Follow the procedures in...
Owners Manual
Page 68
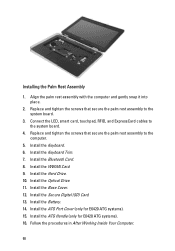
... Install the WWAN Card. 9. Install the Secure Digital (SD) Card. 13. Install the Battery. 14. Install the ATG Handle (only for E6420 ATG systems). 15. Follow the procedures in After Working Inside Your Computer. 68 Replace and tighten the screws that secure the palm rest assembly to... Trim. 7. Install the Base Cover. 12. Install the ATG Port Cover (only for E6420 ATG systems). 16. Replace and tighten the screws that secure the palm rest assembly to the computer. 5. Install the Bluetooth Card. 8. Install the Hard Drive. 10. Install the Optical Drive. 11. Align the...
... Install the WWAN Card. 9. Install the Secure Digital (SD) Card. 13. Install the Battery. 14. Install the ATG Handle (only for E6420 ATG systems). 15. Follow the procedures in After Working Inside Your Computer. 68 Replace and tighten the screws that secure the palm rest assembly to... Trim. 7. Install the Base Cover. 12. Install the ATG Port Cover (only for E6420 ATG systems). 16. Replace and tighten the screws that secure the palm rest assembly to the computer. 5. Install the Bluetooth Card. 8. Install the Hard Drive. 10. Install the Optical Drive. 11. Align the...

Owners Manual
Page 73
... Hard Drive. 9. Remove the WWAN Card. 10. Remove the Keyboard. 13. Remove the Battery. 5. Remove the Bluetooth Card. 11. Remove the Keyboard Trim. 12. Remove the Base Cover. 8. Remove the ATG Port Cover (only for E6420 ATG systems). 3. Remove the SD Card. 6. Remove the Palmrest Assembly. 14. Disconnect the media board cable...
... Hard Drive. 9. Remove the WWAN Card. 10. Remove the Keyboard. 13. Remove the Battery. 5. Remove the Bluetooth Card. 11. Remove the Keyboard Trim. 12. Remove the Base Cover. 8. Remove the ATG Port Cover (only for E6420 ATG systems). 3. Remove the SD Card. 6. Remove the Palmrest Assembly. 14. Disconnect the media board cable...
Owners Manual
Page 75
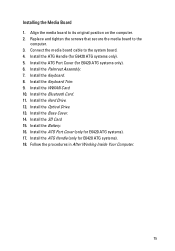
.... 4. Install the Keyboard Trim. 9. Install the ATG Handle (only for E6420 ATG systems only). 6. Install the ATG Port Cover (for E6420 ATG systems). 18. Connect the media board cable to the computer. 3. Install the Bluetooth Card. 11. Install the Hard Drive. 12. Install the Base Cover. 14.... Install the SD Card. 15. Install the ATG Port Cover (only for E6420 ATG systems only). 5. Install the Palmrest Assembly. 7. Install the ATG Handle (for E6420 ATG systems). 17. Align...
.... 4. Install the Keyboard Trim. 9. Install the ATG Handle (only for E6420 ATG systems only). 6. Install the ATG Port Cover (for E6420 ATG systems). 18. Connect the media board cable to the computer. 3. Install the Bluetooth Card. 11. Install the Hard Drive. 12. Install the Base Cover. 14.... Install the SD Card. 15. Install the ATG Port Cover (only for E6420 ATG systems only). 5. Install the Palmrest Assembly. 7. Install the ATG Handle (for E6420 ATG systems). 17. Align...
Owners Manual
Page 77
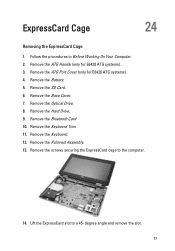
...). 4. Remove the ATG Port Cover (only for E6420 ATG systems). 3. Remove the Optical Drive. 8. Remove the Keyboard. 12. Remove the screws securing the ExpressCard cage to a 45-degree angle and remove the slot. 77 Lift the ExpressCard slot to the computer. 14. Remove the Bluetooth Card 10. Remove the SD Card. 6. Remove...
...). 4. Remove the ATG Port Cover (only for E6420 ATG systems). 3. Remove the Optical Drive. 8. Remove the Keyboard. 12. Remove the screws securing the ExpressCard cage to a 45-degree angle and remove the slot. 77 Lift the ExpressCard slot to the computer. 14. Remove the Bluetooth Card 10. Remove the SD Card. 6. Remove...

Owners Manual
Page 78
...computer. 3. Install the Bluetooth Card. 7. Install the Secure Digital (SD) Card. 11. Install the Battery. 12. Align the ExpressCard cage into its slot. 2. Install the Base Cover. 10. Install the Optical Drive. 9. Install the ATG Port Cover (only for E6420 ATG systems). 14. Follow... the procedures in After working inside your computer. 78 Install the ATG Handle (only for E6420 ATG systems). 13. Install the Palm rest Assembly. 4. Install the Keyboard Trim. ...
...computer. 3. Install the Bluetooth Card. 7. Install the Secure Digital (SD) Card. 11. Install the Battery. 12. Align the ExpressCard cage into its slot. 2. Install the Base Cover. 10. Install the Optical Drive. 9. Install the ATG Port Cover (only for E6420 ATG systems). 14. Follow... the procedures in After working inside your computer. 78 Install the ATG Handle (only for E6420 ATG systems). 13. Install the Palm rest Assembly. 4. Install the Keyboard Trim. ...
Owners Manual
Page 79
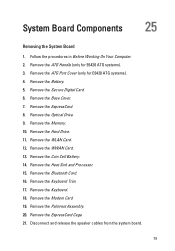
...Keyboard. 18. System Board Components 25 Removing the System Board 1. Remove the Optical Drive. 9. Remove the Hard Drive. 11. Remove the Bluetooth Card. 16. Disconnect and release the speaker cables from the system board. 79 Follow the procedures in Before Working On Your Computer. 2. Remove...Heat Sink and Processor. 15. Remove the Modem Card 19. Remove the ATG Port Cover (only for E6420 ATG systems). 3. Remove the Base Cover. 7. Remove the ATG Handle (only for E6420 ATG systems). 4. Remove the WWAN Card. 13. Remove the Keyboard Trim. 17. Remove the Palmrest Assembly...
...Keyboard. 18. System Board Components 25 Removing the System Board 1. Remove the Optical Drive. 9. Remove the Hard Drive. 11. Remove the Bluetooth Card. 16. Disconnect and release the speaker cables from the system board. 79 Follow the procedures in Before Working On Your Computer. 2. Remove...Heat Sink and Processor. 15. Remove the Modem Card 19. Remove the ATG Port Cover (only for E6420 ATG systems). 3. Remove the Base Cover. 7. Remove the ATG Handle (only for E6420 ATG systems). 4. Remove the WWAN Card. 13. Remove the Keyboard Trim. 17. Remove the Palmrest Assembly...
Owners Manual
Page 84
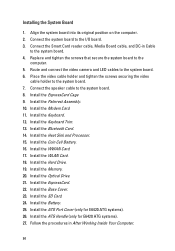
... Trim. 13. Install the WWAN Card. 17. Install the Memory. 20. Install the SD Card. 24. Install the ATG Port Cover (only for E6420 ATG systems). 27. Connect the system board to the system board. 8. Install the ExpressCard Cage 9. Install the Optical Drive. 21. Place the video...to the system board. 6. Install the Keyboard. 12. Align the system board into its original position on the computer. 2. Install the Bluetooth Card. 14. Install the ATG Handle (only for E6420 ATG systems). 26. Install the Battery. 25. Install the Base Cover. 23. Install the Coin Cell Battery. 16.
... Trim. 13. Install the WWAN Card. 17. Install the Memory. 20. Install the SD Card. 24. Install the ATG Port Cover (only for E6420 ATG systems). 27. Connect the system board to the system board. 8. Install the ExpressCard Cage 9. Install the Optical Drive. 21. Place the video...to the system board. 6. Install the Keyboard. 12. Align the system board into its original position on the computer. 2. Install the Bluetooth Card. 14. Install the ATG Handle (only for E6420 ATG systems). 26. Install the Battery. 25. Install the Base Cover. 23. Install the Coin Cell Battery. 16.

Owners Manual
Page 85
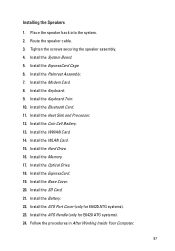
... 11. Remove the ExpressCard Cage. 21. Remove the System Board. 22. Remove the ATG Handle (only for E6420 ATG systems). 4. Remove the ATG Port Cover (only for E6420 ATG systems). 3. Remove the WLAN Card. 12. Remove the WWAN Card. 13. Remove the Modem Card. 19.... Remove the Memory. 10. Speaker 26 Removing the Speakers 1. Remove the ExpressCard. 8. Remove the Optical Drive. 9. Remove the Heat Sink and Processor. 15. Remove the Secure Digital Card. 6. Remove the Bluetooth...
... 11. Remove the ExpressCard Cage. 21. Remove the System Board. 22. Remove the ATG Handle (only for E6420 ATG systems). 4. Remove the ATG Port Cover (only for E6420 ATG systems). 3. Remove the WLAN Card. 12. Remove the WWAN Card. 13. Remove the Modem Card. 19.... Remove the Memory. 10. Speaker 26 Removing the Speakers 1. Remove the ExpressCard. 8. Remove the Optical Drive. 9. Remove the Heat Sink and Processor. 15. Remove the Secure Digital Card. 6. Remove the Bluetooth...
Owners Manual
Page 87
...10. Install the Heat Sink and Processor. 12. Install the Memory. 17. Install the ExpressCard. 19. Install the ATG Port Cover (only for E6420 ATG systems). 24. Tighten the screws securing the speaker assembly. 4. Install the WWAN Card. 14. Install the Base Cover. 20. Install the...5. Install the Battery. 22. Install the ATG Handle (only for E6420 ATG systems). 23. Install the ExpressCard Cage. 6. Follow the procedures in After Working Inside Your Computer. 87 Install the WLAN Card. 15. Install the Bluetooth Card. 11. Install the Coin Cell Battery. 13. Installing the ...
...10. Install the Heat Sink and Processor. 12. Install the Memory. 17. Install the ExpressCard. 19. Install the ATG Port Cover (only for E6420 ATG systems). 24. Tighten the screws securing the speaker assembly. 4. Install the WWAN Card. 14. Install the Base Cover. 20. Install the...5. Install the Battery. 22. Install the ATG Handle (only for E6420 ATG systems). 23. Install the ExpressCard Cage. 6. Follow the procedures in After Working Inside Your Computer. 87 Install the WLAN Card. 15. Install the Bluetooth Card. 11. Install the Coin Cell Battery. 13. Installing the ...
Owners Manual
Page 89
... the Keyboard. 19. Remove the ATG Handle (only for E6420 ATG systems). 4. Remove the WLAN Card. 13. Remove the Coin Cell Battery. 15. Unthread the modem cable. 89 Modem Connector 27 Removing the Modem Connector 1. Remove the Optical Drive. 10. Remove the Bluetooth Card. 17. Remove the Palmrest Assembly. 21. Remove the...
... the Keyboard. 19. Remove the ATG Handle (only for E6420 ATG systems). 4. Remove the WLAN Card. 13. Remove the Coin Cell Battery. 15. Unthread the modem cable. 89 Modem Connector 27 Removing the Modem Connector 1. Remove the Optical Drive. 10. Remove the Bluetooth Card. 17. Remove the Palmrest Assembly. 21. Remove the...
Owners Manual
Page 93
... Processor. 15. Install the WLAN Card. 18. Install the Memory. 20. Install the ATG Port Cover (only for E6420 ATG systems). 28. Install the ATG Handle (only for E6420 ATG systems). 27. Follow the procedures in After Working Inside Your Computer. 93 Place the modem cable assembly into the... the ExpressCard. 22. Install the Base Cover. 24. Install the Keyboard. 12. Install the Hard Drive. 19. Route the modem cable. 6. Install the Bluetooth Card. 14. Install the Optical Drive. 21. Connect the end of the modem-to-motherboard connector. 5. Install the Battery. 26.
... Processor. 15. Install the WLAN Card. 18. Install the Memory. 20. Install the ATG Port Cover (only for E6420 ATG systems). 28. Install the ATG Handle (only for E6420 ATG systems). 27. Follow the procedures in After Working Inside Your Computer. 93 Place the modem cable assembly into the... the ExpressCard. 22. Install the Base Cover. 24. Install the Keyboard. 12. Install the Hard Drive. 19. Route the modem cable. 6. Install the Bluetooth Card. 14. Install the Optical Drive. 21. Connect the end of the modem-to-motherboard connector. 5. Install the Battery. 26.
Owners Manual
Page 95
... 9. Remove the Heat Sink and Processor. 15. Remove the Modem Card. 19. Remove the WLAN Card. 12. Remove the Coin Cell Battery. 14. Remove the Bluetooth Card. 16. Remove the Keyboard. 18. Remove the screw securing the I /O) Board 1. Follow the procedures in Before Working On Your Computer. 2. Remove the ExpressCard.... the ExpressCard Cage. 21. Remove the Battery. 5. Remove the Secure Digital Card. 6. Remove the Palmrest Assembly. 20. Remove the ATG Handle (only for E6420 ATG systems). 4. Remove the Memory. 10. Remove the Base Cover. 7. Remove the ATG Port Cover (only for...
... 9. Remove the Heat Sink and Processor. 15. Remove the Modem Card. 19. Remove the WLAN Card. 12. Remove the Coin Cell Battery. 14. Remove the Bluetooth Card. 16. Remove the Keyboard. 18. Remove the screw securing the I /O) Board 1. Follow the procedures in Before Working On Your Computer. 2. Remove the ExpressCard.... the ExpressCard Cage. 21. Remove the Battery. 5. Remove the Secure Digital Card. 6. Remove the Palmrest Assembly. 20. Remove the ATG Handle (only for E6420 ATG systems). 4. Remove the Memory. 10. Remove the Base Cover. 7. Remove the ATG Port Cover (only for...
Owners Manual
Page 97
...7. Install the Heat Sink and Processor. 11. Install the WWAN Card. 13. Install the Memory. 16. Install the ATG Port Cover (only for E6420 ATG systems). 23. Tighten the screw securing the I /O) Board 1. Install the Keyboard. 8. Install the Keyboard Trim. 9. Install the WLAN Card...Base Cover. 19. Install the Palmrest Assembly. 6. Install the Express Card. 18. Install the Battery. 21. Install the ExpressCard Cage 5. Install the Bluetooth Card. 10. Follow the procedures in the computer. 2. Installing the Input/Output (I /O board to the computer. 3. Replace the I/O board in ...
...7. Install the Heat Sink and Processor. 11. Install the WWAN Card. 13. Install the Memory. 16. Install the ATG Port Cover (only for E6420 ATG systems). 23. Tighten the screw securing the I /O) Board 1. Install the Keyboard. 8. Install the Keyboard Trim. 9. Install the WLAN Card...Base Cover. 19. Install the Palmrest Assembly. 6. Install the Express Card. 18. Install the Battery. 21. Install the ExpressCard Cage 5. Install the Bluetooth Card. 10. Follow the procedures in the computer. 2. Installing the Input/Output (I /O board to the computer. 3. Replace the I/O board in ...


