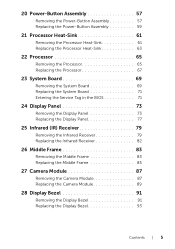
Specifications (SWF/PDF)
Page 3
... Stand Cover 16 5 Stand 17 Removing the Stand 17 Replacing the Stand 18 6 Back Cover 19 Removing the Back Cover 19 Replacing the Back Cover 20 7 Hard Drive 21 Removing the Hard Drive 21 Replacing the Hard Drive 23 8 Optical Drive 25 Removing the Optical Drive 25 Replacing the Optical Drive...
Specifications (SWF/PDF)
Page 5
20 Power-Button Assembly 57 Removing the Power-Button Assembly 57 Replacing the Power-Button Assembly 59 21 Processor Heat-Sink 61 Removing the Processor Heat-...
Specifications (SWF/PDF)
Page 20
See "Replacing the Stand" on page 13. 20 | Back Cover See "Replacing the Stand Cover" on page 16. 3 Follow the instructions in "After Working Inside Your Computer" on page 18. 2 Replace the stand cover. Postrequisites 1 Replace the stand. Replacing the Back Cover Procedure Align the tabs on the back cover with the tabs on the middle frame and snap the back cover into place.
Specifications (SWF/PDF)
Page 23
... and data cable to the chassis. See "Replacing the Stand Cover" on page 16. 4 Follow the instructions in "After Working Inside Your Computer" on page 20. 2 Replace the stand. Postrequisites 1 Replace the back cover. See "Replacing the Back Cover" on page 13. See "Replacing the Stand" on page 18. 3 Replace the...
Specifications (SWF/PDF)
Page 26
... fully seated. 5 Replace the screw that secures the optical-drive assembly to the chassis. 6 Connect the power and data cable to the connector on page 20. 2 Replace the stand. See "Replacing the Back Cover" on the optical-drive assembly. Postrequisites 1 Replace the back cover. See "Replacing the Stand" on page 13...
Specifications (SWF/PDF)
Page 28
... the connector on the B-CAS card. 2 Turn the B-CAS card over. 3 Align the screw hole on the B-CAS card with the screw hole on page 20. 2 Replace the stand. See "Replacing the Back Cover" on the middle frame. 4 Replace the screw that secures the B-CAS card to the middle frame.
Specifications (SWF/PDF)
Page 30
See "Replacing the Stand Cover" on page 16. 4 Follow the instructions in "After Working Inside Your Computer" on the converter board. Replacing the Converter Board Procedure 1 Align the screw holes on the converter board with the screw holes on the chassis. 2 Replace the screws that secure the converter board to the chassis. 3 Connect the cables to the connectors on page 13. 30 | Converter Board See "Replacing the Back Cover" on page 18. 3 Replace the stand cover. Postrequisites 1 Replace the back cover. See "Replacing the Stand" on page 20. 2 Replace the stand.
Specifications (SWF/PDF)
Page 33
... the computer. See "Replacing the Back Cover" on page 18. 3 Replace the stand cover. Postrequisites 1 Replace the back cover. See "Replacing the Stand" on page 20. 2 Replace the stand. As the computer boots, it . If you do not hear the click, remove the memory module and reinstall it detects the memory...
Specifications (SWF/PDF)
Page 36
..." on page 13. 36 | System-Board Shield See "Replacing the Back Cover" on page 18. 3 Replace the stand cover. See "Replacing the Stand" on page 20. 2 Replace the stand. See "Replacing the Stand Cover" on page 16. 4 Follow the instructions in connector.
Specifications (SWF/PDF)
Page 38
... the antenna-in connector to the system-board shield. Replacing the Antenna-In Connector Procedure 1 Slide the antenna-in connector into the slot on page 20. 3 Replace the stand. See "Replacing the Stand Cover" on page 16. 5 Follow the instructions in "After Working Inside Your Computer" on page 13. 38 | Antenna...
Specifications (SWF/PDF)
Page 40
See "Replacing the System-Board Shield" on page 20. 3 Replace the stand. See "Replacing the Back Cover" on page 36. 2 Replace the back cover. See "Replacing the Stand Cover" on page 16. 5 Follow the ...
Specifications (SWF/PDF)
Page 43
.... TV-Tuner Card (Optional) | 43 See "Replacing the System-Board Shield" on page 18. 4 Replace the stand cover. See "Replacing the Back Cover" on page 20. 3 Replace the stand.
Specifications (SWF/PDF)
Page 47
... the Back Cover" on page 13. See "Replacing the Stand Cover" on page 16. 5 Follow the instructions in "After Working Inside Your Computer" on page 20. 3 Replace the stand. Wireless Mini-Card (Optional) | 47 The Mini-Card has two triangles (black and white) marked on the label: • Connect the black...
Specifications (SWF/PDF)
Page 50
See "Replacing the Stand Cover" on page 16. 5 Follow the instructions in "After Working Inside Your Computer" on page 36. 2 Replace the back cover. Replacing the Coin-Cell Battery Procedure Insert the new battery (CR2032) into the battery socket with the side labeled + facing up, and press the battery into place. Postrequisites 1 Replace the system-board shield. See "Replacing the System-Board Shield" on page 13. 50 | Coin-Cell Battery See "Replacing the Back Cover" on page 18. 4 Replace the stand cover. See "Replacing the Stand" on page 20. 3 Replace the stand.
Specifications (SWF/PDF)
Page 53
See "Replacing the Stand Cover" on page 16. 6 Follow the instructions in "After Working Inside Your Computer" on page 20. 4 Replace the stand. See "Replacing the Back Cover" on page 13. Speakers | 53 See "Replacing the System-Board Shield" on the system board. Replacing the ...
Specifications (SWF/PDF)
Page 56
See "Replacing the Stand Cover" on page 16. 5 Follow the instructions in "After Working Inside Your Computer" on page 20. 3 Replace the stand. See "Replacing the Back Cover" on page 13. 56 | Fan See "Replacing the Stand" on the system board. Postrequisites 1 Replace the system-...
Specifications (SWF/PDF)
Page 57
...Removing the Power-Button Assembly Prerequisites 1 Remove the stand cover. See "Removing the Stand Cover" on page 17. 3 Remove the back cover. 20 Power-Button Assembly WARNING: Before working inside your computer, read the safety information that shipped with your computer and follow the steps in "Before You...See "Removing the System-Board Shield" on page 11. For additional safety best practices information, see the Regulatory Compliance Homepage at dell.com/regulatory_compliance. See "Removing the Back Cover" on page 19. 4 Remove the system-board shield. Power-Button Assembly | 57
Specifications (SWF/PDF)
Page 59
See "Replacing the Stand Cover" on page 16. 5 Follow the instructions in "After Working Inside Your Computer" on page 20. 3 Replace the stand. Postrequisites 1 Replace the system-board shield. See "Replacing the Back Cover" on page 13. Power-Button Assembly | 59 See "Replacing the System-...
Specifications (SWF/PDF)
Page 63
... board. If either the processor or the processor heat-sink is replaced, use the thermal grease provided in "After Working Inside Your Computer" on page 20. 3 Replace the stand. Procedure 1 Clean the thermal grease from the bottom of the processor heat-sink can be reused if the original processor and processor...
Specifications (SWF/PDF)
Page 68
... the top of the processor. See "Replacing the Processor Heat-Sink" on page 18. 5 Replace the stand cover. See "Replacing the Back Cover" on page 20. 4 Replace the stand. Postrequisites 1 Replace the processor heat-sink.