Owner's Manual
Page 5
Removing the Wireless Mini-Card 34 Prerequisites 34 Procedure 34 Replacing the Wireless Mini-Card 36 Procedure 36 Postrequisites 36 Removing the I/O Board 37 Prerequisites 37 Procedure 37 Replacing the I/O Board 38 Procedure 38 Postrequisites 38 Removing the System Board 39 Prerequisites 39 Procedure 40 Replacing the System Board 43 Procedure 43 Postrequisites 44 Removing the Fan 45 Prerequisites 45 Procedure 46 Replacing the Fan 47 Procedure 47 Postrequisites 47 Removing the Cooling Assembly 48 Prerequisites 48 Procedure 49 Contents | 5
Removing the Wireless Mini-Card 34 Prerequisites 34 Procedure 34 Replacing the Wireless Mini-Card 36 Procedure 36 Postrequisites 36 Removing the I/O Board 37 Prerequisites 37 Procedure 37 Replacing the I/O Board 38 Procedure 38 Postrequisites 38 Removing the System Board 39 Prerequisites 39 Procedure 40 Replacing the System Board 43 Procedure 43 Postrequisites 44 Removing the Fan 45 Prerequisites 45 Procedure 46 Replacing the Fan 47 Procedure 47 Postrequisites 47 Removing the Cooling Assembly 48 Prerequisites 48 Procedure 49 Contents | 5
Owner's Manual
Page 42
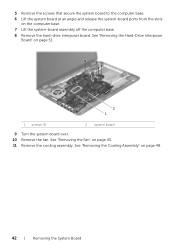
5 Remove the screws that secure the system board to the computer base. 6 Lift the system board at an angle and release the system-board ports from the slots on page 48. 42 | Removing the System Board See "Removing the Cooling Assembly" on the computer base. 7 Lift the system-board assembly off the computer base. 8 Remove the hard-drive interposer board. See "Removing the Fan" on page 51 2 1 1 screws (5) 2 system board 9 Turn the system board over. 10 Remove the fan. See "Removing the Hard-Drive Interposer Board" on page 45. 11 Remove the cooling assembly.
5 Remove the screws that secure the system board to the computer base. 6 Lift the system board at an angle and release the system-board ports from the slots on page 48. 42 | Removing the System Board See "Removing the Cooling Assembly" on the computer base. 7 Lift the system-board assembly off the computer base. 8 Remove the hard-drive interposer board. See "Removing the Fan" on page 51 2 1 1 screws (5) 2 system board 9 Turn the system board over. 10 Remove the fan. See "Removing the Hard-Drive Interposer Board" on page 45. 11 Remove the cooling assembly.
Owner's Manual
Page 43
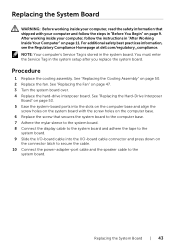
... and the speaker cable to the system board. 9 Slide the I/O-board cable into the I/O-board cable connector and press down on page 50. 2 Replace the fan. You must enter the Service Tag in the system board. See "Replacing the Hard-Drive Interposer Board" on page 53. 5 Ease the system-board ports... and follow the instructions in "After Working Inside Your Computer" on page 11. For additional safety best practices information, see the Regulatory Compliance Homepage at dell.com/regulatory_compliance. See "Replacing the Fan" on page 9.
... and the speaker cable to the system board. 9 Slide the I/O-board cable into the I/O-board cable connector and press down on page 50. 2 Replace the fan. You must enter the Service Tag in the system board. See "Replacing the Hard-Drive Interposer Board" on page 53. 5 Ease the system-board ports... and follow the instructions in "After Working Inside Your Computer" on page 11. For additional safety best practices information, see the Regulatory Compliance Homepage at dell.com/regulatory_compliance. See "Replacing the Fan" on page 9.
Owner's Manual
Page 45
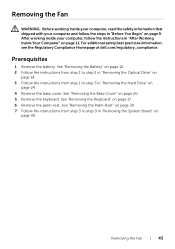
... 39. See "Removing the Base Cover" on page 17. 6 Remove the palm-rest. Removing the Fan | 45 For additional safety best practices information, see the Regulatory Compliance Homepage at dell.com/regulatory_compliance. Prerequisites 1 Remove the battery. See "Removing the Palm-Rest" on page 30. 7 ...3 to step 3 in "Before You Begin" on page 9. See "Removing the Keyboard" on page 20. 5 Remove the keyboard. Removing the Fan WARNING: Before working inside your computer, read the safety information that shipped with your computer, follow the steps in "Removing the Hard Drive" on...
... 39. See "Removing the Base Cover" on page 17. 6 Remove the palm-rest. Removing the Fan | 45 For additional safety best practices information, see the Regulatory Compliance Homepage at dell.com/regulatory_compliance. Prerequisites 1 Remove the battery. See "Removing the Palm-Rest" on page 30. 7 ...3 to step 3 in "Before You Begin" on page 9. See "Removing the Keyboard" on page 20. 5 Remove the keyboard. Removing the Fan WARNING: Before working inside your computer, read the safety information that shipped with your computer, follow the steps in "Removing the Hard Drive" on...

Owner's Manual
Page 46
Procedure 1 Disconnect the fan cable from the system board. 2 Remove the screw that secures the fan to the system board. 3 Lift the fan along with the cable, off the computer base. 1 2 3 1 fan cable 3 fan 2 screw 46 | Removing the Fan
Procedure 1 Disconnect the fan cable from the system board. 2 Remove the screw that secures the fan to the system board. 3 Lift the fan along with the cable, off the computer base. 1 2 3 1 fan cable 3 fan 2 screw 46 | Removing the Fan
Owner's Manual
Page 47
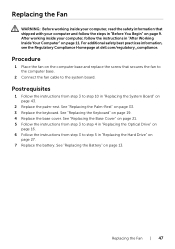
See "Replacing the Keyboard" on page 33. 3 Replace the keyboard. Replacing the Fan | 47 See "Replacing the Palm-Rest" on page 19. 4 Replace the base cover. Postrequisites 1 Follow the instructions from step 3 to step 5 in "Before You Begin" ... step 3 to step 10 in "After Working Inside Your Computer" on page 11. For additional safety best practices information, see the Regulatory Compliance Homepage at dell.com/regulatory_compliance. Replacing the Fan WARNING: Before working inside your computer, read the safety information that secures the...
See "Replacing the Keyboard" on page 33. 3 Replace the keyboard. Replacing the Fan | 47 See "Replacing the Palm-Rest" on page 19. 4 Replace the base cover. Postrequisites 1 Follow the instructions from step 3 to step 5 in "Before You Begin" ... step 3 to step 10 in "After Working Inside Your Computer" on page 11. For additional safety best practices information, see the Regulatory Compliance Homepage at dell.com/regulatory_compliance. Replacing the Fan WARNING: Before working inside your computer, read the safety information that secures the...


