Owner's Manual (PDF)
Page 4
Replacing the Palm-Rest 31 Procedure 31 Postrequisites 31 Removing the Battery 33 Prerequisites 33 Procedure 34 Replacing the Battery 35 Procedure 35 Postrequisites 35 Removing the Hard-Drive Assembly 37 Prerequisites 37 Procedure 38 Replacing the Hard-Drive Assembly 39 Procedure 39 Postrequisites 39 ...
Replacing the Palm-Rest 31 Procedure 31 Postrequisites 31 Removing the Battery 33 Prerequisites 33 Procedure 34 Replacing the Battery 35 Procedure 35 Postrequisites 35 Removing the Hard-Drive Assembly 37 Prerequisites 37 Procedure 38 Replacing the Hard-Drive Assembly 39 Procedure 39 Postrequisites 39 ...
Owner's Manual (PDF)
Page 5
Replacing the Speakers 51 Procedure 51 Postrequisites 51 Removing the Coin-Cell Battery 53 Prerequisites 53 Procedure 54 Replacing the Coin-Cell Battery 55 Procedure 55 Postrequisites 55 Removing the System Board 57 Prerequisites 57 Procedure 58 Replacing the System Board 61 Procedure 61 Postrequisites 61 Entering the ...
Replacing the Speakers 51 Procedure 51 Postrequisites 51 Removing the Coin-Cell Battery 53 Prerequisites 53 Procedure 54 Replacing the Coin-Cell Battery 55 Procedure 55 Postrequisites 55 Removing the System Board 57 Prerequisites 57 Procedure 58 Replacing the System Board 61 Procedure 61 Postrequisites 61 Entering the ...
Owner's Manual (PDF)
Page 23
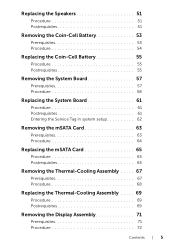
4 Lift and slide the keyboard to release the tabs on the keyboard from the palm-rest assembly. 5 Push the battery switch to turn off the power source from the battery to the computer. 1 1 battery switch Removing the Keyboard | 23
4 Lift and slide the keyboard to release the tabs on the keyboard from the palm-rest assembly. 5 Push the battery switch to turn off the power source from the battery to the computer. 1 1 battery switch Removing the Keyboard | 23

Owner's Manual (PDF)
Page 25
... After working inside your computer, follow the steps in "After Working Inside Your Computer" on page 9. Postrequisites 1 Follow the instructions from the battery to the computer. 3 Slide the tabs on the keyboard into the slots on the palm-rest assembly and place the keyboard on the palm-...Slide the keyboard cable and the keyboard-backlight cable into their connectors and press down on the connector latches to secure them. 2 Push the battery switch to turn the computer over. 6 Replace the screw that shipped with your computer, read the safety information that secures the keyboard to ...
... After working inside your computer, follow the steps in "After Working Inside Your Computer" on page 9. Postrequisites 1 Follow the instructions from the battery to the computer. 3 Slide the tabs on the keyboard into the slots on the palm-rest assembly and place the keyboard on the palm-...Slide the keyboard cable and the keyboard-backlight cable into their connectors and press down on the connector latches to secure them. 2 Push the battery switch to turn the computer over. 6 Replace the screw that shipped with your computer, read the safety information that secures the keyboard to ...
Owner's Manual (PDF)
Page 33
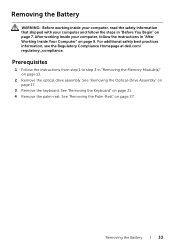
...follow the instructions in "Removing the Memory Module(s)" on page 9. For additional safety best practices information, see the Regulatory Compliance Homepage at dell.com/ regulatory_compliance. Prerequisites 1 Follow the instructions from step 1 to step 3 in "After Working Inside Your Computer" on page 13. ...2 Remove the optical drive assembly. Removing the Battery WARNING: Before working inside your computer, read the safety information that shipped with your computer, follow the steps in "Before You Begin" on...
...follow the instructions in "Removing the Memory Module(s)" on page 9. For additional safety best practices information, see the Regulatory Compliance Homepage at dell.com/ regulatory_compliance. Prerequisites 1 Follow the instructions from step 1 to step 3 in "After Working Inside Your Computer" on page 13. ...2 Remove the optical drive assembly. Removing the Battery WARNING: Before working inside your computer, read the safety information that shipped with your computer, follow the steps in "Before You Begin" on...

Owner's Manual (PDF)
Page 34
Procedure 1 Remove the screws that secure the battery to the computer base. 2 Lift the battery to disconnect it from the system board and remove the battery from the computer base. 1 battery 2 1 2 screws (5) 34 | Removing the Battery
Procedure 1 Remove the screws that secure the battery to the computer base. 2 Lift the battery to disconnect it from the system board and remove the battery from the computer base. 1 battery 2 1 2 screws (5) 34 | Removing the Battery

Owner's Manual (PDF)
Page 35
... Regulatory Compliance Homepage at dell.com/ regulatory_compliance. See "Replacing the Keyboard" on page 31. 2 Replace the keyboard. See "Replacing the Palm-Rest" on page 25. 3 Replace the optical-drive assembly. Procedure 1 Align the screw holes on the battery with your computer, follow... Follow the instructions in "After Working Inside Your Computer" on page 7. Replacing the Battery WARNING: Before working inside your computer, read the safety information that secure the battery to the computer base. After working inside your computer and follow the instructions in "...
... Regulatory Compliance Homepage at dell.com/ regulatory_compliance. See "Replacing the Keyboard" on page 31. 2 Replace the keyboard. See "Replacing the Palm-Rest" on page 25. 3 Replace the optical-drive assembly. Procedure 1 Align the screw holes on the battery with your computer, follow... Follow the instructions in "After Working Inside Your Computer" on page 7. Replacing the Battery WARNING: Before working inside your computer, read the safety information that secure the battery to the computer base. After working inside your computer and follow the instructions in "...

Owner's Manual (PDF)
Page 36
36 | Replacing the Battery
36 | Replacing the Battery
Owner's Manual (PDF)
Page 37
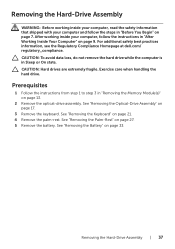
..."Removing the Optical-Drive Assembly" on page 21. 4 Remove the palm-rest. For additional safety best practices information, see the Regulatory Compliance Homepage at dell.com/ regulatory_compliance. CAUTION: Hard drives are extremely fragile. See "Removing the Keyboard" on page 17. 3 Remove the keyboard. Removing the Hard-Drive ... the hard drive. See "Removing the Palm-Rest" on page 33. Removing the Hard-Drive Assembly | 37 See "Removing the Battery" on page 27. 5 Remove the battery. Prerequisites 1 Follow the instructions from step 1 to step 3 in "Before You Begin" on page 9.
..."Removing the Optical-Drive Assembly" on page 21. 4 Remove the palm-rest. For additional safety best practices information, see the Regulatory Compliance Homepage at dell.com/ regulatory_compliance. CAUTION: Hard drives are extremely fragile. See "Removing the Keyboard" on page 17. 3 Remove the keyboard. Removing the Hard-Drive ... the hard drive. See "Removing the Palm-Rest" on page 33. Removing the Hard-Drive Assembly | 37 See "Removing the Battery" on page 27. 5 Remove the battery. Prerequisites 1 Follow the instructions from step 1 to step 3 in "Before You Begin" on page 9.
Owner's Manual (PDF)
Page 39
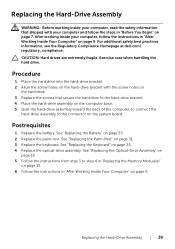
Postrequisites 1 Replace the battery. See "Replacing the Battery" on page 31. 3 Replace the keyboard. Exercise care when handling the hard drive. See "Replacing the Palm-Rest" on page 35. 2 Replace the palm-rest. ... computer and follow the instructions in "After Working Inside Your Computer" on page 9. For additional safety best practices information, see the Regulatory Compliance Homepage at dell.com/ regulatory_compliance. Replacing the Hard-Drive Assembly WARNING: Before working inside your computer, read the safety information that shipped with the screw holes on the...
Postrequisites 1 Replace the battery. See "Replacing the Battery" on page 31. 3 Replace the keyboard. Exercise care when handling the hard drive. See "Replacing the Palm-Rest" on page 35. 2 Replace the palm-rest. ... computer and follow the instructions in "After Working Inside Your Computer" on page 9. For additional safety best practices information, see the Regulatory Compliance Homepage at dell.com/ regulatory_compliance. Replacing the Hard-Drive Assembly WARNING: Before working inside your computer, read the safety information that shipped with the screw holes on the...

Owner's Manual (PDF)
Page 41
... additional safety best practices information, see the Regulatory Compliance Homepage at dell.com/ regulatory_compliance. Your computer has one , full-height wireless mini-card slot which supports a Wireless Local Area Network (WLAN) + Bluetooth combo card. See "Removing the Battery" on page 21. 4 Remove the palm-rest. Removing the Wireless Mini-Card WARNING: Before...
... additional safety best practices information, see the Regulatory Compliance Homepage at dell.com/ regulatory_compliance. Your computer has one , full-height wireless mini-card slot which supports a Wireless Local Area Network (WLAN) + Bluetooth combo card. See "Removing the Battery" on page 21. 4 Remove the palm-rest. Removing the Wireless Mini-Card WARNING: Before...
Owner's Manual (PDF)
Page 44
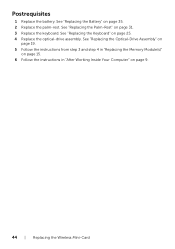
See "Replacing the Battery" on page 9. 44 | Replacing the Wireless Mini-Card See "Replacing the Optical-Drive Assembly" on page 19. 5 Follow the instructions from step 3 and step 4 in "Replacing the Memory Module(s)" on page 15. 6 Follow the instructions in "After Working Inside Your Computer" on page 35. 2 Replace the palm-rest. See "Replacing the Palm-Rest" on page 25. 4 Replace the optical-drive assembly. See "Replacing the Keyboard" on page 31. 3 Replace the keyboard. Postrequisites 1 Replace the battery.
See "Replacing the Battery" on page 9. 44 | Replacing the Wireless Mini-Card See "Replacing the Optical-Drive Assembly" on page 19. 5 Follow the instructions from step 3 and step 4 in "Replacing the Memory Module(s)" on page 15. 6 Follow the instructions in "After Working Inside Your Computer" on page 35. 2 Replace the palm-rest. See "Replacing the Palm-Rest" on page 25. 4 Replace the optical-drive assembly. See "Replacing the Keyboard" on page 31. 3 Replace the keyboard. Postrequisites 1 Replace the battery.
Owner's Manual (PDF)
Page 45
... Prerequisites 1 Follow the instructions from step 1 to step 3 in "Removing the Memory Module(s)" on page 33. See "Removing the Battery" on page 13. 2 Remove the optical-drive assembly. For additional safety best practices information, see the Regulatory Compliance Homepage at... dell.com/ regulatory_compliance. See "Removing the Keyboard" on page 27. 5 Remove the battery. See "Removing the Palm-Rest" on page 21. 4 Remove the palm-rest. See "Removing the ...
... Prerequisites 1 Follow the instructions from step 1 to step 3 in "Removing the Memory Module(s)" on page 33. See "Removing the Battery" on page 13. 2 Remove the optical-drive assembly. For additional safety best practices information, see the Regulatory Compliance Homepage at... dell.com/ regulatory_compliance. See "Removing the Keyboard" on page 27. 5 Remove the battery. See "Removing the Palm-Rest" on page 21. 4 Remove the palm-rest. See "Removing the ...
Owner's Manual (PDF)
Page 47
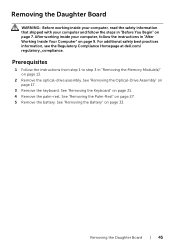
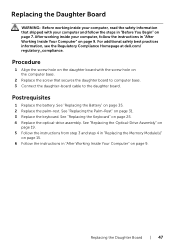
... with the screw hole on page 31. 3 Replace the keyboard. For additional safety best practices information, see the Regulatory Compliance Homepage at dell.com/ regulatory_compliance. Procedure 1 Align the screw hole on the daughter board with your computer, follow the steps in "Before You Begin" on... page 7. See "Replacing the Battery" on page 25. 4 Replace the optical-drive assembly. Replacing the Daughter Board | 47 See "Replacing the Optical-Drive Assembly" on page 19....
... with the screw hole on page 31. 3 Replace the keyboard. For additional safety best practices information, see the Regulatory Compliance Homepage at dell.com/ regulatory_compliance. Procedure 1 Align the screw hole on the daughter board with your computer, follow the steps in "Before You Begin" on... page 7. See "Replacing the Battery" on page 25. 4 Replace the optical-drive assembly. Replacing the Daughter Board | 47 See "Replacing the Optical-Drive Assembly" on page 19....
Owner's Manual (PDF)
Page 49
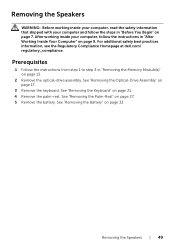
For additional safety best practices information, see the Regulatory Compliance Homepage at dell.com/ regulatory_compliance. Prerequisites 1 Follow the instructions from step 1 to step 3 in "Removing the Memory Module(s)" on page 33. See "Removing the Battery" on page 13. 2 Remove the optical-drive assembly. See "Removing the Optical-Drive ...Assembly" on page 27. 5 Remove the battery. See "Removing the Palm-Rest" on page 17. 3 Remove the keyboard. See "Removing the Keyboard" on page 9. After working...
For additional safety best practices information, see the Regulatory Compliance Homepage at dell.com/ regulatory_compliance. Prerequisites 1 Follow the instructions from step 1 to step 3 in "Removing the Memory Module(s)" on page 33. See "Removing the Battery" on page 13. 2 Remove the optical-drive assembly. See "Removing the Optical-Drive ...Assembly" on page 27. 5 Remove the battery. See "Removing the Palm-Rest" on page 17. 3 Remove the keyboard. See "Removing the Keyboard" on page 9. After working...

Owner's Manual (PDF)
Page 51
... instructions in "After Working Inside Your Computer" on page 31. 3 Replace the keyboard. See "Replacing the Battery" on page 7. Postrequisites 1 Replace the battery. For additional safety best practices information, see the Regulatory Compliance Homepage at dell.com/ regulatory_compliance. Replacing the Speakers WARNING: Before working inside your computer, read the safety information that shipped...
... instructions in "After Working Inside Your Computer" on page 31. 3 Replace the keyboard. See "Replacing the Battery" on page 7. Postrequisites 1 Replace the battery. For additional safety best practices information, see the Regulatory Compliance Homepage at dell.com/ regulatory_compliance. Replacing the Speakers WARNING: Before working inside your computer, read the safety information that shipped...
Owner's Manual (PDF)
Page 53
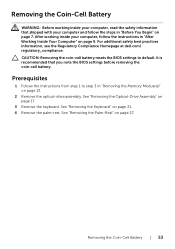
... page 9. After working inside your computer, follow the steps in "Removing the Memory Module(s)" on page 7. CAUTION: Removing the coin-cell battery resets the BIOS settings to step 3 in "Before You Begin" on page 13. 2 Remove the optical-drive assembly. See "Removing the..." on page 21. 4 Remove the palm-rest. For additional safety best practices information, see the Regulatory Compliance Homepage at dell.com/ regulatory_compliance. Removing the Coin-Cell Battery | 53 Prerequisites 1 Follow the instructions from step 1 to default. See "Removing the Keyboard" on page 17. 3 ...
... page 9. After working inside your computer, follow the steps in "Removing the Memory Module(s)" on page 7. CAUTION: Removing the coin-cell battery resets the BIOS settings to step 3 in "Before You Begin" on page 13. 2 Remove the optical-drive assembly. See "Removing the..." on page 21. 4 Remove the palm-rest. For additional safety best practices information, see the Regulatory Compliance Homepage at dell.com/ regulatory_compliance. Removing the Coin-Cell Battery | 53 Prerequisites 1 Follow the instructions from step 1 to default. See "Removing the Keyboard" on page 17. 3 ...
Owner's Manual (PDF)
Page 54
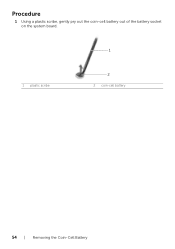
Procedure 1 Using a plastic scribe, gently pry out the coin-cell battery out of the battery socket on the system board. 1 1 plastic scribe 2 2 coin-cell battery 54 | Removing the Coin-Cell Battery
Procedure 1 Using a plastic scribe, gently pry out the coin-cell battery out of the battery socket on the system board. 1 1 plastic scribe 2 2 coin-cell battery 54 | Removing the Coin-Cell Battery
Owner's Manual (PDF)
Page 55
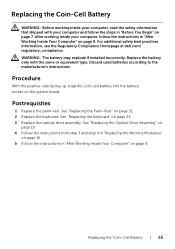
...'s instructions. For additional safety best practices information, see the Regulatory Compliance Homepage at dell.com/ regulatory_compliance. See "Replacing the Keyboard" on the system board. Replace the battery only with your computer and follow the instructions in "After Working Inside Your Computer"...the Memory Module(s)" on page 15. 5 Follow the instructions in "Before You Begin" on page 7. Replacing the Coin-Cell Battery WARNING: Before working inside your computer, read the safety information that shipped with the same or equivalent type. After working inside...
...'s instructions. For additional safety best practices information, see the Regulatory Compliance Homepage at dell.com/ regulatory_compliance. See "Replacing the Keyboard" on the system board. Replace the battery only with your computer and follow the instructions in "After Working Inside Your Computer"...the Memory Module(s)" on page 15. 5 Follow the instructions in "Before You Begin" on page 7. Replacing the Coin-Cell Battery WARNING: Before working inside your computer, read the safety information that shipped with the same or equivalent type. After working inside...

Owner's Manual (PDF)
Page 56
56 | Replacing the Coin-Cell Battery
56 | Replacing the Coin-Cell Battery


