
Specifications
Page 2
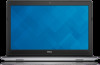
White light - Power adapter is connected and the battery is low or critical. 2 Hard-drive activity light Turns on when the computer reads from or writes to the hard drive. Battery charge is being charged. Specifications Front Front 12 Left Views Right Base Display 1 Power and battery‑status light Indicates the power state and battery state of the computer. Amber light -
White light - Power adapter is connected and the battery is low or critical. 2 Hard-drive activity light Turns on when the computer reads from or writes to the hard drive. Battery charge is being charged. Specifications Front Front 12 Left Views Right Base Display 1 Power and battery‑status light Indicates the power state and battery state of the computer. Amber light -

Specifications
Page 14
Views Storage Interface Hard drive Specifications SATA 6 Gbps One 2.5-inch drive (supports Intel Smart Response Technology) Dimensions and Weight System Information Memory Ports and Connectors Communications Video Audio Storage Media-Card Reader Display Keyboard Camera Touch Pad Battery Power Adapter Computer Environment
Views Storage Interface Hard drive Specifications SATA 6 Gbps One 2.5-inch drive (supports Intel Smart Response Technology) Dimensions and Weight System Information Memory Ports and Connectors Communications Video Audio Storage Media-Card Reader Display Keyboard Camera Touch Pad Battery Power Adapter Computer Environment

Specifications
Page 22
... G† 160 G‡ Altitude (maximum) -15.2 m to 3048 m (-50 ft to 10,000 ft) -15.2 m to 10,668 m (-50 ft to 35,000 ft) * Measured using a random vibration spectrum that simulates user environment. † Measured using a 2 ms half-sine pulse when the hard drive is in use. ‡ Measured using a ...2 ms half-sine pulse when the hard-drive head is in parked...
... G† 160 G‡ Altitude (maximum) -15.2 m to 3048 m (-50 ft to 10,000 ft) -15.2 m to 10,668 m (-50 ft to 35,000 ft) * Measured using a random vibration spectrum that simulates user environment. † Measured using a 2 ms half-sine pulse when the hard drive is in use. ‡ Measured using a ...2 ms half-sine pulse when the hard-drive head is in parked...

Service Manual
Page 3
Contents Before Working Inside Your Computer 8 Before You Begin 8 Safety Instructions 8 Recommended Tools 9 After Working Inside Your Computer 11 Removing the Base Cover 12 Procedure...12 Replacing the Base Cover 14 Procedure...14 Removing the Battery 15 Prerequisites...15 Procedure...15 Replacing the Battery 16 Procedure...16 Post-requisites 16 Removing the Hard Drive 17 Prerequisites...17 Procedure...17 Replacing the Hard Drive 20 Procedure...20 Post-requisites 20
Contents Before Working Inside Your Computer 8 Before You Begin 8 Safety Instructions 8 Recommended Tools 9 After Working Inside Your Computer 11 Removing the Base Cover 12 Procedure...12 Replacing the Base Cover 14 Procedure...14 Removing the Battery 15 Prerequisites...15 Procedure...15 Replacing the Battery 16 Procedure...16 Post-requisites 16 Removing the Hard Drive 17 Prerequisites...17 Procedure...17 Replacing the Hard Drive 20 Procedure...20 Post-requisites 20

Service Manual
Page 17
...: Before working inside your computer, read the safety information that secure the hard-drive assembly to the base frame. 17 For more safety best practices, see the Regulatory Compliance home page at dell.com/regulatory_compliance. Exercise care when handling the hard drive. Prerequisites 1 Remove the base cover. 2 Remove the battery. After working inside your computer...
...: Before working inside your computer, read the safety information that secure the hard-drive assembly to the base frame. 17 For more safety best practices, see the Regulatory Compliance home page at dell.com/regulatory_compliance. Exercise care when handling the hard drive. Prerequisites 1 Remove the base cover. 2 Remove the battery. After working inside your computer...

Service Manual
Page 18
2 Using the pull tab, slide the hard-drive assembly out of the base frame. 1 pull tab 2 screws (4) 3 hard-drive assembly 3 Disconnect the hard-drive cable from the hard drive. 1 hard-drive assembly 2 hard-drive cable 4 Remove the screws that secure the hard-drive bracket to the hard drive. 18
2 Using the pull tab, slide the hard-drive assembly out of the base frame. 1 pull tab 2 screws (4) 3 hard-drive assembly 3 Disconnect the hard-drive cable from the hard drive. 1 hard-drive assembly 2 hard-drive cable 4 Remove the screws that secure the hard-drive bracket to the hard drive. 18

Service Manual
Page 19
5 Lift the hard drive off the hard-drive bracket . 1 screws (4) 2 hard-drive bracket 19
5 Lift the hard drive off the hard-drive bracket . 1 screws (4) 2 hard-drive bracket 19

Service Manual
Page 20
.... 5 Replace the screws that shipped with the screw holes on the hard drive. 2 Replace the screws that secure the hard-drive bracket to the hard drive. 3 Connect the hard-drive cable to the base frame. For more safety best practices, see the Regulatory Compliance home page at dell.com/regulatory_compliance. Post-requisites 1 Replace the battery. 2 Replace the base cover...
.... 5 Replace the screws that shipped with the screw holes on the hard drive. 2 Replace the screws that secure the hard-drive bracket to the hard drive. 3 Connect the hard-drive cable to the base frame. For more safety best practices, see the Regulatory Compliance home page at dell.com/regulatory_compliance. Post-requisites 1 Replace the battery. 2 Replace the base cover...

Service Manual
Page 38
For more safety best practices, see the Regulatory Compliance home page at dell.com/regulatory_compliance. After working inside your computer and follow the instructions in removing the hard drive. 4 Remove the fan. 5 Remove the keyboard. Prerequisites 1 Remove the base cover. 2 Remove the battery. 3 Follow the procedure from step 1 to step 3 in After Working Inside...
For more safety best practices, see the Regulatory Compliance home page at dell.com/regulatory_compliance. After working inside your computer and follow the instructions in removing the hard drive. 4 Remove the fan. 5 Remove the keyboard. Prerequisites 1 Remove the base cover. 2 Remove the battery. 3 Follow the procedure from step 1 to step 3 in After Working Inside...

Service Manual
Page 42
.... 6 Slide the status-light cable and touchpad cables into the connectors on the system board and press down the latches to step 5 in replacing the hard drive. 4 Replace the battery. 5 Replace the base cover. 42 Post-requisites 1 Replace the keyboard. 2 Replace the fan. 3 Follow the procedure from step 3 to secure the cables... inside your computer and follow the instructions in Before Working Inside Your Computer. For more safety best practices, see the Regulatory Compliance home page at dell.com/regulatory_compliance.
.... 6 Slide the status-light cable and touchpad cables into the connectors on the system board and press down the latches to step 5 in replacing the hard drive. 4 Replace the battery. 5 Replace the base cover. 42 Post-requisites 1 Replace the keyboard. 2 Replace the fan. 3 Follow the procedure from step 3 to secure the cables... inside your computer and follow the instructions in Before Working Inside Your Computer. For more safety best practices, see the Regulatory Compliance home page at dell.com/regulatory_compliance.

Service Manual
Page 43
... note the BIOS settings before removing the coin-cell battery. CAUTION: Removing the coin-cell battery resets the BIOS settings to step 3 in removing the hard drive. 4 Remove the fan. 5 Remove the keyboard. 6 Remove the base frame. 43 Prerequisites 1 Remove the base cover. 2 Remove the battery. 3 Follow the ... follow the steps in After Working Inside Your Computer. For more safety best practices, see the Regulatory Compliance home page at dell.com/regulatory_compliance. After working inside your computer and follow the instructions in Before Working Inside Your Computer.
... note the BIOS settings before removing the coin-cell battery. CAUTION: Removing the coin-cell battery resets the BIOS settings to step 3 in removing the hard drive. 4 Remove the fan. 5 Remove the keyboard. 6 Remove the base frame. 43 Prerequisites 1 Remove the base cover. 2 Remove the battery. 3 Follow the ... follow the steps in After Working Inside Your Computer. For more safety best practices, see the Regulatory Compliance home page at dell.com/regulatory_compliance. After working inside your computer and follow the instructions in Before Working Inside Your Computer.

Service Manual
Page 45
... home page at dell.com/regulatory_compliance. Post-requisites 1 Replace the base frame. 2 Replace the keyboard. 3 Replace the fan. 4 Follow the procedure from step 3 to the system board. Procedure 1 Adhere the coin-cell battery to the system board. 2 Connect the coin-cell battery cable to step 5 in replacing the hard drive. 5 Replace the battery...
... home page at dell.com/regulatory_compliance. Post-requisites 1 Replace the base frame. 2 Replace the keyboard. 3 Replace the fan. 4 Follow the procedure from step 3 to the system board. Procedure 1 Adhere the coin-cell battery to the system board. 2 Connect the coin-cell battery cable to step 5 in replacing the hard drive. 5 Replace the battery...

Service Manual
Page 46
... at dell.com/regulatory_compliance. Prerequisites 1 Remove the base cover. 2 Remove the battery. 3 Follow the procedure from step 1 to cool before you touch it. Allow sufficient time for the heat sink to step 3 in After Working Inside Your Computer. The oils in your computer and follow the instructions in removing the hard drive. 4 Remove...
... at dell.com/regulatory_compliance. Prerequisites 1 Remove the base cover. 2 Remove the battery. 3 Follow the procedure from step 1 to cool before you touch it. Allow sufficient time for the heat sink to step 3 in After Working Inside Your Computer. The oils in your computer and follow the instructions in removing the hard drive. 4 Remove...

Service Manual
Page 48
For more safety best practices, see the Regulatory Compliance home page at dell.com/regulatory_compliance. CAUTION: Incorrect alignment of the heat sink can be reused if the original system board and heat sink are reinstalled together. If either... board. 2 In sequential order (indicated on the heat sink), replace the screws that thermal conductivity is replaced, use the thermal pad provided in replacing the hard drive. 5 Replace the battery. 6 Replace the base cover. 48 After working inside your computer and follow the instructions in After Working Inside Your Computer. If ...
For more safety best practices, see the Regulatory Compliance home page at dell.com/regulatory_compliance. CAUTION: Incorrect alignment of the heat sink can be reused if the original system board and heat sink are reinstalled together. If either... board. 2 In sequential order (indicated on the heat sink), replace the screws that thermal conductivity is replaced, use the thermal pad provided in replacing the hard drive. 5 Replace the battery. 6 Replace the base cover. 48 After working inside your computer and follow the instructions in After Working Inside Your Computer. If ...

Service Manual
Page 49
... working inside your computer, read the safety information that secures the I /O Board WARNING: Before working inside your computer and follow the instructions in removing the hard drive. 4 Remove the fan. 5 Remove the keyboard. 6 Remove the base frame. Prerequisites 1 Remove the base cover. 2 Remove the battery. 3 Follow the procedure from..., follow the steps in Before Working Inside Your Computer. For more safety best practices, see the Regulatory Compliance home page at dell.com/regulatory_compliance. Removing the I /O board to step 3 in After Working Inside Your Computer.
... working inside your computer, read the safety information that secures the I /O Board WARNING: Before working inside your computer and follow the instructions in removing the hard drive. 4 Remove the fan. 5 Remove the keyboard. 6 Remove the base frame. Prerequisites 1 Remove the base cover. 2 Remove the battery. 3 Follow the procedure from..., follow the steps in Before Working Inside Your Computer. For more safety best practices, see the Regulatory Compliance home page at dell.com/regulatory_compliance. Removing the I /O board to step 3 in After Working Inside Your Computer.

Service Manual
Page 51
Replacing the I /O board to step 5 in replacing the hard drive. 5 Replace the battery. 6 Replace the base cover. 51 For more safety best practices, see the Regulatory Compliance home page at dell.com/regulatory_compliance. After working inside your computer, read the safety information that secures the I /O Board WARNING: Before working inside your computer and follow...
Replacing the I /O board to step 5 in replacing the hard drive. 5 Replace the battery. 6 Replace the base cover. 51 For more safety best practices, see the Regulatory Compliance home page at dell.com/regulatory_compliance. After working inside your computer, read the safety information that secures the I /O Board WARNING: Before working inside your computer and follow...

Service Manual
Page 52
Procedure 1 Disconnect the speaker cable from the system board. 2 Note the speaker-cable routing and remove the cable from step 1 to step 3 in removing the hard drive. 4 Remove the fan. 5 Remove the keyboard. 6 Remove the base frame. Prerequisites 1 Remove the base cover. 2 Remove the battery. 3 Follow the procedure ..., follow the steps in Before Working Inside Your Computer. For more safety best practices, see the Regulatory Compliance home page at dell.com/regulatory_compliance. After working inside your computer and follow the instructions in After Working Inside Your Computer.
Procedure 1 Disconnect the speaker cable from the system board. 2 Note the speaker-cable routing and remove the cable from step 1 to step 3 in removing the hard drive. 4 Remove the fan. 5 Remove the keyboard. 6 Remove the base frame. Prerequisites 1 Remove the base cover. 2 Remove the battery. 3 Follow the procedure ..., follow the steps in Before Working Inside Your Computer. For more safety best practices, see the Regulatory Compliance home page at dell.com/regulatory_compliance. After working inside your computer and follow the instructions in After Working Inside Your Computer.

Service Manual
Page 54
For more safety best practices, see the Regulatory Compliance home page at dell.com/regulatory_compliance. Post-requisites 1 Replace the base frame. 2 Replace the keyboard. 3 Replace the fan. 4 Follow the procedure from step 3 to the system board. After working ... the palm rest. 2 Route the speaker cable through the routing guides on the palm-rest assembly. 3 Connect the speaker cable to step 5 in replacing the hard drive. 5 Replace the battery. 6 Replace the base cover. 54
For more safety best practices, see the Regulatory Compliance home page at dell.com/regulatory_compliance. Post-requisites 1 Replace the base frame. 2 Replace the keyboard. 3 Replace the fan. 4 Follow the procedure from step 3 to the system board. After working ... the palm rest. 2 Route the speaker cable through the routing guides on the palm-rest assembly. 3 Connect the speaker cable to step 5 in replacing the hard drive. 5 Replace the battery. 6 Replace the base cover. 54
Service Manual
Page 55
... the safety information that secures the status-light board to step 3 in removing the hard drive. 4 Remove the fan. 5 Remove the keyboard. 6 Remove the base frame. For more safety best practices, see the Regulatory Compliance home page at dell.com/regulatory_compliance. Prerequisites 1 Remove the base cover. 2 Remove the battery. 3 Follow the procedure from...
... the safety information that secures the status-light board to step 3 in removing the hard drive. 4 Remove the fan. 5 Remove the keyboard. 6 Remove the base frame. For more safety best practices, see the Regulatory Compliance home page at dell.com/regulatory_compliance. Prerequisites 1 Remove the base cover. 2 Remove the battery. 3 Follow the procedure from...

Service Manual
Page 57
..., see the Regulatory Compliance home page at dell.com/regulatory_compliance. Post-requisites 1 Replace the base frame. 2 Replace the keyboard. 3 Replace the fan. 4 Follow the procedure from step 3 to the palm rest. 4 Align the right speaker with your computer, follow the steps in replacing the hard drive. 5 Replace the battery. 6 Replace the base cover...
..., see the Regulatory Compliance home page at dell.com/regulatory_compliance. Post-requisites 1 Replace the base frame. 2 Replace the keyboard. 3 Replace the fan. 4 Follow the procedure from step 3 to the palm rest. 4 Align the right speaker with your computer, follow the steps in replacing the hard drive. 5 Replace the battery. 6 Replace the base cover...


