
User Guide
Page 1
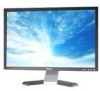
... how to avoid the problem. disclaims any manner whatsoever without notice. © 2006 Dell Inc. All rights reserved. Model E228WFP November 2006 Rev. Dell™ E228WFP Flat Panel Monitor User's Guide About Your Monitor Front View Back View Side View Bottom View Monitor Specifications Caring for property damage, personal injury, or death. Other trademarks and trade names may...
... how to avoid the problem. disclaims any manner whatsoever without notice. © 2006 Dell Inc. All rights reserved. Model E228WFP November 2006 Rev. Dell™ E228WFP Flat Panel Monitor User's Guide About Your Monitor Front View Back View Side View Bottom View Monitor Specifications Caring for property damage, personal injury, or death. Other trademarks and trade names may...

User Guide
Page 2
Back to Contents Page About Your Monitor Dell™ E228WFP Flat Panel Monitor User's Guide Front View Back View Bottom View Side View Monitor Specifications LCD Monitor Quality & Pixel Policy Caring for your Monitor Front View 1. Auto-adjust / Up (+) button 5. Power button (with power light indicator) Back View OSD menu / select button 3. Brightness & Contrast / Down (-) button 4. Input source select button 2.
Back to Contents Page About Your Monitor Dell™ E228WFP Flat Panel Monitor User's Guide Front View Back View Bottom View Side View Monitor Specifications LCD Monitor Quality & Pixel Policy Caring for your Monitor Front View 1. Auto-adjust / Up (+) button 5. Power button (with power light indicator) Back View OSD menu / select button 3. Brightness & Contrast / Down (-) button 4. Input source select button 2.

User Guide
Page 3
.... Connect your computer VGA cable. Press to contact Dell for technical support. Help organize cables by placing them through the hole. Left side Monitor Specifications Power Management Modes Right side List the regulatory approvals. Bottom View 1 Power connector 2 DVI connector 3 VGA connector Side View Insert the power cable. 1 VESA mounting ...
.... Connect your computer VGA cable. Press to contact Dell for technical support. Help organize cables by placing them through the hole. Left side Monitor Specifications Power Management Modes Right side List the regulatory approvals. Bottom View 1 Power connector 2 DVI connector 3 VGA connector Side View Insert the power cable. 1 VESA mounting ...

User Guide
Page 8
... with respect to Part 15 of the FCC Rules. It will not occur in the "Electrical Specifications" section. l Do not store or use the LCD monitor in the bottom of controls, adjustments, or procedures other than those specified in this equipment. Do... or have an adverse effect on different branch circuits. l Do not subject the LCD monitor to Contents Page Appendix Dell™ E228WFP Flat Panel Monitor FCC Identification Information CAUTION: Safety Instruction Contacting Dell FCC Identification Information FCC Notice (U.S. l Never insert anything to spill on the power...
... with respect to Part 15 of the FCC Rules. It will not occur in the "Electrical Specifications" section. l Do not store or use the LCD monitor in the bottom of controls, adjustments, or procedures other than those specified in this equipment. Do... or have an adverse effect on different branch circuits. l Do not subject the LCD monitor to Contents Page Appendix Dell™ E228WFP Flat Panel Monitor FCC Identification Information CAUTION: Safety Instruction Contacting Dell FCC Identification Information FCC Notice (U.S. l Never insert anything to spill on the power...

User Guide
Page 9
... the following table. l For worldwide support through the web, go to an electrical shock hazard. NOTE: In certain countries, support specific to unplug the monitor first. If you may contact Dell through the Internet and by qualified service personnel. l For support by e-mail, see the e-mail addresses listed in direct sunlight, and keep...
... the following table. l For worldwide support through the web, go to an electrical shock hazard. NOTE: In certain countries, support specific to unplug the monitor first. If you may contact Dell through the Internet and by qualified service personnel. l For support by e-mail, see the e-mail addresses listed in direct sunlight, and keep...

User Guide
Page 30
...from the computer. Position settings only - For best user experience and optimum performance of your monitor parameters (brightness, color balance etc) to use. See Specifications for Image Position back to Factory Settings menu without resetting any OSD options. DDC/CI (...Display Data Channel/Command Interface) allows your monitor, keep this monitor. Color settings only - NOTE: The floating Dell Self-test Feature Check dialog...
...from the computer. Position settings only - For best user experience and optimum performance of your monitor parameters (brightness, color balance etc) to use. See Specifications for Image Position back to Factory Settings menu without resetting any OSD options. DDC/CI (...Display Data Channel/Command Interface) allows your monitor, keep this monitor. Color settings only - NOTE: The floating Dell Self-test Feature Check dialog...

User Guide
Page 33
... that allows you to Contents Page Solving Problems Dell™ E228WFP Flat Panel Monitor User's Guide Troubleshooting Your Monitor General Problems Product Specific Problems Troubleshooting Your Soundbar CAUTION: Before you use the previous procedure, check your monitor and computer are properly connected but the monitor screen remains dark, run the monitor self-test by performing the following warning...
... that allows you to Contents Page Solving Problems Dell™ E228WFP Flat Panel Monitor User's Guide Troubleshooting Your Monitor General Problems Product Specific Problems Troubleshooting Your Soundbar CAUTION: Before you use the previous procedure, check your monitor and computer are properly connected but the monitor screen remains dark, run the monitor self-test by performing the following warning...

User Guide
Page 34
.... l Adjust Phase and Clock controls via OSD. l Boot up in proper video mode. LCD Scratched Screen has scratches or smudges l Turn monitor off the monitor at the both ends of the monitor and ensure the correct input source is fuzzy, blurry, or ghosting l Push Auto Adjust button... Optimum Resolution 1680 x1050 60Hz This means that the monitor cannot synchronize with the computer or that the monitor is secure. Either the signal is a natural defect that occurs in self-test mode. See Monitor Specifications for the Horizontal and Vertical frequency ranges addressable by ...
.... l Adjust Phase and Clock controls via OSD. l Boot up in proper video mode. LCD Scratched Screen has scratches or smudges l Turn monitor off the monitor at the both ends of the monitor and ensure the correct input source is fuzzy, blurry, or ghosting l Push Auto Adjust button... Optimum Resolution 1680 x1050 60Hz This means that the monitor cannot synchronize with the computer or that the monitor is secure. Either the signal is a natural defect that occurs in self-test mode. See Monitor Specifications for the Horizontal and Vertical frequency ranges addressable by ...

User Guide
Page 35
...to another source Can't select input source when not in use a dynamically changing screensaver. Product Specific Problems SPECIFIC SYMPTOMS Screen image is too small Cannot adjust the monitor with the buttons on the front panel WHAT YOU EXPERIENCE POSSIBLE SOLUTIONS Image is used . .... l Clear any obstructions between the Soundbar and the user. NOTE: Image Burn-In is illumina l Confirm that the monitor has power. l If the monitor has no power, see Troubleshooting your warranty. l Clear any obstructions between the Soundbar and the user. l Confirm that ...
...to another source Can't select input source when not in use a dynamically changing screensaver. Product Specific Problems SPECIFIC SYMPTOMS Screen image is too small Cannot adjust the monitor with the buttons on the front panel WHAT YOU EXPERIENCE POSSIBLE SOLUTIONS Image is used . .... l Clear any obstructions between the Soundbar and the user. NOTE: Image Burn-In is illumina l Confirm that the monitor has power. l If the monitor has no power, see Troubleshooting your warranty. l Clear any obstructions between the Soundbar and the user. l Confirm that ...

