
User's Guide
Page 4
... supplies 138 Ordering supplies...139 Storing supplies...140 Replacing supplies...141 Moving the printer...146 Managing the printer 149 Managing printer messages...149 Accessing Status Monitor Center...149 Checking the virtual display...149 Modifying confidential print settings...150 Copying printer settings to other printers 150 Restoring factory default settings...151 Clearing jams 152 Avoiding jams...152...
... supplies 138 Ordering supplies...139 Storing supplies...140 Replacing supplies...141 Moving the printer...146 Managing the printer 149 Managing printer messages...149 Accessing Status Monitor Center...149 Checking the virtual display...149 Modifying confidential print settings...150 Copying printer settings to other printers 150 Restoring factory default settings...151 Clearing jams 152 Avoiding jams...152...

User's Guide
Page 12
...and Sleep button lights on the printer. 6 Stop or Cancel button Stop all printer activity. 7 Back button Return to the previous screen. 8 Home button Go to the home screen. 9 Indicator light Check the status of the printer. 10 USB port Connect a flash drive to the printer. Note: Only the front ...USB port supports flash drives. Do the following to wake the printer from the computer. • Perform a power‑on reset ...
...and Sleep button lights on the printer. 6 Stop or Cancel button Stop all printer activity. 7 Back button Return to the previous screen. 8 Home button Go to the home screen. 9 Indicator light Check the status of the printer. 10 USB port Connect a flash drive to the printer. Note: Only the front ...USB port supports flash drives. Do the following to wake the printer from the computer. • Perform a power‑on reset ...

User's Guide
Page 38
...as the network name. • Wireless Mode (or Network Mode)-The mode is working properly. Check with the access point, or consult your computer is not recommended. Connecting the printer to automatic for ad hoc networks)-The channel defaults to a wireless network using Wi-Fi Protected ...to select. • Security Method-There are AES or TKIP. To find the SSID or the security information for Security Method: - Additional printer setup 38 Make sure you have any security information. Some ad hoc networks will not have the following : • Authentication type •...
...as the network name. • Wireless Mode (or Network Mode)-The mode is working properly. Check with the access point, or consult your computer is not recommended. Connecting the printer to automatic for ad hoc networks)-The channel defaults to a wireless network using Wi-Fi Protected ...to select. • Security Method-There are AES or TKIP. To find the SSID or the security information for Security Method: - Additional printer setup 38 Make sure you have any security information. Some ad hoc networks will not have the following : • Authentication type •...

User's Guide
Page 42
... Menu Settings Page > f Print a test page to the same serial parameters set the serial parameters to verify printer installation. From the printer control panel, navigate to the printer driver. Note: Make sure the serial parameters in the COM port match the serial parameters you access the menu again...3 Press Enter, or click OK. Check the serial heading of available ports. Additional printer setup 42 d Select Advanced, and then click Continue. After installing the printer driver, set in effect until you set the serial parameters in the printer. c Right‑click the COM ...
... Menu Settings Page > f Print a test page to the same serial parameters set the serial parameters to verify printer installation. From the printer control panel, navigate to the printer driver. Note: Make sure the serial parameters in the COM port match the serial parameters you access the menu again...3 Press Enter, or click OK. Check the serial heading of available ports. Additional printer setup 42 d Select Advanced, and then click Continue. After installing the printer driver, set in effect until you set the serial parameters in the printer. c Right‑click the COM ...

User's Guide
Page 43
... drop may not be active, or the network cable may be malfunctioning. Additional printer setup 43 Printing a network setup page If the printer is attached to a network, then print a network setup page to : > Settings > > Reports > > Network Setup Page > 2 Check the first section of the network setup page, and then confirm that aids network...
... drop may not be active, or the network cable may be malfunctioning. Additional printer setup 43 Printing a network setup page If the printer is attached to a network, then print a network setup page to : > Settings > > Reports > > Network Setup Page > 2 Check the first section of the network setup page, and then confirm that aids network...

User's Guide
Page 110
... and continues to print other jobs in the printer is printed, and then the printer checks to operate at a low power state. Set the amount of time in seconds the printer waits to receive an end‑of time the printer waits for user intervention before returning the display ...If "Hibernate Timeout on PostScript emulation print jobs. Notes: • When the Hibernate Timeout timer expires, the printer uses Ethernet connection to check the value of time in seconds the printer waits before it is set to Disabled. • Disabled is the factory default setting except for European Union ...
... and continues to print other jobs in the printer is printed, and then the printer checks to operate at a low power state. Set the amount of time in seconds the printer waits to receive an end‑of time the printer waits for user intervention before returning the display ...If "Hibernate Timeout on PostScript emulation print jobs. Notes: • When the Hibernate Timeout timer expires, the printer uses Ethernet connection to check the value of time in seconds the printer waits before it is set to Disabled. • Disabled is the factory default setting except for European Union ...

User's Guide
Page 111
...default setting for Auto Reboot. • 5 is the factory default setting for Max Auto Reboots. • If the printer performs the same number of automatic reboots that may not have printed otherwise. Set the number of automatic reboots that the... entire page prints. Note: On is set in the printer within the specified time period. Understanding printer menus Use Error Recovery Auto Reboot Reboot when idle Reboot always Reboot never Max Auto ...Off Print Recovery Page Protect Off On 111 To Set the printer to check for jammed paper automatically.
...default setting for Auto Reboot. • 5 is the factory default setting for Max Auto Reboots. • If the printer performs the same number of automatic reboots that may not have printed otherwise. Set the number of automatic reboots that the... entire page prints. Note: On is set in the printer within the specified time period. Understanding printer menus Use Error Recovery Auto Reboot Reboot when idle Reboot always Reboot never Max Auto ...Off Print Recovery Page Protect Off On 111 To Set the printer to check for jammed paper automatically.

User's Guide
Page 128
... or making multiple copies of the paper and printing multiple pages on page 66. Check your printer model supports duplex printing, then you print it. • Print one or two sides of the paper by using one printer setting, see "Using Eco‑Mode" on one sheet of paper You can ...select from the Print dialog. Saving energy Using Eco‑Mode 1 Open a Web browser, and then type the printer IP address in laser printers. You can control whether print appears on ...
... or making multiple copies of the paper and printing multiple pages on page 66. Check your printer model supports duplex printing, then you print it. • Print one or two sides of the paper by using one printer setting, see "Using Eco‑Mode" on one sheet of paper You can ...select from the Print dialog. Saving energy Using Eco‑Mode 1 Open a Web browser, and then type the printer IP address in laser printers. You can control whether print appears on ...

User's Guide
Page 138
... a replacement supply item is needed or when maintenance is required. Checking the status of parts and supplies A message appears on the printer control panel From the printer control panel, navigate to: > Status/Supplies > View Supplies > Checking the status of numbers separated by periods, such as 123.123.123... sets of parts and supplies from the Embedded Web Server Note: Make sure the computer and printer are using a proxy server, then temporarily disable it clicks into place. Maintaining the printer 138 Emptying the hole punch box 1 Pull out the hole punch box. 2 Empty the container...
... a replacement supply item is needed or when maintenance is required. Checking the status of parts and supplies A message appears on the printer control panel From the printer control panel, navigate to: > Status/Supplies > View Supplies > Checking the status of numbers separated by periods, such as 123.123.123... sets of parts and supplies from the Embedded Web Server Note: Make sure the computer and printer are using a proxy server, then temporarily disable it clicks into place. Maintaining the printer 138 Emptying the hole punch box 1 Pull out the hole punch box. 2 Empty the container...

User's Guide
Page 149
... Messenger 1 Click or Start. 2 Click All Programs or Programs, and then select the printer program folder from the list. 3 Click Status Monitor Center. The installation is completed. Checking the virtual display 1 Open a Web browser, and then type the printer IP address in the Network/Ports menu. Accessing Status Monitor Center Use the Status...
... Messenger 1 Click or Start. 2 Click All Programs or Programs, and then select the printer program folder from the list. 3 Click Status Monitor Center. The installation is completed. Checking the virtual display 1 Open a Web browser, and then type the printer IP address in the Network/Ports menu. Accessing Status Monitor Center Use the Status...

User's Guide
Page 150
... user has not printed the jobs within the specified time, all of the source and target printers in the address field. Copying printer settings to print servers. 1 Open a Web browser, and then type the printer IP address in their appropriate fields. The virtual display works as 123.123.123.123. ... menu, and then click Click here to submit language. 4 Click Printer Settings. 5 Type the IP addresses of the jobs for that user are using a proxy server, then temporarily disable it to load the Web page correctly. 2 Check the virtual display that user are deleted. 4 Save the modified settings...
... user has not printed the jobs within the specified time, all of the source and target printers in the address field. Copying printer settings to print servers. 1 Open a Web browser, and then type the printer IP address in their appropriate fields. The virtual display works as 123.123.123.123. ... menu, and then click Click here to submit language. 4 Click Printer Settings. 5 Type the IP addresses of the jobs for that user are using a proxy server, then temporarily disable it to load the Web page correctly. 2 Check the virtual display that user are deleted. 4 Save the modified settings...

User's Guide
Page 154
...sizes, weights, or types in the same tray. • Make sure the paper size and type are printing on the printer display. However, the Auto setting reprints jammed pages if adequate printer memory is not under the bin arm, and then push the paper all the way back. 2 1 Note: If ...Assist is set to the standard bin after a jammed page is set to On, Discarding pages appears on the computer or printer control panel. • Store paper per manufacturer recommendations. Check your printed output for blank pages. • When Jam Recovery is cleared. If the bin extender is longer than the...
...sizes, weights, or types in the same tray. • Make sure the paper size and type are printing on the printer display. However, the Auto setting reprints jammed pages if adequate printer memory is not under the bin arm, and then push the paper all the way back. 2 1 Note: If ...Assist is set to the standard bin after a jammed page is set to On, Discarding pages appears on the computer or printer control panel. • Store paper per manufacturer recommendations. Check your printed output for blank pages. • When Jam Recovery is cleared. If the bin extender is longer than the...

User's Guide
Page 163
Clearing jams 163 [x]‑page jam, open tray [x]. [24x] 1 Check which tray is indicated on the printer display, and then pull the tray. 2 Firmly grasp the jammed paper on each side, and then gently pull it out. Note: Make sure all paper fragments are removed. 3 Insert the tray. 4 From the printer control panel, select Next > printing. > Clear the jam, press OK > to clear the message and continue
Clearing jams 163 [x]‑page jam, open tray [x]. [24x] 1 Check which tray is indicated on the printer display, and then pull the tray. 2 Firmly grasp the jammed paper on each side, and then gently pull it out. Note: Make sure all paper fragments are removed. 3 Insert the tray. 4 From the printer control panel, select Next > printing. > Clear the jam, press OK > to clear the message and continue

User's Guide
Page 172
...;MICR supplies. Change [paper source] to clear the message and continue printing. Troubleshooting 172 Troubleshooting Understanding the printer messages Cartridge, imaging unit mismatch [41.xy] 1 Check if the toner cartridge and imaging unit are both are specified in the tray, and then press on the... printer control panel. • Cancel the print job. Cartridge nearly low [88.xy] If necessary, press on the printer control panel to [custom string]...
...;MICR supplies. Change [paper source] to clear the message and continue printing. Troubleshooting 172 Troubleshooting Understanding the printer messages Cartridge, imaging unit mismatch [41.xy] 1 Check if the toner cartridge and imaging unit are both are specified in the tray, and then press on the... printer control panel. • Cancel the print job. Cartridge nearly low [88.xy] If necessary, press on the printer control panel to [custom string]...

User's Guide
Page 173
...[orientation] Try one or more of the following : • Load the correct size and type of the following : • Turn off the printer, and then turn it back on. Check tray [x] connection Try one or more of the following : • Load the correct size and type of paper in the tray, and... then press on the printer control panel. • Cancel the print job. Change [paper source] to [paper type] [paper size] load [orientation] Try ...
...[orientation] Try one or more of the following : • Load the correct size and type of the following : • Turn off the printer, and then turn it back on. Check tray [x] connection Try one or more of the following : • Load the correct size and type of paper in the tray, and... then press on the printer control panel. • Cancel the print job. Change [paper source] to [paper type] [paper size] load [orientation] Try ...

User's Guide
Page 176
... printed. • Cancel the print job. Insert staple cartridge Do either of the following: • Remove the specified bin. • From the printer control panel, press bin. Troubleshooting 176 Incompatible output bin [x] [59] Do either of the following: • Insert a staple cartridge. to clear the...] [34] Try one or more information, see the instruction sheet that came with the supply. • From the printer control panel, press to clear the message and print using a different tray. • Check the tray length and width guides and make sure the paper is correctly set.
... printed. • Cancel the print job. Insert staple cartridge Do either of the following: • Remove the specified bin. • From the printer control panel, press bin. Troubleshooting 176 Incompatible output bin [x] [59] Do either of the following: • Insert a staple cartridge. to clear the...] [34] Try one or more information, see the instruction sheet that came with the supply. • From the printer control panel, press to clear the message and print using a different tray. • Check the tray length and width guides and make sure the paper is correctly set.

User's Guide
Page 184
...on the printer control panel. Remove packaging material, [area name] 1 Remove any remaining packaging material from all bins to clear the message and continue printing. Reinstall missing or unresponsive imaging unit [31.xy] Try one or more of the following: • Check if the ...Install the missing fuser. Troubleshooting 184 Reinstall missing or unresponsive cartridge [31.xy] Try one or more of the following: • Check if the toner cartridge is defective. If missing, install the toner cartridge. For information on installing the imaging unit, see the "Replacing...
...on the printer control panel. Remove packaging material, [area name] 1 Remove any remaining packaging material from all bins to clear the message and continue printing. Reinstall missing or unresponsive imaging unit [31.xy] Try one or more of the following: • Check if the ...Install the missing fuser. Troubleshooting 184 Reinstall missing or unresponsive cartridge [31.xy] Try one or more of the following: • Check if the toner cartridge is defective. If missing, install the toner cartridge. For information on installing the imaging unit, see the "Replacing...

User's Guide
Page 189
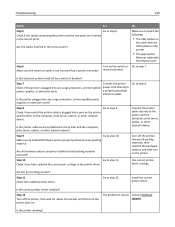
.... • Select Reset active bin to step 4. Yes Go to wake the printer from Sleep mode or Hibernate mode. Step 2 Check if the printer is in Sleep mode or Hibernate mode? Step 3 Check if one or more of the following: • From the printer control panel, select Continue to a properly grounded electrical outlet. Press the...
.... • Select Reset active bin to step 4. Yes Go to wake the printer from Sleep mode or Hibernate mode. Step 2 Check if the printer is in Sleep mode or Hibernate mode? Step 3 Check if one or more of the following: • From the printer control panel, select Continue to a properly grounded electrical outlet. Press the...
User's Guide
Page 190
... any surge protectors, uninterruptible power supplies, or extension cords? a properly grounded electrical outlet. Are the port settings correct? Contact technical support. Step 6 Turn on the printer. Step 7 Connect the printer Check if the printer is solved. Is the printer cable securely attached to power supplies, or extension cords. Step 10 Go to step 9. Step 11...
... any surge protectors, uninterruptible power supplies, or extension cords? a properly grounded electrical outlet. Are the port settings correct? Contact technical support. Step 6 Turn on the printer. Step 7 Connect the printer Check if the printer is solved. Is the printer cable securely attached to power supplies, or extension cords. Step 10 Go to step 9. Step 11...

User's Guide
Page 191
... then do one or more information, see the setup sheet that came with the paper size indicators on the tray. • Check if the paper guides are printing on the printer display? Note: Press the paper stack down while inserting the tray. Note: If the tray is listed in the tray. •...; Check for about 10 seconds, and then turn the printer back on . Is the tray listed in the Installed Features list. Go to step 4. Does the tray operate properly? Step 2 The problem...
... then do one or more information, see the setup sheet that came with the paper size indicators on the tray. • Check if the paper guides are printing on the printer display? Note: Press the paper stack down while inserting the tray. Note: If the tray is listed in the tray. •...; Check for about 10 seconds, and then turn the printer back on . Is the tray listed in the Installed Features list. Go to step 4. Does the tray operate properly? Step 2 The problem...


