
Handling swollen Lithium-ion batteries
Page 1
... the battery cells Swollen battery may be replaced and disposed of any type to reassemble a damaged or swollen battery into a notebook PC. ● Swollen batteries should be trademarks of the laptop. Contact Dell product support at an approved recycling center. To discharge the battery, unplug the AC adapter from Dell that is the potential for assistance and further instructions. ● Using a non-Dell or incompatible battery may...
... the battery cells Swollen battery may be replaced and disposed of any type to reassemble a damaged or swollen battery into a notebook PC. ● Swollen batteries should be trademarks of the laptop. Contact Dell product support at an approved recycling center. To discharge the battery, unplug the AC adapter from Dell that is the potential for assistance and further instructions. ● Using a non-Dell or incompatible battery may...
Service Manual
Page 10
... all open applications. 2 Shut down your computer. Click Start → Power → Shut down instructions. 3 Disconnect your computer and all attached devices from their electrical outlets. 4 Disconnect all attached network devices and peripherals, such as keyboard, mouse, and monitor from your computer. 5 Remove any media card and optical disc from potential damage and ensure your computer, read the safety information that the work surface is...
... all open applications. 2 Shut down your computer. Click Start → Power → Shut down instructions. 3 Disconnect your computer and all attached devices from their electrical outlets. 4 Disconnect all attached network devices and peripherals, such as keyboard, mouse, and monitor from your computer. 5 Remove any media card and optical disc from potential damage and ensure your computer, read the safety information that the work surface is...
Service Manual
Page 50
... Compliance home page at www.dell.com/regulatory_compliance. Procedure 1 Disconnect the coin-cell battery cable from the routing guide on the system board. 3 Peel the tape to step 4 in "Removing the hard drive". 3 Remove the wireless card. 4 Remove the solid-state drive. 5 Remove the rear-I/O cover. 6 Remove the computer base. CAUTION: Removing the coin-cell battery resets the BIOS setup program's settings to default. Removing the coin-cell battery WARNING: Before working inside your computer, read...
... Compliance home page at www.dell.com/regulatory_compliance. Procedure 1 Disconnect the coin-cell battery cable from the routing guide on the system board. 3 Peel the tape to step 4 in "Removing the hard drive". 3 Remove the wireless card. 4 Remove the solid-state drive. 5 Remove the rear-I/O cover. 6 Remove the computer base. CAUTION: Removing the coin-cell battery resets the BIOS setup program's settings to default. Removing the coin-cell battery WARNING: Before working inside your computer, read...
Service Manual
Page 67
... in "Removing the hard drive". 3 Remove the wireless card. 4 Remove the solid-state drive. 5 Remove the rear-I/O cover. 6 Remove the computer base. 7 Remove the memory modules. Procedure 1 Turn the computer over. 2 Peel the tape to access the display cable on the system board. 3 Open the latch and disconnect the display cable from the system board, note the location of the connectors so that shipped with your computer and follow the instructions in After working inside your...
... in "Removing the hard drive". 3 Remove the wireless card. 4 Remove the solid-state drive. 5 Remove the rear-I/O cover. 6 Remove the computer base. 7 Remove the memory modules. Procedure 1 Turn the computer over. 2 Peel the tape to access the display cable on the system board. 3 Open the latch and disconnect the display cable from the system board, note the location of the connectors so that shipped with your computer and follow the instructions in After working inside your...

Service Manual
Page 121
... "Removing the hard drive". 3 Remove the wireless card. 4 Remove the solid-state drive. 5 Remove the rear-I/O cover. 6 Remove the computer base. 7 Remove the coin-cell battery. 8 Remove the speakers. 9 Remove the I/O board. 10 Remove the subwoofer. 11 Remove the memory modules. 12 Follow the procedure from step 1 to step 22 in Before working inside your computer, follow the steps in "Removing the system board". 13 Remove the power-button board. 14 Remove the power-adapter port. 15 Remove the battery. 16 Remove the touchpad. 17 Remove the keyboard...
... "Removing the hard drive". 3 Remove the wireless card. 4 Remove the solid-state drive. 5 Remove the rear-I/O cover. 6 Remove the computer base. 7 Remove the coin-cell battery. 8 Remove the speakers. 9 Remove the I/O board. 10 Remove the subwoofer. 11 Remove the memory modules. 12 Follow the procedure from step 1 to step 22 in Before working inside your computer, follow the steps in "Removing the system board". 13 Remove the power-button board. 14 Remove the power-adapter port. 15 Remove the battery. 16 Remove the touchpad. 17 Remove the keyboard...
Service Manual
Page 125
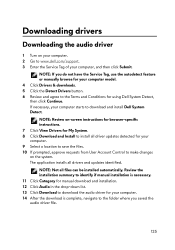
... manual installation is complete, navigate to download the audio driver for using Dell System Detect, then click Continue. If necessary, your computer starts to www.dell.com/support. 3 Enter the Service Tag of your computer. 2 Go to download and install Dell System Detect. NOTE: Not all drivers and updates identified. The application installs all files can be installed automatically. Downloading drivers Downloading the audio driver 1 Turn on the system. NOTE: Review on-screen instructions for browser-specific instructions. 7 Click View Drivers...
... manual installation is complete, navigate to download the audio driver for using Dell System Detect, then click Continue. If necessary, your computer starts to www.dell.com/support. 3 Enter the Service Tag of your computer. 2 Go to download and install Dell System Detect. NOTE: Not all drivers and updates identified. The application installs all files can be installed automatically. Downloading drivers Downloading the audio driver 1 Turn on the system. NOTE: Review on-screen instructions for browser-specific instructions. 7 Click View Drivers...
Service Manual
Page 126
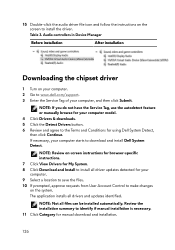
... instructions on the screen to www.dell.com/support. 3 Enter the Service Tag of your computer, and then click Submit. Audio controllers in Device Manager Before installation After installation Downloading the chipset driver 1 Turn on your computer. 2 Go to install the driver. The application installs all files can be installed automatically. NOTE: Not all drivers and updates identified. Table 3. If necessary, your computer model. 4 Click Drivers & downloads. 5 Click the Detect Drivers button. 6 Review and agree to download and install Dell...
... instructions on the screen to www.dell.com/support. 3 Enter the Service Tag of your computer, and then click Submit. Audio controllers in Device Manager Before installation After installation Downloading the chipset driver 1 Turn on your computer. 2 Go to install the driver. The application installs all files can be installed automatically. NOTE: Not all drivers and updates identified. Table 3. If necessary, your computer model. 4 Click Drivers & downloads. 5 Click the Detect Drivers button. 6 Review and agree to download and install Dell...
Service Manual
Page 127
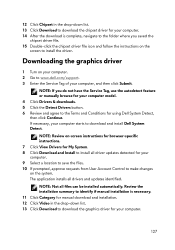
... chipset driver file icon and follow the instructions on the screen to install the driver. NOTE: Review on-screen instructions for browser-specific instructions. 7 Click View Drivers for My System. 8 Click Download and Install to install all driver updates detected for your computer. 14 After the download is necessary. 11 Click Category for manual download and installation. 12 Click Video in the drop-down list. 13 Click Download to www.dell.com/support. 3 Enter the Service Tag...
... chipset driver file icon and follow the instructions on the screen to install the driver. NOTE: Review on-screen instructions for browser-specific instructions. 7 Click View Drivers for My System. 8 Click Download and Install to install all driver updates detected for your computer. 14 After the download is necessary. 11 Click Category for manual download and installation. 12 Click Video in the drop-down list. 13 Click Download to www.dell.com/support. 3 Enter the Service Tag...
Service Manual
Page 128
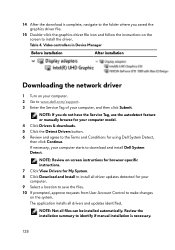
.... Video controllers in Device Manager Before installation After installation Downloading the network driver 1 Turn on -screen instructions for browser-specific instructions. 7 Click View Drivers for My System. 8 Click Download and Install to install all driver updates detected for using Dell System Detect, then click Continue. Table 4. NOTE: Not all drivers and updates identified. NOTE: If you do not have the Service Tag, use the autodetect feature or manually browse for your computer model. 4 Click Drivers & downloads. 5 Click the Detect Drivers button. 6 Review and...
.... Video controllers in Device Manager Before installation After installation Downloading the network driver 1 Turn on -screen instructions for browser-specific instructions. 7 Click View Drivers for My System. 8 Click Download and Install to install all driver updates detected for using Dell System Detect, then click Continue. Table 4. NOTE: Not all drivers and updates identified. NOTE: If you do not have the Service Tag, use the autodetect feature or manually browse for your computer model. 4 Click Drivers & downloads. 5 Click the Detect Drivers button. 6 Review and...

Service Manual
Page 129
... computer model. 4 Click Drivers & downloads. 5 Click the Detect Drivers button. 6 Review and agree to the Terms and Conditions for your computer. 9 Select a location to save the files. 10 If prompted, approve requests from User Account Control to make changes on your computer. 2 Go to www.dell.com/support. 3 Enter the Service Tag of your computer, and then click Submit. If necessary, your computer starts to install all driver updates...
... computer model. 4 Click Drivers & downloads. 5 Click the Detect Drivers button. 6 Review and agree to the Terms and Conditions for your computer. 9 Select a location to save the files. 10 If prompted, approve requests from User Account Control to make changes on your computer. 2 Go to www.dell.com/support. 3 Enter the Service Tag of your computer, and then click Submit. If necessary, your computer starts to install all driver updates...
Service Manual
Page 130
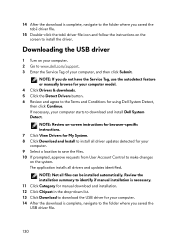
Downloading the USB driver 1 Turn on your computer. 2 Go to www.dell.com/support. 3 Enter the Service Tag of your computer. 9 Select a location to save the files. 10 If prompted, approve requests from User Account Control to make changes on the system. NOTE: Review on the screen to install the driver. NOTE: Not all drivers and updates identified. If necessary, your computer model. 4 Click Drivers & downloads. 5 Click the Detect Drivers button. 6 Review and agree to the...
Downloading the USB driver 1 Turn on your computer. 2 Go to www.dell.com/support. 3 Enter the Service Tag of your computer. 9 Select a location to save the files. 10 If prompted, approve requests from User Account Control to make changes on the system. NOTE: Review on the screen to install the driver. NOTE: Not all drivers and updates identified. If necessary, your computer model. 4 Click Drivers & downloads. 5 Click the Detect Drivers button. 6 Review and agree to the...
Service Manual
Page 131
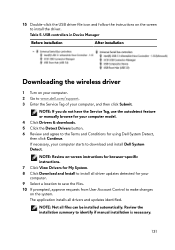
... Service Tag, use the autodetect feature or manually browse for your computer model. 4 Click Drivers & downloads. 5 Click the Detect Drivers button. 6 Review and agree to the Terms and Conditions for your computer. 9 Select a location to save the files. 10 If prompted, approve requests from User Account Control to make changes on -screen instructions for browser-specific instructions. 7 Click View Drivers for My System. 8 Click Download and Install to install all driver updates detected for using Dell...
... Service Tag, use the autodetect feature or manually browse for your computer model. 4 Click Drivers & downloads. 5 Click the Detect Drivers button. 6 Review and agree to the Terms and Conditions for your computer. 9 Select a location to save the files. 10 If prompted, approve requests from User Account Control to make changes on -screen instructions for browser-specific instructions. 7 Click View Drivers for My System. 8 Click Download and Install to install all driver updates detected for using Dell...
Service Manual
Page 134
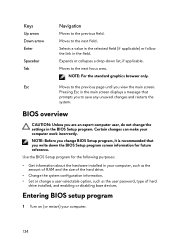
... in your computer, such as the amount of RAM and the size of the hard drive. • Change the system configuration information. • Set or change a user-selectable option, such as the user password, type of hard drive installed, and enabling or disabling base devices. Moves to save any unsaved changes and restarts the system. Pressing Esc in the BIOS Setup program. Use the BIOS Setup program for future reference. NOTE: For the standard...
... in your computer, such as the amount of RAM and the size of the hard drive. • Change the system configuration information. • Set or change a user-selectable option, such as the user password, type of hard drive installed, and enabling or disabling base devices. Moves to save any unsaved changes and restarts the system. Pressing Esc in the BIOS Setup program. Use the BIOS Setup program for future reference. NOTE: For the standard...
Service Manual
Page 135
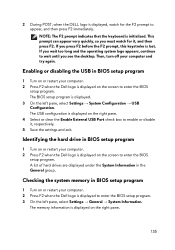
..., select Settings → General → System Information. Identifying the hard drive in BIOS setup program 1 Turn on or restart your computer. 2 Press F2 when the Dell logo is displayed on the screen to enable or disable it , and then press F2. The USB configuration is displayed on the right pane. 4 Select or clear the Enable External USB Port check box to enter the BIOS setup program. Enabling or disabling the USB in BIOS setup program 1 Turn on or...
..., select Settings → General → System Information. Identifying the hard drive in BIOS setup program 1 Turn on or restart your computer. 2 Press F2 when the Dell logo is displayed on the screen to enable or disable it , and then press F2. The USB configuration is displayed on the right pane. 4 Select or clear the Enable External USB Port check box to enter the BIOS setup program. Enabling or disabling the USB in BIOS setup program 1 Turn on or...
Service Manual
Page 138
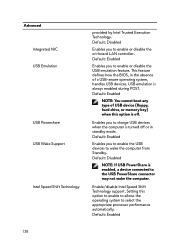
.... Setting this option is turned off . Default: Disabled Enables you to enable the USB devices to enable or disable the on-board LAN controller. Enables you to charge USB devices when the computer is off or in the absence of USB device (floppy, hard drive, or memory key) when this option to enable to allows the operating system to the USB PowerShare connector may not wake the computer. Enable/disable Intel Speed Shift Technology support. Advanced Integrated NIC USB Emulation USB Powershare USB Wake Support...
.... Setting this option is turned off . Default: Disabled Enables you to enable the USB devices to enable or disable the on-board LAN controller. Enables you to charge USB devices when the computer is off or in the absence of USB device (floppy, hard drive, or memory key) when this option to enable to allows the operating system to the USB PowerShare connector may not wake the computer. Enable/disable Intel Speed Shift Technology support. Advanced Integrated NIC USB Emulation USB Powershare USB Wake Support...
Service Manual
Page 139
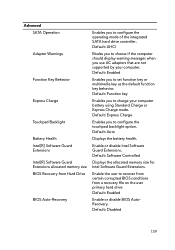
... Software Controlled Displays the allocated memory size for Intel Software Guard Extensions. Enable the user to choose if the computer should display warning messages when you to charge your computer. Default: AHCI Ebales you to recover from certain corrupted BIOS conditions from Hard Drive BIOS Auto-Recovery Enables you to configure the operating mode of the integrated SATA hard drive controller. Default: Express Charge Enables you to configure the touchpad backlight option. Default: Disabled 139 Advanced SATA Operation Adapter Warnings Function Key Behavior Express Charge...
... Software Controlled Displays the allocated memory size for Intel Software Guard Extensions. Enable the user to choose if the computer should display warning messages when you to charge your computer. Default: AHCI Ebales you to recover from certain corrupted BIOS conditions from Hard Drive BIOS Auto-Recovery Enables you to configure the operating mode of the integrated SATA hard drive controller. Default: Express Charge Enables you to configure the touchpad backlight option. Default: Disabled 139 Advanced SATA Operation Adapter Warnings Function Key Behavior Express Charge...
Service Manual
Page 144
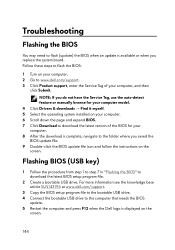
... replace the system board. Flashing BIOS (USB key) 1 Follow the procedure from step 1 to step 7 in "Flashing the BIOS" to download the latest BIOS setup program file. 2 Create a bootable USB drive. Troubleshooting Flashing the BIOS You may need to flash (update) the BIOS when an update is available or when you do not have the Service Tag, use the auto-detect feature or manually browse for your computer model. 4 Click Drivers & downloads → Find it myself. 5 Select the operating...
... replace the system board. Flashing BIOS (USB key) 1 Follow the procedure from step 1 to step 7 in "Flashing the BIOS" to download the latest BIOS setup program file. 2 Create a bootable USB drive. Troubleshooting Flashing the BIOS You may need to flash (update) the BIOS when an update is available or when you do not have the Service Tag, use the auto-detect feature or manually browse for your computer model. 4 Click Drivers & downloads → Find it myself. 5 Select the operating...
Service Manual
Page 145
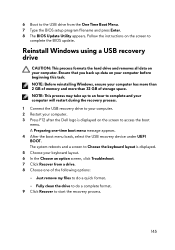
... instructions on the screen to Choose the keyboard layout is displayed. 5 Choose your keyboard layout. 6 In the Choose an option screen, click Troubleshoot. 7 Click Recover from the One Time Boot Menu. 7 Type the BIOS setup program filename and press Enter. 8 The BIOS Update Utility appears. Just remove my files to start the recovery process. 145 NOTE: Before reinstalling Windows, ensure your computer. 3 Press F12 after the Dell logo is displayed on the screen to the USB drive...
... instructions on the screen to Choose the keyboard layout is displayed. 5 Choose your keyboard layout. 6 In the Choose an option screen, click Troubleshoot. 7 Click Recover from the One Time Boot Menu. 7 Type the BIOS setup program filename and press Enter. 8 The BIOS Update Utility appears. Just remove my files to start the recovery process. 145 NOTE: Before reinstalling Windows, ensure your computer. 3 Press F12 after the Dell logo is displayed on the screen to the USB drive...
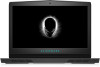
Setup and Specifications
Page 15
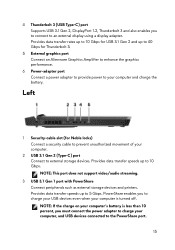
... computer's battery is less than 10 percent, you to the PowerShare port. 15 NOTE: This port does not support video/audio streaming. 3 USB 3.1 Gen 1 port with PowerShare Connect peripherals such as external storage devices and printers. NOTE: If the charge on your computer is turned off. Left 1 Security-cable slot (for Thunderbolt 3. 5 External graphics port Connect an Alienware Graphics Amplifier to enhance the graphics performance. 6 Power-adapter port Connect a power adapter to provide power to an external display using a display adapter.
... computer's battery is less than 10 percent, you to the PowerShare port. 15 NOTE: This port does not support video/audio streaming. 3 USB 3.1 Gen 1 port with PowerShare Connect peripherals such as external storage devices and printers. NOTE: If the charge on your computer is turned off. Left 1 Security-cable slot (for Thunderbolt 3. 5 External graphics port Connect an Alienware Graphics Amplifier to enhance the graphics performance. 6 Power-adapter port Connect a power adapter to provide power to an external display using a display adapter.
Setup and Specifications
Page 19
... M.2 card slot for Wi-Fi and Bluetooth combo card Communications Table 6. Communications specifications Ethernet Wireless 10/100/1000 Mbps Ethernet controller integrated on system board • Wi-Fi 802.11ac • Bluetooth 4.1 Wireless module Table 7. Wireless module specifications Transfer rate Frequency bands supported Encryption Up to 1733 Mbps Dual band 2.4 GHz/5 GHz • WEP • WPA • EAP • WPS • PMF • TKIP Audio Table 8. Audio specifications Controller...
... M.2 card slot for Wi-Fi and Bluetooth combo card Communications Table 6. Communications specifications Ethernet Wireless 10/100/1000 Mbps Ethernet controller integrated on system board • Wi-Fi 802.11ac • Bluetooth 4.1 Wireless module Table 7. Wireless module specifications Transfer rate Frequency bands supported Encryption Up to 1733 Mbps Dual band 2.4 GHz/5 GHz • WEP • WPA • EAP • WPS • PMF • TKIP Audio Table 8. Audio specifications Controller...


