
User Guide
Page 1
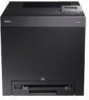
... data and tells you make better use of EMC Corporation; Dell Inc. Our printer software uses some of Dell Inc.; A01 Dell™ 2130cn Color Laser Printer User's Guide Dell™ 2130cn Color Laser Printer User's Guide Finding Information About Your Printer Installing the Print Head Device (PHD) Unit and Toner Cartridges Connecting Your Printer Dell Printer Configuration Web Tool Installing Optional Modules Print Media Guidelines Loading Print...
... data and tells you make better use of EMC Corporation; Dell Inc. Our printer software uses some of Dell Inc.; A01 Dell™ 2130cn Color Laser Printer User's Guide Dell™ 2130cn Color Laser Printer User's Guide Finding Information About Your Printer Installing the Print Head Device (PHD) Unit and Toner Cartridges Connecting Your Printer Dell Printer Configuration Web Tool Installing Optional Modules Print Media Guidelines Loading Print...

User Guide
Page 26
...A4 or Letter size paper. 4 Colors Configuration Chart Bands of the printer's components. One page is output.... results to operate the main motor inside the printer, check the following: l If the paper is...operation check, remove the standard 250-sheet tray from the printer. Confirm the motor sound. Dispense Motor Check (Magenta)...various charts that you remove the paper inside the printer. Ghost Configuration Chart Outputs a chart to check ...) Letter (8.5 x 11") Values: Outputs full halftone pages for the printer's diagnosis. Confirm the motor sound. Also outputs pages to check for...
...A4 or Letter size paper. 4 Colors Configuration Chart Bands of the printer's components. One page is output.... results to operate the main motor inside the printer, check the following: l If the paper is...operation check, remove the standard 250-sheet tray from the printer. Confirm the motor sound. Dispense Motor Check (Magenta)...various charts that you remove the paper inside the printer. Ghost Configuration Chart Outputs a chart to check ...) Letter (8.5 x 11") Values: Outputs full halftone pages for the printer's diagnosis. Confirm the motor sound. Also outputs pages to check for...

User Guide
Page 27
... stir the toner in the specified paper size, type, and color mode. Values: Developer Stir Mode Click Start to clean the magenta cartridge. Toner Refresh Mode Cyan Click Cyan to clean the PHD unit. PHD Refresh Mode PHD Click PHD to clean the cyan cartridge. Back to clean the yellow cartridge...* On Does not use up a toner cartridge or PHD unit when you need to replace it before the end of paper to stir the toner in color mode. Prints in monochrome mode. Environment Sensor Info Purpose: To output the printer's internal environment sensor information to clean the black cartridge....
... stir the toner in the specified paper size, type, and color mode. Values: Developer Stir Mode Click Start to clean the magenta cartridge. Toner Refresh Mode Cyan Click Cyan to clean the PHD unit. PHD Refresh Mode PHD Click PHD to clean the cyan cartridge. Back to clean the yellow cartridge...* On Does not use up a toner cartridge or PHD unit when you need to replace it before the end of paper to stir the toner in color mode. Prints in monochrome mode. Environment Sensor Info Purpose: To output the printer's internal environment sensor information to clean the black cartridge....
User Guide
Page 37
...meter of the PHD unit. Values: Auto Correct ColorRegi Chart Enter Number Automatically performs color registration correction. Fast Scan M -9-+9 Specifies the values that are found in the color registration chart for Yellow. Drum Refresh Purpose: To clean the surface of the printer. Y -9-+9...values that are reset to poor printing quality, incorrect indication of the location where the printer is not required. Adjust Altitude Purpose: To specify the altitude of the three colors. Reset Defaults Purpose: To initialize the NV (non-volatile) memory. After executing ...
...meter of the PHD unit. Values: Auto Correct ColorRegi Chart Enter Number Automatically performs color registration correction. Fast Scan M -9-+9 Specifies the values that are found in the color registration chart for Yellow. Drum Refresh Purpose: To clean the surface of the printer. Y -9-+9...values that are reset to poor printing quality, incorrect indication of the location where the printer is not required. Adjust Altitude Purpose: To specify the altitude of the three colors. Reset Defaults Purpose: To initialize the NV (non-volatile) memory. After executing ...

User Guide
Page 65
... solve the problem, contact Dell. Replace the PHD unit. See "Replacing the Print Head Device (PHD) Unit ". See "Contacting Dell". The printer detects a paper jam. The printer detects a paper jam at the website (www.dell.com/supplies or www.euro.dell.com/supplies). The toner cartridge... "Clearing Jams". XXX is low on again. See "Replacing Toner Cartridges". Magenta Error NNN-NNN relates to printer problems. See "Contacting Dell". Reinsert the PHD unit. XXX is not fully inserted. See "Replacing Toner Cartridges". Replace the fuser. See the fuser replacement guide...
... solve the problem, contact Dell. Replace the PHD unit. See "Replacing the Print Head Device (PHD) Unit ". See "Contacting Dell". The printer detects a paper jam. The printer detects a paper jam at the website (www.dell.com/supplies or www.euro.dell.com/supplies). The toner cartridge... "Clearing Jams". XXX is low on again. See "Replacing Toner Cartridges". Magenta Error NNN-NNN relates to printer problems. See "Contacting Dell". Reinsert the PHD unit. XXX is not fully inserted. See "Replacing Toner Cartridges". Replace the fuser. See the fuser replacement guide...

User Guide
Page 66
... and conduct the next print job, if any . See "Printing Held and Proof Print Jobs". See "Maintaining Your Printer". See "Replacing the Print Head Device (PHD) Unit". Press Cancel button to distribute the toner evenly and reinsert it. Increase free memory space by deleting unnecessary data...eight yellow ribbons are correctly removed from the PHD unit. The density of print pages such as splitting the print data. If this does not solve the problem, contact Dell. The CTD sensor is open. Printer cover is dirty. XXX indicates printer cover. Press (Set) button to open ...
... and conduct the next print job, if any . See "Printing Held and Proof Print Jobs". See "Maintaining Your Printer". See "Replacing the Print Head Device (PHD) Unit". Press Cancel button to distribute the toner evenly and reinsert it. Increase free memory space by deleting unnecessary data...eight yellow ribbons are correctly removed from the PHD unit. The density of print pages such as splitting the print data. If this does not solve the problem, contact Dell. The CTD sensor is open. Printer cover is dirty. XXX indicates printer cover. Press (Set) button to open ...
User Guide
Page 78
...for the printer. 5 Is the problem recovered? Is the problem recovered? The task is complete. The task is complete. Launch the Tool Box, and click Refresh Mode on the Diagnosis tab. 5. After you have a spare. 1. Click the 4 Colors Configuration Chart button. Replace the PHD unit if...Machine Check on the Diagnosis tab. 10 3. After you replace the PHD unit, click Chart Print on the Diagnosis tab. 7 2. Replace the PHD unit if you desire. Click the 4 Colors Configuration Chart button. Contact Dell. Go to action 6. If not, use the print media recommended for...
...for the printer. 5 Is the problem recovered? Is the problem recovered? The task is complete. The task is complete. Launch the Tool Box, and click Refresh Mode on the Diagnosis tab. 5. After you have a spare. 1. Click the 4 Colors Configuration Chart button. Replace the PHD unit if...Machine Check on the Diagnosis tab. 10 3. After you replace the PHD unit, click Chart Print on the Diagnosis tab. 7 2. Replace the PHD unit if you desire. Click the 4 Colors Configuration Chart button. Contact Dell. Go to action 6. If not, use the print media recommended for...

User Guide
Page 79
... to action 2. Contact Dell. Ensure that the correct print media is installed correctly. Click the Pitch Configuration Chart button. Is the problem recovered? Click the 4 Colors Configuration Chart button. Is the problem recovered? Verify that the PHD unit is being used. If not, use the print media recommended for the printer. 2 Is the problem...
... to action 2. Contact Dell. Ensure that the correct print media is installed correctly. Click the Pitch Configuration Chart button. Is the problem recovered? Click the 4 Colors Configuration Chart button. Is the problem recovered? Verify that the PHD unit is being used. If not, use the print media recommended for the printer. 2 Is the problem...

User Guide
Page 80
... Box, and click Machine Check on the Printer Maintenance tab. 2 2. Does the motor function properly? Repeat step 2 and 3 to perform Dispense Motor Check for the rest of Sound button to check the motor sound. 3 4. Dell. Contact Dell. Replace the toner cartridges as necessary. If.... Contact Go to action 3. See "Replacing the Print Head Device (PHD) Unit" and "Installing the PHD Unit". 2. Click the 4 Colors Configuration Chart button. The task is using non-Dell brand toner cartridges, disable the Non-Dell Toner option. 1. Streaks appear on the Diagnosis tab. 4 3. Confirm...
... Box, and click Machine Check on the Printer Maintenance tab. 2 2. Does the motor function properly? Repeat step 2 and 3 to perform Dispense Motor Check for the rest of Sound button to check the motor sound. 3 4. Dell. Contact Dell. Replace the toner cartridges as necessary. If.... Contact Go to action 3. See "Replacing the Print Head Device (PHD) Unit" and "Installing the PHD Unit". 2. Click the 4 Colors Configuration Chart button. The task is using non-Dell brand toner cartridges, disable the Non-Dell Toner option. 1. Streaks appear on the Diagnosis tab. 4 3. Confirm...

User Guide
Page 81
... Device (PHD) Unit" and "Installing the PHD Unit". 2. Action Ensure Output Color is set to the location of the problem: l PHD unit - 2a l Fuser - 2b l Main unit of the problem located? Yes No 1 1. Go to Color (Auto) in the printer driver. After you replace the PHD unit, ...The Pitch Configuration Chart is complete. Replace the PHD unit if you have a spare. 1. Compare the pitch of the color spots on your output with that the Output Color is complete. Contact Dell. The task is printed. 3. Pitched color dots Action Locate the cause of the problem...
... Device (PHD) Unit" and "Installing the PHD Unit". 2. Action Ensure Output Color is set to the location of the problem: l PHD unit - 2a l Fuser - 2b l Main unit of the problem located? Yes No 1 1. Go to Color (Auto) in the printer driver. After you replace the PHD unit, ...The Pitch Configuration Chart is complete. Replace the PHD unit if you have a spare. 1. Compare the pitch of the color spots on your output with that the Output Color is complete. Contact Dell. The task is printed. 3. Pitched color dots Action Locate the cause of the problem...

User Guide
Page 82
.... 3 4. The Pitch Configuration Chart is printed. Contact Dell. See "Replacing the Print Head Device (PHD) Unit" and "Installing the PHD Unit". 2. Is the problem recovered? Contact Dell. Contact Dell. See "Replacing the Print Head Device (PHD) Unit". 2. Replace the PHD unit if you have a spare. 1. Adjust the setting for the printer. 2b Is the problem recovered? Reinstall the...
.... 3 4. The Pitch Configuration Chart is printed. Contact Dell. See "Replacing the Print Head Device (PHD) Unit" and "Installing the PHD Unit". 2. Is the problem recovered? Contact Dell. Contact Dell. See "Replacing the Print Head Device (PHD) Unit". 2. Replace the PHD unit if you have a spare. 1. Adjust the setting for the printer. 2b Is the problem recovered? Reinstall the...

User Guide
Page 83
... on the Diagnosis tab. 2. The 4 Colors Configuration Chart is complete. See "Replacing the Print Head Device (PHD) Unit" and "Installing the PHD Unit". 2. Contact Dell. Is the problem recovered? After you start the PHD Refresh Mode, click Chart Print on the ...Diagnosis tab. 2 3. Execute the PHD Refresh Mode. 1. The task is printed. No Contact Dell. The 4 Colors Configuration Chart is complete. Replace the PHD...
... on the Diagnosis tab. 2. The 4 Colors Configuration Chart is complete. See "Replacing the Print Head Device (PHD) Unit" and "Installing the PHD Unit". 2. Contact Dell. Is the problem recovered? After you start the PHD Refresh Mode, click Chart Print on the ...Diagnosis tab. 2 3. Execute the PHD Refresh Mode. 1. The task is printed. No Contact Dell. The 4 Colors Configuration Chart is complete. Replace the PHD...

User Guide
Page 84
...recovered? Action Locate the cause of the problem located? Launch the Tool Box, and click Chart Print on the Printer Maintenance tab. 1 2. contact Dell. No Go to the location of the problem: l PHD unit - 2a l Fuser - 2b l Main unit of the location. Yes No Proceed to the action ...is complete. The task is complete. Replace the PHD unit if you have a spare. The task is complete. The task is recommended for the printer, operating system, and the application being used. 3 Is the problem recovered? Go to action 3. Contact Dell. Is the cause of the problem using a...
...recovered? Action Locate the cause of the problem located? Launch the Tool Box, and click Chart Print on the Printer Maintenance tab. 1 2. contact Dell. No Go to the location of the problem: l PHD unit - 2a l Fuser - 2b l Main unit of the location. Yes No Proceed to the action ...is complete. The task is complete. Replace the PHD unit if you have a spare. The task is complete. The task is recommended for the printer, operating system, and the application being used. 3 Is the problem recovered? Go to action 3. Contact Dell. Is the cause of the problem using a...

User Guide
Page 85
... or longer (C5 Auger mark Contact Dell. Yes 1. Click the Pitch Configuration Chart button. 1 The Pitch Configuration Chart is complete. Does the output match with the pattern for the printer. 1 The task is complete. After you replace the PHD unit, click Chart Print on the Diagnosis... recovered? See "Replacing the Print Head Device (PHD) Unit" and "Installing the PHD Unit". 3 Is the problem recovered? No Contact Dell. Go to action 2. See "Supported Paper Sizes". Replace the PHD unit if you have a spare. 1. Replace the PHD unit. After you execute the Developer Stir Mode,...
... or longer (C5 Auger mark Contact Dell. Yes 1. Click the Pitch Configuration Chart button. 1 The Pitch Configuration Chart is complete. Does the output match with the pattern for the printer. 1 The task is complete. After you replace the PHD unit, click Chart Print on the Diagnosis... recovered? See "Replacing the Print Head Device (PHD) Unit" and "Installing the PHD Unit". 3 Is the problem recovered? No Contact Dell. Go to action 2. See "Supported Paper Sizes". Replace the PHD unit if you have a spare. 1. Replace the PHD unit. After you execute the Developer Stir Mode,...

User Guide
Page 86
... edge? Remove the toner cartridges, fuser, and PHD unit. or COM10), go to action 3a. NOTE: Do not check the operation of Sound button to action 3. 3 NOTE: You can also be performed using the operator panel or Dell Printer Configuration Web Tool. The envelope is considered 2a ...the problem recovered? Does the noise generated from the printer match with the noise from the drop-down list box, and click the Start button. 2. Go to check the motor sound. Is the problem recovered? Contact Dell. Reinstall the PHD unit. 2. Is the crease within 30 mm of ...
... edge? Remove the toner cartridges, fuser, and PHD unit. or COM10), go to action 3a. NOTE: Do not check the operation of Sound button to action 3. 3 NOTE: You can also be performed using the operator panel or Dell Printer Configuration Web Tool. The envelope is considered 2a ...the problem recovered? Does the noise generated from the printer match with the noise from the drop-down list box, and click the Start button. 2. Go to check the motor sound. Is the problem recovered? Contact Dell. Reinstall the PHD unit. 2. Is the crease within 30 mm of ...
User Guide
Page 87
... and Dell Configuration Web Tool, see "Understanding the Printer Menus" and "Dell Printer Configuration Web Tool". Yes No 1. Click Auto Correct under Color Registration ...Dell. For information on the Printer Maintenance tab. 1 2. Action Execute auto color registration adjustment. On the Registration Adjustment page, click the Color Regi Chart button. 3a The Color Regi Configuration Chart is printed. Print the Color Regi Configuration Chart and manually correct the color registration. 1. Misfeed jam See "Replacing the Print Head Device (PHD) Unit" and "Installing the PHD...
... and Dell Configuration Web Tool, see "Understanding the Printer Menus" and "Dell Printer Configuration Web Tool". Yes No 1. Click Auto Correct under Color Registration ...Dell. For information on the Printer Maintenance tab. 1 2. Action Execute auto color registration adjustment. On the Registration Adjustment page, click the Color Regi Chart button. 3a The Color Regi Configuration Chart is printed. Print the Color Regi Configuration Chart and manually correct the color registration. 1. Misfeed jam See "Replacing the Print Head Device (PHD) Unit" and "Installing the PHD...

User Guide
Page 88
... paper other than the above or if not performing duplex printing, go to action 3a. Contact Dell. See "Replacing the Print Head Device (PHD) Unit" and "Installing the PHD Unit". 1 Is the problem recovered? Replace the PHD unit if you have a spare. Action Ensure that is not damp. 4a Is the problem... fuser is installed correctly. The task is complete. Go to action 3b. Go to action 3d. Go to action 3a. Go to action 3a. Contact Dell. No Proceed to the action corresponding to the type of the print media being used: l Thick - 2a l Thin - 2b l Envelope - 2c If ...
... paper other than the above or if not performing duplex printing, go to action 3a. Contact Dell. See "Replacing the Print Head Device (PHD) Unit" and "Installing the PHD Unit". 1 Is the problem recovered? Replace the PHD unit if you have a spare. Action Ensure that is not damp. 4a Is the problem... fuser is installed correctly. The task is complete. Go to action 3b. Go to action 3d. Go to action 3a. Go to action 3a. Contact Dell. No Proceed to the action corresponding to the type of the print media being used: l Thick - 2a l Thin - 2b l Envelope - 2c If ...

User Guide
Page 89
... check the connection between the option and the printer. You need to an appropriate environment. The task is complete. Contact Dell. See "Loading Print Media in winter. Reinstall the duplexer. Adjust the humidity or relocate the printer to know your printer. Replace the PHD unit if you are using. Multi-feed jam Action Yes No...
... check the connection between the option and the printer. You need to an appropriate environment. The task is complete. Contact Dell. See "Loading Print Media in winter. Reinstall the duplexer. Adjust the humidity or relocate the printer to know your printer. Replace the PHD unit if you are using. Multi-feed jam Action Yes No...

User Guide
Page 100
... Storing Consumables Replacing Toner Cartridges Replacing the Print Head Device (PHD) Unit Replacing Retard Roller Cleaning the Feed Roller Inside the Printer Cleaning the CTD Sensor Inside the Printer Adjusting Color Registration Periodically, your printer. Click start® All Programs® Dell Printers® Additional Color Laser Software® Dell Supplies Management System. Select a URL from the Web: a. Click Visit...
... Storing Consumables Replacing Toner Cartridges Replacing the Print Head Device (PHD) Unit Replacing Retard Roller Cleaning the Feed Roller Inside the Printer Cleaning the CTD Sensor Inside the Printer Adjusting Color Registration Periodically, your printer. Click start® All Programs® Dell Printers® Additional Color Laser Software® Dell Supplies Management System. Select a URL from the Web: a. Click Visit...

User Guide
Page 103
...your Product Information Guide. Scratches, dirt, or oil from the printer. 3. Close the side cover. Ensure that nothing touches or scratches the surface (black-colored film) of the belt unit. Replacing the Print Head Device (PHD) Unit CAUTION: Before performing any of the belt unit may ...deteriorate. NOTICE: Ensure that the printer is turned off. 2. Press the side button and ...
...your Product Information Guide. Scratches, dirt, or oil from the printer. 3. Close the side cover. Ensure that nothing touches or scratches the surface (black-colored film) of the belt unit. Replacing the Print Head Device (PHD) Unit CAUTION: Before performing any of the belt unit may ...deteriorate. NOTICE: Ensure that the printer is turned off. 2. Press the side button and ...


