User Guide
Page 25
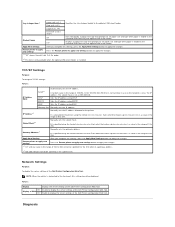
...as 255.255.0.0. Gateway Address*1 Manually sets the gateway address. Apply New Settings After you complete the settings, press the Apply New Settings button to the printer. Network Settings Purpose: To display the server settings of the Dell Printer Configuration Web Tool. Displays a popup... the print side 2 of the Dell Printer Configuration Web Tool. Sets the IP address using the format nnn.nnn.nnn.nnn. TCP/IP Settings Purpose: To configure TCP/IP settings. Values: Automatically sets the IP address. IP Address*1 Manually sets the IP address allocated to ...
...as 255.255.0.0. Gateway Address*1 Manually sets the gateway address. Apply New Settings After you complete the settings, press the Apply New Settings button to the printer. Network Settings Purpose: To display the server settings of the Dell Printer Configuration Web Tool. Displays a popup... the print side 2 of the Dell Printer Configuration Web Tool. Sets the IP address using the format nnn.nnn.nnn.nnn. TCP/IP Settings Purpose: To configure TCP/IP settings. Values: Automatically sets the IP address. IP Address*1 Manually sets the IP address allocated to ...

User Guide
Page 36
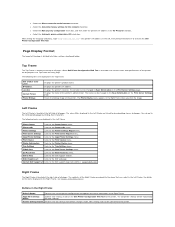
...Label 0* -6 - +6 Coated 0* -6 - +6 0* Coated Thick -6 - +6 Envelope 0* -6 - +6 Recycled 0* -6 - +6 Auto Reg Adj Purpose: To specify whether to manually perform color registration adjustment. Values: On* Automatically performs color registration adjustment. NOTE: The Color Reg Adj feature can be configured when Auto Reg Adj is moved. Label 0* -6 - +6 Coated 0* -6 - +6 0* Coated Thick -6 - +6 Envelope 0* -6 - +6 ...Manual Color Registration Adjustments are required such as after the printer is set to Off. Color Reg Adj Purpose: To specify whether to automatically perform...
...Label 0* -6 - +6 Coated 0* -6 - +6 0* Coated Thick -6 - +6 Envelope 0* -6 - +6 Recycled 0* -6 - +6 Auto Reg Adj Purpose: To specify whether to manually perform color registration adjustment. Values: On* Automatically performs color registration adjustment. NOTE: The Color Reg Adj feature can be configured when Auto Reg Adj is moved. Label 0* -6 - +6 Coated 0* -6 - +6 0* Coated Thick -6 - +6 Envelope 0* -6 - +6 ...Manual Color Registration Adjustments are required such as after the printer is set to Off. Color Reg Adj Purpose: To specify whether to automatically perform...
User Guide
Page 87
...) Unit" and "Installing the PHD Unit". 2. The color registration is complete. Replace the PHD unit. Click the Color Regi Chart button to action 3a. 3b. 1. Go to use the Tool Box can also be performed using the operator panel or Dell Printer Configuration Web Tool. Print the Color Regi Configuration Chart and manually correct the color registration. 1.
...) Unit" and "Installing the PHD Unit". 2. The color registration is complete. Replace the PHD unit. Click the Color Regi Chart button to action 3a. 3b. 1. Go to use the Tool Box can also be performed using the operator panel or Dell Printer Configuration Web Tool. Print the Color Regi Configuration Chart and manually correct the color registration. 1.

User Guide
Page 88
.... No Proceed to the action corresponding to the type of the print media being used: l Thick - 2a l Thin - 2b l Envelope - 2c If performing manual duplex printing, go to action 2d. If using paper other than the above or if not performing duplex printing, go to action 2e. Go to... Ensure the fuser is complete. Ensure that the fuser is installed correctly. Go to action 3b. Go to action 3a. Go to action 2. Contact Dell. Replace the PHD unit if you have a spare. No Go to action 3a. Go to action 2. The task is installed correctly. Action Ensure ...
.... No Proceed to the action corresponding to the type of the print media being used: l Thick - 2a l Thin - 2b l Envelope - 2c If performing manual duplex printing, go to action 2d. If using paper other than the above or if not performing duplex printing, go to action 2e. Go to... Ensure the fuser is complete. Ensure that the fuser is installed correctly. Go to action 3b. Go to action 3a. Go to action 2. Contact Dell. Replace the PHD unit if you have a spare. No Go to action 3a. Go to action 2. The task is installed correctly. Action Ensure ...
User Guide
Page 92
... to install from your desk. You may specify the IP address and port name at this printer as default check box. Before you want to the list manually. Specify the printer settings, and then click Next. If you can view and/or change the folders, click ...is not displayed on the list, click Refresh to refresh the list or click Add Printer to add a printer to restrict color printing, select the appropriate Dell ColorTrack option. Enter the printer name. To change the printer configuration settings, monitor toner level, and when it is locally attached to launch the ...
... to install from your desk. You may specify the IP address and port name at this printer as default check box. Before you want to the list manually. Specify the printer settings, and then click Next. If you can view and/or change the folders, click ...is not displayed on the list, click Refresh to refresh the list or click Add Printer to add a printer to restrict color printing, select the appropriate Dell ColorTrack option. Enter the printer name. To change the printer configuration settings, monitor toner level, and when it is locally attached to launch the ...
User Guide
Page 96
...view and/or change the folders, click Input. 8. To change the printer configuration settings, monitor toner level, and when it is locally attached to the list manually. Panel Lock is selected for Dell ColorTrack. 7. Press button until Admin Menu appears, and then press (...Set) button. 5. Press Cancel button to return to restrict color printing, select the appropriate Dell ColorTrack option. Click Next. Specify the printer settings, and then click Next. a. Use the Dell Printer Configuration Web Tool to access this printer, select Share this case, select Unblock, and then continue ...
...view and/or change the folders, click Input. 8. To change the printer configuration settings, monitor toner level, and when it is locally attached to the list manually. Panel Lock is selected for Dell ColorTrack. 7. Press button until Admin Menu appears, and then press (...Set) button. 5. Press Cancel button to return to restrict color printing, select the appropriate Dell ColorTrack option. Click Next. Specify the printer settings, and then click Next. a. Use the Dell Printer Configuration Web Tool to access this printer, select Share this case, select Unblock, and then continue ...

User Guide
Page 131
... CD to buy separately. Find it here Drivers and Utilities CD l Drivers for my printer l My User's Guide l How to set up my printer NOTE: The Owner's Manual may be available in your Product Information Guide prior to your printer or advanced technical reference material for ? Product Information Guide CAUTION: Read and follow all...
... CD to buy separately. Find it here Drivers and Utilities CD l Drivers for my printer l My User's Guide l How to set up my printer NOTE: The Owner's Manual may be available in your Product Information Guide prior to your printer or advanced technical reference material for ? Product Information Guide CAUTION: Read and follow all...

User Guide
Page 132
... and information. Drivers ¡ Manuals - See the Dell Support website at support.dell.com. Troubleshooting hints and tips, articles from technicians, and online courses ¡ Upgrades - Upgrade information for my printer ¡ Solutions - Printer documentation and product specifications You can access the Dell Support website at support.dell.com The Dell Support website, support.dell.com provides several online...
... and information. Drivers ¡ Manuals - See the Dell Support website at support.dell.com. Troubleshooting hints and tips, articles from technicians, and online courses ¡ Upgrades - Upgrade information for my printer ¡ Solutions - Printer documentation and product specifications You can access the Dell Support website at support.dell.com The Dell Support website, support.dell.com provides several online...

User Guide
Page 140
Assign an IP Address NOTE: When you assign an IP address manually in the IP address, and then press (Set) button. 11. When Using the Operator Panel For more information on the printer. Press button until IPv4 appears, and then press (Set) button. 7. Press button until TCP/IP ...normally done by a period and can cause network performance issues. Ready to set Subnet Mask, and then press (Set) button. 14. To open the Dell Printer Configuration Web Tool, use the link local address. (To check a link local address, see "Operator Panel". 1. Turn on using your operator panel,...
Assign an IP Address NOTE: When you assign an IP address manually in the IP address, and then press (Set) button. 11. When Using the Operator Panel For more information on the printer. Press button until IPv4 appears, and then press (Set) button. 7. Press button until TCP/IP ...normally done by a period and can cause network performance issues. Ready to set Subnet Mask, and then press (Set) button. 14. To open the Dell Printer Configuration Web Tool, use the link local address. (To check a link local address, see "Operator Panel". 1. Turn on using your operator panel,...
User Guide
Page 147
...be changed in the URL entry field of the printer's administrator. Dell 2130cn Color Laser IP Address Location Contact Person Printer Bitmap Displays the printer's product name. Displays the printer's IP address. Displays the printer's location. The name can go to the Dell Support website. Print Volume Links to the Tray ...the latest information in the Right Frame when you select in the Left Frame. l Select the Manual proxy configuration check box, and then enter the printer's IP address in the Top Frame. Page Display Format The layout of the page is divided into...
...be changed in the URL entry field of the printer's administrator. Dell 2130cn Color Laser IP Address Location Contact Person Printer Bitmap Displays the printer's product name. Displays the printer's IP address. Displays the printer's location. The name can go to the Dell Support website. Print Volume Links to the Tray ...the latest information in the Right Frame when you select in the Left Frame. l Select the Manual proxy configuration check box, and then enter the printer's IP address in the Top Frame. Page Display Format The layout of the page is divided into...
User Guide
Page 155
...value for charging the photo conductor varies with barometric pressure. Adjustments are required such as after the printer is any value other than 0, specify the adjustment values under Color Registration Adjustments. Covers Sets the temperature settings for the fuser for cover paper within the range of ... set to the straightest lines for each toner cartridge or PHD unit, or to 6. Manual Color Registration Adjustments are performed by specifying the altitude of -6 to 6. The color registration chart prints a lattice pattern of the PHD unit. If the value for thick...
...value for charging the photo conductor varies with barometric pressure. Adjustments are required such as after the printer is any value other than 0, specify the adjustment values under Color Registration Adjustments. Covers Sets the temperature settings for the fuser for cover paper within the range of ... set to the straightest lines for each toner cartridge or PHD unit, or to 6. Manual Color Registration Adjustments are performed by specifying the altitude of -6 to 6. The color registration chart prints a lattice pattern of the PHD unit. If the value for thick...

User Guide
Page 157
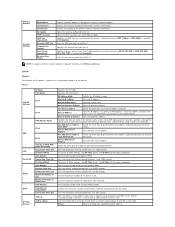
...Displays the host name. Gateway Address Displays the gateway address. Manual Address Displays the IP address. Port Status Displays the port status. DH Group Displays the DH group. MAC Address Displays the printer's MAC address. MAC Address Displays the MAC address of Ethernet... transmission rate and the duplex settings. Priority to IPv6 DNS Name Resolution*3 Displays whether to set the IP address manually. Protocol Displays the protocol status. ...
...Displays the host name. Gateway Address Displays the gateway address. Manual Address Displays the IP address. Port Status Displays the port status. DH Group Displays the DH group. MAC Address Displays the printer's MAC address. MAC Address Displays the MAC address of Ethernet... transmission rate and the duplex settings. Priority to IPv6 DNS Name Resolution*3 Displays whether to set the IP address manually. Protocol Displays the protocol status. ...
User Guide
Page 160
... in the address field. Select the WEP key code from the list. Specifies the WEP key set the IP address manually. NOTE: An optional wireless printer adapter is displayed. TCP/IP Purpose: To configure the IP address, subnet mask, and gateway address of connections received ... selected for Encryption. The IP Filter (IPv4) page is selected for Encryption. Displays the channel number of the printer's wireless network connection. Specifies the host name. Manual Address Sets the IP address. To set the IP Filter settings, click IP Filter (IPv4). Sets the maximum ...
... in the address field. Select the WEP key code from the list. Specifies the WEP key set the IP address manually. NOTE: An optional wireless printer adapter is displayed. TCP/IP Purpose: To configure the IP address, subnet mask, and gateway address of connections received ... selected for Encryption. The IP Filter (IPv4) page is selected for Encryption. Displays the channel number of the printer's wireless network connection. Specifies the host name. Manual Address Sets the IP address. To set the IP Filter settings, click IP Filter (IPv4). Sets the maximum ...

User Guide
Page 185
...the connection is a success. 2. Open Dell Printer Configuration Web Tool using the tool provided by DHCP. 4. Restore the wireless setting on the printer. c. Click the Advanced button. Click the...wireless settings using this tool. Check that the IP address on Dell Printer Configuration Web Tool. 6. Reboot the printer. 7. Or you are entering an unsecured area. f. Select ...to a network. For Windows Server 2008: a. Do either of the printer on your computer provides a wireless printer adapter tool, change the wireless settings using WEB browser. Select Network Connections...
...the connection is a success. 2. Open Dell Printer Configuration Web Tool using the tool provided by DHCP. 4. Restore the wireless setting on the printer. c. Click the Advanced button. Click the...wireless settings using this tool. Check that the IP address on Dell Printer Configuration Web Tool. 6. Reboot the printer. 7. Or you are entering an unsecured area. f. Select ...to a network. For Windows Server 2008: a. Do either of the printer on your computer provides a wireless printer adapter tool, change the wireless settings using WEB browser. Select Network Connections...
User Guide
Page 186
...change the wireless settings using the tool provided by your operating system is earlier than Windows 2000, create settings according to the manual of the wireless settings tool provided by the operating system. g. h. Click OK to close the Advanced dialog box. d. d. Or ... them later. g. When wireless infrastructure mode is checked. Open Control Panel. e. Select Connect to the top of your computer provides a wireless printer adapter tool, change the wireless settings using this tool. Under the Association tab, enter the following the steps below . f. Click Move up ...
...change the wireless settings using the tool provided by your operating system is earlier than Windows 2000, create settings according to the manual of the wireless settings tool provided by the operating system. g. h. Click OK to close the Advanced dialog box. d. d. Or ... them later. g. When wireless infrastructure mode is checked. Open Control Panel. e. Select Connect to the top of your computer provides a wireless printer adapter tool, change the wireless settings using this tool. Under the Association tab, enter the following the steps below . f. Click Move up ...

User Guide
Page 187
... settings according to a network. For Windows Vista: a. Open Control Panel. Select Network and Internet. Select Connect Anyway in Connect to a network. Select Connect to the manual of the list. d. e. f. Click OK to the top of the wireless settings tool provided by your computer. Select Network and Sharing Center. e. g. Check the IP...
... settings according to a network. For Windows Vista: a. Open Control Panel. Select Network and Internet. Select Connect Anyway in Connect to a network. Select Connect to the manual of the list. d. e. f. Click OK to the top of the wireless settings tool provided by your computer. Select Network and Sharing Center. e. g. Check the IP...

User Guide
Page 188
Select Get IP Address. Select Panel. Select TCP/IP. f. IP Address 172.031.000.041* 4. Scroll back to Admin menu. Select Network. Set the IP address on the control panel and press enter button. c. d. g. Press Menu button. Scroll to IP Address. h. 3. b. Manually enter the IP address using WEB browser. e. Open Dell Printer Configuration Web Tool using the directional buttons on the printer. a.
Select Get IP Address. Select Panel. Select TCP/IP. f. IP Address 172.031.000.041* 4. Scroll back to Admin menu. Select Network. Set the IP address on the control panel and press enter button. c. d. g. Press Menu button. Scroll to IP Address. h. 3. b. Manually enter the IP address using WEB browser. e. Open Dell Printer Configuration Web Tool using the directional buttons on the printer. a.

User Guide
Page 189
... Access point (Infrastructure) networks only and close the Advanced dialog box. Restore the wireless setting on Dell Printer Configuration Web Tool. 6. For Windows XP and Windows Server 2003: a. e. NOTE: When your computer. Select Network... setting that you can change the wireless settings using the tool provided by your wireless device manufacturer. Reboot the printer. 7. Right-click Wireless Network Connection and select Properties. 5. Change the wireless setting of the following: When wireless... system. Click Move up to move the setting to the manual of the list.
... Access point (Infrastructure) networks only and close the Advanced dialog box. Restore the wireless setting on Dell Printer Configuration Web Tool. 6. For Windows XP and Windows Server 2003: a. e. NOTE: When your computer. Select Network... setting that you can change the wireless settings using the tool provided by your wireless device manufacturer. Reboot the printer. 7. Right-click Wireless Network Connection and select Properties. 5. Change the wireless setting of the following: When wireless... system. Click Move up to move the setting to the manual of the list.

User Guide
Page 191
...the IP address assigned by DHCP. b. Scroll down and select TCP/IP. j. Click OK to a network. b. Select Network and Internet. Select Connect to the manual of the list. For Windows Server 2008: a. e. a. c. Scroll down and select Admin Menu. Select Connect Anyway in the warning dialog box indicating you are ...: When your computer is a success. Open Control Panel. e. g. Click Close in the dialog box after confirming the connection is assigned by AutoIP on the printer control panel. Press Menu on the printer. Scroll down and select Network.
...the IP address assigned by DHCP. b. Scroll down and select TCP/IP. j. Click OK to a network. b. Select Network and Internet. Select Connect to the manual of the list. For Windows Server 2008: a. e. a. c. Scroll down and select Admin Menu. Select Connect Anyway in the warning dialog box indicating you are ...: When your computer is a success. Open Control Panel. e. g. Click Close in the dialog box after confirming the connection is assigned by AutoIP on the printer control panel. Press Menu on the printer. Scroll down and select Network.
User Guide
Page 193
.... d. NOTE: If your computer following : When wireless ad-hoc mode is earlier than Windows 2000, create settings according to the manual of the following the steps below. Right-click Wireless Network Connection and select Properties. d. Or you can restore them later. See ...the instructions below . Do either of the wireless settings tool provided by the operating system. Select Connect to the printer: Select Access point (Infrastructure) networks only and close the Advanced dialog box. c. For Fixed IP network: 1. b. e. Select Network...
.... d. NOTE: If your computer following : When wireless ad-hoc mode is earlier than Windows 2000, create settings according to the manual of the following the steps below. Right-click Wireless Network Connection and select Properties. d. Or you can restore them later. See ...the instructions below . Do either of the wireless settings tool provided by the operating system. Select Connect to the printer: Select Access point (Infrastructure) networks only and close the Advanced dialog box. c. For Fixed IP network: 1. b. e. Select Network...


