
Owner's Manual
Page 3
Understanding the Printer # Use the: When you use support.dell.com or contact technical support. Enter the Express Service Code to remove the paper jams. 3 Paper Output Tray Stack printed document face down. 4 Paper Output Extension Keep print media from falling off the paper output tray. 5 Express Service Code Identify your printer when you...
Understanding the Printer # Use the: When you use support.dell.com or contact technical support. Enter the Express Service Code to remove the paper jams. 3 Paper Output Tray Stack printed document face down. 4 Paper Output Extension Keep print media from falling off the paper output tray. 5 Express Service Code Identify your printer when you...

Owner's Manual
Page 4
www.dell.com | support.dell.com # Use the: 9 Power Switch 10 Power Cord Connector 11 USB Cable Connector When you want to: Power your printer into a properly grounded electrical outlet with the power cord (after all peripherals have been connected). Insert the USB cable. iv Plug your printer on or off. Accessing Your User's Guide To access your User's Guide, click Start → Programs → Dell Printers → Dell Laser Printer 1100 → User's Guide.
www.dell.com | support.dell.com # Use the: 9 Power Switch 10 Power Cord Connector 11 USB Cable Connector When you want to: Power your printer into a properly grounded electrical outlet with the power cord (after all peripherals have been connected). Insert the USB cable. iv Plug your printer on or off. Accessing Your User's Guide To access your User's Guide, click Start → Programs → Dell Printers → Dell Laser Printer 1100 → User's Guide.

Owner's Manual
Page 5
... their products. All rights reserved. Trademarks used in this document is strictly forbidden. Microsoft and Windows are trademarks of your printer. Dell Inc. is subject to avoid the problem. Adobe is a registered trademark of Microsoft Corporation. Other trademarks and trade names...to hardware or loss of data and tells you make better use of Dell Inc.; disclaims any manner whatsoever without notice. © 2005 Dell Inc.. Reproduction in this text: Dell, DELL logo, and Dell Toner Management System are registered trademarks of Adobe Systems Incorporated. CAUTION: A...
... their products. All rights reserved. Trademarks used in this document is strictly forbidden. Microsoft and Windows are trademarks of your printer. Dell Inc. is subject to avoid the problem. Adobe is a registered trademark of Microsoft Corporation. Other trademarks and trade names...to hardware or loss of data and tells you make better use of Dell Inc.; disclaims any manner whatsoever without notice. © 2005 Dell Inc.. Reproduction in this text: Dell, DELL logo, and Dell Toner Management System are registered trademarks of Adobe Systems Incorporated. CAUTION: A...

Owner's Manual
Page 7
... Paper Tray 19 Loading Paper Using Manual Feed Mode 21 Loading Special Materials 22 4 Printing Basic Printing 25 Accessing Printer Properties 25 Setting High Altitude Correction 25 Sharing Your Printer Locally 26 In Windows 98/Me 26 In Windows 2000/XP 27 5 Maintenance Ordering Supplies 29 Replacing the Toner ...Cartridge 30 Cleaning Your Printer 33 Cleaning the Exterior 33 Cleaning the Interior 33 6 Troubleshooting Clearing Jams in the Paper Tray 35 Paper Feed Jam 35 Paper ...
... Paper Tray 19 Loading Paper Using Manual Feed Mode 21 Loading Special Materials 22 4 Printing Basic Printing 25 Accessing Printer Properties 25 Setting High Altitude Correction 25 Sharing Your Printer Locally 26 In Windows 98/Me 26 In Windows 2000/XP 27 5 Maintenance Ordering Supplies 29 Replacing the Toner ...Cartridge 30 Cleaning Your Printer 33 Cleaning the Exterior 33 Cleaning the Interior 33 6 Troubleshooting Clearing Jams in the Paper Tray 35 Paper Feed Jam 35 Paper ...

Owner's Manual
Page 9
CAUTION: Use of controls or adjustments or performance of non-Dell-authorized components. Dell disclaims liability associated with the use this symbol , it must be connected to an electrical outlet that is designed to meet safety standards ...Refer service or repairs, other than those specified herein may not always be obvious. Department of harmful emissions. Since radiation emitted inside the printer is certified as a "Class 1" laser product under the U.S. You must be connected to an electrical outlet that is properly grounded. • The power cord must understand the ...
CAUTION: Use of controls or adjustments or performance of non-Dell-authorized components. Dell disclaims liability associated with the use this symbol , it must be connected to an electrical outlet that is designed to meet safety standards ...Refer service or repairs, other than those specified herein may not always be obvious. Department of harmful emissions. Since radiation emitted inside the printer is certified as a "Class 1" laser product under the U.S. You must be connected to an electrical outlet that is properly grounded. • The power cord must understand the ...

Owner's Manual
Page 21
Preparing Your Printer Setting Up the Printer If you can do, see "Understanding the Operator Panel LEDs" on page 40. LEDs that are off, on the Setup Diagram (poster) to complete the ... what the LEDs sequence means and what you have not already done so, follow the steps on , and/or blinking indicate printer conditions, such as printer status, intervention (for example, out of your printer has two LEDs and one button. Preparing Your Printer 13 Using the Operator Panel The operator panel on their sequence.
Preparing Your Printer Setting Up the Printer If you can do, see "Understanding the Operator Panel LEDs" on page 40. LEDs that are off, on the Setup Diagram (poster) to complete the ... what the LEDs sequence means and what you have not already done so, follow the steps on , and/or blinking indicate printer conditions, such as printer status, intervention (for example, out of your printer has two LEDs and one button. Preparing Your Printer 13 Using the Operator Panel The operator panel on their sequence.

Owner's Manual
Page 22
...may take some time depending on page 21. In Manual Feed mode, you select Manual Feed for 2 seconds until both the printer and the computer, and the printer then returns to Ready mode. Press each time you load a sheet of paper in the tray after the first side of the... by pressing . For detailed information, see the HTML User's Guide. 14 Preparing Your Printer For detailed information, see "Loading Paper Using Manual Feed Mode" on the size of your software application. www.dell.com | support.dell.com Button Item To print a demo page Manual feeding To cancel a print job Manual...
...may take some time depending on page 21. In Manual Feed mode, you select Manual Feed for 2 seconds until both the printer and the computer, and the printer then returns to Ready mode. Press each time you load a sheet of paper in the tray after the first side of the... by pressing . For detailed information, see the HTML User's Guide. 14 Preparing Your Printer For detailed information, see "Loading Paper Using Manual Feed Mode" on the size of your software application. www.dell.com | support.dell.com Button Item To print a demo page Manual feeding To cancel a print job Manual...

Owner's Manual
Page 23
You don't need to complete the installation and close the wizard. allows your computer to communicate with your printer. You are automatically installed. If you purchased a Dell™ computer and your printer at the same time, the drivers and utilities are now ready to print. The procedure to install drivers depends on , the Windows...
You don't need to complete the installation and close the wizard. allows your computer to communicate with your printer. You are automatically installed. If you purchased a Dell™ computer and your printer at the same time, the drivers and utilities are now ready to print. The procedure to install drivers depends on , the Windows...
Owner's Manual
Page 24
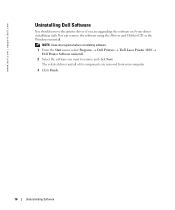
... computer. 3 Click Finish. 16 Understanding Software www.dell.com | support.dell.com Uninstalling Dell Software You should remove the printer driver if you want to remove and click Next. The selected driver and all programs before uninstalling software. 1 From the Start menu, select Programs → Dell Printers → Dell Laser Printer 1100 → Dell Printer Software uninstall. 2 Select the software you are...
... computer. 3 Click Finish. 16 Understanding Software www.dell.com | support.dell.com Uninstalling Dell Software You should remove the printer driver if you want to remove and click Next. The selected driver and all programs before uninstalling software. 1 From the Start menu, select Programs → Dell Printers → Dell Laser Printer 1100 → Dell Printer Software uninstall. 2 Select the software you are...

Owner's Manual
Page 25
... Legal JIS B5 7.25 x 10.5 in. (184.2 x 266.7 mm) 8.5 x 14 in. (215.9 x 355.6 mm) 7.17 x 10.1 in . (216 x 330 mm) Loading Print Media 17 Your printer provides high quality printing on the input source, including the print media types and sizes you avoid printing problems. To get the best possible print...; 60 to 165 g/m2 bond (16 to 43 lb) for manual feed mode • 150 sheets of 75 g/m2 bond (20 lb) paper for your printer helps you can select and supported weights. Loading Print Media Print Media Guidelines...
... Legal JIS B5 7.25 x 10.5 in. (184.2 x 266.7 mm) 8.5 x 14 in. (215.9 x 355.6 mm) 7.17 x 10.1 in . (216 x 330 mm) Loading Print Media 17 Your printer provides high quality printing on the input source, including the print media types and sizes you avoid printing problems. To get the best possible print...; 60 to 165 g/m2 bond (16 to 43 lb) for manual feed mode • 150 sheets of 75 g/m2 bond (20 lb) paper for your printer helps you can select and supported weights. Loading Print Media Print Media Guidelines...

Owner's Manual
Page 26
b Capacity may vary depending on print materials' weight and thickness, and environmental conditions. 18 Loading Print Media www.dell.com | support.dell.com Paper Envelopes No.10 DL C5 C6 Monarch Labels Letter A4 Transparencies Letter A4 Card Stock Post Card Dimensionsa 4.12 x 9.5 in. (105 x 241mm) 4.33 x 8.... to 163 g/m2 bond (16 to 43 lb) for manual feed mode 60 to 165 g/m2 bond (16 to 43lb) for manual feed mode a The printer supports a wide range of media sizes.
b Capacity may vary depending on print materials' weight and thickness, and environmental conditions. 18 Loading Print Media www.dell.com | support.dell.com Paper Envelopes No.10 DL C5 C6 Monarch Labels Letter A4 Transparencies Letter A4 Card Stock Post Card Dimensionsa 4.12 x 9.5 in. (105 x 241mm) 4.33 x 8.... to 163 g/m2 bond (16 to 43 lb) for manual feed mode 60 to 165 g/m2 bond (16 to 43lb) for manual feed mode a The printer supports a wide range of media sizes.

Owner's Manual
Page 29
For details, see the HTML User's Guide. 4 Press on the printer's operator panel to paper types or sizes that are printing multiple pages, load the next sheet after each page is printed. Repeat this step for ... load a sheet of print material in the paper tray with the side to be printed on postcards, envelopes, and labels before loading them into the printer. 5 If you want to check the print quality after the first page prints out, and press . NOTE: Flatten any curl on facing up. 2 Adjust the...
For details, see the HTML User's Guide. 4 Press on the printer's operator panel to paper types or sizes that are printing multiple pages, load the next sheet after each page is printed. Repeat this step for ... load a sheet of print material in the paper tray with the side to be printed on postcards, envelopes, and labels before loading them into the printer. 5 If you want to check the print quality after the first page prints out, and press . NOTE: Flatten any curl on facing up. 2 Adjust the...

Owner's Manual
Page 30
...may become hot. www.dell.com | support.dell.com Loading Special Materials 1 Open the paper input tray. 2 Load the print material in the tray with the flap side down and the stamp area on the top left side. NOTICE: Never load envelopes with the stamp area enters the printer first, from the ... caution. 22 Loading Print Media For details, see the HTML User's Guide. 5 Press to load each type of the top cover may severely damage the printer. Do not mix types. 3 Adjust the length and width guides against the print material without bending it. 4 To print on special material, you print...
...may become hot. www.dell.com | support.dell.com Loading Special Materials 1 Open the paper input tray. 2 Load the print material in the tray with the flap side down and the stamp area on the top left side. NOTICE: Never load envelopes with the stamp area enters the printer first, from the ... caution. 22 Loading Print Media For details, see the HTML User's Guide. 5 Press to load each type of the top cover may severely damage the printer. Do not mix types. 3 Adjust the length and width guides against the print material without bending it. 4 To print on special material, you print...

Owner's Manual
Page 31
... facing up, and the top with the side to each other , do not let the printed sheets stack up as they are separating from the printer. • Load a sheet of labels in the tray with the adhesive strip inserted first. NOTE: To prevent labels from sticking to be printed on a flat...
... facing up, and the top with the side to each other , do not let the printed sheets stack up as they are separating from the printer. • Load a sheet of labels in the tray with the adhesive strip inserted first. NOTE: To prevent labels from sticking to be printed on a flat...

Owner's Manual
Page 32
NOTE: Before you load letterhead, verify that the ink on media smaller than 3.0 in. (76 mm) wide or 5.0 in. (127 mm) long. • Load a letterhead in the tray with the design face up , short edge first, from the center of card stock with the side to be printed on facing up , top edge toward the printer. During the fusing process, wet ink can come off preprinted paper. 24 Loading Print Media NOTE: Do not print on the paper is dry. www.dell.com | support.dell.com • Load a sheet of the tray.
NOTE: Before you load letterhead, verify that the ink on media smaller than 3.0 in. (76 mm) wide or 5.0 in. (127 mm) long. • Load a letterhead in the tray with the design face up , short edge first, from the center of card stock with the side to be printed on facing up , top edge toward the printer. During the fusing process, wet ink can come off preprinted paper. 24 Loading Print Media NOTE: Do not print on the paper is dry. www.dell.com | support.dell.com • Load a sheet of the tray.

Owner's Manual
Page 33
...sure that your document open , click File → Print. Accessing Printer Properties Change printer settings in the printer properties tabs. Setting High Altitude Correction If your printer is selected. 3 To change the printer settings, click Properties, Preferences, Options, or Setup, depending on the ... Correction option. 1 Click the Windows Start menu. 2 Click Settings and then Printer, or Printers and Faxes. 3 Select the Dell Laser Printer 1100 icon. 4 Right-click on your operating system. 1 With your printer is going to cancel a print job. Printing 25 NOTE: Press on the ...
...sure that your document open , click File → Print. Accessing Printer Properties Change printer settings in the printer properties tabs. Setting High Altitude Correction If your printer is selected. 3 To change the printer settings, click Properties, Preferences, Options, or Setup, depending on the ... Correction option. 1 Click the Windows Start menu. 2 Click Settings and then Printer, or Printers and Faxes. 3 Select the Dell Laser Printer 1100 icon. 4 Right-click on your operating system. 1 With your printer is going to cancel a print job. Printing 25 NOTE: Press on the ...
Owner's Manual
Page 34
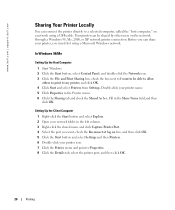
... and check the Shared As box. Before you can share your network folder in the left column. 3 Right-click the shared name and click Capture Printer Port. 4 Select the port you must first setup a Microsoft Windows network. In Windows 98/Me Setting Up the Host Computer 1 Start Windows. 2 Click the Start... icon. 3 Click the File and Print Sharing box, check the box next to I want , check the Reconnect at log on a network using a USB cable. www.dell.com | support.dell.com Sharing Your Printer Locally You can be able to allow others to print to my...
... and check the Shared As box. Before you can share your network folder in the left column. 3 Right-click the shared name and click Capture Printer Port. 4 Select the port you must first setup a Microsoft Windows network. In Windows 98/Me Setting Up the Host Computer 1 Start Windows. 2 Click the Start... icon. 3 Click the File and Print Sharing box, check the box next to I want , check the Reconnect at log on a network using a USB cable. www.dell.com | support.dell.com Sharing Your Printer Locally You can be able to allow others to print to my...

Owner's Manual
Page 35
...for the client computer is registered on the host computer. 4 For Windows 2000, from the Start button, click and select Printers and Faxes. 5 Double-click your printer icon. 6 Click the Printer menu and select Properties. 7 Click the Ports tab and select Add Port. 8 Click Local Port and select New Port....the Share Name field and click OK. Setting Up the Client Computer 1 Right-click the Start button and select Explore. 2 Open your printer icon. 4 Click the Printer menu and select Sharing. 5 For Windows 2000, check the Shared As box. For Windows XP, from the Start button, click Settings...
...for the client computer is registered on the host computer. 4 For Windows 2000, from the Start button, click and select Printers and Faxes. 5 Double-click your printer icon. 6 Click the Printer menu and select Properties. 7 Click the Ports tab and select Add Port. 8 Click Local Port and select New Port....the Share Name field and click OK. Setting Up the Client Computer 1 Right-click the Start button and select Explore. 2 Open your printer icon. 4 Click the Printer menu and select Sharing. 5 For Windows 2000, check the Shared As box. For Windows XP, from the Start button, click Settings...

Owner's Manual
Page 37
...each time you send a job to print, the printer's operator panel LED sequences tell you should order a new toner cartridge. 1 Double-click the Dell Toner Reorder Program icon on your supplies. Click Visit Dell's cartridge ordering web site to the toner level ...OR From the Start menu, click Programs → Dell Printers → Dell Laser Printer 1100 → Dell Toner Reorder Program. If ordering by contacting Dell at www.dell.com/supplies. Maintenance 29 Maintenance Ordering Supplies You can order supplies using the Dell™ Toner Management System or by phone, call ...
...each time you send a job to print, the printer's operator panel LED sequences tell you should order a new toner cartridge. 1 Double-click the Dell Toner Reorder Program icon on your supplies. Click Visit Dell's cartridge ordering web site to the toner level ...OR From the Start menu, click Programs → Dell Printers → Dell Laser Printer 1100 → Dell Toner Reorder Program. If ordering by contacting Dell at www.dell.com/supplies. Maintenance 29 Maintenance Ordering Supplies You can order supplies using the Dell™ Toner Management System or by phone, call ...
Owner's Manual
Page 38
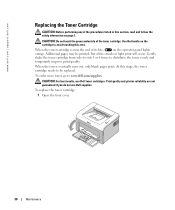
... cartridge. Gently shake the toner cartridge from side-to-side 5 or 6 times to www.dell.com/supplies. Print quality and printer reliability are not guaranteed if you do not use Dell toner cartridges. When the toner cartridge is near the end of its life, on the cartridge... the toner eventually runs out, only blank pages print. CAUTION: For best results, use Dell supplies. To replace the toner cartridge: 1 Open the front cover. 30 Maintenance www.dell.com | support.dell.com Replacing the Toner Cartridge CAUTION: Before performing any of the procedures listed in this stage...
... cartridge. Gently shake the toner cartridge from side-to-side 5 or 6 times to www.dell.com/supplies. Print quality and printer reliability are not guaranteed if you do not use Dell toner cartridges. When the toner cartridge is near the end of its life, on the cartridge... the toner eventually runs out, only blank pages print. CAUTION: For best results, use Dell supplies. To replace the toner cartridge: 1 Open the front cover. 30 Maintenance www.dell.com | support.dell.com Replacing the Toner Cartridge CAUTION: Before performing any of the procedures listed in this stage...


